HTTPS and X509 certificates in .NET Part 3: how to install certificates and use them with IIS

Introduction

In the previous post we looked at the command line tools makecert and pvk2pfx. We saw how they could be used to create a root and a derived certificate and to package the private key and certificate files.

In this post we will install the certificates in the Windows certificate store so that they are trusted by IIS. We’ll also see how to tell IIS to use a specific SSL certificate.

certmgr and MMC snap in

The c:\windows\system32 folder includes two GUI tools for certificate management: certmgr.msc and mmc.exe. MMC.exe is a more general tool where you can import so-called snap-ins. Certificates have their own snap-in.

Run mmc.exe as an administrator. The following empty window will open:

Read more of this post

HTTPS and X509 certificates in .NET Part 2: creating self-signed certificates

Introduction

In the previous post we looked at TLS and certificates in general. We saw what makes up an SSL certificate and how browsers use it to verify the identity of the server and to decrypt/encrypt the communication.

In this post we’ll look at a tool called makecert.exe.

Before we actually continue there are some other important terms that we need to investigate.

Read more of this post

HTTPS and X509 certificates in .NET Part 1: introduction

Introduction

HTTPS, SSL, TLS – these terms are used interchangeably to denote secure communication between a web client and a web server. Secure HTTP communication generally must ensure all of the following:

  • The data sent by the client to the server shouldn’t be tampered with by a third party in between – at least not without the server noticing it
  • The secured data sent by the client should not be easily deciphered by a third party
  • The client must be sure that the web server is really the one it claims to be, i.e. the it belongs to twitter.com and not some bogus site claiming to be twitter.com
  • An attacker should not be able to take the client’s input and resend it to the server multiple times

Read more of this post

Introduction to EntityFramework 6 Part 5: updating schemas

Introduction

In the previous part of this series we looked at asynchronous DB calls and logging in EF 6. In this finishing post we’ll take a look at schemas.

If you create a database through code-first in EntityFramework then the new tables will be automatically put into the dbo schema: dbo.Customers, dbo.Orders etc. That is the case with our demo application where all tables, i.e. Cars and the ones related to identity belong to the dbo schema.

However, there are times that you’d like group your tables into different schemas depending on their purpose, domain or some other criteria.

Migrating from one schema to another in EF code-first is quite easy. We’ll apply it to our demo Cars application so have it ready in Visual Studio.

Demo

The goal is to move the domain related tables to the ‘domain’ schema and the identity related tables to the ‘identity’ schema. The solution is that we need to override the OnModelCreating method in the Db context class(es). Open CarsDbContext and add the following method just above the Cars property:

protected override void OnModelCreating(DbModelBuilder modelBuilder)
{
       modelBuilder.HasDefaultSchema("domain");
       base.OnModelCreating(modelBuilder);
}

Similarly, add the following method to UserManagementDbContext:

protected override void OnModelCreating(DbModelBuilder modelBuilder)
{
       modelBuilder.HasDefaultSchema("identity");
       base.OnModelCreating(modelBuilder);
}

Save and build the solution so that the changes are properly registered.

Our domain and identity models have just got extended so the underlying database and the model are out of sync. That means we’ll need to perform a migration like in part 2 of this series. Open the Package Manager Console – View, Other Windows, Package Manager Console – and run the following command:

Add-Migration -ConfigurationTypeName Cars.Web.Database.DomainMigrations.Configuration “SettingNewSchema”

This creates a new migration file called somedatestamp_SettingNewSchema.cs with the following contents:

public partial class SettingNewSchema : DbMigration
{
        public override void Up()
        {
            MoveTable(name: "dbo.Cars", newSchema: "domain");
        }
        
        public override void Down()
        {
            MoveTable(name: "domain.Cars", newSchema: "dbo");
        }
}

So we’re simply moving the table(s) from the dbo schema to domain.

Let’s do the same for out identity tables. Run the following command in the package manager:

Add-Migration -ConfigurationTypeName Cars.Web.Database.UserManagementMigrations.Configuration “SettingNewSchema”

You’ll get a file similar to the one above but with a MoveTable statement for each identity table. Next we need to run the SettingNewSchema scripts. Run the following commands in the package manager:

Update-Database -ConfigurationTypeName Cars.Web.Database.UserManagementMigrations.Configuration
Update-Database -ConfigurationTypeName Cars.Web.Database.DomainMigrations.Configuration

Open the DB table structure in Server Explorer and you’ll see the new schema names:

Updated schemas through update database entity framework

Run the application and test viewing, adding and updating the car objects. It should all work like it did before.

This post finishes the introductory series on EF 6. You can view all posts related to data storage on this blog here.

Introduction to EntityFramework 6 Part 4: asynchronous operations and logging

Introduction

In the previous post we looked at CRUD operations in EntityFramework 6. In this post we’ll look at the async coding features of EF.

Asynchronous code execution in .NET has been greatly enhanced by the await-async keywords. If you are not sure what they are about you can start here. They can help keeping the available threads busy thereby utilising the CPU resources better. You have probably seen a lot of methods built-into .NET4.5+ whose names end with “Async”, e.g HttpClient.SendAsync or StreamWriter.WriteAsync.

These awaitable asynchronous methods all return a Task or a Task of T. EntityFramework is no exception to the new trend of making the code more responsive and scalable. The async version of some well-known operators such as ToList() are usually available on methods that return something immediately, i.e. the non-deferred LINQ operators.

Demo

Open the Cars demo application we’ve been working on so far in this series. We have the following Index action in CarController.cs at present:

public ActionResult Index()
{
      return View(db.Cars.ToList());
}

As you type “db.Cars.” in the editor you’ll see that there’s a ToListAsync method. You cannot just use that method like…

public ActionResult Index()
{
      return View(db.Cars.ToListAsync());
}

…since it returns a Task of List of Cars and the view is expecting an IEnumerable of Cars. To make the Index method asynchronous we need to transform it as follows:

public async Task<ActionResult> Index()
{
      return View(await db.Cars.ToListAsync());
}

…where Task resides in the System.Threading.Tasks namespace. If you run the application now you should get the list of cars from the database as before. However, the following is happening behind the scenes:

  • Some thread enters the Index action
  • The thread sees the await keyword and lets another thread take over the processing of the awaitable method, i.e. the collection of cars from the database
  • When the awaitable method is finished by another thread then either the original thread or a new thread finishes the Index method

Check out the above link for a more detailed treatment of the async-await keywords.

Similarly the Details method can be rewritten as follows:

public async Task<ActionResult> Details(int? id)
{
          if (id == null)
          {
              return new HttpStatusCodeResult(HttpStatusCode.BadRequest);
          }
          Car car = await db.Cars.FindAsync(id);
          if (car == null)
          {
              return HttpNotFound();
          }
          return View(car);
}

Note the FindAsync method which as the asynchronous version of Find in EF and returns a Task of Car.

The POST Create method can be made asynchronous by calling the async version of SaveChanges, i.e. SaveChangesAsync:

[HttpPost]
[ValidateAntiForgeryToken]
public async Task<ActionResult> Create([Bind(Include="Id,Make,Category")] Car car)
{
          if (ModelState.IsValid)
          {
              db.Cars.Add(car);
              await db.SaveChangesAsync();
              return RedirectToAction("Index");
          }

          return View(car);
}

In case you’d like to generate asynchronous action methods when inserting a new controller then you can check the following option:

Create async action methods in scaffolding

The templating engine will generate code similar to how our existing code was transformed above.

Logging

The DbContext object has a property called Database which in turn has a property called Log. The Log property is of type Action of String, i.e. you can assign a void method to it that accepts a string. The string parameter includes the actual SQL statements sent to the database.

In CarsDbContext.cs we have an empty constructor at present:

public CarsDbContext() : base("DefaultConnection")
{
            
}

Add the following code to the body of the constructor:

Database.Log = statements => Debug.WriteLine(statements);

Run the application and navigate to /cars. You should see a couple of SQL statements in the Output window related to the retrieval of Cars from the data store:

EntityFramework logging to output window

The first time a query is run you’ll see one or more statements related to data migration, but they won’t be run on subsequent queries.

You can of course assign a more complicated logging delegate to the Log property: log to the database, a file, GrayLog etc.

In the next post, which will end this introductory series on EF, we’ll look at how to update schemas.

You can view all posts related to data storage on this blog here.

Introduction to EntityFramework 6 Part 3: CRUD operations

Introduction

In the previous post we’ve got as far as generating our database and the Cars and user management tables. It’s time to add, delete and edit Car objects using the built-in capabilities of MVC 5.

Open the project we’ve been working on so far and let’s get to it!

Demo

We’ll create our Cars controller first. Right-click the Controllers folder of the Web layer, select Add, Controller… The Add Scaffold window will open. Select the following option:

MVC 5 Controller with views, using Entity Framework

Click Add and fill in the Add Controller dialog as follows:

Create scaffolding for Cars with Entity Framework

We want to base our controller and views on the Car object. The correct DB context to use is the CarsDbContext we created previously. Leave all other options untouched so that even the views will be created. The scaffolding engine will produce some boilerplate code as a starting point. It creates a lot of stuff for us actually: all the controller actions and views necessary to add, edit and delete Car objects. Check the Views folder. There’s a new folder in there called Cars with 5 cshtml files following the default view names: create, delete etc.

In reality you’ll almost always modify the controller code such as putting the following instantiation in a Repository and letting the controller reference it through an abstraction:

private CarsDbContext db = new CarsDbContext();

If you don’t know what’s wrong with putting this piece of code directly in a controller then check out the series on SOLID and loosely coupled layered design with DDD. However, this series is – almost – purely technical so it’s up to you to organise your code as you wish.

Now that we have the user management tables in place we can take advantage of them. We want to restrict access to the Car views to authorised users. Add the Authorize attribute to the controller:

[Authorize]
public class CarsController : Controller

If you’d like to know more about authentication and access control in MVC 5 checkout the series on Identity here.

For easy access open _Layout.cshtml in the Views/Shared folder and locate the following code which generates the code:

<ul class="nav navbar-nav">
         <li>@Html.ActionLink("Home", "Index", "Home")</li>
         <li>@Html.ActionLink("About", "About", "Home")</li>
         <li>@Html.ActionLink("Contact", "Contact", "Home")</li>
</ul>

Add another ActionLink to open the Cars Index view:

<li>@Html.ActionLink("Cars", "Index", "Cars")</li>

Run the application, click the Cars link and you’ll be directed to the login page. There’s a link to register new users. Click on it a register yourself with the application. If all goes well then your registration will succeed and you’ll see “Hello ” + your username in the upper right-hand corner of the view. Click the Cars link again and you’ll get to an empty page:

Empty Cars list after initial run of application

Click the Create New link. You’ll directed to a simple page to add new Cars:

Default create car view generated by MVC 5

The text field for the Make property is OK for demo purposes. In reality we might need to pick the Make from a drop-down list so that we don’t end up with values like Ford, ford, FORD in the database. However, the text field for the category is completely off. We’d like to use the enumeration values in here. We don’t want to allow the users to type in just any category. The reason is that the scaffolding engine created the following code to render a field for the category in Create.cshtml:

@Html.EditorFor(model => model.Category)

It didn’t know how to render an editor for an enum so the best approximation was a text field. You probably agree that this is not OK. So we’ll need to digress a little from our main discussion on Entity Framework and do some other work before we resume: we’ll create a new template.

Add a folder called EditorTemplates within the Views/Shared folder so that the new template will be available for all views. Right-click this new folder and select Add, View… as editors are simply partial views. We need to be careful with the naming of the custom editor for the car category. We need to set it to the type of the Category property which is CarCategory. This is how the Razor engine will find the correct partial template. In case the property type is ‘int’ it will go look for a partial editor view called ‘int’. So in the View name field type in “CarCategory” and select the “Create as a partial view” option. You’ll get an empty file called CarCategory.cshtml.

We’ll need to get hold of the values in the CarCategory enumeration. Also, we want to make sure that if someone extends the enumeration then the drop down list Category editor will automatically pick up the new value. We’ll build an extension method that returns a sequence of SelectListItems based on the enumeration values.

Add a new folder called Extensions to the Web layer. Insert a class called EnumExtensions into that folder:

using System;
using System.Collections.Generic;
using System.Linq;
using System.Web;
using System.Web.Mvc;

namespace Cars.Web
{
    public static class EnumExtensions
    {
        public static IEnumerable<SelectListItem> GetItemsAsSelectListItems(this Type type
            , int? selectedItem)
        {
            if (!typeof(Enum).IsAssignableFrom(type))
            {
                throw new ArgumentException("You must pass in an enum type.");
            }

            string[] names = Enum.GetNames(type);
            IEnumerable<int> values = Enum.GetValues(type).Cast<int>();

            return names.Zip(values, (n, v) =>
                new SelectListItem() {Text = n, Value = v.ToString(), Selected = v == selectedItem });
        }
    }
}

Make sure you modify the namespace to Cars.Web so that the extension method becomes available throughout the Web project without having to import a namespace.

In short we do the following in this code:

  • We check if the type is an enum. If it’s not, then an exception is thrown
  • We extract the names and integer values from the enum, such as Family=1,Sports=2 etc
  • We use the Zip LINQ operator to join the names and values into one sequence and build a list of SelectListItems
  • The selectedItem parameter will be used to set the originally saved category as the selected item. Without this check the saved category won’t be selected when updating a Car

If you’re not sure of the usage of the Zip operator, check its documentation here.

CarCategory.cshtml will have the following code:

@using Cars.Domain

@{
    var selectListItems = typeof(CarCategory).GetItemsAsSelectListItems((int?)Model);
}

@Html.DropDownList("", selectListItems)

You are probably wondering what this Model is. These templates also have Model properties like normal views. The Model in this case will be the object that the template is operating on, i.e. CarCategory which can be converted into a nullable int. The CarCategory will be set when editing a Car, hence the need for a nullable value.

Run the application, navigate to Cars, log in and click the Create New link. The car types should show up correctly in the drop down list. Add a couple of new cars. Each time you’ll be redirected to the Cars Index page with the updated list of cars:

New car objects inserted into database

Test the Edit link. You should see that the category is correctly selected in the drop down list.

Then play around with the other links, i.e. Details and Delete. They should work just fine. You can even check the database to see how the cars are stored:

Car objects shown in database

In the next part of this series we’ll look at the new asynchronous language features and logging in EF.

You can view all posts related to data storage on this blog here.

Introduction to EntityFramework 6 Part 2: migrations

Introduction

In the previous post we’ve created our first DbSet of Cars. We’ve also looked at the absolute basics of EntityFramework in an MVC5 project.

It’s now time to let EF create a database and a table for us where we can store the car objects. The current version of EF at the time of writing this post allows us to have multiple migration folders and DB contexts. Previous releases only allowed for one of each.

Demo

Open the Cars web project we started working on before. Open the Package manager console – View, Other windows, Package manager console – and issue the following command to enable migrations:

enable-migrations

If all went well then you should get an exception:

More than one context type was found in the assembly ‘Cars.Web’.
To enable migrations for ‘Cars.Web.Database.CarsDbContext’, use Enable-Migrations -ContextTypeName Cars.Web.Database.CarsDbContext.
To enable migrations for ‘Cars.Web.Database.UserManagementDbContext’, use Enable-Migrations -ContextTypeName Cars.Web.Database.UserManagementDbContext.

This is expected as we have 2 Db context types in the project as the message says: CarsDbContext and UserManagementDbContext. The compiler has found them both. The error message tells us quite clearly that we have to use the ContextTypeName flag to specify the correct context. Run the following command:

enable-migrations -ContextTypeName UserManagementDbContext -MigrationsDirectory Database\UserManagementMigrations

The simple class name was enough as there’s no other class with the same name, i.e. it’s unique. The MigrationsDirectory specifies where the migrations folder will be created for the user management context. Without this argument the migrations folder would be created at the root of the project and a directory can only have a single migrations folder. As we have 2 DB contexts, we want to have 2 migrations folders as well: one for users and another one for our domains.

If all went well then you should get the following message in the console:

Checking if the context targets an existing database…
Code First Migrations enabled for project Cars.Web.

You’ll see that the UserManagementMigrations folder was created within the Database folder with a file called Configuration.cs which specifies a migrations directory:

MigrationsDirectory = @"Database\UserManagementMigrations";

Let’s create the Cars migrations folder as well with the following command:

enable-migrations -ContextTypeName CarsDbContext -MigrationsDirectory Database\DomainMigrations

Check if the folder and the new Configuration.cs file have been created correctly.

Note that at this point there’s no database yet. The enable-migrations command checks if there’s an existing database under the connection string given in the constructor of the context object: DefaultConnection. As there’s none it just continues without creating a database.

Note that both Configuration files have a property called AutomaticMigrationsEnabled and it’s set to false. This means that if we change the structure of our context classes, such as adding a new property to Car, then we’ll need to specifically declare the change in the package manager console. This is a good idea in a production environment where you probably don’t want to change the database structure without advance planning.

As we have no database yet at all let’s create it using the add-migration command as the first step. It accepts a parameter called ConfigurationTypeName which specifies the Configuration class for the migration you want to run. This is the fully qualified name of the Configuration class. We’ll set up the user related tables first in code by executing the following command in the package manager console:

add-migration -ConfigurationTypeName Cars.Web.Database.UserManagementMigrations.Configuration “FirstInitialisation”

That’s the fully qualified name of Configuration in the Database\UserManagementMigrations folder. FirstInitialisation is the name of the migration. If all went well then you’ll be presented a class called FirstInitialisation in a file called [some date value]_FirstInitialisation.cs. It derives from DbMigration which is a base class for code-based migrations. It’s normal C# code and quite straightforward to follow. You’ll see field declarations with their types, lengths, primary keys, foreign keys, indexes etc., e.g.:

CreateTable(
                "dbo.AspNetUserRoles",
                c => new
                    {
                        UserId = c.String(nullable: false, maxLength: 128),
                        RoleId = c.String(nullable: false, maxLength: 128),
                    })
                .PrimaryKey(t => new { t.UserId, t.RoleId })
                .ForeignKey("dbo.AspNetRoles", t => t.RoleId, cascadeDelete: true)
                .ForeignKey("dbo.AspNetUsers", t => t.UserId, cascadeDelete: true)
                .Index(t => t.RoleId)
                .Index(t => t.UserId);

Note that there’s a series on Identity on this blog starting here which goes through the user management tables and how to use them.

These CreateTable and other API calls, like CreateIndex and CreateStoredProcedure are wrappers around SQL statements.

Let’s also initialise the Cars DB:

add-migration -ConfigurationTypeName Cars.Web.Database.DomainMigrations.Configuration “FirstInitialisation”

This will create a FirstInitialisation class for our domains. There’s only the Car domain at preset so the single CreateTable statement is quite simple. The Id will be set as the primary key. Note that maxlength of Make is set to 50 which was extracted from the StringLength attribute we set on the Make property. The category enumeration is stored as a non-nullable integer. So there’s no separate mapping table for the enumeration values. The Cars table will simply include a column called Category with numeric codes for the enumerations. This can be both good and bad: you don’t need to get the string information from another table, but you cannot readily update the descriptions in the database either.

Notice that there’s still no database that reflects our user and car objects. The update-database package console command can do that. It will first check if there’s any existing database and apply all migration scripts that had not been processed up to that point. Otherwise it will create a new database and run all available migration scripts. The ConfigurationTypeName parameter can again be set to show which migration to run. Run the following command to create the user tables:

update-database -ConfigurationTypeName Cars.Web.Database.UserManagementMigrations.Configuration

Refresh the solution and click the Show All Files option in the solution explorer. You should see that there’s a new MDF file within the App_Data folder called aspnet-Cars.Web-somedatestamp.mdf.

Let’s also create the Cars table:

update-database -ConfigurationTypeName Cars.Web.Database.DomainMigrations.Configuration

In case you want to see the actual SQL commands sent to the database you’d need to add the -verbose flag to the update-database command:

update-database -ConfigurationTypeName Cars.Web.Database.DomainMigrations.Configuration -verbose

Double-click the mdf file in Solution Explorer to view the contents. This will open the Server Explorer window where you can see the tables created:

Update-database command executed

The user manager tables will look familiar from the series on Identity referred to above. Also, we have the Cars table with the Id, Make and Category fields.

You are of course not limited to creating the database in the built-in local SQL server. Update the connection string in web.config as you wish and the changes will be reflected in the next update-database command.

In the next post we’ll start adding Car objects to the Cars table.

View the posts related to data storage here.

Introduction to EntityFramework 6 Part 1: the basics of code-first

Introduction

EntityFramework is probably the #1 ORM choice in a database-driven .NET application. EntityFramework 6 comes with a couple of new exciting features that are worth checking out for all MVC 5 developers.

There are 3 approaches to working with EF in your project:

  • Database-first: you can point EF to a database and it will create a model for you using T4 templates. You can fine-tune the model in a design surface
  • Model-first: you have no database and use a design surface to draw your model. You can instruct the designer to create the database for you with all the tables
  • Code-first: write your model in code as classes and instruct EF to generate the necessary database and tables

In the series we’ll look at the code-first approach among other features of EF6.

Demo

I’ll use Visual Studio 2013 Express for Web to build the demo. Select New Project and then insert a new Blank Solution:

Insert new blank solution in Visual Studio

Call the solution Cars and press OK. The blank solution will be created in Visual Studio. Right-click the solution in the Solution Explorer, choose Add… New Project…, select the ASP.NET Web Application template. Call it Cars.Web. In the New ASP.NET Project window select MVC and click OK. The template will automatically include the EntityFramework-related libraries for you. You can see them if you expand the References section of the web project.

In a layered application design it’s customary to put the domain layer in a separate project. Right-click the solution and add a new Class library and call it Cars.Domain. Delete Class1. Add a reference to the Domain project from the Web project. Let’s add our first domain object. Add a new class to the Domain layer called Car. We’ll need to add MVC-related attributes to the class so add the following reference to Cars.Domain:

Add data annotations library to Domain layer

The Car object will look like the following:

public class Car
{
	public int Id { get; set; }
	[Required]
	[StringLength(50)]
	public string Make { get; set; }

	public CarCategory Category { get; set; }
}

…where CarCategory is an enum:

public enum CarCategory
{
	Family
	, Sports
	, Van
	, Estate
}

Is this POCO?

Let’s just stop for a second and ask ourselves this question. Is this Car class a true POCO, i.e. a true domain object as it’s used in the sense of Domain Driven Design? Probably not. We’re letting MVC related attributes enter our classes to add validation which destroys the plain and independent nature of the Car domain. Proper domain objects should be void of technology-related traits. If you’re not sure what I mean then you can skim through the DDD series referenced above. These annotations should be placed in view-models in the Web project so that client-side validation can take place first. However, this solution will be OK for this demo. The point is not to bloat the project and get bogged down by issues not related to EntityFramework.

We’ll commit a lot of these “sins” throughout the demo. You’ll see examples of SOLID being totally disrespected. We’ll concentrate on the technology but it’s up to you to organise your code as you see fit.

Data context

Let’s create our database context from scratch. As the Web layer already references the EntityFramework libraries we can keep it there. Again, this is a big no-no in a real life “serious” application, but it’ll do for now. Add a new folder called Database to the Web project. This folder will contain our database-related objects including the DB representation of our Car domain. You can keep your domain objects clean and store the DB representations separate. Add the following EF context class:

public class CarsDbContext : DbContext
{
}

…where DbContext lies in the System.Data.Entity library.

A collection of entities in the context is represented by the DbSet object. Add the following property to the context class:

public DbSet<Car> Cars { get; set; }

A DbSet is almost always mapped to a table in the database. So when you have an instance of a CarsDbContext object you can use to get hold of all Car objects in the data store and query the data with LINQ.

When you start a new MVC 5 project the template will actually provide you with a DbContext. Check the IdentityModels.cs file in the Models folder:

public class ApplicationDbContext : IdentityDbContext<ApplicationUser>
{
        public ApplicationDbContext()
            : base("DefaultConnection")
        {
        }
}

We discussed the purpose of the ApplicationDbContext in the series on Identity in MVC5 here. It derives from IdentityDbContext which in turn derives from DbContext. It is set up to work with User related data with EntityFramework: create new users, update users, add claims, store external OAuth metadata, store roles, logins etc. It’s meant to give you an EF implementation of every aspect around user management which is often considered a real pain by many programmers who want to concentrate on the real business domain instead. Make sure you at least skim through the series on Identity to learn more about this particular data context.

A little contemplation

We should pause for a minute and ponder what to do now.

We have two different contexts: the Cars context and the ApplicationDbContext. It is certainly possible to build on the ApplicationDbContext class and put all DbSet objects in there. On the other hand it seems like a good choice to keep the annoying user-related logic separate from the “real” business objects in the database.

Also, you may wonder how the ApplicationUser object could be ported to the Domain layer. After all, it is also an object that should reside in the Domain layer, right? The challenge here is that ApplicationUser derives from IdentityUser which lies in the Microsoft.AspNet.Identity.EntityFramework namespace. This means that if you want to keep the EF implementation of user management in the Domain layer then you’ll need to import the EF libraries into the Domain layer as well. That’s a serious step towards “contaminating” your business layer which should be clear of technological concerns. Like it happens in many projects, we are sort of trapped by technological issues: we want to keep our Domain layer clean but we may want to keep the EF user management provided by the MVC 5 template out-of-the-box because it’s convenient. If we want to provide our own User logic in the Domain layer then we’ll need to provide our own implementation of IUserStore, IUserLoginStore, IUserPasswordStore etc. which we saw in the series on Identity. This can be a long and tedious process which will take a long time to complete, time that could be spent on more business-related features. However, in that case we’re guaranteed to freely customise and optimise all aspects of our user-related logic.

If we decide to go with the EF implementation of user management then we have to accept the fact that we’ll use SQL Server as the user store mechanism and EF as the ORM framework of choice. This is again an example where we let technology take over some part of the domain.

On the other hand we can argue that user-related logic is not part of our code business domain. It’s only a necessary evil in order to let people log on and off, drive authentication and authorisation, create users etc. It’s possible that user management will not be part of the core domain of a typical business web application. That most likely belongs to some internal admin site. In that case you can leave the user management to EF as it is and concentrate on the core domain in the separate Domain layer. You can still choose a different data store to keep your domain objects in and have an SQL Server instance just for user-related data. We can even say that this is a good separation of concerns as the user management database might be used by other applications in a single sign-on scenario.

This all really depends on the philosophy you follow in your project. Whichever path you take you’ll have good arguments to back it up if anyone asks.

What do we do now?

We’ll certainly not go down the difficult and time-consuming path of providing our own implementation of user management in this demo. Also, user management is not part of our core domain. However, we still want to organise our code so that the user data context is located in the same place as the cars DB context. Add the following class called UserManagementDbContext to the Database folder:

public class UserManagementDbContext : IdentityDbContext<ApplicationUser>
{
	public UserManagementDbContext()
		: base("DefaultConnection")
	{

	}
}

Import the necessary libraries: Microsoft.AspNet.Identity.EntityFramework and Cars.Web.Models. In IdentityModel.cs erase the ApplicationDbContext class:

public class ApplicationDbContext : IdentityDbContext<ApplicationUser>
    {
        public ApplicationDbContext()
            : base("DefaultConnection")
        {
        }
    }

The compiler will complain that ApplicationDbContext is not found in AccountController.cs. Update the constructor as follows:

public AccountController()
	: this(new UserManager<ApplicationUser>(new UserStore<ApplicationUser>(new UserManagementDbContext())))
{
}

UserManagementDbContext will use a connection string defined in web.config as “DefaultConnection”. We want to make sure that the Cars DB context uses the same connection. Insert the following constructor to CarsDbContext:

public CarsDbContext() : base("DefaultConnection")
{
}

We’ll continue in the next post by creating the Cars database.

View the posts related to data storage here.

Introduction to forms based authentication in ASP.NET MVC5 Part 5: Claims

Introduction

Claims in authorisation have received a lot of attention recently. Claims are simply key-value pairs where the key describes the type of claim, such as “first name” and the value provides the value of that claim, e.g. “Elvis”. Think of a passport which usually has a page with the photo and lots of claims: first name, last name, maiden name, expiry date etc. Those are all key-value pairs that describe the owner of the passport and provide reliable evidence that the person is really the one they are claiming to be.

I have a long series on claims on this blog. If you don’t anything about them then I recommend you at least go through the basics starting here. That series takes up claims in MVC 4. MVC 5 brings a couple of new features as far as claims are concerned.

Demo

We’ll be using the same demo application as before in this series so have it open in Visual Studio 2013.

As we said before authentication in MVC 5 is built using Katana components which are activated with extension methods on the incoming IAppBuilder object. These Katana components work independently of each other: e.g. you can turn on Google authentication at will as we saw in the previous part. At the same time you can even turn off the traditional cookie authentication, it won’t affect the call to app.UseGoogleAuthentication().

When we turned on Google authentication the consent screen stated that the application, i.e. the demo web app, will have access to the user’s email. That’s in fact a type of claim where the key is “email” or most probably some more complete namespace. Where’s that email? How can we read it?

Locate the method called ExternalLoginCallback in the AccountController. That method is fired when the user has successfully logged in using an external auth provider like Google or Facebook. The method will first need to extract the login information using…

var loginInfo = await AuthenticationManager.GetExternalLoginInfoAsync();	

This login information contains the tokens, expiry dates, claims etc. As the login is taken care of by OWIN, MVC will need to tap into the corresponding Katana component to read those values. This is an example of a piece of logic outside OWIN that needs to find out something from it. The AccountController will need this information to handle other scenarios such as signing out. The key object here is the AuthenticationManager.

The AuthenticationManager which is of type IAuthenticationManager is extracted using the following private property accessor in AccountController:

private IAuthenticationManager AuthenticationManager
{
            get
            {
                return HttpContext.GetOwinContext().Authentication;
            }
}

The interface lies in the Microsoft.Owin.Security namespace. The AuthenticationManager is retrieved from the current OWIN context. The GetOwinContext extension method provides a gateway into OWIN from ASP.NET. It allows you to retrieve the request environment dictionary we saw in the series on OWIN:

HttpContext.GetOwinContext().Request.Environment;

I encourage you to type ‘HttpContext.GetOwinContext().’ in the editor and look through the available choices with IntelliSense. The Authentication property exists so that ASP.NET can read authentication related information from the OWIN context as all that is now handled by Katana components.

If you look further down in the code you’ll see the SignInAsync method. The method body shows how to sign users in and out using an external cookie-based login:

AuthenticationManager.SignOut(DefaultAuthenticationTypes.ExternalCookie);
AuthenticationManager.SignIn(new AuthenticationProperties() { IsPersistent = isPersistent }, identity);

Now that we know a little bit about the authentication manager we can return to the ExternalLoginCallback method. Let’s see what the GetExternalLoginInfoAsync method returns in terms of login information. Add a breakpoint within the method and start the application. Click the Log in link and sign in with Google. Code execution stops within the method. Inspect the contents of the “loginInfo” variable. It doesn’t contain too much information: the user name, the provider name – Google – and a provider key. So there’s nothing about any provider specific related claims such as the user’s email address.

Note that the GetExternalLoginInfoAsync method only provides an object which includes properties common to all providers. The list is not too long as we’ve seen. However, the method cannot know in advance what the Google auth provider will provide in terms of claims. The list of available data will be different across providers. Some providers may provide a more generous list of claims than just an email: a URL to the user’s image, the user’s contacts, first and last names etc. Insert the following line of code above the call to GetExternalLoginInfoAsync:

AuthenticateResult authenticateResult = await AuthenticationManager.AuthenticateAsync(DefaultAuthenticationTypes.ExternalCookie);

Leave the breakpoint as it is and restart the application. Sign in with Google and inspect the authenticateResult variable. You’ll see that it provides a lot more information than the login info above. The claims are found
within the Identity property:

Claims from Google authentication

You can see that the claim types are identified in the standard URI way we saw in the series on claims. You can query the Claims collection to see if it includes the email claim. If your application explicitly requires the email address of the user then make sure to indicate it when you set it up with Google or any other auth provider.

You can save the email of the user in at least two ways:

  • Temporarily in the session using the ExternalLoginConfirmationViewModel object further down in the ExternalLoginCallback method. That view model doesn’t by default include any property for emails, you’ll need to extend it
  • In the database using the UserManager object we saw before in this series

Let’s see how we can achieve these. Locate the ExternalLoginConfirmationViewModel object in AccountViewModels.cs and extend it as follows:

public class ExternalLoginConfirmationViewModel
{
        [Required]
        [Display(Name = "User name")]
        public string UserName { get; set; }

	public string EmailFromProvider { get; set; }
}

Add the following method to AccountController.cs to read the email claim from the claims list:

private string ExtractEmailFromClaims(AuthenticateResult authenticateResult)
{
	string email = string.Empty;
	IEnumerable<Claim> claims = authenticateResult.Identity.Claims;
	Claim emailClaim = (from c in claims where c.Type == ClaimTypes.Email select c).FirstOrDefault();
	if (emailClaim != null)
	{
		email = emailClaim.Value;
	}
	return email;
}

You can read this value in the body of ExternalLoginCallback and store it in a ExternalLoginConfirmationViewModel like this:

public async Task<ActionResult> ExternalLoginCallback(string returnUrl)
{
	AuthenticateResult authenticateResult = await AuthenticationManager.AuthenticateAsync(DefaultAuthenticationTypes.ExternalCookie);

        var loginInfo = await AuthenticationManager.GetExternalLoginInfoAsync();			
         if (loginInfo == null)
            {
                return RedirectToAction("Login");
            }

            // Sign in the user with this external login provider if the user already has a login
            var user = await UserManager.FindAsync(loginInfo.Login);

			string emailClaimFromAuthResult = ExtractEmailFromClaims(authenticateResult);

            if (user != null)
            {
                await SignInAsync(user, isPersistent: false);
                return RedirectToLocal(returnUrl);
            }
            else
            {
                // If the user does not have an account, then prompt the user to create an account
                ViewBag.ReturnUrl = returnUrl;
                ViewBag.LoginProvider = loginInfo.Login.LoginProvider;
                return View("ExternalLoginConfirmation", new ExternalLoginConfirmationViewModel 
					{ UserName = loginInfo.DefaultUserName, EmailFromProvider = emailClaimFromAuthResult });
     }
}

This page redirects to a View called ExternalLoginConfirmation when the user first signs up in the “else” clause. Locate ExternalLoginConfirmation.cshtml in the Views/Account folder. You can use the incoming model to view the extracted email claim:

<p>
    We've found the following email from the login provider: @Model.EmailFromProvider
</p>

I’ve deleted all rows in the AspNetUsers table so that I can view this extra information. Also, clear the cookies in your browser otherwise Google will remember you. You can also run the application from a brand new browser window. The email was successfully retrieved:

Found Google email claim

We can store the email claim in the database within ExternalLoginCallback as follows:

if (user != null)
{
        await SignInAsync(user, isPersistent: false);
        IList<Claim> userClaimsInDatabase = UserManager.GetClaims<ApplicationUser>(user.Id);
	Claim emailClaim = (from c in userClaimsInDatabase where c.Type == ClaimTypes.Email select c).FirstOrDefault();
	if (emailClaim == null)
	{
        	IdentityResult identityResult = UserManager.AddClaim<ApplicationUser>(user.Id, new Claim(ClaimTypes.Email, emailClaimFromAuthResult));
	}
				
        return RedirectToLocal(returnUrl);
}

First we check the claims stored in the database using the UserManager.GetClaims method. Then we check if the email Claim is present. If not then we add it to the database. The identityResult helps you check the result of the operation through the Errors and Succeeded properties.

The claims by default end up in the AspNetUserClaims table:

Email claim saved in the aspnetuserclaims table

You can of course use the AspNetUserClaims table to store any kind of claim you can think of: standard claims found in the ClaimTypes list or your own custom ones, such as http://mycompany.com/claims/customer-type.

You can view the list of posts on Security and Cryptography here.

Introduction to forms based authentication in ASP.NET MVC5 Part 4

Introduction

In the previous part of this series we looked at some key objects around the new Identity packages in .NET. We also identified the EntityFramework database context object which can be extended with your own entities. By default it only contains User-related entities. Then we tried to extend the default implementation of IUser, i.e. ApplicationUser which derives from the EF entity IdentityUser. We failed at first as there’s no mechanism that will update our database on the fly if we make a change to the underlying User model.

We’ll continue working on the same demo project as before so have it ready in Visual Studio 2013.

Database migrations and seeding

As hinted at in the previous post we’ll look at EntityFramework 6 and DB migration in the series after this one but we’ll need to solve the current issue somehow.

Open the Package Manager Console in Visual Studio: View, Other Windows, Package Manager Console. Run the following command:

Enable-Migrations

This is an EntityFramework specific command. After some console output you should see the following success message:

Code First Migrations enabled for project [your project name]

Also, a couple of new items will be created for you in VS. You’ll see a migration script in a new folder called Migrations. The migration script will have a name with a date stamp followed by _InitialCreate.cs. Also in the same folder you’ll see a file called Configuration.cs. An interesting property is called AutomaticMigrationsEnabled. It is set to false by default. If it’s set to true then whenever you change the structure of your entities then EF will reflect those in the database automatically. In an alpha testing environment this is probably a good idea but for the production environment you’ll want to set it to false. Set it to true for this exercise.

Another interesting element in Configuration.cs is the Seed method. The code is commented out but the purpose of the method is to make sure that there’s some data in the database when the database is updated. E.g. if want to run integration tests with real data in the database then you can use this method to populate the DB tables with some real data.

There are at least two strategies you can follow to populate the User database within the Seed method. The traditional EF context approach looks like this:

PasswordHasher passwordHasher = new PasswordHasher();
context.Users.AddOrUpdate(user => user.UserName
	, new ApplicationUser() { UserName = "andras", PasswordHash = passwordHasher.HashPassword("hello") });
context.SaveChanges();

We use PasswordHasher class built into the identity library to hash a password. The AddOrUpdate method takes a property selector where we define which property should be used for equality. If there’s already a user with the username “andras” then do an update. Otherwise insert the new user.

Another approach is to use the UserManager object in the Identity.EntityFramework assembly. Insert the following code into the Seed method:

if (!context.Users.Any(user => user.UserName == "andras"))
{
	UserStore<ApplicationUser> userStore = new UserStore<ApplicationUser>(context);
	UserManager<ApplicationUser> userManager = new UserManager<ApplicationUser>(userStore);
	ApplicationUser applicationUser = new ApplicationUser() { UserName = "andras" };
	userManager.Create<ApplicationUser>(applicationUser, "password");
}

We first check for the presence of any user with the username “andras” with the help of the Any extension method. If there’s none then we build up the UserManager object in a way that’s now familiar from the AccountController constructor. We then call the Create method of the UserManager and let it take care of the user creation behind the scenes.

Go back to the Package Manager Console and issue the following command:

Update-Database

The console output should say – among other things – the following:

Running Seed method.

Open the database file in the App_Data folder and then check the contents of the AspNetUsers table. The new user should be available and the table also includes the FavouriteProgrammingLanguage column:

User data migration success

Run the application and try to log in with the user you’ve just created in the Seed method. It should go fine. Then log off and register a new user and provide some programming language in the appropriate field. Then refresh the database in the Server Explorer and check the contents of AspNetUsers. You’ll see the new user with there with their favourite language.

If you’d like to create roles and add users to roles in the seed method then it’s a similar process:

string roleName = "IT";
RoleStore<IdentityRole> roleStore = new RoleStore<IdentityRole>(context);
RoleManager<IdentityRole> roleManager = new RoleManager<IdentityRole>(roleStore);
roleManager.Create(new IdentityRole() { Name = roleName });
userManager.AddToRole(applicationUser.Id, roleName);

Third party identity providers

We looked at Start.Auth.cs briefly in a previous part of this series. By default most of the code is commented out in that file and only the traditional login form is activated. However, if you look at the inactive code bits then you’ll see that you can quite quickly enable Microsoft, Twitter, Facebook and Google authentication.

You can take advantage of these external providers so that you don’t have to take care of storing your users’ passwords and all actions that come with it such as updating passwords. Instead, a proven and reliable service will tell your application that the person trying to log in is indeed an authenticated one. Also, your users won’t have to remember another set of username of password.

In order to use these platforms you’ll need to register your application with them with one exception: Google. E.g. for Facebook you’ll need to go to developers.facebook.com, sign in and register an application with a return URL. In return you’ll get an application ID and a secret:

Facebook application ID and secret

The Azure mobile URL is the callback URL for an application I registered before on each of those 4 providers. I hid the application ID and application secret values.

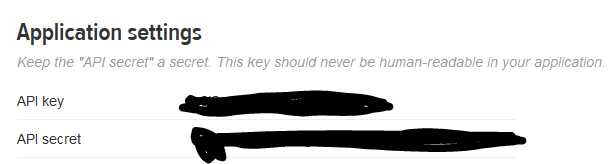
For Twitter you’ll need to go to dev.twitter.com and register your application in a similar fashion. You’ll get an API key and an API secret:

Twitter application keys

These providers will use OAuth2 and OpenId Connect to perform the login but the complex details are hidden behind the Katana extensions, like app.UseMicrosoftAccountAuthentication.

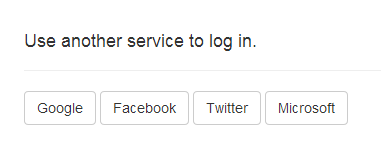
As you activate the external providers there will be new buttons on the Log in page for them:

External providers login buttons

Upon successful login your web app will receive an authentication token from the provider and that token will be used in all subsequent communication with your website. The token will tell your website that the user has authenticated herself along with details such as the expiry date of the token and maybe some user details depending on what your web app has requested.

As mentioned before there’s one exception to the client ID / client secret data requirement: Google. So comment out…

app.UseGoogleAuthentication();

…and run the application. Navigate to the Log in page and press the Google button. You’ll be directed to the standard Google login page. If you’re already logged on with Google then this step is skipped. Next you’ll be shown a consent page where you can read what data “localhost” will be able to read from you:

Google consent screen

If you implement the other providers at a later point then they’ll follow the same process, i.e. show the consent screen. Normally you can configure the kind of data your application will require from the user on the individual developer websites mentioned above.

Click Accept and then you can complete the registration in the last step:

Confirm registration with Google

This is where you create a local account which will be stored in the AspNetUserLogins table. Press Register and there you are, you’ve registered using Google.

Check the contents of AspNetUserLogins:

Google login data in DB

Also, the user is stored in the AspNetUsers table:

Google user

You’ll see that the password is not stored anywhere which is expected. The credentials are stored in the provider’s database.

Read the last part in this series here.

You can view the list of posts on Security and Cryptography here.

Elliot Balynn's Blog

A directory of wonderful thoughts

Software Engineering

Web development

Disparate Opinions

Various tidbits

chsakell's Blog

WEB APPLICATION DEVELOPMENT TUTORIALS WITH OPEN-SOURCE PROJECTS

Once Upon a Camayoc

ARCHIVED: Bite-size insight on Cyber Security for the not too technical.