Introduction to OAuth2: Json Web Tokens
January 20, 2014 13 Comments
Introduction
JSON web tokens are a sort of security token. As such, it is used for authentication purposes, and has similar attributes like the XLM-formatted SAML tokens we met in the series on Claims Bases Authentication. It shows the issuer of the token, the claims about the user, it must be signed to make it tamper-proof and it can have an expiration date. If you then log on to a web page then the authentication server will send back a security token that contains the data mentioned above. Upon successful authentication the web site will consume the token.
Again, like in the case of the SAML tokens there must be a trust relationship between the consumer and the issuer of the token. This ensures that even the contents of the token are trusted. The consumer knows about the key that the issuer uses to sign the token. That key can be used for validation purposes. At the time of writing this post SAML tokens are the most commonly used security tokens. SAML has quite a complex structure with a strict schema involved. It is very expressive with various encryption and signature options.
This last point is actually a limitation in the world of mobile devices. It’s needless to say how widespread mobile devices are in the world. There are probably more tablets and smartphones available nowadays than laptops and stationary computers. It feels like it’s only programmers like me who need computers… Mobile devices must perform their tasks with resources that are limited in comparison to computers. They are not well suited for parsing complex XML tokens.
This is where the JSON web tokens enter the scene with their simplified structure. The data is JSON which is more compact than XML and even mobile devices have the ability to parse them. JSON is also native to JavaScript which has grown into a very important language with applications such as Node.js, Windows 8 store apps, MongoDb etc. There are still a number of symmetric and asymmetric encryption options available for the token content and signature but it’s limited compared to what the SAML standard has to offer. However, the most widely accepted algorithms, such as RSA and AES are available and they will suit the vast majority of needs.
With the fast advance of mobile devices JSON web tokens will soon become – or already have? – the new standard for security tokens. They are already the de facto standard for OAuth2 and OpenID Connect in the modern mobile implementations.
Structure
A JSON security token consists of two parts:
- Header with some metadata, e.g. on the algorithms and keys used to encrypt and sign the message
- Claims
If you don’t know what claims are then make sure you understand the basics: start here.
These claims can be token specific, such as Issuer, Expiration date, or they can be defined by the application. You as the programmer are free to define what goes into the application-specific claims, such as FirstName, Email, NameOfPet, FavouriteColour, you name it.
If you’ve read through the series on Claims Based Auth available on this blog then the token specific claims are probably familiar to you:
- Issuer: the identifier of the issuer of the token so that the recipient knows where the token is coming from
- Audience: shows who the token is targeted at so that the recipient doesn’t use a token meant for a different application or website
- IssuedAt: when the token was issued
- Expiration: the expiration date of the token
- Subject: typically a user ID that describes who the token is meant for
To keep the token size limited these claim types are abbreviated:
- Issuer: iss
- Audience: aud
- IssuedAt: iat
- Expiration: exp
- Subject: sub
This is what a header can look like:
{
"typ": "JWT"
, "alg": "HS256"
}
Type: JWT means of course Json Web Token. Alg shows that the HMACSHA256 algorithm was used to sign the token.
The claims section can look like this:
{
"iss": "issuer name, usually some URL http://www.myauthenticationserver.com",
"exp": "a date in UNIX date format i.e. the number of seconds since 1970/01/01",
"aud": "the URL of the consumer likehttp: //www.mygreatsite.com",
"sub": "user identifier such as bobthebuilder"
}
Other claim types can be useful in the claims section: e.g. “client” to identify the application that requested the token. or “scope” to show the list of allowed operations for authorisation purposes:
{
"scope": ["read", "search"]
}
The list of claims can be extended as you wish, just as we saw in the case of SAML claims based authentication.
To make the token even more compact, the different sections are base64 encoded:
sdfgsdfgdfg.hrtg34twefwf4fg5g45gg.wsefefg345e4gf5g
These are just random characters, but locate the 2 periods in this string. They are delimiters for:
- Header
- Claims
- Signature
…where each section is individually base64 encoded.
Some code
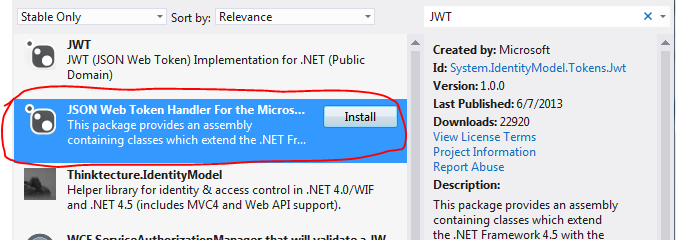
Open Visual Studio 2012 or higher, create a console application and add the below package from NuGet:
In addition, add a reference to the System.IdentityModel library.
There’s a number of ways to exchange JWT tokens between a sender and a receiver. In the below example I’ll use an RSACryptoServiceProvider to sign the JWT so that the receiver can validate it. If you don’t what RSA and asymmetric encryption mean then make sure to read upon it in the blog post mentioned above.
In short: the sender, i.e. the issuer of the token will have a pair of asymmetric encryption keys. The public key can be distributed to the receivers. The receiver will use the public key to validate the signature of the JWT token.
We won’t build a separate sender and receiver, that’s not the point here, but we want to simulate that the sender has access to both the private and public keys and the receiver only has the public key.
The following method will construct a valid RSA key pair:
private static RsaKeyGenerationResult GenerateRsaKeys()
{
	RSACryptoServiceProvider myRSA = new RSACryptoServiceProvider(2048);
	RSAParameters publicKey = myRSA.ExportParameters(true);
	RsaKeyGenerationResult result = new RsaKeyGenerationResult();
	result.PublicAndPrivateKey = myRSA.ToXmlString(true);
	result.PublicKeyOnly = myRSA.ToXmlString(false);
	return result;
}
…where RsaKeyGenerationResult is a DTO:
public class RsaKeyGenerationResult
{
	public string PublicKeyOnly { get; set; }
	public string PublicAndPrivateKey { get; set; }
}
In GenerateRsaKeys() we generate an RSA key and save its full set of keys and the public key only in two separate parameters of the RsaKeyGenerationResult object.
This is how to build and serialise the token:
RSACryptoServiceProvider publicAndPrivate = new RSACryptoServiceProvider();
RsaKeyGenerationResult keyGenerationResult = GenerateRsaKeys();

publicAndPrivate.FromXmlString(keyGenerationResult.PublicAndPrivateKey);
JwtSecurityToken jwtToken = new JwtSecurityToken
	(issuer: "http://issuer.com", audience: "http://mysite.com"
	, claims: new List<Claim>() { new Claim(ClaimTypes.Name, "Andras Nemes") }
	, lifetime: new Lifetime(DateTime.UtcNow, DateTime.UtcNow.AddHours(1))
	, signingCredentials: new SigningCredentials(new RsaSecurityKey(publicAndPrivate)
		, SecurityAlgorithms.RsaSha256Signature, SecurityAlgorithms.Sha256Digest));

JwtSecurityTokenHandler tokenHandler = new JwtSecurityTokenHandler();
string tokenString = tokenHandler.WriteToken(jwtToken);

Console.WriteLine("Token string: {0}", tokenString);
You’ll recognise the parameters in the JwtSecurityToken constructor. You’ll see that we used the full RSA key to sign the token. The SecurityAlgorithms string enumeration stores the fully qualified names of the signature and digest algorithm. Those are compulsory arguments in the constructor.
Run the code up to this point and you should see a long string with the 3 segments mentioned above.
If your organisation has a valid X509 certificate then it can be used in place of the RsaSecurityKey object. Check out the X509AsymmetricSecurityKey object which accepts a 509Certificate2 object in its constructor. You’ll need to export the certificate with both the private and public keys and save it as a .pfx file. You can do that using the certmgr snap-in in Windows. Use the full file name of the .pfx file in the constructor of the X509Certificate2 constructor.
You can transmit the token in a number of different ways: in the header of an HTTP request, in the query string, in a cookie, etc. It’s now a string that you can send to the consumer.
The consumer can validate and read the claims from the token as follows:
JwtSecurityToken tokenReceived = new JwtSecurityToken(tokenString);

RSACryptoServiceProvider publicOnly = new RSACryptoServiceProvider();
publicOnly.FromXmlString(keyGenerationResult.PublicKeyOnly);
TokenValidationParameters validationParameters = new TokenValidationParameters()
{
	ValidIssuer = "http://issuer.com"
	,AllowedAudience = "http://mysite.com"
	, SigningToken = new RsaSecurityToken(publicOnly)
};

JwtSecurityTokenHandler recipientTokenHandler = new JwtSecurityTokenHandler();
ClaimsPrincipal claimsPrincipal = recipientTokenHandler.ValidateToken(tokenReceived, validationParameters);
The client receives the base64 string which can be used in the constructor of the JwtSecurityToken object. We then use the public-key-only version of the RSACryptoServiceProvider to simulate that the receiver only has access to the public key of the sender. The TokenValidationParameters object can be used to build the validation logic. The JwtSecurityTokenHandler object is then used to validate the token. Upon successful validation you’ll get the ClaimsPrincipal which you’ll recognise from the posts on claims based auth mentioned above.
Set a breakpoint after the last line of code and inspect the contents of the claimsPrincipal object by hovering over it in VS.
The encoded JWT token can be decoded on this web page:

Read the next part in this series here.
You can view the list of posts on Security and Cryptography here.


Pingback: Confluence: AS Roadmap
JwtSecurityToken how to use Can you post complete example please
that’s the example that you see in the post, there’s nothing missing I wanted to show here
Can not resolve JwtSecurityToken reference even though I added using System.IdentityModel.Tokens; . Do I need to install any package ?
there’s one NuGet package you have to install, it’s clearly stated in the post.
Can you show how to load an already existing public/private keys instead of generating them.
Check out the posts under the section called “Security and cryptography” on this page: https://dotnetcodr.com/security-and-cryptography/
The posts on asymmetric encryption discuss private and public keys and how to process them, I hope it helps.
//Andras
Pingback: 基于Token的认证和基于声明的标识 | 邢程
Is there a way to skip validating the issuer signing key with TokenValidationParameters()? I tried various options like ValidateIssuerSigningKey = false but no effect. I keep getting the same error IDX10503: Signature validation failed:
I am validating the token manually by calling an API so I would like to skip it during ValidateToken() call.
Can this post help in any way?
//Andras
Lifetime class doesn’t appear to work in the JwtSecurityToken constructor anymore. I had to use Utc dates directly. Also, you state that X509AsymmetricSecurityKey can replace RsaSecurityKey. I found that I had to use X509SecurityKey with X509Certificate2 as the input to its constructor. JwtSecurityToken constructor would not take X509AsymmetricSecurityKey.
Thank you for the post. You saved my day!!
Hi David,
Is there a way to encrypt the generated token.So that payload wont be visible as a normal json.
Thanks in adavance.
Rohan