Using a Windows service in your .NET project part 8: Windows Service body part 2

Introduction

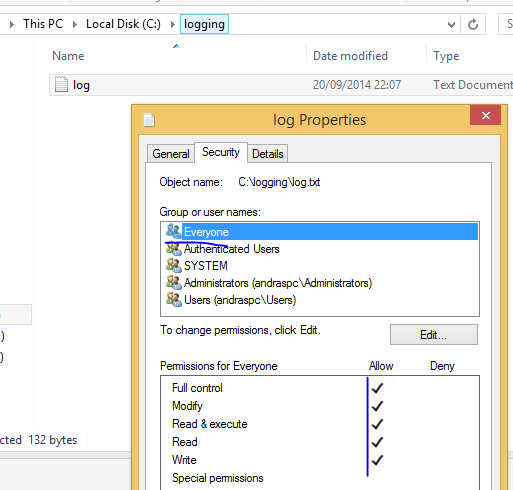
In the previous post of this series we started adding some code to the Windows service. We also implemented a simplified logging system to be able to track what’s happening within the service. In this post we’ll start adding code to actually run the HTTP jobs inserted in MongoDb.

So open the demo application in VS and let’s start.

HttpJobRunner process

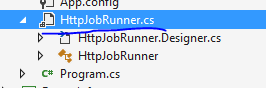
We established before that HttpJobRunner will need an IHttpJobService to retrieve the new jobs and an IHttpJobExecutionService to run them. Open HttpJobRunner.cs and add the following private fields:

private readonly IHttpJobService _httpJobService;
private readonly IHttpJobExecutionService _httpJobExecutionService;

Extend the constructor as follows:

public HttpJobRunner(ILoggingService loggingService, IHttpJobService httpJobService, IHttpJobExecutionService httpJoExecutionService)
{
	InitializeComponent();
	if (loggingService == null) throw new ArgumentNullException("LoggingService");
	if (httpJobService == null) throw new ArgumentNullException("HttpJobService");
	if (httpJobExecutionService == null) throw new ArgumentNullException("HttpJobExecutionService");
	_loggingService = loggingService;
	_httpJobService = httpJobService;
	_httpJobExecutionService = httpJobExecutionService;
	TaskScheduler.UnobservedTaskException += TaskScheduler_UnobservedTaskException;
}

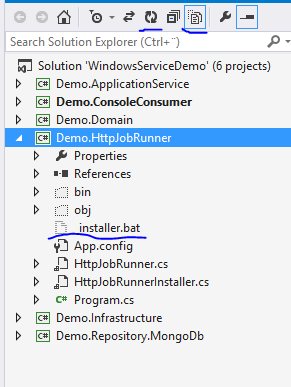
Program.cs in Demo.HttpJobRunner will start complaining of course. Open that file and extend its body to the following:

static class Program
{
	static void Main()
	{
		ServiceBase[] ServicesToRun;
		IHttpJobService httpJobService = BuildHttpJobService();
		IHttpJobExecutionService httpJobExecutionService = BuildHttpJobExecutionService(httpJobService);
		ServicesToRun = new ServiceBase[] 
                { 
				
                   new HttpJobRunner(new FileBasedLoggingService(@"c:\logging\log.txt"), httpJobService, httpJobExecutionService)
                };
		ServiceBase.Run(ServicesToRun);
	}

	private static IHttpJobService BuildHttpJobService()
	{
		IConfigurationRepository configurationRepository = new ConfigFileConfigurationRepository();
		IDatabaseConnectionSettingsService dbConnectionSettingsService = new HttpJobDatabaseConnectionService(configurationRepository);
		IJobRepository jobRepository = new JobRepository(dbConnectionSettingsService);
		IHttpJobService httpJobService = new HttpJobService(jobRepository);
		return httpJobService;
	}

	private static IHttpJobExecutionService BuildHttpJobExecutionService(IHttpJobService httpJobService)
	{
		IHttpJobExecutionService httpJobExecutionService = new HttpJobExecutionService(httpJobService, new HttpJobUrlService(new HttpClientService()));
		return httpJobExecutionService;
	}
}

You’ll need to add a reference to all other projects in the solution from Demo.HttpJobRunner for this code to compile. We do nothing else but declare the concrete implementations of the abstractions in the entry point of the Windows service application.

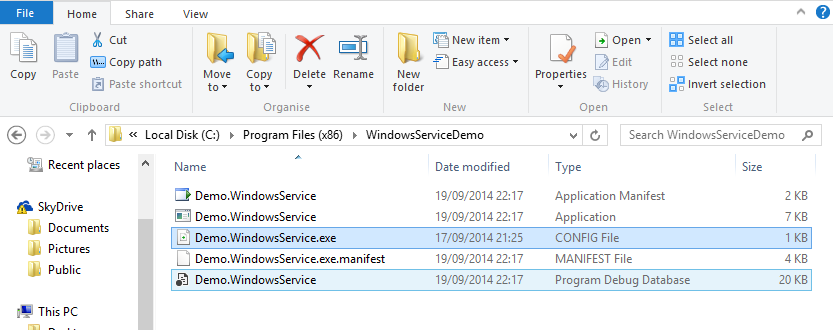
HttpJobRunner has all the dependencies it needs now so we can continue. Well, almost. recall that we saved the connection string and the HttpJobs table name in app.config of the Console application. Check the files available for the Windows service project. There should be another app.config. When we deploy the Windows service then it will consult its own app.config, which is totally independent of the app.config of ConsoleConsumer. It won’t magically have access to the configuration file of the Console app. This means that we need to add the same settings to HttpJobRunner.app.config too. Copy the settings so that the Windows service app.config looks as follows:

<?xml version="1.0" encoding="utf-8" ?>
<configuration>
  <connectionStrings>
    <add name="HttpJobsConnectionString" connectionString="mongodb://localhost"/>
  </connectionStrings>
  <appSettings>
    <add key="HttpJobsDatabaseName" value="HttpJobsDatabase"/>
  </appSettings>
  <startup>
    <supportedRuntime version="v4.0" sku=".NETFramework,Version=v4.5" />
  </startup>
</configuration>

The plan for the job execution process in the service is the following:

  • Check the database for new jobs periodically
  • If new jobs are found then log them and start running them on a different thread
  • Log the result of the job

It’s important to start a new thread for each new job otherwise the job process will block all other code, including checking the database for new jobs. This way the service will be able to execute multiple jobs simultaneously.

We can instruct the Windows service to carry out a certain action using the Timer object in the System.Timers namespace. Add the following private field to the field list of HttpJobRunner:

private readonly Timer _jobCollectionTimer;

…and add the following code into the HttpJobRunner constructor to initialise the timer and attach an event listener to the Timer.Elapsed event:

_jobCollectionTimer = new Timer(10000);
_jobCollectionTimer.Elapsed += _jobCollectionTimer_Elapsed;

…where _jobCollectionTimer_Elapsed was generated by Visual Studio and looks like this by default:

void _jobCollectionTimer_Elapsed(object sender, ElapsedEventArgs e)
{
	throw new NotImplementedException();
}

This handler is called every 10 seconds, i.e. 10000 milliseconds we specified in the Timer’s constructor. Remove the “throw new…” bit from the handler body and add the “async” keyword in front of “void”:

async void _jobCollectionTimer_Elapsed(object sender, ElapsedEventArgs e)

We’ll have an awaitable asynchronous method call within the handler body hence the need for the async keyword.

We need to start the Timer as well. Add the following code…

_jobCollectionTimer.Start();

…to 3 overridden Windows service events:

  • OnStart
  • OnContinue
  • OnPause

Here’s the body of the _jobCollectionTimer_Elapsed handler:

async void _jobCollectionTimer_Elapsed(object sender, ElapsedEventArgs e)
{
	try
	{
		GetHttpJobsResponse getAllNewHttpJobsResponse = _httpJobService.GetNewHttpJobs();
		if (getAllNewHttpJobsResponse.OperationException != null) throw getAllNewHttpJobsResponse.OperationException;
		IEnumerable<HttpJob> newJobs = getAllNewHttpJobsResponse.HttpJobs;
		if (newJobs.Count() > 0)
		{
			LogNewJobs(newJobs);
			foreach (HttpJob httpJob in newJobs)
			{
				await Task.Factory.StartNew(async () => await RunSingleHttpJob(httpJob));
			}
		}
	}
	catch (Exception ex)
	{
		LogException(ex);
	}
}

…and here come the private helper methods:

private async Task RunSingleHttpJob(HttpJob httpJob)
{
	LogStartOfNewJob(httpJob);
	try
	{
		await _httpJobExecutionService.Execute(httpJob);
	}
	catch (Exception ex)
	{
		LogException(ex);
	}
	LogEndOfNewJob(httpJob);
}

private void LogStartOfNewJob(HttpJob newJob)
{
	StringBuilder sb = new StringBuilder();
	sb.Append("About to start job ").Append(newJob.CorrelationId);
	_loggingService.LogInfo(this, sb.ToString());
}

private void LogEndOfNewJob(HttpJob newJob)
{
	StringBuilder sb = new StringBuilder();
	sb.Append("Finished running job ").Append(newJob.CorrelationId);
	_loggingService.LogInfo(this, sb.ToString());
}

private void LogNewJobs(IEnumerable<HttpJob> newJobs)
{
	StringBuilder sb = new StringBuilder();
	sb.Append("Found the following new jobs: ");
	foreach (HttpJob httpJob in newJobs)
	{
		sb.Append(httpJob.CorrelationId).Append(", ");
	}
	_loggingService.LogInfo(this, sb.ToString());
}

private void LogException(Exception exception)
{
	StringBuilder sb = new StringBuilder();
	sb.Append("Exception caught in HttpJobRunner:")
		.Append(NL).Append("Exception message: ").Append(exception.Message)
		.Append(NL).Append("Exception stacktrace: ").Append(exception.StackTrace);
	_loggingService.LogError(this, sb.ToString(), exception);
}

As outlined in the expected work flow the HttpJobRunner will first extract the list of new jobs. If there are any new jobs then they are logged. Then each new job is started on its own thread. Within RunSingleHttpJob we first log the start of the job, instruct the execution service to execute the job and finally log the end of the process.

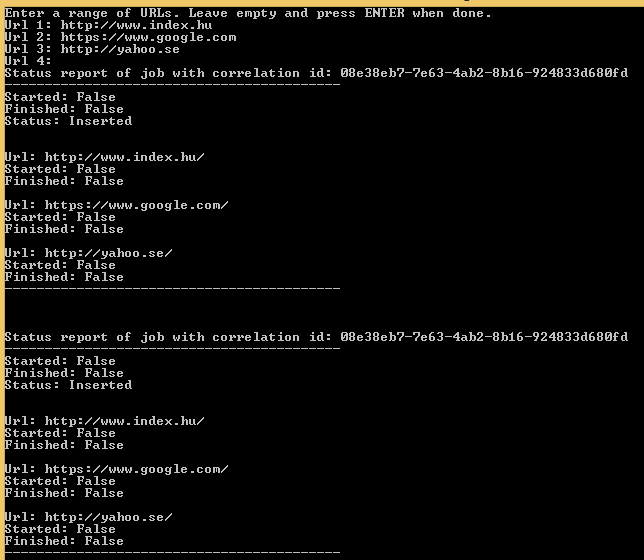
This should be all we need to have a simple but functioning system. Rebuild the solution, uninstall the service and install it again as we did before. Check the log file to make sure the service has “checked in”. Then run the Console app, enter a couple of URLs and wait for the status messages. In my case I got the following:

Service starting executing job

The same message appeared a couple of times, but then…

Job execution ongoing

Job execution near finish

…and finally…:

Job execution finished

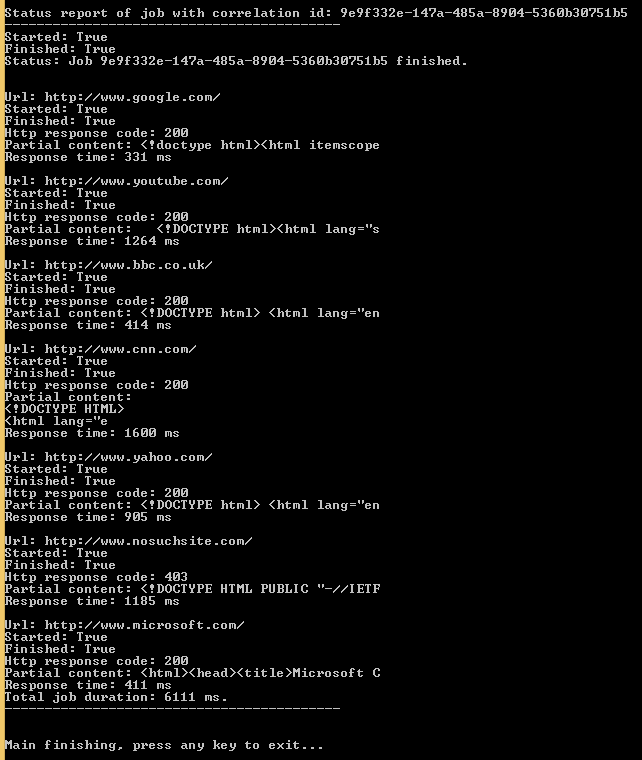
So the job was successfully executed by the HttpJobRunner service. Let’s check the log:

22/09/2014 20:14:58: source: Demo.WindowsService.HttpJobRunner, level: INFO, message: Found the following new jobs: 9e9f332e-147a-485a-8904-5360b30751b5, , any exception: None
22/09/2014 20:14:58: source: Demo.WindowsService.HttpJobRunner, level: INFO, message: About to start job 9e9f332e-147a-485a-8904-5360b30751b5, any exception: None
22/09/2014 20:15:04: source: Demo.WindowsService.HttpJobRunner, level: INFO, message: Finished running job 9e9f332e-147a-485a-8904-5360b30751b5, any exception: None

…which looks fine too.

We’re done, this concludes the series on a possible use of a Windows service in a .NET project. Windows services can be used for other things such as hosting another service, such as WCF, but I wanted to concentrate on their function to execute periodic and/or long running processes.

View the list of posts on Architecture and Patterns here.

Using a Windows service in your .NET project part 7: Windows Service body part 1

Introduction

In the previous post we saw how to install and uninstall the Windows service of our demo project. Currently the service doesn’t do anything as there’s no method implementation anywhere but it’s good that we can safely install and uninstall it.

Let’s review what this service should be able to do and what dependencies it will need:

  • It should periodically check the MongoDb database for new Http jobs. We have a service method for this in IHttpJobService
  • It should then execute those jobs using an IHttpJobExecutionService
  • Log the actions using an interface and implementation we haven’t seen yet

I need to stress the importance of logging in a Windows service. First of all it’s vital to log at least some activity in any real business application so that you can trace what your users are doing and find the source of exceptions. It’s even more important to have logging in place for an application with no user interface such as a Windows service. A Windows service cannot even send messages to a command prompt for you to see during testing. If you have no logging in place then you’ll be wondering what is going on if the service doesn’t perform its job.

We won’t build a full-blown logging system here, just a simplified file-based one. You can read more about logging in two blog posts: an introduction and a concrete example with log4net.

Logging

Let’s get this done first. We’ll reuse the logging interface from the logging intro referred to above. Open the Demo.Infrastructure project and add a new folder called Logging. Insert the following interface:

public interface ILoggingService
{
	void LogInfo(object logSource, string message, Exception exception = null);
	void LogWarning(object logSource, string message, Exception exception = null);
	void LogError(object logSource, string message, Exception exception = null);
	void LogFatal(object logSource, string message, Exception exception = null);
}

We’ll implement a home-made file-based logging service. Insert the following class to the Logging folder:

public class FileBasedLoggingService : ILoggingService
{
	private readonly string _logFileFullPath;

	public FileBasedLoggingService(string logFileFullPath)
	{
		if (string.IsNullOrEmpty(logFileFullPath)) throw new ArgumentException("Log file full path");
		FileInfo logFileInfo = new FileInfo(logFileFullPath);
		if (!logFileInfo.Exists) throw new ArgumentNullException("Log file does not exist");
		_logFileFullPath = logFileFullPath;
	}

	public void LogInfo(object logSource, string message, Exception exception = null)
	{
		AppendMessage(logSource, message, "INFO", exception);
	}

	public void LogWarning(object logSource, string message, Exception exception = null)
	{
		AppendMessage(logSource, message, "WARNING", exception);
	}

	public void LogError(object logSource, string message, Exception exception = null)
	{
		AppendMessage(logSource, message, "ERROR", exception);
	}

	public void LogFatal(object logSource, string message, Exception exception = null)
	{
		AppendMessage(logSource, message, "FATAL", exception);
	}

	private void AppendMessage(object source, string message, string level, Exception exception)
	{
		try
		{
			File.AppendAllText(_logFileFullPath, FormatMessage(source, message, level, exception));
		}
		catch { }
	}

	private string FormatMessage(object source, string message, string level, Exception exception)
	{
		return string.Concat(Environment.NewLine, DateTime.UtcNow.ToString(), ": source: ", source.ToString(), ", level: ", level, ", message: ", message, ", any exception: ", (exception == null ? "None" : exception.Message) );
	}
}

In a real application you’d use a professional tool to log to a file but that would unnecessarily sidetrack us now. Also, we could take the level of abstraction even further. Note that FileBasedLoggingService directly uses objects like File and FileInfo which make it difficult to test the methods in this class. A more complete solution would require us to separate out the concrete file-based operations to an abstraction. We’ll leave the implementation as it is for now. You can clean up this code if you’d like to as a homework. You can take a look at this post where I go through how to factor out file-related operations. It ties in well with what I’ve written in this paragraph.

Create a text file like “log.txt” somewhere on your hard drive and take note of its full path. Make sure that the file is editable by the service. For demo purposes you can give full access to Everyone so that we don’t need to trace any logging-related exceptions:

Set log file access to Everyone

Note how we simply ignore any exceptions thrown within AppendMessage. This is called fire-and-forget. This strategy can be acceptable in logging as we don’t want the application to stop just because e.g. the log file is inaccessible. In a testing phase you can catch the exception and log it somewhere else, such as the event log, in case you don’t see the logging messages in the target file, here’s an example:

private void AppendMessage(object source, string message, string level, Exception exception)
{
	try
	{
		File.AppendAllText(_logFileFullPath, FormatMessage(source, message, level, exception));
	}
	catch (Exception ex)
	{
		string s = "HttpJobRunner";
		string log = "Application";
		if (!EventLog.SourceExists(s))
		{
			EventLog.CreateEventSource(s, log);
		}
		EventLog.WriteEntry(s, "Exception in HttpJobRunner logging: " + ex.Message, EventLogEntryType.Error, 1234);
	}
}

Let’s add this as a dependency to HttpJobRunner. At present HttpJobRunner- the partial class that inherits from ServiceBase – is quite empty with a constructor that calls upon InitializeComponent and two empty overridden methods.

Change the implementation as follows:

public partial class HttpJobRunner : ServiceBase
{
	private readonly ILoggingService _loggingService;

	public HttpJobRunner(ILoggingService loggingService)
	{
		InitializeComponent();
		if (loggingService == null) throw new ArgumentNullException("LoggingService");
		_loggingService = loggingService;
	}

	protected override void OnStart(string[] args)
	{
		_loggingService.LogInfo(this, "HttpJobRunner starting up");
	}

	protected override void OnStop()
	{
		_loggingService.LogInfo(this, "HttpJobRunner stopping");
	}
}

You’ll need to add a project reference to the Infrastructure layer for this to compile. We let an ILoggingService be injected to HttpJobRunner through its constructor. Then we simply take note of the Windows service starting up and shutting down in the log file. Build the project and you should get an exception from Program.cs in the Windows service layer: HttpJobRunner doesn’t have an empty constructor. Change the implementation as follows:

static void Main()
{
	ServiceBase[] ServicesToRun;
	ServicesToRun = new ServiceBase[] 
        { 
             new HttpJobRunner(new FileBasedLoggingService(@"c:\logging\log.txt"))
       };
	ServiceBase.Run(ServicesToRun);
}

Make sure you insert the full path of the log file that you created before in the FileBasedLoggingService constructor.

Let’s see if this works. Rebuild the project and re-install the Windows service following the steps outlined in the previous part. Check the contents of the log file, there should be one entry similar to the following:

20/09/2014 20:07:25: source: Demo.WindowsService.HttpJobRunner, level: INFO, message: HttpJobRunner starting up, any exception: None

You can stop and/or restart the service in the Services window:

Stop and restart a service

The log messages should be added to the log file accordingly, e.g.:

20/09/2014 21:00:42: source: Demo.WindowsService.HttpJobRunner, level: INFO, message: HttpJobRunner starting up, any exception: None
20/09/2014 21:01:02: source: Demo.WindowsService.HttpJobRunner, level: INFO, message: HttpJobRunner shutting down, any exception: None
20/09/2014 21:01:03: source: Demo.WindowsService.HttpJobRunner, level: INFO, message: HttpJobRunner starting up, any exception: None

Great, we have some logging in place.

Restarting a Windows service can have negative consequences in your application. If the service is carrying out a job without saving its current state somewhere then restarting the service will in effect kill the job. So at a minimum we want to know any time the service status has changed. Add the following overrides to HttpJobRunner:

protected override void OnShutdown()
{
	_loggingService.LogInfo(this, "HttpJobRunner shutting down");
}

protected override void OnContinue()
{
	_loggingService.LogInfo(this, "HttpJobRunner continuing");
}

protected override void OnPause()
{
	_loggingService.LogInfo(this, "HttpJobRunner pausing");
}	

This doesn’t of course solve the problem of interrupted jobs but at least we know that something noteworthy has happened which can be the cause of a failed job. It is your responsibility to make your service “clever” enough to pick up an interrupted job when it’s restarted. In our example the service could check all jobs that have been started but not yet finished and start from there – or simply restart the job from the beginning. However, that’s beyond the scope of this series, but it’s still good to know about this issue.

Before we finish this post let’s add one more method to HttpJobRunner. The goal is that the service is never restarted due to an unhandled exception. If there’s an uncaught exception somewhere during the code execution the the service will fail and act according to the failure policy, such as “Restart the service” in our case. However, as noted above service restarts can be detrimental. It’s not always possible to catch all exceptions in a large code base even if you put try-catch clauses everywhere.

There’s a solution to catch all uncaught exceptions in a Windows service though. I mentioned it already in this short post on threading. We’ll reuse much of it here.

Within the HttpJobRunner constructore start typing…

TaskScheduler.UnobservedTaskException +=

…and press Tab twice. This will add a default handler that’s called whenever an uncaught exception bubbles up:

void TaskScheduler_UnobservedTaskException(object sender, UnobservedTaskExceptionEventArgs e)
{
	throw new NotImplementedException();
}

Insert the following implementation:

void TaskScheduler_UnobservedTaskException(object sender, UnobservedTaskExceptionEventArgs e)
{
	e.SetObserved();
	AggregateException aggregateException = (e.Exception as AggregateException).Flatten();
	aggregateException.Handle(ex =>
	{				
		return true;
	});
	List<Exception> inners = aggregateException.InnerExceptions.ToList();
	StringBuilder sb = new StringBuilder();
	sb.Append("Unhandled exception caught in HttpJobRunner by the generic catch-all handler.")
				.Append(NL);
	if (inners != null && inners.Count > 0)
	{
		foreach (Exception inner in inners)
		{
			sb.Append("Exception: ").Append(inner.Message).Append(NL).Append("Stacktrace: ").Append(NL)
				.Append(inner.StackTrace).Append(NL);
			if (inner.InnerException != null)
			{
				Exception innerInner = inner.InnerException;
				sb.Append("Inner exception has also an inner exception. Message: ")
					.Append(innerInner.Message).Append(". ").Append(NL)
					.Append("Stacktrace: ").Append(innerInner.StackTrace);
							
			}
			sb.Append(NL).Append(NL);
		}
	}
	else
	{
		sb.Append("No inner exceptions.").Append(NL);
		sb.Append("Plain message: ").Append(aggregateException.Message).Append(NL);
		sb.Append("Stacktrace: ").Append(aggregateException.StackTrace).Append(NL);
	}

	_loggingService.LogFatal(this, sb.ToString());
}

…where “NL” refers to a private variable to shorten Environment.NewLine:

private readonly string NL = Environment.NewLine;

This is enough for now. We’ll continue with the service implementation in the next post.

View the list of posts on Architecture and Patterns here.

Using a Windows service in your .NET project part 6: Windows Service installation

Introduction

In the previous post we went through the basics of a Windows Service. We saw how to set its properties in code. In this post we’ll see how the service can be installed.

Installation

There are at least three ways to install a Windows Service:

  • Manually calling the InstallUtil tool which is usually located at C:\Windows\Microsoft.NET\Framework64\v4.0.30319 or C:\Windows\Microsoft.NET\Framework\v4.0.30319
  • Call upon InstallUtil in a .bat file
  • Use the InstallShield limited edition project type in Visual Studio and add the components of the installation package

The first option is a bit cumbersome I think. You have to type in the uninstall and install commands to InstallUtil in a command prompt and provide the necessary command parameters. The third option, as far as I can remember, is not by default suitable for installing Windows services. The InstallShield wizard is meant to install “normal” desktop applications, like games. The last time I used the InstallShield project type I had to add a plugin from WiX in order to make it work with Windows services and it wasn’t fun.

We’ll instead go with the second option. There’s a definitive advantage with option 2 compared to the other ones. In a more advanced “enterprise” scenario you’ll likely store your code in some repository like SVN or GitHub. Then the code will be exported to a Continuous Deployment or Continuous Integration tool such as Jenkins or TeamCity. These tools can run the installation script to automatically install the Windows service as part of the automated deployment process.

The installation scripts

The scripts are very simple. We’ll have one for uninstalling a service and one for installing it. Some of the process will be manual but it can be automated with batch files in an automatic deployment scenario. When we install the Windows service we have to make sure that any existing service of the same name is uninstalled otherwise we’ll get an exception hence the need for an uninstaller.

I’m not aware of a batch file item type in Visual Studio so open Notepad. Add the following content to it:

@ECHO OFF

echo Installing HttpJobRunner service…
echo ———————————————–
C:\Windows\Microsoft.NET\Framework\v4.0.30319\InstallUtil /i “C:\Program Files (x86)\WindowsServiceDemo\Demo.WindowsService.exe”
C:\Windows\System32\sc.exe failure “HttpJobRunner” reset= 0 actions= restart/1000
echo ———————————————–
echo Done.
pause

We call InstallUtil, instruct it to install a service with the ‘i’ flag. The install command refers to a folder we haven’t set up yet but will do it soon. Then, as hinted at in the previous post we’ll add an extra call to set the failure mode to restart the service. Be exact with the arguments, including the whitespaces: “reset= 0” and not “reset = 0” or “reset =0”. In my experience putting the space in the wrong position will result in a failure. We then call “pause” to leave the command prompt open so that we can read the outcome. You can later remove that command so that the window closes itself automatically.

We’ll save the file in the same directory where Demo.HttpJobRunner resides. If you’re not sure where it is then right click the Windows service project in the solution explorer and click Open Folder in File Explorer. That is the folder where we’ll save the file we wrote in Notepad. Save the file as “_installer.bat”.

The file first won’t be visible in Solution explorer. Click the “Show all files” and “Refresh” buttons, it should appear:

Installer file shown in Visual Studio

Right-click the file and select “Include in project”. Locate the properties window to set the “Copy to Output Directory” option to Copy always:

Select Copy Always option for installer files

We do this so that the _installer.bat file is also copied to the deploy folder.

Let’s create another file in Notepad with the following content:

@ECHO OFF

echo Uninstalling HttpJobRunner service…
echo ———————————————–
C:\Windows\Microsoft.NET\Framework\v4.0.30319\InstallUtil /u “C:\Program Files (x86)\WindowsServiceDemo\Demo.WindowsService.exe”
echo ———————————————–
echo Done.
pause

As expected this will uninstall the service. Save the file as “_uninstall.bat” and add it to the project the same way as we did with _installer.bat. At the end you should have both files listed in Visual Studio:

All installer files present in Visual Studio solution explorer

Next let’s set up the deployment folder. Normally all applications are installed in the Program Files or Program Files (x86) folder. Let’s follow that convention. Create a folder called WindowsServiceDemo within Program Files (x86) or Program Files. Within that new folder add another folder called Deploy. In Visual Studio set the Build path to this Deploy folder for Demo.HttpJobRunner:

Set build output to new installation folder

Note that the _installer.bat and _uninstaller.bat files refer to Program Files (x86) but if you opted for Program Files then make sure to update the installer files accordingly.

We should be good to go. Right-click the Demo.HttpJobRunner project and select Rebuild. The Deploy folder should be populated:

First build package loaded to new installation path

Copy all files except for _installer.bat and _uninstaller.bat one level up, i.e. under “WindowsServiceDemo”. Then return to Deploy and run _installer.bat as an Administrator. View the notices on the Command prompt. It might tell you that the OnCommitted event has failed but the exception message is misleading I think: you haven’t specified a process file name or something similar. I’ve seen it before, I’m not 100% sure why it happens but I’m pretty certain that it’s because the Process object has not enough rights to run the “sc” command. It’s OK, the installer script will take care of that. In case you don’t see any exceptions from the OnCommitted phase in the output then you can remove the extra call to “sc” in the _installer.bat file. Otherwise just keep it and remove the SetRecoveryOptions method from HttpJobRunnerInstaller if you wish.

OK, let’s see if the service is up and running. It should figure in the list of services and should be running:

HttpJobRunner installed as Windows service

Check its properties. They should be set according to what we provided in code. Check especially the failure mode:

Failure mode for HttoJobRunner

Let’s now test the uninstaller. Go back to the Deploy folder and run _uninstaller.bat as an administrator. After some seconds and output to the console the uninstall process should succeed. Refresh the services list and HttpJobRunner should be gone:

HttpJobRunner uninstalled as Windows service

The service doesn’t do anything yet when installed because we left HttpJobRunner.cs untouched.

The installation process at present is a bit manual but can be automated with new batch files. Assuming that the service is up and running these are the steps to install a new service:

  • Build the project in Visual Studio – this will put the HttpJobRunner deploy package to the Deploy folder including _installer and _uninstaller.bat
  • Run _uninstaller.bat
  • Copy the deploy files to the WindowsServiceDemo folder except for the installation files
  • Run _installer.bat

In the next post we’ll start adding some action to the Windows Service.

View the list of posts on Architecture and Patterns here.

Using a Windows service in your .NET project part 5: the Windows Service project basics

Introduction

In the previous post of this series we added the console UI to the application. The user can now add a HttpJob to the MongoDb database but there’s no job handler yet. In this post we’ll start building the Windows service which will do just that.

I’ll assume you have no or very limited knowledge of Windows services so I’ll go through this at quite a slow pace.

We’ll be working on the demo project we’ve been building so far so have it ready in Visual Studio 2012/2013.

The Windows Service layer

There’s a special project type in Visual Studio professional called… …Windows Service! It’s found under the Windows category VS 2012/2013 Pro:

Windows Service project type in Visual Studio

Call it Demo.HttpJobRunner and add it to the solution. The template will add a couple of elements to the project:

Windows Service as it is first set up by Visual Studio

You’ll recognise App.config probably. As the Windows Service will be a standalone application it must have its own configuration file with its own settings, connection strings etc. It won’t be able to read the app.config file of Demo.ConsoleConsumer of course.

Program.cs seems probably familiar from standard console apps where Program.cs includes the entry point to the application, i.e. Main. This is no different as there we have a Main method which calls upon an array of services to be started. You can add other services to the ServicesToRun method but we’ll have only one. The Main in Program.cs will at present start the service called Service1. That refers to Service1.cs of course. That’s the default name of the file, similar to “Class1” in C# library projects. You’ll see that there are 2 elements called Service1. The top element is the design view which includes the code behind file Service1.cs. Right-click the design file, select Rename, and rename it to HttpJobRunner. You’ll get a question asking if you want to rename the class to HttpJobRunner, click Yes. This is what you should have after the renaming:

Service file name after renaming

So now we have 3 elements called HttpJobRunner. The two “normal” C# classes are partial so they are joint files really. One of the HttpJobRunner.cs files will have the following class declaration:

partial class HttpJobRunner

This small file contains code required to properly run the service, we won’t change anything in there.

The other part of HttpJobRunner has a different declaration:

public partial class HttpJobRunner : ServiceBase

So it derives from ServiceBase in the System.ServiceProcess namespace. The class includes the overridden OnStart and OnStop methods which are empty by default:

public partial class HttpJobRunner : ServiceBase
{
	public HttpJobRunner()
	{
		InitializeComponent();
	}

	protected override void OnStart(string[] args)
	{
	}

	protected override void OnStop()
	{
	}
}

These methods are triggered when the service is started and stopped. We’ll return to these methods in the next post.

Service installers

The service will need to be installed. Add a new item of type Installer class to the service project:

Add installer class to Windows Service

The template will add the following elements:

Initial view of Windows Service installer

We’ll change the properties of our Windows service within the installer. There are two installer-type objects that we’ll use:

  • ServiceInstaller: to define the service description, display name, service name, start type and some other properties like service dependencies
  • ServiceProcessInstaller: the define under which account the service should be running

Windows Service properties

Navigate to the partial HttpJobRunnerInstaller class which includes the InitializeComponent method:

Initialise component method in windows service installer

Under…

private System.ComponentModel.IContainer components = null;

…add the following installer classes and a service name field:

private ServiceInstaller _httpJobServiceInstaller;
private ServiceProcessInstaller _httpJobServiceProcessInstaller;
private String _serviceName = "HttpJobRunner";

In InitializeComponent() we already have one line of code that constructs a new Container() object. We’ll leave it there. Below that let’s construct the installer objects:

_httpJobServiceInstaller = new ServiceInstaller();
_httpJobServiceProcessInstaller = new ServiceProcessInstaller();

Next we’ll set up the service properties:

_httpJobServiceInstaller.Description = "HttpJob runner service which carries out a series of HTTP calls";
_httpJobServiceInstaller.DisplayName = "HttpJob automatic runner";
_httpJobServiceInstaller.ServiceName = _serviceName;
_httpJobServiceInstaller.StartType = ServiceStartMode.Automatic;

The service name is not the same as the display name. The service name is how Windows can find the service.

Example:

Windows service anatomy in the services window

Right-click a service and select Properties. “Name” corresponds to DisplayName.

We have the following startup types:

  • Automatic: start the service as soon as the computer starts. The user doesn’t even need to log in
  • Manual: the user must manually start the service
  • Disabled: the service won’t start until the user changes the startup type and starts the service manually

You’ll notice a tab called Dependencies in the Properties window. It lists any other Windows service service that this particular service depends on. If those services are not available then the dependent service won’t run either. You can add the dependencies by name using the ServicesDependedOn property. Example:

_httpJobServiceInstaller.ServicesDependedOn = new string[] { "servicename1", "servicename2" };

A Windows Service can run under a specific security context:

  • LocalService: runs as a non-privileged user on the local computer with anonymous credentials
  • NetworkService: enables the service to authenticate to another computer on the network
  • LocalSystem: almost unlimited privileges where the service presents the computer’s credentials to any remote server
  • User: runs under the security settings of a user

The following will specify the security context using the ServiceAccount enumeration:

_httpJobServiceProcessInstaller.Account = ServiceAccount.LocalSystem;

In case you want to run the service under a specific user then you can add the username and password details here:

_httpJobServiceProcessInstaller.Account = ServiceAccount.User;
_httpJobServiceProcessInstaller.Username = "username";
_httpJobServiceProcessInstaller.Password = "password";

Finally we add our installers to the list of installers that need to run:

Installers.AddRange(new System.Configuration.Install.Installer[]
	{
		_httpJobServiceInstaller
		, _httpJobServiceProcessInstaller
	});

So to recap we have the following code in InitializeComponent right now:

private void InitializeComponent()
{
	components = new System.ComponentModel.Container();
	_httpJobServiceInstaller = new ServiceInstaller();
	_httpJobServiceProcessInstaller = new ServiceProcessInstaller();
	_httpJobServiceInstaller.Description = "HttpJob runner service which carries out a series of HTTP calls";
	_httpJobServiceInstaller.DisplayName = "HttpJob automatic runner";
	_httpJobServiceInstaller.ServiceName = "HttpJobRunner";
	_httpJobServiceInstaller.StartType = ServiceStartMode.Automatic;

	_httpJobServiceProcessInstaller.Account = ServiceAccount.LocalSystem;

	Installers.AddRange(new System.Configuration.Install.Installer[]
		{
			_httpJobServiceInstaller
			, _httpJobServiceProcessInstaller
		});
}

After the installation we’d like the service to start automatically. Add the following override below InitializeComponent():

protected override void OnAfterInstall(System.Collections.IDictionary savedState)
{
	base.OnAfterInstall(savedState);
	using (var serviceController = new ServiceController(_httpJobServiceInstaller.ServiceName, Environment.MachineName))
	{
		serviceController.Start();
	}
}

Without this code the service would be sitting inactive after the installation.

We’ll set one last option before we’re ready to move on. In the Properties window of a service you’ll note a tab called Recovery:

Recovery options

There are 4 options here for all failure types:

  • Take no action: if there’s an unhandled exception in the Service then it will stop and will stay inactive until restarted. This may not be optimal because if the service encounters a failure then it will just stop and wait
  • Restart the service: restart the service after an unexpected shutdown
  • Run a program: run an executable program with some parameters
  • Restart the computer: probably the most drastic recovery type

Setting the recovery type in code is not as straightforward as we’ve seen so far. We have to call the command line tool for Services, called “sc” programmatically. The process must run after the installation has been committed. The following code will set the recovery options to “restart the service”:

private void SetRecoveryOptions()
{
	int exitCode;
	using (Process process = new Process())
	{
		ProcessStartInfo processStartInfo = new ProcessStartInfo();
		processStartInfo.FileName = "sc";
		processStartInfo.WindowStyle = ProcessWindowStyle.Hidden;
		processStartInfo.Arguments = string.Format("failure \"{0}\" reset= 0 actions= restart/1000", _serviceName);
		process.Start();
		process.WaitForExit();
		exitCode = process.ExitCode;
	}

	if (exitCode != 0)
	{
		throw new InvalidOperationException(string.Format("sc failure setting process exited with code {0}", exitCode));
	}
}

The above code will be called from an overridden method:

protected override void OnCommitted(System.Collections.IDictionary savedState)
{
	base.OnCommitted(savedState);
	SetRecoveryOptions();
}

Note the following: it requires administrator rights to change the status of a Windows service through “sc”. BTW “sc” refers to c:\windows\system32\sc.exe which allows the manipulation of Windows services in a command prompt. So it is possible that if we in the next module run the installation script then the “OnCommitted” phase will fail even if we run the script as an administrator. The reason is that the Process object itself won’t have admin rights. We’ll add an extra safety in the installation script to account for that possibility. The outcome depends on the UCL settings.

You might think that the SetRecoveryOptions method is then not needed if we do the same in the script later. I’ll leave it as it is so that you see how it can be done in code and you can decide how to set up your installation options.

We’re done with the basics. There are many other methods that you can override in the installer. Just type “override” in the editor and press Space. You’ll get a range of methods that you can override to tweak what should happen during the installation process.

Other properties

There are many other properties of a Windows service that you cannot change here. Instead you would turn to the InitializeComponent method of HttpJobRunner.cs where by default we have the current implementation:

private void InitializeComponent()
{
	components = new System.ComponentModel.Container();
	this.ServiceName = "Service1";		
}

Change the ServiceName to “HttpJobRunner” here as well otherwise messages logged to the Event Log will appear under the name of “Service1”. If you type “this.” in the editor then IntelliSense will give you all the properties that you can set. Some interesting ones are those whose name starts with “Can”, such as “CanShutDown”. You can specify if the service can be paused, shut down or stopped. In case you’re looking for a property that you cannot set through the installer then it’s a safe bet that you’ll find it here.

This will be enough of the basics. We’ll continue with the installation in the next post.

View the list of posts on Architecture and Patterns here.

Using a Windows service in your .NET project part 4: the consumer layer

Introduction

In the previous post of this series we built the application service of the demo application. We’re now ready to build the consumer layer.

For demo purposes we’ll only build a Console-based consumer where the user can insert the URLs to run and monitor the progress. In reality the consumer layer would most likely be an MVC application which can then be refreshed periodically to get the latest status. Alternatively you can turn to web sockets with SignalR to push the updates to the screen. In our example, however, a console app will suffice to reach the goal of using a Windows service.

We’ll build upon the demo app we’ve been using so far so have it ready in Visual Studio

The consumer layer

Add a new Console application to the demo solution called Demo.DemoConsumer. Add a reference to all other layers in the solution:

  • Repository
  • ApplicationService
  • Domain
  • Infrastructure

First we’ll need a method that builds an IHttpJobService that the Console can work with:

private static IHttpJobService BuildHttpJobService()
{
	IConfigurationRepository configurationRepository = new ConfigFileConfigurationRepository();
	IDatabaseConnectionSettingsService dbConnectionSettingsService = new HttpJobDatabaseConnectionService(configurationRepository);
	IJobRepository jobRepository = new JobRepository(dbConnectionSettingsService);
	IHttpJobService httpJobService = new HttpJobService(jobRepository);
	return httpJobService;
}

There’s nothing magic here I hope. We simply build an IHttpJobService from various other ingredients according to their dependencies.

Then we’ll build a simple console UI to type in the URLs to run. Insert the following method to Program.cs where the user can enter URLs and break the loop with an empty string:

private static List<Uri> EnterUrlJobs()
{
	HttpJob httpJob = new HttpJob();
	List<Uri> uris = new List<Uri>();
	Console.WriteLine("Enter a range of URLs. Leave empty and press ENTER when done.");
	Console.Write("Url 1: ");
	string url = Console.ReadLine();
	uris.Add(new Uri(url));
	int urlCounter = 2;
	while (!string.IsNullOrEmpty(url))
	{
		Console.Write("Url {0}: ", urlCounter);
		url = Console.ReadLine();
		if (!string.IsNullOrEmpty(url))
		{
			uris.Add(new Uri(url));
			urlCounter++;
		}
	}		
			
	return uris;
}

The following method will insert a new HttpJob and return the insertion response:

private static InsertHttpJobResponse InsertHttpJob(List<Uri> uris, IHttpJobService httpJobService)
{
	InsertHttpJobRequest insertRequest = new InsertHttpJobRequest(uris);
	InsertHttpJobResponse insertResponse = httpJobService.InsertHttpJob(insertRequest);
	return insertResponse;
}

Finally we need a method to monitor the job and print the job status on the screen:

private static void MonitorJob(Guid correlationId, IHttpJobService httpJobService)
{
	GetHttpJobRequest getJobRequest = new GetHttpJobRequest() { CorrelationId = correlationId };
	GetHttpJobResponse getjobResponse = httpJobService.GetHttpJob(getJobRequest);
	bool jobFinished = getjobResponse.Job.Finished;
	while (!jobFinished)
	{
		Console.WriteLine(getjobResponse.Job.ToString());
		getjobResponse = httpJobService.GetHttpJob(getJobRequest);
		jobFinished = getjobResponse.Job.Finished;
		if (!jobFinished)
		{
			Thread.Sleep(2000);
			Console.WriteLine();
		}
	}
	getjobResponse = httpJobService.GetHttpJob(getJobRequest);
	Console.WriteLine(getjobResponse.Job.ToString());
}

We keep extracting the updated HttpJob until it has reached the Finished status. We wait for 2 seconds between each iteration. After the loop we want to print the final job status.

The methods can be called as following from Main:

static void Main(string[] args)
{
	List<Uri> uris = EnterUrlJobs();
	IHttpJobService httpJobService = BuildHttpJobService();
	InsertHttpJobResponse insertResponse = InsertHttpJob(uris, httpJobService);
	MonitorJob(insertResponse.JobCorrelationId, httpJobService);

	Console.WriteLine("Main finishing, press any key to exit...");
	Console.ReadKey();
}

Run this code to see it in action. You’ll be able enter a number of URLs first. Note that there’s no extra validation so be precise and enter the full address, like “https://www.google.com&#8221;. When you’re done just press enter without entering a URL. The monitoring phase will begin:

Initial Program output with no runner yet

There’s of course nothing that carries out the job yet so the while loop never exits in MonitorJob.

We’ll start building the Windows service in the next post.

View the list of posts on Architecture and Patterns here.

Using a Windows service in your .NET project part 3: the application service layer

Introduction

In the previous post we built the Domain and Repository layers of the demo app. We’ll now build the application service layer that connects the two with the consumer layer which we’ll build in the next post.

Normally the consumer layer, such as a Web UI should not directly contact the repository for its data. The application service is responsible for joining all necessary repositories and other services to provide the data that the consumer layer needs to show.

We’ll build upon the demo app we’ve been working on so far in this series so have it ready in Visual Studio.

Short return to Infrastructure

Before we begin we’ll need two new elements in the Infrastructure layer. You’ll recall from the previous post that the abstract MongoDbRepository class will need an IDatabaseConnectionSettingsService interface to read the connection string and database name. We’ll store those in the app.config file which we’ll create in the next post. However, these settings could potentially be stored in various different places: a database, a web service, etc.

We saw in this post how reading settings can be hidden behind an interface. We’ll take a similar approach here.

Add a new folder called ConfigurationService to the Infrastructure layer. Insert the following interface into it:

public interface IConfigurationRepository
{
	T GetConfigurationValue<T>(string key);
	T GetConfigurationValue<T>(string key, T defaultValue);
	string GetConnectionString(string connectionStringName);
}

Normally settings come in name-value pairs so we pass some key value and expect the corresponding setting value back.

For the implementation we’ll take the ConfigurationManager class located in the System.Configuration namespace. You’ll need to add this dll to the references list of the Infrastructure layer. Here’s the implementing class:

public class ConfigFileConfigurationRepository : IConfigurationRepository
{
	public T GetConfigurationValue<T>(string key)
	{
		string value = ConfigurationManager.AppSettings[key];
		if (value == null)
		{
			throw new KeyNotFoundException("Key " + key + " not found.");
		}
		try
		{
			if (typeof(Enum).IsAssignableFrom(typeof(T)))
				return (T)Enum.Parse(typeof(T), value);
			return (T)Convert.ChangeType(value, typeof(T));
		}
		catch (Exception ex)
		{
			throw ex;
		}
	}

	public T GetConfigurationValue<T>(string key, T defaultValue)
	{
		string value = ConfigurationManager.AppSettings[key];
		if (value == null)
		{
			return defaultValue;
		}
		try
		{
			if (typeof(Enum).IsAssignableFrom(typeof(T)))
				return (T)Enum.Parse(typeof(T), value);
			return (T)Convert.ChangeType(value, typeof(T));
		}
		catch (Exception ex)
		{
			return defaultValue;
		}
	}

	public string GetConnectionString(string connectionStringName)
	{
		return ConfigurationManager.ConnectionStrings[connectionStringName].ConnectionString;
	}
}

We’ll see shortly how this abstraction is used.

The service layer

Add a new C# library called Demo.ApplicationService to the solution. Add a project reference to the Domain and Infrastructure layers. Insert 3 folders:

  • Messaging
  • JobServices
  • DatabaseConnectionService

Let’s get the database connection service out of the way first. The implementation will need a dependency of type IConfigurationRepository to read the connection string and database name values. Insert the following class into the DatabaseConnectionService folder:

public class HttpJobDatabaseConnectionService : IDatabaseConnectionSettingsService
{
	private readonly IConfigurationRepository _configurationRepository;

	public HttpJobDatabaseConnectionService(IConfigurationRepository configurationRepository)
	{
		if (configurationRepository == null) throw new ArgumentNullException("IConfigurationRepository");
		_configurationRepository = configurationRepository;
	}

	public string GetDatabaseConnectionString()
	{
		return _configurationRepository.GetConnectionString(Constants.HttpJobsConnectionStringKeyName);
	}

	public string GetDatabaseName()
	{
		return _configurationRepository.GetConfigurationValue<string>(Constants.HttpJobsDatabaseNameSettingKeyName);
	}
}

This class reads the setting key names from another class called Constants:

public static class Constants
{
	public static string HttpJobsConnectionStringKeyName = "HttpJobsConnectionString";
	public static string HttpJobsDatabaseNameSettingKeyName = "HttpJobsDatabaseName";
}

So we’ll store the connection string with the key “HttpJobsConnectionString” and the database name with the key “HttpJobsDatabaseName”. Remember, these settings could be stored anywhere hence the need to inject the service which actually reads the settings. We’ll fill in the app settings file shortly.

Service abstractions

OK, let’s create the abstractions for the Job related services. An IHttpJobService should be able to retrieve a specific job, retrieve all new jobs, insert a new job and update an existing job. Add the following interface to the JobServices folder:

public interface IHttpJobService
{
	InsertHttpJobResponse InsertHttpJob(InsertHttpJobRequest request);
	GetHttpJobResponse GetHttpJob(GetHttpJobRequest request);
	UpdateHttpJobResponse UpdateHttpJob(UpdateHttpJobRequest request);
	GetHttpJobsResponse GetNewHttpJobs();
}

We have several new but simple RequestResponse objects here. They are used to relay all necessary inputs to the Service instead of creating many overloaded variants of the same methods. Insert the following classes to the Messaging folder:

public abstract class BaseResponse
{
	public Exception OperationException { get; set; }
}
public class InsertHttpJobResponse : BaseResponse
{
	public Guid JobCorrelationId { get; set; }
}
public class InsertHttpJobRequest
{
	private List<Uri> _urisToRun;

	public InsertHttpJobRequest(List<Uri> urisToRun)
	{
		if (urisToRun == null || !urisToRun.Any())
		{
			throw new ArgumentException("The URI list cannot be empty.");				
		}
		_urisToRun = urisToRun;
	}

	public List<Uri> UrisToRun
	{
		get
		{
			return _urisToRun;
		}
	}
}
public class GetHttpJobResponse : BaseResponse
{
	public HttpJob Job { get; set; }
}
public class GetHttpJobRequest
{
	public Guid CorrelationId { get; set; }
}
public class UpdateHttpJobResponse : BaseResponse
{}
public class UpdateHttpJobRequest
{
	private HttpJob _updatedJob;
	public UpdateHttpJobRequest(HttpJob updatedJob)
	{
		_updatedJob = updatedJob;
	}

	public HttpJob UpdatedHttpJob
	{
		get
		{
			return _updatedJob;
		}
	}
}
public class GetHttpJobsResponse : BaseResponse
{
	public IEnumerable<HttpJob> HttpJobs { get; set; }
}

Those were the elements needed for the HttpJob service. We’ll need a separate service to carry out a single JobUrl within a HttpJob object. Add the following interface to the JobServices folder:

public interface IHttpJobUrlService
{
	Task<JobUrlProcessResponse> CarryOutSingleJobUrl(Uri uri);
}

Carrying out a HTTP call can take some time so we’ll go for an asynchronous model using the Task library. JobUrlProcessResponse is similar to the above Response objects. Insert the following class to the Messaging folder:

public class JobUrlProcessResponse : BaseResponse
{
	public int HttpResponseCode { get; set; }
	public string HttpContent { get; set; }
	public TimeSpan TotalResponseTime { get; set; }
}

You’ll recognise the properties from the JobUrl domain object: we’ll need to read the HTTP response code, the HTML content and the response time from a single URL call.

We need one final abstraction: an interface which co-ordinates the functions of IHttpJobService and IHttpJobUrlService. In other words we need a service that carries out a complete job. Insert the following interface into the JobServices folder:

public interface IHttpJobExecutionService
{
	Task Execute(HttpJob httpJob);
}

Again, it takes time to carry out a job so we’ll go for asynchronous calls here as well.

If you don’t understand why these methods are meant to be asynchronous and why they return Task objects then start here.

Concrete service classes

OK, enough of abstractions, let’s look at the implementations now. HttpJobService which implements IHttpJobService will work with the IJobRepository interface to carry out the repository-related actions such as insertions and updates. Insert the following class to the JobServices folder:

public class HttpJobService : IHttpJobService
{
	private readonly IJobRepository _jobRepository;

	public HttpJobService(IJobRepository jobRepository)
	{
		if (jobRepository == null) throw new ArgumentNullException("Job repository!!");
		_jobRepository = jobRepository;
	}

	public InsertHttpJobResponse InsertHttpJob(InsertHttpJobRequest request)
	{
		InsertHttpJobResponse response = new InsertHttpJobResponse();
		HttpJob job = new HttpJob();
		job.StatusMessage = "Inserted";
		List<JobUrl> jobUrls = new List<JobUrl>();
		foreach (Uri uri in request.UrisToRun)
		{
			jobUrls.Add(new JobUrl() { Uri = uri });
		}
		job.UrlsToRun = jobUrls;
		try
		{
			Guid correlationId = _jobRepository.InsertNewHttpJob(job);
			response.JobCorrelationId = correlationId;
		}
		catch (Exception ex)
		{
			response.OperationException = ex;
		}
		return response;
	}

	public GetHttpJobResponse GetHttpJob(GetHttpJobRequest request)
	{
		GetHttpJobResponse response = new GetHttpJobResponse();

		try
		{
			response.Job = _jobRepository.FindBy(request.CorrelationId);
		}
		catch (Exception ex)
		{
			response.OperationException = ex;
		}

		return response;
	}

	public UpdateHttpJobResponse UpdateHttpJob(UpdateHttpJobRequest request)
	{
		UpdateHttpJobResponse response = new UpdateHttpJobResponse();			
		try
		{
			_jobRepository.Update(request.UpdatedHttpJob);
		}
		catch (Exception ex)
		{
			response.OperationException = ex;
		}
		return response;
	}

	public GetHttpJobsResponse GetNewHttpJobs()
	{
		GetHttpJobsResponse response = new GetHttpJobsResponse();
		try
		{
			response.HttpJobs = _jobRepository.GetUnhandledJobs();
		}
		catch (Exception ex)
		{
			response.OperationException = ex;
		}
		return response;
	}
}

I think the code is really simple and straightforward, there’s nothing magic in it.

HttpJobUrlService which implements IHttpJobUrlService will need an IHttpService interface to carry out the HTTP calls. We saw the IHttpService interface in the first post of this series. Insert the following class into the JobServices folder:

public class HttpJobUrlService : IHttpJobUrlService
{
	private readonly IHttpService _httpService;

	public HttpJobUrlService(IHttpService httpService)
	{
		if (httpService == null) throw new ArgumentNullException("HttpService");
		_httpService = httpService;
	}

	public async Task<JobUrlProcessResponse> CarryOutSingleJobUrl(Uri uri)
	{
		JobUrlProcessResponse response = new JobUrlProcessResponse();
		
		try
		{				
			MakeHttpCallRequest httpCallRequest = new MakeHttpCallRequest();
			httpCallRequest.HttpMethod = HttpMethodType.Get;
			httpCallRequest.Uri = uri;
			DateTime start = DateTime.UtcNow;
			MakeHttpCallResponse httpCallResponse = await httpService.MakeHttpCallAsync(httpCallRequest);
         		DateTime stop = DateTime.UtcNow;
			TimeSpan diff = stop - start;
			response.TotalResponseTime = diff;
			if (!string.IsNullOrEmpty(httpCallResponse.ExceptionMessage))
			{
				response.HttpContent = httpCallResponse.ExceptionMessage;
				response.HttpResponseCode = -1;
			}
			else
			{					
				response.HttpContent = httpCallResponse.HttpResponse;
				response.HttpResponseCode = httpCallResponse.HttpResponseCode;
			}				
		}
		catch (Exception ex)
		{
			response.OperationException = ex;
		}
			
		return response;
	}
}

We initiate a HTTP request through the injected IHttpService service and note the time between the start and end of the call. This might not be the most precise way to measure the response time of a URL but it’s good enough for the demo. Then we populate the HttpContent and HttpResponseCode properties of the JobUrlProcessResponse object based on the result stored in MakeHttpCallResponse.

Finally, we have an implementation of the IHttpJobExecutionService interface. This implementation will use IHttpJobService and IHttpJobUrlService to carry out its work. Insert the following class into the JobServices folder:

public class HttpJobExecutionService : IHttpJobExecutionService
{
	private readonly IHttpJobService _httpJobService;
	private readonly IHttpJobUrlService _httpJobUrlService;

	public HttpJobExecutionService(IHttpJobService httpJobService, IHttpJobUrlService httpJobUrlService)
	{
		if (httpJobService == null) throw new ArgumentNullException("HttpJobService");
		if (httpJobUrlService == null) throw new ArgumentNullException("HttpJobUrlService");
		_httpJobService = httpJobService;
		_httpJobUrlService = httpJobUrlService;
	}

	public async Task Execute(HttpJob httpJob)
	{
		httpJob.Started = true;
		httpJob.StatusMessage = string.Format("Starting job {0}.", httpJob.CorrelationId);
		_httpJobService.UpdateHttpJob(new UpdateHttpJobRequest(httpJob));
		TimeSpan totalTime = new TimeSpan(0, 0, 0);
		foreach (JobUrl jobUrl in httpJob.UrlsToRun)
		{
			jobUrl.Started = true;
			httpJob.StatusMessage = string.Concat("Starting url ", jobUrl.Uri);
			_httpJobService.UpdateHttpJob(new UpdateHttpJobRequest(httpJob));
			JobUrlProcessResponse jobUrlProcessResponse = await _httpJobUrlService.CarryOutSingleJobUrl(jobUrl.Uri);				
			jobUrl.Finished = true;
			jobUrl.HttpContent = jobUrlProcessResponse.HttpContent.Length > 30 ? jobUrlProcessResponse.HttpContent.Substring(0, 30) : jobUrlProcessResponse.HttpContent;
			jobUrl.HttpResponseCode = jobUrlProcessResponse.HttpResponseCode;
			jobUrl.TotalResponseTime = jobUrlProcessResponse.TotalResponseTime;
			httpJob.StatusMessage = string.Concat("Finished url ", jobUrl.Uri);
			_httpJobService.UpdateHttpJob(new UpdateHttpJobRequest(httpJob));
			totalTime += jobUrlProcessResponse.TotalResponseTime;
		}
		httpJob.Finished = true;
		httpJob.TotalJobDuration = totalTime;
		httpJob.StatusMessage = string.Format("Job {0} finished.", httpJob.CorrelationId);
		_httpJobService.UpdateHttpJob(new UpdateHttpJobRequest(httpJob));
	}		
}

In the Execute method we first update the job status to Started. Then we go through each URL in the UrlsToRun list of the HttpJob object. In the for-each loop we update the status of the URL to started and then save the HTTP response code and content. We also add the response time of the URL to the total response time of the job. Finally we update the job status to Finished and assign the total response time to the appropriate property.

That’s it, we have the service layer ready to go.

In the next post we’ll build the consumer layer which will be a simple Console app.

View the list of posts on Architecture and Patterns here.

Using a Windows service in your .NET project part 2: the domain and repository

Introduction

In the previous post we went through the goals of this series and also started building a demo app. At present we have an Infrastructure layer in the solution to abstract away the service that makes the HTTP calls. As we said the demo project will carry out HTTP calls and measure the response times.

In this post we’ll build the domain and repository layers. We’ll build upon the demo project so have it ready in Visual Studio.

The domain

The domain will be quite small with only two domain objects and one abstract repository. Add a C# library to the solution called Demo.Domain. Add the following object to it:

public class JobUrl
{
	public Uri Uri { get; set; }
	public int HttpResponseCode { get; set; }
	public string HttpContent { get; set; }
	public bool Started { get; set; }
	public bool Finished { get; set; }
	public TimeSpan TotalResponseTime { get; set; }
}

JobUrl has the following properties:

  • Uri: the Uri to call
  • HttpResponseCode: the HTTP response from the call such as 200, 403 etc.
  • HttpContent: the pure HTML content of the URI
  • Started: whether the HTTP call to the URI has been initiated
  • Finished: whether the HTTP call has been processed
  • TotalResponseTime: the response time of the URL

We want to be able to carry out multiple HTTP calls within a single job so we’ll need the following “wrapper” object:

public class HttpJob
{
	public List<JobUrl> UrlsToRun { get; set; }
	public string StatusMessage { get; set; }
	public bool Started { get; set; }
	public bool Finished { get; set; }
	public TimeSpan TotalJobDuration { get; set; }
	public Guid CorrelationId { get; set; }

	public override string ToString()
	{
		string NL = Environment.NewLine;
		StringBuilder sb = new StringBuilder();
		sb.Append("Status report of job with correlation id: ").Append(CorrelationId).Append(NL);
		sb.Append("------------------------------------------").Append(NL);
		sb.Append("Started: ").Append(Started).Append(NL);
		sb.Append("Finished: ").Append(Finished).Append(NL);
		sb.Append("Status: ").Append(StatusMessage).Append(NL).Append(NL);

		foreach (JobUrl jobUrl in UrlsToRun)
		{
			sb.Append(NL);
			sb.Append("Url: ").Append(jobUrl.Uri).Append(NL);
			sb.Append("Started: ").Append(jobUrl.Started).Append(NL);
			sb.Append("Finished: ").Append(jobUrl.Finished).Append(NL);
			if (jobUrl.Finished)
			{
				sb.Append("Http response code: ").Append(jobUrl.HttpResponseCode).Append(NL);
				sb.Append("Partial content: ").Append(jobUrl.HttpContent).Append(NL);
				sb.Append("Response time: ").Append(Convert.ToInt32(jobUrl.TotalResponseTime.TotalMilliseconds)).Append(" ms").Append(NL);					
			}
		}

		if (Finished)
		{
			sb.Append("Total job duration: ").Append(Convert.ToInt32(TotalJobDuration.TotalMilliseconds)).Append(" ms. ").Append(NL);
		}
		sb.Append("------------------------------------------").Append(NL).Append(NL);

		return sb.ToString();
	}
}

HttpJob has the following properties:

  • UrlsToRun: the URIs to be visited in the job
  • StatusMessage: a status message such as “starting” or “in progress”
  • Started: whether the job has been started
  • Finished: whether the job has been finished
  • TotalJobDuration: the sum of the response times of the individual URLs
  • CorrelationId: in essence the job ID which can be used to retrieve the job from the data store

Then we have an overridden ToString method which builds a long string to show the current status of the job. We’ll see it in action towards the end of the series.

We’ll also need an abstract repository where we declare the capabilities of the job repository. This abstraction must be then implemented by a concrete repository such as Entity Framework or NHibernate. Add the following interface to the Domain layer:

public interface IJobRepository
{
	Guid InsertNewHttpJob(HttpJob httpJob);
	HttpJob FindBy(Guid correlationId);
	void Update(HttpJob httpJob);
	IEnumerable<HttpJob> GetUnhandledJobs();
}

So in this interface we declare that any concrete repository implementation should be able to do the following:

  • Insert a new HttpJob and return a correlation ID
  • Find a job based on the correlation ID
  • Update a job
  • Find all “unhandled” jobs i.e. the ones that have not been started yet

This concludes the Domain layer.

The repository layer

As mentioned in the previous post we’ll use the file-based MongoDb as the data storage mechanism. Don’t worry if you’ve never used it, it’s very easy to get going and you’ll learn something new. We won’t see much of MongoDb in action here anyway. I have a series devoted to MongoDb that you can go through if you wish, the list of posts is available here.

In order to move on though you’ll need to install MongoDb. If you want to keep it short then go through the section called “Setup on Windows” in part two of the MongoDb series. In case you want to read the foundations then here’s part one for you.

At the end of the setup process you should have MongoDb up and running as a Windows service:

MongoDb as Windows Service

Add a new C# library called Demo.Repository.MongoDb to the solution. Add a project reference to the Domain and Infrastructure layers. We’ll also need to work with MongoDb in a programmatic way so add the following Nuget package:

MongoDb C# driver

Add a new folder called DatabaseObjects and insert a class called DbHttpJobs into that folder:

public class DbHttpJob : HttpJob
{
	public ObjectId Id { get; set; }
}

Let’s stop for a second

What on Earth is this??? We can save just about any object in MongoDb on one condition: the object must have a property called Id which will be used as the primary key for the object. The most straightforward implementation for the Id is the MongoDb ObjectId type which is similar to a GUID. We won’t work with it at all but it’s a must for MongoDb so we simply add it to the DbHttpJob object which inherits everything else from HttpJob.

Why not use the correlation ID as the ID in the DB??? We could certainly do that by decorating the CorrelationId property of the HttpJob object with the BsonId attribute. However, that would require us to add a reference to the MongoDb C# driver in the Domain layer and add that MongoDb-specific attribute to our POCO model(s).

And so what??? If you’ve gone through the series on Domain Driven Design then you’ll understand the concept of POCO classes that are oblivious of the underlying storage mechanism. This is called persistence ignorance. A POCO should be as POCO as possible. As soon as we add data storage specific elements to a POCO then it’s not really POCO any more I think. There will be traces of the concrete repository in the POCO, so at best it can be called a contaminated POCO. The domain layer will have a tight coupling to the underlying concrete repository which could be avoided. In case you’d like to share the class with someone else who also needs to work with the domain then that person will also inherit MongoDb from you whereas they might work with an entirely different data storage mechanism.

If we go down that path and introduce MongoDb at the domain level then it can be difficult to change the storage mechanism later. Say that you want to store the HttpJob objects in Sql Server with Entity Framework or in Amazon S3 later on. Then you’ll first have to decouple the Domain layer from MongoDb and replace it with another technology, right? Well, hopefully you won’t make the same mistake again and keep the technology-specific code in the technology-specific layer.

OK, let’s move on

After some theory we’ll move on with the practical discussion. A MongoDb repository will need two things in order to find the database: the connection string and the database name. These elements will most likely be stored in a settings file like app.config or web.config but they could come from any other store: a database, a web service etc. This sounds like we’ll need to abstract away the service that finds the connection-related elements.

Let’s return briefly to the Infrastructure layer. Add a new folder called DatabaseConnectionSettingsService and insert the following interface:

public interface IDatabaseConnectionSettingsService
{
	string GetDatabaseConnectionString();
	string GetDatabaseName();
}

Back in the repository layer we can build the abstract base class for all repositories. Insert the following class to the project:

public abstract class MongoDbRepository
{
	private readonly IDatabaseConnectionSettingsService _databaseConnectionSettingsService;
	private MongoClient _mongoClient;
	private MongoServer _mongoServer;
	private MongoDatabase _mongoDatabase;

	public MongoDbRepository(IDatabaseConnectionSettingsService databaseConnectionSettingsService)
	{
		if (databaseConnectionSettingsService == null) throw new ArgumentNullException();
		_databaseConnectionSettingsService = databaseConnectionSettingsService;
		_mongoClient = new MongoClient(_databaseConnectionSettingsService.GetDatabaseConnectionString());
		_mongoServer = _mongoClient.GetServer();
		_mongoDatabase = _mongoServer.GetDatabase(_databaseConnectionSettingsService.GetDatabaseName());
	}

	public MongoDatabase HttpJobsDatabase
	{
		get
		{
			return _mongoDatabase;
		}
	}

	public MongoCollection<DbHttpJob> HttpJobs
	{
		get
		{
			return HttpJobsDatabase.GetCollection<DbHttpJob>("httpjobs");
		}
	}
}

You’ll recognise the IDatabaseConnectionSettingsService interface which is injected to the MongoDbRepository constructor. I won’t go into the MongoDb-specific details here, just keep in mind the following:

  • A “collection” in MongoDb is similar to a “table” in MS SQL
  • The collection name “httpjobs” could be anything, like “mickeymouse”, it doesn’t matter really – the type variable declares the type of objects stored in the collection
  • There’s no need to check for the presence of a database or a collection – they will be created by MongoDb upon the first data entry
  • The HttpJobs property is similar to DbContext.Cars in EntityFramework i.e. it gets a reference to the collection of DbHttpJobs in the database

We’re now ready to implement the IJobRepository interface. Add the following class to the project:

public class JobRepository : MongoDbRepository, IJobRepository
{
	public JobRepository(IDatabaseConnectionSettingsService databaseConnectionSettingsService)
		: base(databaseConnectionSettingsService)
	{}

	public Guid InsertNewHttpJob(HttpJob httpJob)
	{
		Guid correlationId = Guid.NewGuid();
		httpJob.CorrelationId = correlationId;
		DbHttpJob dbHttpJob = httpJob.ConvertToInsertDbObject();
		HttpJobs.Insert(dbHttpJob);
		return correlationId;
	}

	public HttpJob FindBy(Guid correlationId)
	{
		return FindInDb(correlationId);
	}

	public void Update(HttpJob httpJob)
	{
		DbHttpJob existing = FindInDb(httpJob.CorrelationId);
		existing.Finished = httpJob.Finished;
		existing.Started = httpJob.Started;
		existing.StatusMessage = httpJob.StatusMessage;
		existing.TotalJobDuration = httpJob.TotalJobDuration;
		existing.UrlsToRun = httpJob.UrlsToRun;
		HttpJobs.Save(existing);
	}

	public IEnumerable<HttpJob> GetUnhandledJobs()
	{
		IMongoQuery query = Query<DbHttpJob>.EQ(j => j.Started, false);
		return HttpJobs.Find(query);
	}

	private DbHttpJob FindInDb(Guid correlationId)
	{
		IMongoQuery query = Query<DbHttpJob>.EQ(j => j.CorrelationId, correlationId);
		DbHttpJob firstJob = HttpJobs.FindOne(query);
		return firstJob;
	}		
}

Again, I won’t go into the MongoDb specific code. It is quite easy to follow anyway as it’s only about retrieving, inserting and updating a HttpJob object.

There’s one extension method called ConvertToInsertDbObject() which looks as follows:

namespace Demo.Repository.MongoDb
{
	public static class ModelExtensions
	{
		public static DbHttpJob ConvertToInsertDbObject(this HttpJob domain)
		{
			return new DbHttpJob()
			{
				CorrelationId = domain.CorrelationId
				, Finished = domain.Finished
				, Started = domain.Started
				, StatusMessage = domain.StatusMessage
				, TotalJobDuration = domain.TotalJobDuration
				, UrlsToRun = domain.UrlsToRun
				, Id = ObjectId.GenerateNewId()
			};
		}		
	}
}

You can put this anywhere in the MongoDb layer. The method simply constructs a new DbHttpJob object with a new ObjectId ready for insertion. The generation of the Id is not really necessary as MongoDb will create one for us in case it’s null but I prefer to be specific.

We’re done with the repository layer. In the next post we’ll look at the Service layer.

View the list of posts on Architecture and Patterns here.

Using a Windows service in your .NET project part 1: foundations

Introduction

As the title suggests we’ll discuss Windows services in this new series and how they can be used in your .NET project. We’ll take up the following topics:

  • What is a Windows service?
  • How can it be (un)installed using scripts?
  • What’s the use of a Windows Service?
  • How can it be taken advantage of in a .NET project?
  • Simplified layered architecture with OOP principles: we’ll see a lot of abstractions and dependency injection

We’ll also build a small demo application with the following components:

  • A Windows service
  • A Console-based consumer with a simplified layered architecture
  • A MongoDb database

If you’re not familiar with MongoDb, don’t worry. You can read about it on this blog starting here. Just make sure you read at least the first 2 posts so that you know how to install MongoDb as a Windows service on your PC. Otherwise we won’t see much MongoDb related code in the demo project.

A warning: it’s not possible to create Windows services in the Express edition of Visual Studio. I’ll be building the project in VS 2013 Professional.

Windows services

Windows services are executable assemblies that run in the background without the user’s ability to interact with them directly. They are often used for long running or periodically recurring activities such as polling, monitoring, listening to network connections and the like. Windows services have no user interface and have their own user session. It’s possible to start a Windows service without the user logging on to the computer.

An average Windows PC has a large number of pre-installed Windows services, like:

…and many more. You can view the services by opening the Services window:

Windows services window

We’ll go through the different categories like “Name” and “Status” when we create the Windows service project.

There are some special considerations about Windows services:

  • A Windows service project cannot be started directly in Visual Studio and step through its code with F11
  • Instead the service must be installed and started in order to see it in action
  • An installer must be attached to the Windows service so that it can registered with the Windows registry
  • Windows services cannot communicate directly with the logged-on user. E.g. it cannot write to a Console that the user can read. Instead it must write messages to another source: a log file, the Windows event log, a web service, email etc.
  • A Windows service runs under a user context different from that of the logged-on user. It’s possible to give a different role to the Windows service than the role of the user. Normally you’ll run the service with roles limited to the tasks of the service

Demo project description

In the demo project we’ll simulate a service that analyses web sites for us: makes a HTTP call, takes note of the response time and also registers the contents of the web site. This operation could take a long time especially of the user is allowed to enter a range of URIs that should be carried out in succession. Think of a recorded session in Selenium where each step is carried out sequentially, like…

  • Go to login page
  • Log in
  • Search for a product
  • Reserve a product
  • Pay
  • Log out

It is not too wise to make these URL calls directly from a web page and present the results at the end. The HTTP communication may take far too much time to get the final status and the end user won’t see any intermediate results, such as “initialising”, “starting step 1”, “step 2 complete” etc. Websites are simply not designed to carry out long-running processes and wait for the response.

Instead it’s better to just create a “job” in some data storage that a continuous process, like a Windows service, is monitoring. This service can then carry out the job and update the data storage with information. The web site receives a correlation ID for the job which it can use to query the data store periodically. The most basic solution for the web page is to have a timer which automatically refreshes the window and runs the code that retrieves the latest status of the job using the correlation ID. An alternative here is web sockets.

You could even hide the data store and the Windows service setup behind a web service so that the web site only communicates with this web service using the correlation ID.

To keep this series short and concise I’ll skip the web page. I’m not exactly a client-side wizard and it would only create unnecessary noise to build a web side with all the elements to enter the URLs and show the job updates. Instead, we’ll replace it with a Console based consumer.

At the end we’ll have a console app where you can enter a series of URLs which are then entered in the MongoDb data store as a job. The Console will receive a job correlation ID. The Windows Service will monitor this data store and act upon every new job. It will call the URLs in succession and take note of the response time and string content of each URL. It will also update the status message of the job. The console will in turn monitor the job status and print the messages so that the user can track the status. We’ll also put in place a simple file-based logging system to see what the Windows service is actually doing.

Start: infrastructure

Open Visual Studio 2012/2013 Pro and create a blank solution called WindowsServiceDemo. Make sure to select .NET4.5 as the framework for all layers we create within this solution.

We’ll start from the very end of the project and create an abstraction for the planned HTTP calls. We’ve discussed a lot on this blog why it’s important to factor out dependencies such as file system operations, emailing, service calls etc. If you’re not sure why this is a good idea then go through the series on SOLID starting here, where especially Dependency Injection is most relevant.

We’ve also gone through a range of examples of cross cutting concerns in this series where we factored out the common concerns into an Infrastructure project. We’ll do it here as well and describe the HTTP communication service in an interface first.

Insert a new C# class library called Demo.Infrastructure into the blank solution. Add a folder called HttpCommunication to it. Making a HTTP call can require a large amount of inputs: the URI, the HTTP verb, a HTTP body, the headers etc. Instead of creating a long range of overloaded methods we’ll gather them in an object which will be used as the single input parameter. Let’s keep this simple and insert the following interface into the folder:

public interface IHttpService
{
    Task<MakeHttpCallResponse> MakeHttpCallAsync(MakeHttpCallRequest request);
}

The HTTP calls will be carried out asynchronously. If you’re not familiar with asynchronous method calls in .NET4.5 then start here. MakeHttpCallResponse and MakeHttpCallRequest have the following form:

public class MakeHttpCallResponse
{
        public int HttpResponseCode { get; set; }
        public string HttpResponse { get; set; }
        public bool Success { get; set; }
        public string ExceptionMessage { get; set; }
}
  • HttpResponseCode: the HTTP response code from the server, such as 200, 302, 400 etc.
  • HttpResponse: the string contents of the URL
  • Success: whether the HTTP call was successful
  • ExceptionMessage: any exception message in case Success was false
public class MakeHttpCallRequest
{
	public Uri Uri { get; set; }
	public HttpMethodType HttpMethod { get; set; }
	public string PostPutPayload { get; set; }
}
  • Uri: the URI to be called
  • HttpMethodType: the HTTP verb
  • PostPutPayload: the string HTTP body for POST and PUT operations

HttpMethodType is an enumeration which you can also insert into HttpCommunication:

public enum HttpMethodType
{
	Get
	, Post
	, Put
	, Delete
	, Head
	, Options
	, Trace
}

That should be straightforward.

Both MakeHttpCallRequest and MakeHttpCallResponse are admittedly oversimplified in their current forms but they suffice for the demo.

For the implementation we’ll use the HttpClient class in the System.Net library. Add the following .NET libraries to the Infrastructure layer:

  • System.Net version 4.0.0.0
  • System.Net.Http version 4.0.0.0

Insert a class called HttpClientService to the HttpCommunication folder, which will implement IHttpService as follows:

public class HttpClientService : IHttpService
{
	public async Task<MakeHttpCallResponse> MakeHttpCallAsync(MakeHttpCallRequest request)
	{
		MakeHttpCallResponse response = new MakeHttpCallResponse();
		using (HttpClient httpClient = new HttpClient())
		{
			httpClient.DefaultRequestHeaders.ExpectContinue = false;
			HttpRequestMessage requestMessage = new HttpRequestMessage(Translate(request.HttpMethod), request.Uri);
			if (!string.IsNullOrEmpty(request.PostPutPayload))
			{
				requestMessage.Content = new StringContent(request.PostPutPayload);
			}
			try
			{
				HttpResponseMessage responseMessage = await httpClient.SendAsync(requestMessage, HttpCompletionOption.ResponseContentRead, CancellationToken.None);
				HttpStatusCode statusCode = responseMessage.StatusCode;
				response.HttpResponseCode = (int)statusCode;
				response.HttpResponse = await responseMessage.Content.ReadAsStringAsync();
				response.Success = true;
			}
			catch (Exception ex)
			{
				Exception inner = ex.InnerException;
				if (inner != null)
				{
					response.ExceptionMessage = inner.Message;
				}
				else
				{
					response.ExceptionMessage = ex.Message;
				}
			}
		}
		return response;
	}

	public HttpMethod Translate(HttpMethodType httpMethodType)
	{
		switch (httpMethodType)
		{
			case HttpMethodType.Delete:
				return HttpMethod.Delete;
			case HttpMethodType.Get:
				return HttpMethod.Get;
			case HttpMethodType.Head:
				return HttpMethod.Head;
			case HttpMethodType.Options:
				return HttpMethod.Options;
			case HttpMethodType.Post:
				return HttpMethod.Post;
			case HttpMethodType.Put:
				return HttpMethod.Put;
			case HttpMethodType.Trace:
				return HttpMethod.Trace;
		}
		return HttpMethod.Get;
	}
}

So we simply call the URI using the HttpClient and HttpRequestMessage objects. We get the HttpResponseMessage by awaiting the asynchronous SendAsync method of HttpClient. We save the Http status code as an integer and the string content of the URI in the MakeHttpCallResponse object. We also store any exception message in this response object to indicate that the HTTP call failed.

In the next part of the series we’ll build the domain and repository layer.

View the list of posts on Architecture and Patterns here.

Elliot Balynn's Blog

A directory of wonderful thoughts

Software Engineering

Web development

Disparate Opinions

Various tidbits

chsakell's Blog

WEB APPLICATION DEVELOPMENT TUTORIALS WITH OPEN-SOURCE PROJECTS

Once Upon a Camayoc

Bite-size insight on Cyber Security for the not too technical.