Using a Windows service in your .NET project part 6: Windows Service installation
October 23, 2014 2 Comments
Introduction
In the previous post we went through the basics of a Windows Service. We saw how to set its properties in code. In this post we’ll see how the service can be installed.
Installation
There are at least three ways to install a Windows Service:
- Manually calling the InstallUtil tool which is usually located at C:\Windows\Microsoft.NET\Framework64\v4.0.30319 or C:\Windows\Microsoft.NET\Framework\v4.0.30319
- Call upon InstallUtil in a .bat file
- Use the InstallShield limited edition project type in Visual Studio and add the components of the installation package
The first option is a bit cumbersome I think. You have to type in the uninstall and install commands to InstallUtil in a command prompt and provide the necessary command parameters. The third option, as far as I can remember, is not by default suitable for installing Windows services. The InstallShield wizard is meant to install “normal” desktop applications, like games. The last time I used the InstallShield project type I had to add a plugin from WiX in order to make it work with Windows services and it wasn’t fun.
We’ll instead go with the second option. There’s a definitive advantage with option 2 compared to the other ones. In a more advanced “enterprise” scenario you’ll likely store your code in some repository like SVN or GitHub. Then the code will be exported to a Continuous Deployment or Continuous Integration tool such as Jenkins or TeamCity. These tools can run the installation script to automatically install the Windows service as part of the automated deployment process.
The installation scripts
The scripts are very simple. We’ll have one for uninstalling a service and one for installing it. Some of the process will be manual but it can be automated with batch files in an automatic deployment scenario. When we install the Windows service we have to make sure that any existing service of the same name is uninstalled otherwise we’ll get an exception hence the need for an uninstaller.
I’m not aware of a batch file item type in Visual Studio so open Notepad. Add the following content to it:
@ECHO OFF
echo Installing HttpJobRunner service…
echo ———————————————–
C:\Windows\Microsoft.NET\Framework\v4.0.30319\InstallUtil /i “C:\Program Files (x86)\WindowsServiceDemo\Demo.WindowsService.exe”
C:\Windows\System32\sc.exe failure “HttpJobRunner” reset= 0 actions= restart/1000
echo ———————————————–
echo Done.
pause
We call InstallUtil, instruct it to install a service with the ‘i’ flag. The install command refers to a folder we haven’t set up yet but will do it soon. Then, as hinted at in the previous post we’ll add an extra call to set the failure mode to restart the service. Be exact with the arguments, including the whitespaces: “reset= 0” and not “reset = 0” or “reset =0”. In my experience putting the space in the wrong position will result in a failure. We then call “pause” to leave the command prompt open so that we can read the outcome. You can later remove that command so that the window closes itself automatically.
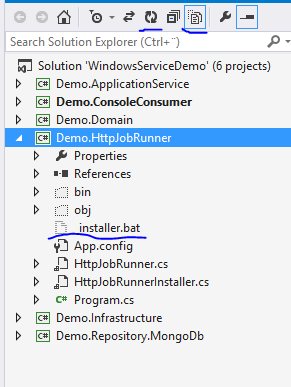
We’ll save the file in the same directory where Demo.HttpJobRunner resides. If you’re not sure where it is then right click the Windows service project in the solution explorer and click Open Folder in File Explorer. That is the folder where we’ll save the file we wrote in Notepad. Save the file as “_installer.bat”.
The file first won’t be visible in Solution explorer. Click the “Show all files” and “Refresh” buttons, it should appear:
Right-click the file and select “Include in project”. Locate the properties window to set the “Copy to Output Directory” option to Copy always:
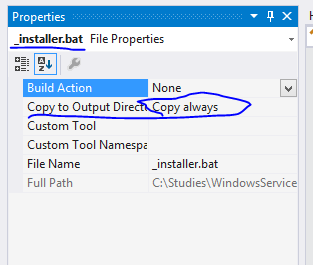
We do this so that the _installer.bat file is also copied to the deploy folder.
Let’s create another file in Notepad with the following content:
@ECHO OFF
echo Uninstalling HttpJobRunner service…
echo ———————————————–
C:\Windows\Microsoft.NET\Framework\v4.0.30319\InstallUtil /u “C:\Program Files (x86)\WindowsServiceDemo\Demo.WindowsService.exe”
echo ———————————————–
echo Done.
pause
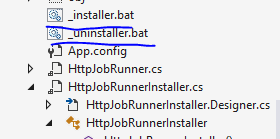
As expected this will uninstall the service. Save the file as “_uninstall.bat” and add it to the project the same way as we did with _installer.bat. At the end you should have both files listed in Visual Studio:
Next let’s set up the deployment folder. Normally all applications are installed in the Program Files or Program Files (x86) folder. Let’s follow that convention. Create a folder called WindowsServiceDemo within Program Files (x86) or Program Files. Within that new folder add another folder called Deploy. In Visual Studio set the Build path to this Deploy folder for Demo.HttpJobRunner:

Note that the _installer.bat and _uninstaller.bat files refer to Program Files (x86) but if you opted for Program Files then make sure to update the installer files accordingly.
We should be good to go. Right-click the Demo.HttpJobRunner project and select Rebuild. The Deploy folder should be populated:
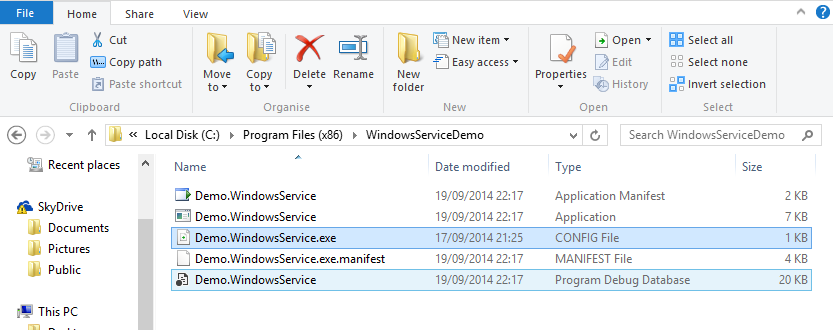
Copy all files except for _installer.bat and _uninstaller.bat one level up, i.e. under “WindowsServiceDemo”. Then return to Deploy and run _installer.bat as an Administrator. View the notices on the Command prompt. It might tell you that the OnCommitted event has failed but the exception message is misleading I think: you haven’t specified a process file name or something similar. I’ve seen it before, I’m not 100% sure why it happens but I’m pretty certain that it’s because the Process object has not enough rights to run the “sc” command. It’s OK, the installer script will take care of that. In case you don’t see any exceptions from the OnCommitted phase in the output then you can remove the extra call to “sc” in the _installer.bat file. Otherwise just keep it and remove the SetRecoveryOptions method from HttpJobRunnerInstaller if you wish.
OK, let’s see if the service is up and running. It should figure in the list of services and should be running:
![]()
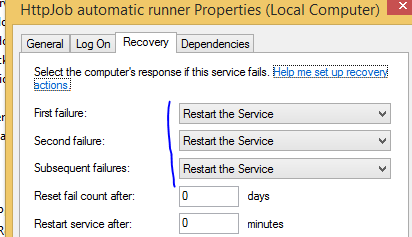
Check its properties. They should be set according to what we provided in code. Check especially the failure mode:
Let’s now test the uninstaller. Go back to the Deploy folder and run _uninstaller.bat as an administrator. After some seconds and output to the console the uninstall process should succeed. Refresh the services list and HttpJobRunner should be gone:
![]()
The service doesn’t do anything yet when installed because we left HttpJobRunner.cs untouched.
The installation process at present is a bit manual but can be automated with new batch files. Assuming that the service is up and running these are the steps to install a new service:
- Build the project in Visual Studio – this will put the HttpJobRunner deploy package to the Deploy folder including _installer and _uninstaller.bat
- Run _uninstaller.bat
- Copy the deploy files to the WindowsServiceDemo folder except for the installation files
- Run _installer.bat
In the next post we’ll start adding some action to the Windows Service.
View the list of posts on Architecture and Patterns here.


Pingback: Architecture and patterns | Michael's Excerpts
Thanks for sharing!! In this post I knew how to install service. The images were helpful.