MongoDB in .NET part 2: setup
July 31, 2014 1 Comment
Introduction
In the previous post we covered the basics of MongoDb. In this post we’ll look at how to set it up in Windows and how to connect to it through the C# driver.
Note that the C# driver is actually a .NET driver which can be called from Visual Basic as well.
Setup on Windows
Let’s set up MongoDb on the localhost. Navigate to the MongoDb downloads page and click the Windows download link:
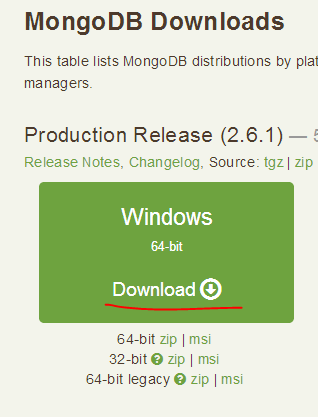
This will download an msi installer. Step through the installer. Choose the “typical” installation mode when the question comes. The installer will put the MongoDb files in the Program Files/MongoDB x.x Standard folder:

The installation package is self-contained, i.e. there’s no dependency on other elements. We’ll put it somewhere where it’s easier to find. Create a folder called mongodb on your C drive and cut/paste the contents of the Program Files/MongoDB x.x Standard into it. MongoDb will by default use a folder called “data” on your C drive to store the documents. So insert a folder called “data” on c:\. Within the “data” folder create another folder called “db”.
Let’s first connect to MongoDb manually. Open a command prompt, navigate to c:\mongodb\bin and issue the following command:
mongod.exe
This will start the MongoDb database engine. You’ll see that it’s waiting for connections:

Open up another command prompt, navigate to c:\mongodb\bin and start the client:
mongo.exe
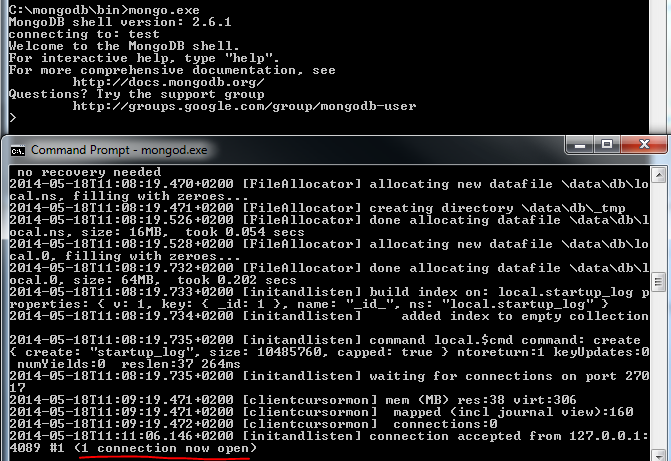
So we managed to connect to the MongoDb engine from a client. You can write direct JavaScript commands in the client to create databases, collections, insert documents etc. I will not go through these low level operations here – I’m only familiar with the basics myself anyway. We’ll do all that in C#. However, if you’re interested in those direct commands then you can check out the official manual.
Close both command prompts to start afresh and open a new one. Make sure it has administrator rights. It’s not convenient having to start the DB engine all the time we want to talk to it. Fortunately MongoDb can be set up as a Windows service. We’ll need a folder for the log files so add a folder called “log” to c:\mongodb. Create a configuration file for the logpath option for MongoDb in the command prompt by issuing this command:
echo logpath=C:\mongodb\log\mongo.log> C:\mongodb\mongod.cfg
This will create a mongod.cfg file in c:\mongodb.
Next run the following command:
C:\mongodb\bin\mongod.exe –config C:\mongodb\mongod.cfg –install
This will create the MongoDB Windows service. Note that it is a double-dash in front of “config” and “install”, this is not easily visible due to the rendering of this post on your screen. Let’s start the service:
net start mongodb
The command prompt should say that the service was started successfully. If you get an error message that the service doesn’t exist then re-run the installation command from an Administrator command prompt.
Let’s connect to MongoDb again from the client:
c:\mongodb\bin\mongo.exe
It should say “connecting to: test” so we’ve connected to the MongoDb engine that is now up and running thanks to the Windows service. “Test” is the default database that the mongo client connects to first.
Connecting to MongoDb in code
We’ll build up a simple MVC web application where people can rent cars.
Warning: I’ll be concentrating on Mongo-related functionality and ignore software practices like SOLID or layered architecture. If you are familiar with those concepts then you’ll see a lot of “big no-no” code here. However, I want to concentrate on MongoDb. It’s your responsibility to organise your code to fit good software engineering design.
Open Visual Studio 2012/2013 and create a new ASP.NET MVC web application called CarRentalWeb. It doesn’t matter if it’s MVC4 or 5 really, we’ll be concentrating on MongoDb. I’ll build this demo using MVC 4 in VS 2012 but MVC 5 in VS 2013 should be equally fine. If you have VS 2013 then when you create the project make sure to select the “No authentication” auth type. We don’t want to be sidetracked by security issues. Add the following NuGet package to the references list:

A general note: the MongoDb C# driver evolves quite quickly with lots of additions and deprecated code. At the time of writing this post the most recent version was 1.9.1. By the time you’re reading this there may well be a new version. It’s happened before to me that an updated release included code that immediately broke the existing code I wrote. It is possible that the code I’m going to write in this demo gets outdated quickly but hopefully it’ll be enough for you to follow along.
The NuGet package will install the following libraries:

Just like an SQL Server driver such as EntityFramework the MongoDb driver will also need a connection string. There’s a whole list of examples on how to construct MongoDb connection strings here. Open web.config and add the following connection string to the connectionStrings section:
<add name="CarRentalConnectionString" connectionString="mongodb://localhost"/>
This is probably as easy as it gets.
Open HomeController.cs in the Controllers folder and add the following private fields and a constructor to it:
private MongoClient _mongoClient;
private MongoServer _mongoServer;
private MongoDatabase _mongoDatabase;

public HomeController()
{
	_mongoClient = new MongoClient(ConfigurationManager.ConnectionStrings["CarRentalConnectionString"].ConnectionString);
	_mongoServer = _mongoClient.GetServer();
	_mongoDatabase = _mongoServer.GetDatabase(ConfigurationManager.AppSettings["CarRentalDatabaseName"]);
}
The MongoServer object will be used to connect to a database. MongoClient serves for sending commands to the server. We’ll store the name of the database in web.config. Add the following setting to the appSettings section:
<add key="CarRentalDatabaseName" value="CarRentalDatabase"/>
We haven’t created that database anywhere but we don’t need to worry. It will be created for us automatically when we insert the first document. Let’s verify that the connection can be made through reading the server build info. Erase the contents of Index() and add the following instead:
_mongoDatabase.GetCollectionNames();
return Json(_mongoDatabase.Server.BuildInfo, JsonRequestBehavior.AllowGet);
The first row is only needed to trigger a connection in the driver, it doesn’t have any other purpose. OK, let’s now run the application. If everything went well then you’ll get some long JSON on your screen:

Note the MongoDb server version: 2.6.1. Also, the C# driver we installed above was of version 1.9. All demos and code examples will be built on this configuration. If you have an older version of whichever then you might not get the same behaviour, e.g. you may see that an older version of the driver doesn’t have certain methods. Therefore make sure you have those versions are higher.
A short aside: MongoDb settings
We saw above the simplest way to declare our connection to the MongoDb server. There’s however a rich imperative way of declaring your MongoDb settings through the MongoClientSettings object. Examples:
MongoClientSettings settings = new MongoClientSettings();
String mongoHost = ConfigurationManager.ConnectionStrings["CarRentalConnectionString"].ConnectionString);
MongoServerAddress address = new MongoServerAddress(mongoHost);
settings.ConnectTimeout = new TimeSpan(0, 1, 5);
settings.SocketTimeout = new TimeSpan(0, 1, 5);
settings.Server = address;
The above code sets the connection string and the connection timeouts. You can also set the connection pool and wait queue size with a wait queue timeout:
settings.MaxConnectionPoolSize = 1500;
settings.WaitQueueSize = 1500;
settings.WaitQueueTimeout = new TimeSpan(0, 1, 0);
It’s very likely that our database will require authentication. The following method can help you set up the MongoDb credentials list:
private static List<MongoCredential> GetMongoCredentials()
{
	string username = ConfigurationManager.AppSettings["MongoDbUserName"];
	string password = ConfigurationManager.AppSettings["MongoDbPassword"];
	string mongoDbAuthMechanism = ConfigurationManager.AppSettings["MongoDbAuthMechanism"];
	MongoInternalIdentity internalIdentity = new MongoInternalIdentity(LtpMongoDbDefaultDatabase, username);
	PasswordEvidence passwordEvidence = new PasswordEvidence(password);
	MongoCredential mongoCredential = new MongoCredential(mongoDbAuthMechanism, internalIdentity, passwordEvidence);
	List<MongoCredential> credentials = new List<MongoCredential>() { mongoCredential };
	return credentials;
}
…where “MongoDbAuthMechanism” has the following value: “MONGODB-CR”, more about that here. You can then set the credentials as follows:
settings.Credentials = GetMongoCredentials();
In case you have a replica set in place, i.e. a primary server with one ore more secondary servers then you can set the read preference and connection mode as follows:
settings.ReadPreference = new ReadPreference(ReadPreferenceMode.SecondaryPreferred);
settings.ConnectionMode = ConnectionMode.ReplicaSet;
And finally we construct the MongoServer object as follows:
MongoClient client = new MongoClient(settings);
MongoServer mongoServer = client.GetServer();
_mongoServer = mongoServer;
The MongoClientSettings object has more properties than shown here. If you need to set some specific property to connect to your database then check out this object, it will probably have something for you.
The MongoDb context class
If you’ve used Linq to SQL or EntityFramework then you’ll know that they each have their DB context classes. There’s no equivalent in MongoDb but it can be emulated to a certain extent. We’ll wrap the code which constructs the MongoDatabase class in its own container class. Insert a new folder called MongoDb to the project. Add a class called CarRentalContext to it:
private MongoClient _mongoClient;
private MongoServer _mongoServer;
private MongoDatabase _mongoDatabase;

public CarRentalContext()
{
	_mongoClient = new MongoClient(ConfigurationManager.ConnectionStrings["CarRentalConnectionString"].ConnectionString);
	_mongoServer = _mongoClient.GetServer();
	_mongoDatabase = _mongoServer.GetDatabase(ConfigurationManager.AppSettings["CarRentalDatabaseName"]);
}

public MongoDatabase CarRentalDatabase
{
	get
	{
		return _mongoDatabase;
	}
}
This way the context class can be accessed from other controllers as well. Keep in mind that this context class is not nearly as sophisticated as the DB context classes of Linq to SQL or EntityFramework. There’s no SubmitChanges/SaveChanges method to carry out the changes stored in the context. There’s no InsertOnSubmit, DeleteOnSubmit etc. methods either. The changes will be immediate unless you write your own Unit of Work wrapper around this simple context class. Back in HomeController erase the private fields and delete the contents of the constructor. Update the code as follows:
private CarRentalContext _carRentalContext;

public HomeController()
{
	_carRentalContext = new CarRentalContext();
}

public ActionResult Index()
{
	_carRentalContext.CarRentalDatabase.GetCollectionNames();
	return Json(_carRentalContext.CarRentalDatabase.Server.BuildInfo, JsonRequestBehavior.AllowGet);
}
I can’t stress this enough: you should never build real-life controllers like that. Make sure you understand SOLID which tells you how to inject such dependencies correctly. Re-run the application to make sure it’s still working. It should.
You’ll notice that there’s no code to connect to and disconnect from the database. The driver will handle all that for you through the connection pool. Also, MongoServer instances are cached for a given set of settings so don’t worry about using this context class multiple times. The driver will provide the cached version. Also, the 3 key objects we saw above, i.e. MongoClient, MongoServer and MongoDatabase are all threadsafe, so don’t worry about locks and data races.
In the next post we’ll be looking into (de)serialisation of POCO objects in MongoDb.
You can view all posts related to data storage on this blog here.


Pingback: Lindermann's Blog | MongoDB Series