HTTPS and X509 certificates in .NET Part 3: how to install certificates and use them with IIS
June 4, 2015 6 Comments
Introduction
In the previous post we looked at the command line tools makecert and pvk2pfx. We saw how they could be used to create a root and a derived certificate and to package the private key and certificate files.
In this post we will install the certificates in the Windows certificate store so that they are trusted by IIS. We’ll also see how to tell IIS to use a specific SSL certificate.
certmgr and MMC snap in
The c:\windows\system32 folder includes two GUI tools for certificate management: certmgr.msc and mmc.exe. MMC.exe is a more general tool where you can import so-called snap-ins. Certificates have their own snap-in.
Run mmc.exe as an administrator. The following empty window will open:

Select Add/Remove Snap-in from the File menu. In the “Add or remove snap-ins” dialog click “Certificates”, then the “Add” button. This will open another dialog where you can specify the account for which you’d like to manage the certificates. The accounts are also called “certificate stores”.
Certificates can be dedicated to a specific user which will be stored in the user-level certificate store. Then we have Windows services which also can have certificates. These services can be view in the Services window which you can open by double-clicking “services.msc” in the c:\windows\system32 folder. Finally we have the computer-wide certificate store where the server-side SSL certificates are typically stored. That’s where e.g. IIS will locate its certificates as well.
Therefore select the “Computer account” option and click Next. You’ll be asked to provide the computer name and we can just leave the “local computer” option untouched and click Finish. Click OK on the “Add or remove snap-ins” dialog.
Expand the “Certificates (Local Computer)” node on the left hand panel. You’ll see that the installed certificates which have a private key are organised into folders. E.g. if you open the Trusted Root Certification Authorities folder and select the Certificates subfolder you’ll see the list of CAs that Windows trust by default. You’ll see CAs like DigiCert, VeriSign and Go Daddy.
So where are the certificates we created before? They are not listed here yet as they are not yet trusted. They must be installed first.
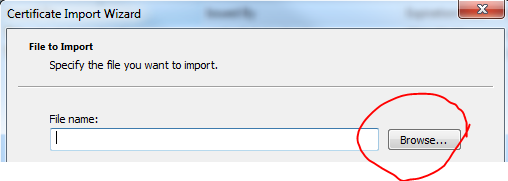
First we have to import our CA certificate “RootCert”. Left-click the Certificates folder under Trusted Root Certification Authorities, select All Tasks, then Import. This opens the Certificate Import Wizard dialog:

Click Next. You’ll be able to browse to the root .cer file created in the previous post – RootCert.cer in my example:
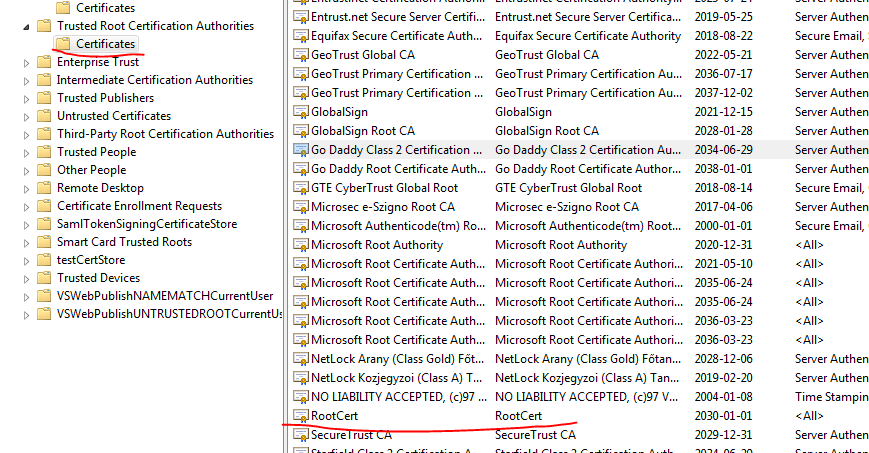
Click Next and Finish in the dialog. If all goes well then you should see “The import was successful” in a small popup. RootCert.cer is indeed available among the trusted CA certificates:
We’ll also need to install the derived certificate as well that can be used to establish an SSL connection. However, we’ll also need the private key otherwise the SSL certificate won’t be trusted. Do you remember which file contained both the public and the private key? Those who said “pfx” are right.
Expand the Personal folder in the GUI and left-click Certificates. Select All Tasks, Import and then press the Browse button like we did above. Browse to the folder where you created all the cer and pfx files in the previous post. Change the file type filter to Personal Information Exchange:

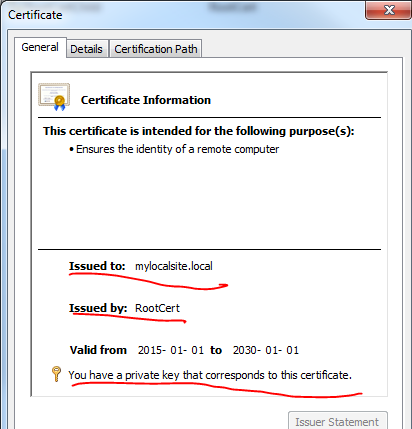
Click Next until the dialog closes. If all goes well then a popup should confirm that the import was successful. You’ll see that the intended purpose of the certificate is “Server authentication”. If you double-click the certificate you’ll be able to read its properties in the Certificate window. You can see that the certificate was issued by RootCert which is our own local CA and that we have access to the private key:
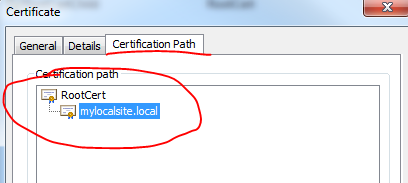
Also, if you click the Certification Path tab then you’ll see that the certificate is indeed derived from RootCert:
IIS
We can finally tell IIS to use our self-signed certificate to establish SSL. This will of course only work locally but that’s fine as we follow these steps to test SSL locally.
Let’s first set up the folder structure of our great web site. I issued the self-signed SSL certificate to “mylocalsite.local” in the previous post so I’ll go with that name for the rest of the exercise. If you gave it a different name then you’ll need to substitute it anywhere you see “mylocalsite.local”.
Navigate to the following folder:
C:\inetpub\wwwroot
Create a subfolder called mylocalsite.local. Insert a file called index.html with the following markup:
<!DOCTYPE html>
<html>
<body>

<h1>My First SSL site</h1>

<p>My first SSL site with a self-signed certificate.</p>

</body>
</html>
Now open IIS and right-click the Sites node in the left-hand panel. Select the “Add web site” option. The Add Web Site window will open. Fill it in as follow with special attention to the Binding section where you must choose https and pick the self-signed SSL certificate:
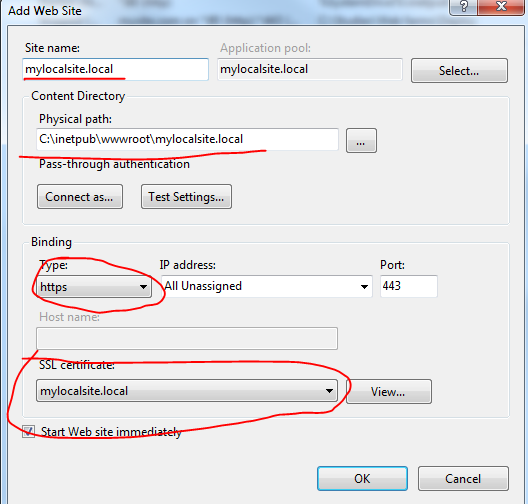
Click OK to create the web site.
Before we can test this we need to extend the hosts file so that our browser will understand mylocalsite.local. On Windows the hosts file is usually stored in the following folder:
C:\Windows\System32\drivers\etc
There should be a file called “hosts” with no file extension. If there’s a file called “hosts.txt” or “hosts.anyextension” then it’s wrong, you’ll need to remove the file extension. It’s a text file so it can be edited in a text editor. You’ll have to open that file as an administrator, i.e. run Notepad, Notepad++ or something similar as an administrator and open the hosts file from within the editor. Add the following entry to the file and save it:
127.0.0.1 mylocalsite.local
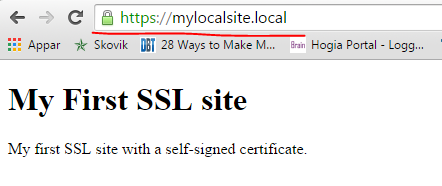
Open a fresh browser window and navigate to https://mylocalsite.local. If everything goes well then our simple index.html page should be visible. This is what it looks like in Chrome:
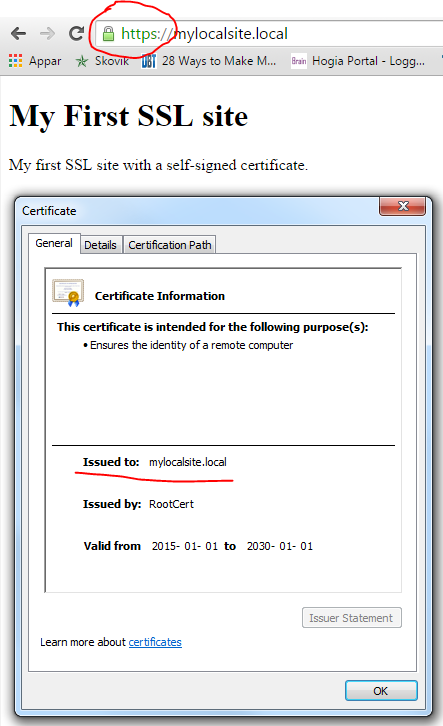
You can even view the certificate information from the browser:
We have successfully carried out the process of creating an SSL certificate and installing it for our local web site in IIS. In the next post we’ll start looking at some certificate related code in .NET.
You can view the list of posts on Security and Cryptography here.


Hi, i got a problem, when i tried to import the “mylocalsite.local.pfx” after i import the RootCert.cer, and it ask me a private password, i put which i used to create it, but it popup a message saying “wrong password”..
Do u know what could be the problem?
Hello, take a look at the comments section in this post: https://dotnetcodr.com/2016/01/18/using-client-certificates-in-net-part-3-installing-the-client-certificate/
Another user had a similar problem, try the fix I’ve proposed there.
//Andras
Thanks for the answer, i could fix it the same way than them.
Pingback: X.509 certificates in .NET | Around computing
Hello, I’ve got a problem. Created website is detected by the browser as not safe, despite that i took all the steps identically as you did. Errors: “Subject Alternative Name missing
The certificate for this site does not contain a Subject Alternative Name extension containing a domain name or IP address.”, “Certificate error
There are issues with the site’s certificate chain (net::ERR_CERT_COMMON_NAME_INVALID).”, SHA-1 certificate
The certificate chain for this site contains a certificate signed using SHA-1. (this is chrome browser, but it isn’t safe in any other browser either. Have you got any idea what might be a problem ? Thanks in advance !
Hi,
I wanna ask about who is the responsible to generate client certificate from server side or client side. in anther words, the client will generate the “client certificate” and in server side make this cert as trusted or the server side generate the client cert??