HTTPS and X509 certificates in .NET Part 1: introduction
May 28, 2015 6 Comments
Introduction
HTTPS, SSL, TLS – these terms are used interchangeably to denote secure communication between a web client and a web server. Secure HTTP communication generally must ensure all of the following:
- The data sent by the client to the server shouldn’t be tampered with by a third party in between – at least not without the server noticing it
- The secured data sent by the client should not be easily deciphered by a third party
- The client must be sure that the web server is really the one it claims to be, i.e. the it belongs to twitter.com and not some bogus site claiming to be twitter.com
- An attacker should not be able to take the client’s input and resend it to the server multiple times
If you navigate to a site with “https” as its protocol, such as https://twitter.com then it indicates that the communication between the server and client is secured with TLS – Transport Layer Security. Traditional unsecured HTTP communication happens through port 80 of the web server, e.g. http://www.mysite.com:80/ although the port is usually ignored as its the default HTTP port value. HTTPS communication on the other hand is directed through port 443 of the server.
However, the fact that a URL starts with “https” is not a guarantee for security. There can still be some bogus website deployed on that server waiting for you to give it your credit card number and PIN code. Therefore there must be some means for the server to prove that it really is the web server it claims to be and it really represents twitter.com or microsoft.com or wordpress.com etc. This is where certificates enter the scene.
Certificates
Certificates – X.509 certificates to be exact – are important ingredients in secure web communication. They are not some complex objects but simple files stored on the file system. Chances are that even your PC has a number of certificates stored in specially designated folders. The certificates snap-in can be used to view them. This page on MSDN describes how to open the snap-in, it’s really simple.
Once you have the snap-in open you can double-click on a certificate to view its properties:

A certificate has a large number of properties but probably the most important ones are the following:
- Issued to: if the certificate is used for TLS communication then this is a domain name like amazon.com. That domain is the owner of the certificate
- Issued by: in order to create a trusted web server environment the certificate must be issued by a trusted certificate authority (CA) such as Symantec or Go Daddy. The relationship between a certificate and a CA can be likened to your travel passport and the authority that issued that passport, e.g. the ministry of interior or the police. The example in the above screenshot shows that the certificate was issued by myself to myself, i.e. it’s a so-called self-signed certificate. It’s nice that I trust myself but the above certificate could never be used for real life HTTPS. I’m not a trusted CA. Also, a significant portion of Earth’s population doesn’t know me and probably wouldn’t trust me with their credit card numbers. However, self-signed certificates are great for testing purposes. You might not want to pay for a real certificate just to test some code. The DigiCert homepage shows an example of what a certificate can cost per year.
- Validity dates: a certificate has start and expiry date. Outside those limits the certificate cannot be used for server authentication
- Public key: the public key part of an asymmetric public/private key pair
What is this public key? If you open the Details tab in the Certificate window you’ll find a property called Public key with some long byte content:
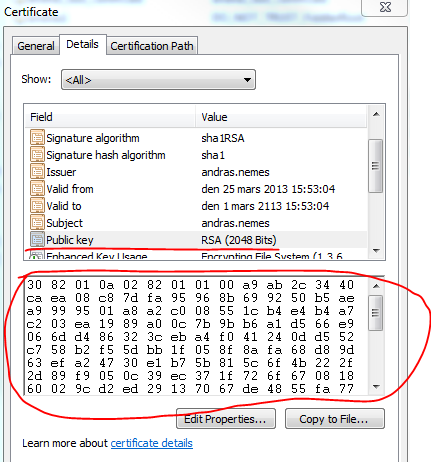
Public and private key pairs are the two most important ingredients in asymmetric encryption and digital signatures. If you are new to these topics then I have dedicated some detailed posts to them where you can start, I won’t repeat all the details here:
- Introduction to asymmetric encryption in .NET cryptography
- Introduction to digital signatures in .NET cryptography
In a nutshell public and private keys in asymmetric encryption are used as follows:
- The public key is as its name implies public and available to everyone
- The private key on the other hand is absolutely secret and should be stored safely on the web server. If it’s compromised then a new pair of keys must be generated immediately
- Say you want to send me an encrypted message. I’ll give you my public key to start with
- You encrypt your message with a random encryption key which is independent of the public key I’ve just sent you
- You then encrypt that random encryption key using my public key
- You send me two sets of messages: the main message encrypted with the random key and the random key encrypted with my public key
- I decrypt the random encryption key with the private key part of my asymmetric encryption key
- I use the decrypted random encryption key to decipher your message
Public and private keys are not generated independently of each other. A certain public key will have a matching private key and only that private key can be used in asymmetric encryption. In that sense public and private keys are actually symmetric. You’ll see in the first screenshot above the message saying “You have a private key that corresponds to this certificate”. So the private key that matches the public key is stored separately and is available.
We’ll see in a bit that the communication between a browser and a server basically follows these steps if the communication is tunneled through TLS.
Revocation lists
Another important term that’s used in conjunction with certificates is the Certificate Revocation List (CRL). The idea is that if a certificate needs to be revoked, e.g. in case it was compromised, then the certificate owner can inform the CA that issued it. The CA then puts the certificate on its CRL. Therefore it is the CA that handles the CRL for the certificates that it has issued. A revoked certificate cannot of course be used for secure communication.
Certificates and browsers
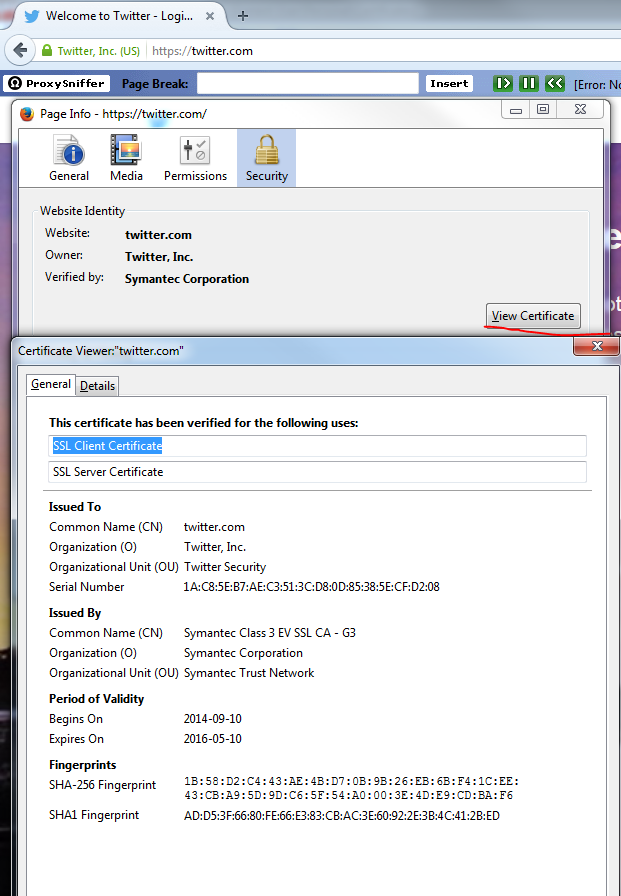
Modern browsers are equipped with tools to handle certificates. If you navigate to twitter.com you’ll see that the server certificate has been verified:

You can normally find out more about the certificate. The way to do this depends on the browser but you should be able to just click the information in green and select to view more details. This is an excerpt of what Firefox can show about Twitter’s certificate:
Here’s a simplified flow of what happens between the browser and the server when you navigate to https://twitter.com:
- The browser connects to Twitter’s server on port 443
- Twitter sends back the information on its certificate as seen in the above screenshot
- The browser inspects the details of the certificate and verifies it in a number of ways
- E.g. it makes sure that the validity dates are not outside of the current date and the “issued to” field matches the domain name of the URL, i.e. that “twitter.com” in the certificate is the same as “twitter.com” in the domain
- The browser also checks if the issuer is on its list of trusted issuers. The list of trusted commercial issuers is maintained by the operating system like Windows or Mac OS.
- The browser also checks the revocation list of the CA to see if the certificate has been revoked
If any of the checks fails then the browser issues a warning and the green text turns red. You’ve probably come across web sites where the browser complained that the server certificate could not be verified. You’ll then have to confirm that you want to continue to the web site. A frequent issue with certificates is that they expire and the person responsible of maintaining the certificate forgets to replace the expired certificate.
Communication flow
Let’s assume then that the browser has verified the validity of the certificate. The flow from here on is very similar to the steps outlined above where we summarised how asymmetric encryption keys are typically used.
The browser now has access to the public key of the server. The browser will then generate a random encryption key, also called a session key which it uses to encrypt the message with. The session key is encrypted with the server’s public key. The server can decrypt the session key with its private key and finally decrypt the message sent by the client. An extra security feature is that if the server doesn’t have the private key, e.g. because it only pretends to be twitter.com then it won’t be able to decrypt the session key and the message. The communication between the browser and the server would fail. So if I managed to steal the SSL certificate from Twitter’s server then it won’t be enough for me to fake a secure Twitter website. The session key is then used during the session to encrypt the messages back and forth. The messages are also signed.
Click here for the next part of the series.
You can view the list of posts on Security and Cryptography here.


that is true
Awesome article. Really useful
Hi,
I like your posts but I have a question
About this part:
——————————————
“You send me two sets of messages: the main message encrypted with the random key and the random key encrypted with my public key
I decrypt the random encryption key with the private key part of my asymmetric encryption key
I use the decrypted random encryption key to decipher your message”
———————————————————-
Why the message is encrypted using a random key instead of encrypted using only the public key?
Hello, thank you for your comment.
You can start here:
In summary the public key of an asymmetric key-pair is not used for encrypting large messages as it’s too slow. To speed things up a random key, which is typically some short string, is used to encrypt the main message.
//Andras
Pingback: X.509 certificates in .NET | Around computing
excellent. thanks a ton for this post.