Introduction to forms based authentication in ASP.NET MVC5 Part 1

Introduction

ASP.NET MVC5 comes with a number of new elements regarding user management and security. When you create a new MVC 5 web app you’ll be able to choose between 4 default authentication types:

  • No authentication, i.e. anonymous users can access your site
  • Individual user accounts: the traditional way to log onto the site using a login form. The user store is backed by SQL identity tables. You can also enable some well known auth providers: Twitter, Google, Facebook and Microsoft where you don’t need to worry about the password
  • Organisational accounts: Active Directory Federation Services (ADFS), used within organisations that manage their users in ADFS, typically coupled with Single SignOn for the applications within the organisation. You can enable Azure-based ADFS as well
  • Windows auth: Windows Active Directory authentication for intranet apps. Your Windows login credentials will be used to access the internal applications of your company. This is somewhat like a stripped down version of the organisational accounts option

In this blog series we’ll look at the new identity features of MVC5.

Forms based authentication

Fire up Visual Studio 2013 and select the ASP.NET Web Application template in the New Project window. Give the project some name and click OK. A new window will open where you can select additional templates. Pick MVC. Press the ‘Change authentication’ button and make sure that ‘Individual user accounts’ is selected:

Individual user accounts option

Visual Studio will set up a forms-enabled MVC app for you without any extra effort. Run the web app and you’ll be directed to the default home page. You’ll see that it comes with the Register and Log in links:

Register and log in links in MVC 5 web app

If you used Forms based auth in MVC 4 then this is of course no surprise to you. Click Register and create a user. If everything goes well you’ll be automatically logged in and you’ll see your username instead of “Register”:

User registered and logged in

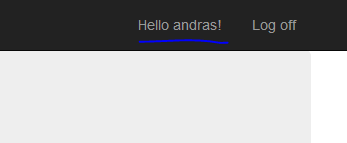
You can click on “Hello (your name)” to manage save your password if you want. Click Log off and then log in again with your credentials to check if it works fine. It should.

The Layout view

The top menu of the MVC 5 template is controlled by _Layout.cshtml in the Views/Shared folder. Open that file. You’ll see the links for Home, About and Contact. Below those links you’ll have a partial view called _LoginPartial. _LoginPartial is located in the same folder. Open it and let’s see what it contains.

There’s an if-else statement which tweaks what the user sees based on the Request.IsAuthenticated property. This property is set by the framework depending on whether the current user has logged on or not.

The user name is extracted using the User.Identity.GetUserName() method. User is an IPrincipal object and represents the currently logged-on user. Identity is the IIdentity belonging to the user which contains a small set of information about the user such as the user name or the authentication type. User.Identity is also set by the framework just like with the IsAuthenticated property.

You can read the User object anywhere within the controllers and views, i.e. where a valid HTTP session is available. Open Controllers/HomeController.cs and add the following code to Index() just above the return statement:

string userName = User.Identity.Name;

Set a breakpoint within Index and run the application. You’ll see that the username can be easily extracted this way.

Restrict access

There’s little point in authenticating users if you don’t limit the access to certain parts of your website to authenticated users only.

Right-click the Controllers folder and select Add, Controller. In the Add Scaffold window select the topmost option, i.e. Empty. Call it CustomersController. Add the following two methods to the controller:

public string SecretName()
{
	return "This is the secret customer name.";
}

public string PublicName()
{
	return "This is the public customer name.";
}

The goal is to protect access to the SecretName action and only let anonymous users read the public name.

Run the application and log off if you’re still logged in. Then navigate to the above actions:

  • localhost:xxxx/Customers/publicname
  • localhost:xxxx/Customers/secretname

Not surprisingly you can access both methods without having to log in first.

If your only requirement is to restrict access to a controller action to authenticated users only then you can use the Authorize attribute like this:

[Authorize]
public string SecretName()
{
	return "This is the secret customer name.";
}

Re-run the app and navigate to the secretname action. You should see that you’re redirected to the login page. Log in and you’ll see the secret. Note the URL of the Login page: Account/Login. It is defined in a Katana component in Startup.Auth.cs in the App_Start folder:

app.UseCookieAuthentication(new CookieAuthenticationOptions
{
          AuthenticationType = DefaultAuthenticationTypes.ApplicationCookie,
          LoginPath = new PathString("/Account/Login")
});

If you don’t know what OWIN and Katana mean then you can start here.

The ReturnUrl query string in the URL will store which controller and action you’ve tried to access. It will be fed to the POST Login action of AccountController:

public async Task<ActionResult> Login(LoginViewModel model, string returnUrl)

Now log off and navigate to /Customers/publicname. It should still be available to anonymous users.

What if you want to restrict access to all actions within the controller? You can apply the Authorize attribute on the controller level:

[Authorize]
public class CustomersController : Controller

Run the app again and navigate to /Customers/publicname. It is now also a restricted site so you’ll be redirected to the login page.

You can override the controller level Authorize attribute by decorated the individual action(s) with the AllowAnonymous attribute:

[AllowAnonymous]
public string PublicName()
{
	return "This is the public customer name.";
}

Run the app and verify that /Customers/publicname is publicly available again.

The Authorize attribute accepts a couple of parameters to further refine the access filter. Examples:

[Authorize(Users="andras,admin")]
[Authorize(Roles="admin,poweruser")]

You can probably guess what they mean: allow users with specific user names – andras and admin – or only allow users who have either admin and power user role to access an action.

You can test this as follows. Add the following attribute to SecretName:

[Authorize(Users = "elvis,bob")]
public string SecretName()
{
	return "This is the secret customer name.";
}

Run the app and navigate to the secret name action. Log in with your user. You should see that you’re immediately redirected back to the Login page – unless you selected ‘elvis’ or ‘bob’ as the user name in the sign up process. In that case the great secret will be revealed to you.

We’ve now seen the basics of forms based authentication in MVC5. We’ll dig much deeper in the coming blog posts.

Read the next post in this series here.

You can view the list of posts on Security and Cryptography here.

Introduction to OAuth2 part 3: the code flow

Introduction

Flows are a very important concept in the OAuth2 security chain. Flows describe the way how a client can get hold of the identification token in order to access a protected resource.

There are four different flows according to the OAuth2 specification:

  • Code flow
  • Implicit flow
  • Resource owner flow
  • Client flow

Let’s look at the code flow first in a bit more detail. The posts that follow will discuss the other flows in the list.

Authorisation Code Flow

This flow is most often used for web application clients. The web application wants to access a resource owned by the resource owner. The owner doesn’t want to give a full-access password to the application. Instead they will rely on an OAuth2 service to retrieve a limited-access token.

The web application will first ask an authorisation server for the token via a GET request. A typical URI to get that token may look like this:

GET /auth?client_id=greatapp_id&scope=protected_resource&redirect_uri=http://greatapp/callback&response_type=code&state=123

the URI consists of the following elements:

  • client_id: the name of the client that’s trying to access the resource. The client needs to be registered with the auth server. So before anything can happen the client needs to go through this registration step.
  • scope: the name of the resource the client is trying to access
  • redirect_uri: the URI to redirect to upon retrieving the resource. This is a callback URI through which the auth server will send back a so-called authorisation code
  • state: an optional random number that the client provides. It can be stored locally and can be used as a correlation ID. The auth server will send back the state parameter in its response so that the client can match it up with what it has saved locally. This is a good protection against Cross Site Request Forgery

So the GET request arrives at the auth server. The client will need to authenticate itself. That’s when you see these login screens that are becoming ubiquitous in the world of Facebook, Twitter, Google etc. identification scenarios, e.g.:

Google OAuth screen

Without this step the auth server will not be able to make any security decisions.

The full GET request by Google in this example looks like this:

https://accounts.google.com/o/oauth2/auth?response_type=code&client_id=108380595987-4e427srhd9jr0lsnohleutb2ilbuof70.apps.googleusercontent.com&redirect_uri=https%3A%2F%2Fpublic-api.wordpress.com%2Fconnect%2F%3Fmagic%3Dkeyring%26service%3Dgoogle_plus%26action%3Dverify&state=8183180&scope=https%3A%2F%2Fwww.googleapis.com%2Fauth%2Fplus.stream.write+https%3A%2F%2Fwww.googleapis.com%2Fauth%2Fplus.login&access_type=offline&approval_prompt=force&request_visible_actions=http%3A%2F%2Fschemas.google.com%2FCreateActivity

…which has the following – by now familiar – sections:

  • response_type=code
  • client_id=108380595987-4e427srhd9jr0lsnohleutb2ilbuof70.apps.googleusercontent.com
  • scope=https%3A%2F%2Fwww.googleapis.com%2Fauth%2Fplus.stream.write+https%3A%2F%2Fwww.googleapis.com%2Fauth%2Fplus.login
  • redirect_uri=https%3A%2F%2Fpublic-api.wordpress.com%2Fconnect%2F%3Fmagic%3Dkeyring%26service%3Dgoogle_plus%26action%3Dverify&state=8183180&scope=https%3A%2F%2Fwww.googleapis.com%2Fauth%2Fplus.stream.write+https%3A%2F%2Fwww.googleapis.com%2Fauth%2Fplus.login&access_type=offline
  • state=8183180

…and some other sections as well, but these are the most important ones I believe.

Next, the client will have to give its consent on the so-called consent screen:

Google consent screen

So you see that it is WordPress that’s making the request. An informative consent screen will also tell you which resources the requesting application wants to gain access to. This screen is a question to the user: do you agree that the WordPress client gains access to some specific Google+ resources about you? Then you can say yes or no.

If you say yes then Google auth server will give WordPress an auth token with just enough claims to access the requested resources.

Here’s another example by Twitter:

Twitter OAuth screen

The point is that the requesting client – WordPress – will get some limited amount of access to resources owned by someone else without giving out the password which would give them full access.

The consent screen is a very important step. If you’re planning to build a custom OAuth server then make sure to make this screen as informative as possible. An extra option is setting a time limit to access rights.

If you click OK then the auth server will redirect you to the callback URI and present the authorisation code to the requesting application. The auth code is not yet the access token. The token is requested in the next step.

Now that the client application has the auth code it will directly ask the auth server for the token. The communication takes the form of a POST request that includes the following parameters:

grant_type=authorization_code&authorization_code=same_code_that_was_provided_in_the_first_response_from_auth_server&redirect_uri=must_be_same_as_before_so_that_auth_server_can_verify_validity

The client will have to authenticate with the auth server using the credentials it received during the initial registration process mentioned above. The client will send the auth code to the auth server. The auth server will verify its validity and that the code belongs to the original requesting application. If the auth server is happy then it sends back a JSON formatted token. In a reduced form it can look like the following:

{
"access_token" : "some name"
, "expires_in": "number of seconds"
, "token_type": "Bearer"
}

An access_token coupled with the expires_in parameter is a token with a time limit on its validity. The client will get access to the resource with this access token. We’ll discuss bearer tokens in a later post.

As you see the access token has a limit on its validity as defined by the expires_in parameter. If it’s set to 10 minutes then the client loses its access to the protected resource after 10 minutes. The user will then need to go through the consent process. The client will also need to ask for a new token. That’s certainly an option but it’s not very efficient. Imagine having to give consent to show your tweets on a page, such as here on WordPress, every 10 minutes otherwise the service stops.

Instead the JSON token can be extended with a refresh_token parameter:

{
"access_token" : "some name"
, "expires_in": "number of seconds"
, "token_type": "Bearer"
, "refresh_token": "some name"
}

With this extended token the application will be able to request new tokens without the user giving consent every time. It sends a POST request to the auth server with the following parameters:

grant_type=refresh_token&refresh_token=(same name as the refresh_token parameter in the JSON above)

The token will also contain a range of other things, such as claims and a signature. Please refer to this post for an introduction on JSON Web Tokens. Keep in mind that it’s up to you as the application developer to decide which claims need to be included in the full access token.

From this point on with refresh tokens the application will have access to the resource for ever which is not always desired. Normally an application will let you remove your consent, such as the following screen in WordPress:

WordPress client management

Read the next part in this series here.

You can view the list of posts on Security and Cryptography here.

Introduction to OAuth2 part 2: foundations

Introduction

OAuth and OAuth2 has become an important term in web and mobile security. According to the OAuth homepage it’s “an open protocol that allows secure authorisation in a simple and standard method from web, mobile and desktop applications.” About OAuth2 is says specifically that it is an “authorisation framework that enables a third-party application to obtain limited access to a HTTP service.”

In this post we’ll look at the foundations of OAuth2: some theory and background and the most important terminology. We’ll continue the series with the different auth flows in OAuth2 in the following posts.

OAuth2 basics

The starting point is simple: you as a user would like to retrieve some data from an online resource. You may do so from a web browser, a mobile phone, a tablet or some other similar device with internet connection. In traditional enterprise software all elements of an authorisation system belonged to the same organisation: the client software, the backend resources, the separate authorisation server if any. If a user wanted to access your resources then they navigated to your homepage, logged on and performed what they were allowed to do depending on their access rights.

In the world of the web services, mobile devices and mobile applications we need to separate the parts a little. According to the OAuth specification there’s a distinction between a “client” and a “resource owner”. The distinction becomes important as nowadays we can have a multitude of applications consuming a resource that belongs to someone else. Building web services that expose some type of data is a huge thing in the world of software development. It is one of the drivers behind the popularity of Twitter, Facebook etc. Would you like to write your own little Facebook app? Here are the public endpoints with the SDKs, happy coding! In this case it’s not unthinkable that the owner of the software is not the same – i.e. does not belong to the same trusted subsystem – as the owner of the resource that the software is using. In OAuth therefore the client is the software itself that accesses a certain resource. The resource owner will still be part of the trusted system but naturally such third-party tools may fall outside. Just because you write a Twitter-app your software will not become a trusted application.

A frequent analogy used to describe OAuth2 is Valet parking which is quite common in the US. You give the key of your car to a person who will park it for you. You are the resource owner, the car is the resource, the key is the password and the person who parks your car – the valet – is the third party system which is more or less trusted. You shouldn’t of course provide your password to anyone like that thinking that the person won’t do anything harmful. The most expensive cars often have two sets of keys – a “normal” key and a valet-parking key. The valet-parking key provides limited access to the car: you can drive it for a couple of miles, you cannot open the boot (trunk) etc. The target in OAuth2 is similar in the digital world: you as the resource owner have 2 sets of keys. You have the password which gives full access to a resource and another one which gives limited rights in a digital transaction.

There are 4 important components in the OAuth setup:

  • Client: as mentioned above, this is the software accessing a protected resource. The client may be private or public and trusted or untrusted
  • Resource owner: the person/organisation who owns the resource the software is trying to access
  • Resource server: the machine where the resource is stored
  • Authorisation server: the server that can issue the limited access keys

By default the resource server and the authorisation server must belong to the same trust system. The auth server knows about the protected resources and the resource server knows how to read the limited access key issued by the auth server.

In enterprise software the trusted software would very likely be part of the same trusted system. Nowadays we can have partially – or not at all – trusted clients built by millions of mobile app developers in the world. The organisation who owns the resource will probably not have any control over the quality of those third-party applications.

The client will need some sort of a limited access key to access the protected resource. This is the purpose of the authorisation server which can issue such tokens to registered clients. Using that key the client will be able to access the resource. This is very similar to the process of single sign-on we saw here where an external authorisation server provides a SAML token with some initial amount of claims to registered users. The SAML token can be then used to access the protected service. The main difference is that in the enterprise-like WS-Trust specification with the SAML tokens the client is implicitly trusted.

Flows

OAuth2 must work with a wide range of consuming applications so no wonder that there are various ways to get hold of the limited access token.

OAuth2 defines a number of different flows as to how to access a protected resource. We’ll look at these in more detail later, this is just to give some idea on what’s coming up:

  1. Authorisation code flow: used in conjunction with web application clients
  2. Implicit flow: used with native – user-agent based – clients
  3. Resource owner password credential flow: is used with trusted clients
  4. Client credential flow: used in client-to-service communication

Useful resources

We’ll see very little code in this series. I’ll instead concentrate on giving an introduction to this relatively new field of security. Also, unlike with claims, there’s no native C# library with objects around OAuth2 and OpenID in .NET at the time of writing these posts. By “native” I mean something that is e.g. part of the System.Security namespace. So writing these classes on my own in my free time can be a challenge.

However, you don’t need to start from scratch. Like we saw in the series on claims, Thinktecture has prepared a lot of work in this area as well. You can install their library from NuGet and use it on your .NET project:

Thinktecture library in NuGet

You can read about this project with examples on its GitHub repository.

We briefly looked at the ThinkTecture identity server in the claims series. You can find its GitHub page here. Check out its Wiki page for extensive demos and how-tos.

We’ll continue the series on a discussion of the different auth flows. Read the next instalment here.

You can view the list of posts on Security and Cryptography here.

An encrypted messaging project in .NET with C# part 5: processing the encrypted message

We finished off the previous post with the Sender sending the ingredients of the secret message to the Receiver:

  • The unique message ID
  • The encrypted AES public key
  • The AES cipher text
  • The AES initialisation vector

Now it’s up to the Receiver to decrypt the message. In case you don’t understand some code specific to encryption in .NET please refer to my previous blog posts on the topic.

Demo

Open the Receiver project we’ve been working on. Add the following interface to the Interfaces folder of the ApplicationService layer:

public interface ISecretMessageProcessingService
{
	ProcessSecretMessageResponse ProcessSecretMessage(ProcessSecretMessageRequest processSecretMessageRequest);
}

We constructed the Request-Response objects in the previous post.

Add the following implementation stub to the Implementations folder:

public class SecretMessageProcessingService : ISecretMessageProcessingService
{
	public ProcessSecretMessageResponse ProcessSecretMessage(ProcessSecretMessageRequest processSecretMessageRequest)
	{
		throw new NotImplementedException();
	}
}

The first step in the process will be to retrieve the AsymmetricKeyPairGenerationResult object based on the incoming message id. If you recall we have an interface called IAsymmetricKeyRepository for exactly that purpose. Add the following private field and public constructor to the service:

private readonly IAsymmetricKeyRepositoryFactory _asymmetricKeyRepositoryFactory;

public SecretMessageProcessingService(IAsymmetricKeyRepositoryFactory asymmetricKeyRepositoryFactory)
{
	if (asymmetricKeyRepositoryFactory == null) throw new ArgumentNullException("Asymmetric key repository factory.");
	_asymmetricKeyRepositoryFactory = asymmetricKeyRepositoryFactory;
}

Add the following stub to the ProcessSecretMessage method:

ProcessSecretMessageResponse response = new ProcessSecretMessageResponse();
try
{
	AsymmetricKeyPairGenerationResult asymmetricKeyInStore = _asymmetricKeyRepositoryFactory.Create().FindBy(processSecretMessageRequest.MessageId);				           _asymmetricKeyRepositoryFactory.Create().Remove(processSecretMessageRequest.MessageId);
}
catch (Exception ex)
{
        response.SecretMessageProcessResult = string.Concat("Exception during the message decryption process: ", ex.Message);
	response.Exception = ex;
}
return response;

Nothing awfully complicated up to now I hope: we retrieve the asymmetric key pair stored in the repository and remove it immediately. Recall that our implementation, i.e. InMemoryAsymmetricKeyRepository.cs throws an exception if the key is not found.

The next step is to decrypt the sender’s public key. We need to extend the IAsymmetricCryptographyService interface in the Infrastructure layer. Open IAsymmetricCryptographyService.cs and add the following method:

string DecryptCipherText(string cipherText, AsymmetricKeyPairGenerationResult keyPair);

Open RsaCryptographyService.cs and implement the new method as follows:

public string DecryptCipherText(string cipherText, XDocument keyXml)
{
	RSACryptoServiceProvider rsa = new RSACryptoServiceProvider();
	rsa.FromXmlString(keyPair.FullKeyPairXml.ToString());
	byte[] original = rsa.Decrypt(Convert.FromBase64String(cipherText), false);
	return Encoding.UTF8.GetString(original);
}

Add the following private field to SecretMessageProcessingService.cs:

private readonly IAsymmetricCryptographyService _asymmetricCryptoService;

Modify its constructor as follows:

public SecretMessageProcessingService(IAsymmetricKeyRepositoryFactory asymmetricKeyRepositoryFactory
	, IAsymmetricCryptographyService asymmetricCryptoService)
{
	if (asymmetricKeyRepositoryFactory == null) throw new ArgumentNullException("Asymmetric key repository factory.");
	if (asymmetricCryptoService == null) throw new ArgumentNullException("Asymmetric crypto service.");
	_asymmetricKeyRepositoryFactory = asymmetricKeyRepositoryFactory;
	_asymmetricCryptoService = asymmetricCryptoService;
}

Add the following line within the try-statement of the ProcessSecretMessage method:

String decryptedPublicKey = _asymmetricCryptoService.DecryptCipherText(processSecretMessageRequest.EncryptedPublicKey
	, asymmetricKeyInStore);

Now that we have the decrypted public key from the Sender we can build in the symmetric encryption service into the Receiver. Add the following interface into the Cryptography folder of the Infrastructure layer:

public interface ISymmetricEncryptionService
{
	string Decrypt(string initialisationVector, string publicKey, string cipherText);
}

Add the following private variable to SecretMessageProcessingService.cs:

private readonly ISymmetricEncryptionService _symmetricCryptoService;

…and modify its constructor as follows:

public SecretMessageProcessingService(IAsymmetricKeyRepositoryFactory asymmetricKeyRepositoryFactory
	, IAsymmetricCryptographyService asymmetricCryptoService, ISymmetricEncryptionService symmetricCryptoService)
{
	if (asymmetricKeyRepositoryFactory == null) throw new ArgumentNullException("Asymmetric key repository factory.");
	if (asymmetricCryptoService == null) throw new ArgumentNullException("Asymmetric crypto service.");
	if (symmetricCryptoService == null) throw new ArgumentException("Symmetric crypto service.");
	_asymmetricKeyRepositoryFactory = asymmetricKeyRepositoryFactory;
	_asymmetricCryptoService = asymmetricCryptoService;
	_symmetricCryptoService = symmetricCryptoService;
}

Add the following statements to the try-block of ProcessSecretMessage:

String decryptedMessage = _symmetricCryptoService.Decrypt(processSecretMessageRequest.SymmetricEncryptionArgs.InitialisationVector
	, decryptedPublicKey, processSecretMessageRequest.SymmetricEncryptionArgs.CipherText);
response.SecretMessageProcessResult = string.Concat("Message received and deciphered: ", decryptedMessage);

We let the symmetric crypto service decrypt the message using the ingredients that came from the Sender. We finally assign some message to the response. Normally you shouldn’t of course send back the decrypted message in the receipt, but in this case we want to test on the sender’s side if everything has gone well.

We’ll use the built-in RijndaelManaged class to do the symmetric encryption bit. Add the following implementation to the Cryptography folder of the Infrastructure layer:

public class RijndaelSymmetricCryptographyService : ISymmetricEncryptionService
{
	public string Decrypt(string initialisationVector, string publicKey, string cipherText)
	{
		RijndaelManaged cipherForDecryption = CreateCipherForDecryption(initialisationVector, publicKey);
		ICryptoTransform cryptoTransform = cipherForDecryption.CreateDecryptor();
		byte[] cipherTextBytes = Convert.FromBase64String(cipherText);
		byte[] plainText = cryptoTransform.TransformFinalBlock(cipherTextBytes, 0, cipherTextBytes.Length);
		return Encoding.UTF8.GetString(plainText);
	}

	private RijndaelManaged CreateCipherForDecryption(string initialisationVector, string publicKey)
	{
		RijndaelManaged cipher = new RijndaelManaged();
		cipher.KeySize = CalculateKeySize(publicKey);
		cipher.IV = RecreateInitialisationVector(initialisationVector);
		cipher.BlockSize = 128;
		cipher.Padding = PaddingMode.ISO10126;
		cipher.Mode = CipherMode.CBC;
		byte[] key = HexToByteArray(publicKey);
		cipher.Key = key;
		return cipher;
	}

	private int CalculateKeySize(string publicKey)
	{
		return (publicKey.Length / 2) * 8;
	}

	private byte[] RecreateInitialisationVector(string initialisationVector)
	{
		return Convert.FromBase64String(initialisationVector);
	}

	private byte[] HexToByteArray(string hexString)
	{
		if (0 != (hexString.Length % 2))
		{
			throw new ApplicationException("Hex string must be multiple of 2 in length");
		}
		int byteCount = hexString.Length / 2;
		byte[] byteValues = new byte[byteCount];
		for (int i = 0; i < byteCount; i++)
        	{
			byteValues[i] = Convert.ToByte(hexString.Substring(i * 2, 2), 16);
		}
		return byteValues;
	}
}

Most of this code should look familiar from the posts on symmetric encryption so I won’t go into the details here.

We need to declare in IoC.cs in the Web layer that we want to use RijndaelSymmetricCryptographyService when StructureMap stumbles upon an ISymmetricEncryptionService interface dependency. Add the following line to the Initialize block:

x.For<ISymmetricEncryptionService>().Use<RijndaelSymmetricCryptographyService>();

Start the Receiver and the Sender. Enter your message to be sent to the Receiver. I encourage you to step through the Receiver project with F11 to see how the bits and pieces are connected. If everything goes well then the Sender should get a JSON response similar to this:

{"$id":"1","SecretMessageProcessResult":"Message received and deciphered: your message","Exception":null}

That’s it really as far as a basic implementation is concerned. The system can be extended in a number of ways, e.g.:

  • Add an expiry date to the message ID from the Receiver so that the temporary RSA key pair must be consumed within a certain time limit
  • Add digital signatures so that the Sender can check the authenticity of the message from the Receiver
  • Use a one-time AES public key for the Sender as well. Even if an attacker manages to somehow figure out the public key of the Sender, it will be different when the next message is sent.

I’ll be covering SOA in a number of posts soon which will show an example of adding expiry date checking to the message chain. Regarding digital signatures you can consult this post, there should be enough to get you started. The third point is straightforward to implement: just generate a new valid AES public key when the Sender sends out the message instead of reading it from the config file.

You can view the list of posts on Security and Cryptography here.

An encrypted messaging project in .NET with C# part 4: encrypting and sending the message

Introduction

In the previous post we got as far as retrieving an RSA public key and a message ID from the Receiver. It is now time for the Sender to do the following:

  • Encrypt the message using his symmetric encryption key
  • Encrypt his symmetric encryption key using the RSA public key of the receiver
  • Send a message to the Receiver which includes all this information

If you are not familiar with the basics of symmetric and asymmetric encryption algorithms then I highly recommend to read my blog posts: here, here and here. I won’t explain those concepts here in detail again. The sender will use the Rijndael managed AES algorithm as was introduced in the post on symmetric encryption.

Demo

Open the Sender console app we started building in the previous post. Add an app.config file to it where we’ll store the AES public key. Add the following app setting:

<configuration>
	<appSettings>
		<add key="RijndaelManagedKey" value="8B50BB68A8162E3D1E102556D2853291"/>
	</appSettings>
</configuration>

This is a 128bit key. It consists of 32 characters where each section comes in pairs according to the hexadecimal notation of a byte: 8B-50-BB etc. So there are 16 bytes stored in this string which is equal to 16 * 8 = 128 bits.

Note that the public key is included in the config file for convenience. In reality it should be stored in a more secure place, check out this post.

Insert a new class called SymmetricAlgorithmService to the project. Add the following private string to it:

private readonly string _mySymmetricPublicKey = ConfigurationManager.AppSettings["RijndaelManagedKey"];

You’ll need to add a reference to the System.Configuration library.

Let’s first create our Rijndael managed cipher. Add the following method to the service:

private RijndaelManaged CreateCipher()
{
	RijndaelManaged cipher = new RijndaelManaged();
	cipher.KeySize = 128;
	cipher.BlockSize = 128;
	cipher.Padding = PaddingMode.ISO10126;
	cipher.Mode = CipherMode.CBC;
	byte[] key = HexToByteArray(_mySymmetricPublicKey);
	cipher.Key = key;
	return cipher;
}

Consult the above links if you don’t know what Mode, PaddingMode etc. mean. HexToByteArray is another private method that does what the method name suggests: convert a hexadecimal string to a byte array.

private byte[] HexToByteArray(string hexString)
{
	if (0 != (hexString.Length % 2))
	{
		throw new ApplicationException("Hex string must be multiple of 2 in length");
	}

	int byteCount = hexString.Length / 2;
	byte[] byteValues = new byte[byteCount];
	for (int i = 0; i < byteCount; i++)
	{				
		byteValues[i] = Convert.ToByte(hexString.Substring(i * 2, 2), 16);
	}

	return byteValues;
}

We’re now ready to encrypt the message to be sent to the Receiver. Add the following method to the service:

public SymmetricEncryptionResult Encrypt(string plainText)
{
	SymmetricEncryptionResult res = new SymmetricEncryptionResult();
	RijndaelManaged rijndael = CreateCipher();
	res.InitialisationVector = Convert.ToBase64String(rijndael.IV);
	ICryptoTransform cryptoTransform = rijndael.CreateEncryptor();
	byte[] plain = Encoding.UTF8.GetBytes(plainText);
	byte[] cipherText = cryptoTransform.TransformFinalBlock(plain, 0, plain.Length);
	res.CipherText = Convert.ToBase64String(cipherText);
	return res;
}

…where SymmetricEncryptionResult is a DTO to include the parameters that the Receiver will need later on:

public class SymmetricEncryptionResult
{
	public string CipherText { get; set; }
	public string InitialisationVector { get; set; }
}

The symmetric encryption portion of the Sender is ready. Now insert a class called AsymmetricEncryptionService. It is very slim:

public class AsymmetricEncryptionService
{
	private RSACryptoServiceProvider _rsaPublicKeyForEncryption;

	public AsymmetricEncryptionService(RSACryptoServiceProvider rsaPublicKeyForEncryption)
	{
		_rsaPublicKeyForEncryption = rsaPublicKeyForEncryption;
	}

	public string GetCipherText(string plainText)
	{
		byte[] data = Encoding.UTF8.GetBytes(plainText);
		byte[] cipherText = _rsaPublicKeyForEncryption.Encrypt(data, false);
		return Convert.ToBase64String(cipherText);
	}
}

The RSACryptoServiceProvider object will be extracted from the PublicKeyResponse we got from the Receiver.

Locate the Main method. The last bit of code we entered in the previous post was the one that read the message to be sent from the console:

Console.Write("Public key request successful. Enter your message: ");
string message = Console.ReadLine();

Add the next two lines underneath:

SymmetricAlgorithmService symmetricService = new SymmetricAlgorithmService();
SymmetricEncryptionResult symmetricEncryptionResult = symmetricService.Encrypt(message);

Now we have the cipher text ready at this point. We’ll now encrypt the AES public key. Add the following lines immediately after:

AsymmetricEncryptionService asymmetricService = new AsymmetricEncryptionService(publicKeyResponse.RsaPublicKey);
string encryptedAesPublicKey =  asymmetricService.GetCipherText(ConfigurationManager.AppSettings["RijndaelManagedKey"]);

We now have all the necessary ingredients. We’ll wrap all these in a JSON message:

SendMessageArguments sendMessageArgs = new SendMessageArguments() { EncryptedPublicKey = encryptedAesPublicKey, 
	SymmetricEncryptionArgs = symmetricEncryptionResult, MessageId = publicKeyResponse.MessageId };
string jsonifiedArgs = JsonConvert.SerializeObject(sendMessageArgs);

…where SendMessageArguments is a wrapper DTO:

public class SendMessageArguments
{
	public SymmetricEncryptionResult SymmetricEncryptionArgs { get; set; }
	public string EncryptedPublicKey { get; set; }
	public Guid MessageId { get; set; }
}

We use Json.Net to build a JSON string out of this object.

Let’s see if it works up to now. Open and start the Receiver object. Then start the Sender. After it received the public key from the Receiver it will prompt the user for a message. Enter something and follow the code execution using F11. If everything goes well then you should have a JSON string ready to be sent to the Receiver. The structure of the JSON string should look like the following:

{"SymmetricEncryptionArgs":{"CipherText":"QPELLoPSNj9EsjnXNoK6ow==","InitialisationVector":"pq4reDIUEI3uNloYlwc06Q=="},"EncryptedPublicKey":"a jungle of characters","MessageId":"0509dc4e-3766-4308-afe7-2ecbe6504e81"}

The exact values will of course differ from what you got.

We’re now ready to send this message to the Receiver. If you haven’t done so yet then open the Receiver project. We’ll need to create a Controller for the incoming message. Right-click the Controllers folder in the Web layer and add an empty API controller called MessageController. We’re going to POST the message from the Sender and send along the JSON which should be translated into an object.

We’ll make the JSON translation as easy as possible so that we don’t need to be sidetracked by serialisation issues. If you haven’t done so yet add a folder called Requests to the ApplicationService layer and in it an object called ProcessSecretMessageRequest. It will have the same structure as SendMessageArguments on the Sender’s side.

Add the following objects to the Requests folder:

public class SymmetricEncryptionArguments
{
	public string CipherText { get; set; }
	public string InitialisationVector { get; set; }
}

ProcessSecretMessageRequest takes the following form:

public class ProcessSecretMessageRequest
{
	public SymmetricEncryptionArguments SymmetricEncryptionArgs { get; set; }
	public string EncryptedPublicKey { get; set; }
	public Guid MessageId { get; set; }
}

We’ll also want to notify the sender of the success/failure of the message transfer so add the following object to the Responses folder of the ApplicationService layer:

public class ProcessSecretMessageResponse : ServiceResponseBase
{
	public string SecretMessageProcessResult { get; set; }
}

Put the following Post method into MessageController:

public HttpResponseMessage Post(ProcessSecretMessageRequest secretMessageRequest)
{
	throw new NotImplementedException();
}

Let’s set up the Sender’s message-sending function. Add the following method to Program.cs:

private static void SendSecretMessageToReceiver(string jsonArguments)
{
	try
	{
        	HttpRequestMessage requestMessage = new HttpRequestMessage(HttpMethod.Post, _secretMessageServiceUri);
		requestMessage.Headers.ExpectContinue = false;
		requestMessage.Content = new StringContent(jsonArguments, Encoding.UTF8, "application/json");
		HttpClient httpClient = new HttpClient();
		Task<HttpResponseMessage> httpRequest = httpClient.SendAsync(requestMessage,
		HttpCompletionOption.ResponseContentRead, CancellationToken.None);
        	HttpResponseMessage httpResponse = httpRequest.Result;
		HttpStatusCode statusCode = httpResponse.StatusCode;
		HttpContent responseContent = httpResponse.Content;
		if (responseContent != null)
		{
			Task<String> stringContentsTask = responseContent.ReadAsStringAsync();
			String stringContents = stringContentsTask.Result;
                        Console.Write(stringContents);
		}
	}
	catch (Exception ex)
	{
		Console.WriteLine("Exception caught while sending the secret message to the Receiver: "
			+ ex.Message);
	}
}

…where _secretMessageServiceUri holds the URI to the MessageController:

private static Uri _secretMessageServiceUri = new Uri("http://localhost:7695/Message");

Modify the port as necessary. So we simply send a POST message to the web service and await a string response. Put a break point within the – yet unimplemented – Post() method of the MessageController. Start the web service application and then run the Sender app as well. Enter your secret message in the console and then you should see that the ingredients of the secret message have been translated by the JSON formatter:

Secret message values translated in web service

We’ll see in the next post how the Receiver processes and decrypts this message.

You can view the list of posts on Security and Cryptography here.

An encrypted messaging project in .NET with C# part 3: client proxy with web API

Introduction

In the previous post we finished building the backend part for the first step in the conversation between the sender and the receiver. The sender needs to get a valid one-time public key and a message ID from the receiver. The receiver will communicate with the receiver through a web API based web service.

The Web layer

In this section I’ll refer a lot to this post in the series on the DDD skeleton project. Make sure to get familiar with it as it contains a lot of information that’s relevant to this post. In that post I show you how to add a web API project and transform it so that it only contains the web service relevant parts. We don’t want to deal with views, JS files, images etc. in a web service project. I also go through the basics of how to install and use the IoC called StructureMap in an MVC-based project. It will be responsible for resolving dependencies such as the ones in this constructor:

public AsymmetricCryptographyApplicationService(IAsymmetricCryptographyService cryptographyInfrastructureService
			, IAsymmetricKeyRepositoryFactory asymmetricKeyRepositoryFactory)

Add a new MVC4 web application called Receiver.Web to the solution. Make sure to select the Web API template in the MVC4 Project Template window. Add a reference to all other layers – this is necessary for StructureMap as we’ll see in a bit.

Next get rid of the standard MVC4 web application components. Again, consult the above link to see how it can be done. Install StructureMap from NuGet. Locate the generated IoC.cs file in the DependencyResolution folder. Make sure it looks as follows:

public static IContainer Initialize()
{
	ObjectFactory.Initialize(x =>
		{
			x.Scan(scan =>
			{
				scan.TheCallingAssembly();
				scan.AssemblyContainingType<IAsymmetricCryptographyApplicationService>();
				scan.AssemblyContainingType<IAsymmetricCryptographyService>();
				scan.AssemblyContainingType<IAsymmetricKeyRepository>();
				scan.WithDefaultConventions();
			});
			x.For<IAsymmetricCryptographyService>().Use<RsaCryptographyService>();
			x.For<IAsymmetricKeyRepositoryFactory>().Use<LazySingletonAsymmetricKeyRepositoryFactory>();
                        x.For<ISymmetricEncryptionService>().Use<RijndaelSymmetricCryptographyService>();
		});
	ObjectFactory.AssertConfigurationIsValid();
        return ObjectFactory.Container;
}

Again, consult the above link if you don’t know what this code means. We tell StructureMap to look for concrete implementations of abstractions in the other layers of the application. We also tell it to pick the RSA implementation of the IAsymmetricCryptographyService interface and the InMemoryAsymmetricKeyRepositoryFactory implementation of the IAsymmetricKeyRepositoryFactory interface.

Add the following section to the Register method of WebApiConfig.cs in the App_Start folder to make sure that we respond with JSON. Web API seems to have an issue with serialising XML:

var json = config.Formatters.JsonFormatter;
json.SerializerSettings.PreserveReferencesHandling = Newtonsoft.Json.PreserveReferencesHandling.Objects;			
config.Formatters.Remove(config.Formatters.XmlFormatter);

In the same method you’ll see that the API calls are routed to api/controller/id by default. Remove the ‘api’ bit as follows:

config.Routes.MapHttpRoute(
	name: "DefaultApi",
	routeTemplate: "{controller}/{id}",
	defaults: new { id = RouteParameter.Optional }
	);	

Add a folder called Helpers to the web layer. Add the following two classes with extension methods:

public static class ExceptionDictionary
{
	public static HttpStatusCode ConvertToHttpStatusCode(this Exception exception)
	{
		Dictionary<Type, HttpStatusCode> dict = GetExceptionDictionary();
		if (dict.ContainsKey(exception.GetType()))
		{
			return dict[exception.GetType()];
		}
		return dict[typeof(Exception)];
	}

	private static Dictionary<Type, HttpStatusCode> GetExceptionDictionary()
	{
		Dictionary<Type, HttpStatusCode> dict = new Dictionary<Type, HttpStatusCode>();
		dict[typeof(ResourceNotFoundException)] = HttpStatusCode.NotFound;
		dict[typeof(Exception)] = HttpStatusCode.InternalServerError;
		return dict;
	}
}	
public static class HttpResponseBuilder
{	
	public static HttpResponseMessage BuildResponse(this HttpRequestMessage requestMessage, ServiceResponseBase baseResponse)
	{
		HttpStatusCode statusCode = HttpStatusCode.OK;
		if (baseResponse.Exception != null)
		{
			statusCode = baseResponse.Exception.ConvertToHttpStatusCode();
			HttpResponseMessage message = new HttpResponseMessage(statusCode);
			message.Content = new StringContent(baseResponse.Exception.Message);
			throw new HttpResponseException(message);
		}
		return requestMessage.CreateResponse<ServiceResponseBase>(statusCode, baseResponse);
	}
}

Set the namespace of both classes to Receiver.Web so that they are available from everywhere in the Web project without having to set using statements.

Add a new Web API controller in the Controllers folder. Name it PublicKeyController and make sure to select the Empty Api controller template in the Add Controller window. You’ll see that the controller derives from ApiController. The public key controller will depend on the IAsymmetricCryptographyApplicationService interface, so insert the following private field and constructor:

private readonly IAsymmetricCryptographyApplicationService _asymmetricCryptoApplicationService;

public PublicKeyController(IAsymmetricCryptographyApplicationService asymmetricCryptoApplicationService)
{
	if (asymmetricCryptoApplicationService == null) throw new ArgumentNullException("IAsymmetricCryptographyApplicationService");
	_asymmetricCryptoApplicationService = asymmetricCryptoApplicationService;
}

The client will call this controller to get a new public key and a message ID. Therefore we need a GET method that returns just these elements. The implementation is very simple:

public HttpResponseMessage Get()
{
	ServiceResponseBase response = _asymmetricCryptoApplicationService.GetAsymmetricPublicKey();
	return Request.BuildResponse(response);
}

We ask the application service to create the necessary elements and build a JSON response out of them. Set a breakpoint within AsymmetricCryptographyApplicationService.GetAsymmetricPublicKey(). Set the start page to PublicKey in properties of the web layer:

Set PublicKey as start page in web properties

Press F5 to start the application. Execution should stop at the breakpoint you set previously. Follow the code execution with F11 and see how the parts are connected. The new asymmetric key pair is generated and saved in the dictionary of the repository. At the end of the process the message ID and the public key should appear in the web browser:

RSA key printed in web browser

Take note of the URL, it will be the web service URL the sender will communicate with in the next step.

Now let’s see how this value can be read by a sender.

The sender

The sender will be a Console application that sends and receives HTTP messages to and from the web service. I won’t care too much about software practices here in order to save time.

Create a new Console application in Visual Studio and call it Sender. Add the following library references:

  • System.Net
  • System.Net.Http

Add a reference to Json.NET – previously known as NewtonSoft – through NuGet. We have contacted the Receiver before and we know that they now employ a standard RSA asymmetric algorithm for their encryption purposes. Synchronisation is vital in encryption scenarios otherwise the two parties will not be able to read each other’s messages.

Add the following service URI to Program.cs:

private static Uri _publicKeyServiceUri = new Uri("http://localhost:7695/PublicKey");

The port will almost certainly differ in your case so please modify it.

We’ll process the Json coming from the Receiver in the following object:

public class PublicKeyResponse
{
	public Guid MessageId { get; set; }
	public RSACryptoServiceProvider RsaPublicKey { get; set; }
}

From this post you’ll know that RSACryptoServiceProvider is the .NET implementation of the RSA asymmetric encryption.

Enter the following method to Program.cs:

private static PublicKeyResponse GetPublicKeyMessageId()
{
	PublicKeyResponse resp = new PublicKeyResponse();
	try
	{
		HttpRequestMessage requestMessage = new HttpRequestMessage(HttpMethod.Get, _publicKeyServiceUri);
		requestMessage.Headers.ExpectContinue = false;
		HttpClient httpClient = new HttpClient();
		httpClient.Timeout = new TimeSpan(0, 10, 0);
		Task<HttpResponseMessage> httpRequest = httpClient.SendAsync(requestMessage,
				HttpCompletionOption.ResponseContentRead, CancellationToken.None);
		HttpResponseMessage httpResponse = httpRequest.Result;
		HttpStatusCode statusCode = httpResponse.StatusCode;
		HttpContent responseContent = httpResponse.Content;
		if (responseContent != null)
		{
			Task<String> stringContentsTask = responseContent.ReadAsStringAsync();
			String stringContents = stringContentsTask.Result.Replace("$", string.Empty);
			XmlDocument doc = (XmlDocument)JsonConvert.DeserializeXmlNode(stringContents, "root");
			XmlElement root = doc.DocumentElement;
			XmlNode messageIdNode = root.SelectSingleNode("MessageId");
			resp.MessageId = Guid.Parse(doc.DocumentElement.SelectSingleNode("MessageId").InnerText);
					RSACryptoServiceProvider rsaProvider = new RSACryptoServiceProvider();
			rsaProvider.FromXmlString(doc.DocumentElement.SelectSingleNode("PublicKeyXml").InnerXml);
			resp.RsaPublicKey = rsaProvider;
		}
	}
	catch (Exception ex)
	{
		Console.WriteLine(ex.Message);
	}
	return resp;
}

Let’s see what’s going on here. We want to return a PublicKeyResponse object. We initiate a Http GET request using the HttpClient and HttpRequestMessage objects which are built-in components of the System.Net library. We send the request by calling the SendAsync method. We read the Http status code and the response content. We then extract the string message coming from the service, which is the JSON you saw in the web browser.

We want to transform the JSON into XML to take advantage of the FromXmlString method of the RSACryptoServiceProvider object. However, the JSON response includes an element ‘$id’ which invalidates the XML, the ‘$’ character is illegal. Hence we need to get rid of it. The JSON now looks as follows:

"id": "1",
"MessageId": "157a0890-be7d-4a25-bcf8-78829c99f13a",
"PublicKeyXml": {
"RSAKeyValue": {
"Modulus": "uB6pzihs7A70Su2J33SegPMkMXdWayRoqE57X94eyOPAeiPW+lMhy+pFxHNZ6+1+l35vRzcGZ8xL6AFKFiiriq1Dgu5WSqluBylkkWGTZfA+k7cpAh4CEEy0jg4BvPlxg/f7ufzLhy9iAGKARISKLBbCLIEeBpjqgyXEcW0tzrk=",
"Exponent": "AQAB"
}
},
"Exception": null

The exact values will certainly differ from what you see but the format should be the same.

There’s a very handy method in the Json.NET library which allows to transform a JSON string into an XmlDocument in the System.Xml namespace. This is done by the DeserializeXmlNode method. You’ll notice the “root” parameter. The things is that the current JSON format makes it difficult for the JSON converter to know what the root node is. As you know there’s no valid XML without a root node. Without this parameter you’ll get an exception:

JSON root object has multiple properties. The root object must have a single property in order to create a valid XML document. Consider specifying a DeserializeRootElementName.

After the conversion our XML should look like this:

<root>
	<id>1</id>
	<MessageId>4d38ee45-8c8a-4531-9513-765c5569c942</MessageId>
	<PublicKeyXml>
		<RSAKeyValue>
			<Modulus>kdl1gUhLj6RNk6Ppm5LC6mol1CcIXKft9O34naJLbAOy2720a1HshFfhjkvW4A6ibqhLJCo2N2IGfIBGNDaOeQfyzxvltC6Mvw3Zykxe4Jkmbv7cbzxpnZ20GMW1wCzmfGoqB36movrDqAn1c2ftiznhu0IbDY8GJf3bkB0SwFc=</Modulus>
			<Exponent>AQAB</Exponent>
		</RSAKeyValue>
	</PublicKeyXml>
	<Exception />
</root>

Then it’s only a matter of reading out the relevant nodes from the XML and populate the PublicKeyResponse object.

You can call this method from Main as follows:

PublicKeyResponse publicKeyResponse = GetPublicKeyMessageId();
if (publicKeyResponse.MessageId != null &amp;&amp; publicKeyResponse.RsaPublicKey != null)
{
	Console.Write("Public key request successful. Enter your message: ");
	string message = Console.ReadLine();
}
else
{
	Console.WriteLine("Public key request failed.");
}
Console.ReadKey();

We check if the public key request was successful and then ask the user to enter a message.

Make sure that the web API project is running and then start the Sender app. You can set a breakpoint within the Get method of the PublicKeyController of the Receiver to see the request come in. The Receiver will respond and the Sender will process the Json message. If everything goes well then you should have a populated PublicKeyResponse with a message id and an RSA public key.

So what happens with the message entered by the user? We’ll find out in the next post.

You can view the list of posts on Security and Cryptography here.

An encrypted messaging project in .NET with C# part 2: service and repository

Introduction

In the previous post we started building the foundations of an encrypted messaging project. To be exact we built a couple of objects in the Infrastructure layer to support the creation of new RSA key pairs.

We’ll now look at how the asymmetric key-pair can be stored, located and removed in a repository.

Repository

Insert a new class library called Receiver.Repository to the Receiver solution and add a reference to the Infrastructure layer. Add a new folder called “Cryptography”. The exact way how a key-pair can be stored can vary a lot: in a database, in memory, in a file, on a separate machine, etc. You can read more about key storage here. Therefore it sounds like a good idea to hide the implementation behind an interface. Add the following interface to the folder:

public interface IAsymmetricKeyRepository
{
	void Add(Guid messageId, AsymmetricKeyPairGenerationResult asymmetricKeyPair);
	AsymmetricKeyPairGenerationResult FindBy(Guid messageId);
	void Remove(Guid messageId);
}

We saw the AsymmetricKeyPairGenerationResult object in the previous post. The message ID, as discussed before, will be used to check the validity of the key supplied by the sender. We also need to be able to locate a key-pair by the message ID and remove a message id after it’s been used.

We’ll go with a simple in-memory implementation to make things simple. The repository will be instantiated using the singleton design pattern. Again, as the implementation is hidden behind an interface you can easily change your key storage strategy later on.

Add the following class to the folder:

public class InMemoryAsymmetricKeyRepository : IAsymmetricKeyRepository
{
	private Dictionary<Guid, AsymmetricKeyPairGenerationResult> _asymmetricKeyPairs;

	public InMemoryAsymmetricKeyRepository()
	{
		_asymmetricKeyPairs = new Dictionary<Guid, AsymmetricKeyPairGenerationResult>();
	}

	public void Add(Guid messageId, AsymmetricKeyPairGenerationResult asymmetricKeyPair)
	{
		_asymmetricKeyPairs[messageId] = asymmetricKeyPair;
	}

	public AsymmetricKeyPairGenerationResult FindBy(Guid messageId)
	{
		if (_asymmetricKeyPairs.ContainsKey(messageId))
		{
			return _asymmetricKeyPairs[messageId];
		}
		throw new KeyNotFoundException("Invalid message ID.");
	}

	public void Remove(Guid messageId)
	{
		if (_asymmetricKeyPairs.ContainsKey(messageId))
		{
			_asymmetricKeyPairs.Remove(messageId);
		}
	}

        public static InMemoryAsymmetricKeyRepository Instance
	{
		get
		{
			return Nested.instance;
		}
	}

	private class Nested
	{
		static Nested()
		{
		}
		internal static readonly InMemoryAsymmetricKeyRepository instance = new InMemoryAsymmetricKeyRepository();
	}
}

If you don’t understand what the Nested class and the Instance property mean then make sure to check out the link provided above on the Singleton design pattern.

We store the message ID and its asymmetric key-pair in a Dictionary. I believe it’s easy to follow the implementation: we add, find and remove elements in the dictionary.

We’ll need a couple of extra classes in order to get an instance of the repository. Add the following classes into the Cryptography folder:

public interface IAsymmetricKeyRepositoryFactory
{
	InMemoryAsymmetricKeyRepository Create();
}
public class LazySingletonAsymmetricKeyRepositoryFactory : IAsymmetricKeyRepositoryFactory
{
	public InMemoryAsymmetricKeyRepository Create()
	{
		return InMemoryAsymmetricKeyRepository.Instance;
	}
}

Check out this post to gain a full understanding on the purpose of the abstract factory and its implementation. We want to make sure that only a single instance of the InMemoryAsymmetricKeyRepository object is returned. We don’t want different sets of the _asymmetricKeyPairs dictionary fly around every time we need an InMemoryAsymmetricKeyRepository.

We’re actually done with the repository layer so let’s move on.

Application services

If you’ve read through this series then you’ll know what’s the purpose of the application service layer. In short it’s the thin connecting tissue between the consumer layer – MVC, web service, console and the like – and the backend parts. It should be void of any logic. It co-ordinates the tasks among its dependencies in order to respond to the consumer layer in a meaningful way. Make sure you read at least this post so that you become familiar with things like Request-Response and the ServiceResponseBase object. Those techniques will be reused here.

Add a new C# library called Receiver.ApplicationService to the solution. Add a folder called Interfaces. The first service we implement will need to provide a valid and unused pair of keys and a message ID to the consumer. Insert the following interface into the folder:

public interface IAsymmetricCryptographyApplicationService
{
	GetAsymmetricPublicKeyResponse GetAsymmetricPublicKey();
}

…where GetAsymmetricPublicKeyResponse is a simple wrapper. Add a new folder called Responses and in it add this object:

public class GetAsymmetricPublicKeyResponse : ServiceResponseBase
{
	public Guid MessageId { get; set; }
	public XDocument PublicKeyXml { get; set; }
}

The ServiceResponseBase is located in the Responses folder as well:

public abstract class ServiceResponseBase
{
	public ServiceResponseBase()
	{
		this.Exception = null;
	}

	/// <summary>
	/// Save the exception thrown so that consumers can read it
	/// </summary>
	public Exception Exception { get; set; }
}

Add a new folder called Implementations to the service layer. In it add the following implementation of the above interface:

public class AsymmetricCryptographyApplicationService : IAsymmetricCryptographyApplicationService
{
	private readonly IAsymmetricCryptographyService _cryptographyInfrastructureService;
	private readonly IAsymmetricKeyRepositoryFactory _asymmetricKeyRepositoryFactory;

	public AsymmetricCryptographyApplicationService(IAsymmetricCryptographyService cryptographyInfrastructureService
		, IAsymmetricKeyRepositoryFactory asymmetricKeyRepositoryFactory)
	{
		if (cryptographyInfrastructureService == null) throw new ArgumentNullException("IAsymmetricCryptographyService");
		if (asymmetricKeyRepositoryFactory == null) throw new ArgumentNullException("IAsymmetricKeyRepositoryFactory");
		_cryptographyInfrastructureService = cryptographyInfrastructureService;
		_asymmetricKeyRepositoryFactory = asymmetricKeyRepositoryFactory;
	}

	public GetAsymmetricPublicKeyResponse GetAsymmetricPublicKey()
	{
		GetAsymmetricPublicKeyResponse publicKeyResponse = new GetAsymmetricPublicKeyResponse();
		try
		{
			AsymmetricKeyPairGenerationResult asymmetricKeyPair = _cryptographyInfrastructureService.GenerateAsymmetricKeys();
			Guid messageId = Guid.NewGuid();
			publicKeyResponse.MessageId = messageId;
			publicKeyResponse.PublicKeyXml = asymmetricKeyPair.PublicKeyOnlyXml;
			_asymmetricKeyRepositoryFactory.Create().Add(messageId, asymmetricKeyPair);
		}
		catch (Exception ex)
		{
			publicKeyResponse.Exception = ex;
		}
		return publicKeyResponse;
	}
}

The implementation will need an IAsymmetricCryptographyService and an IAsymmetricKeyRepositoryFactory object to fulfil its job. It doesn’t care which exact implementations are injected through its constructor. We set some guard clauses in the constructor so that the injected dependencies won’t be null.

Take a look at the GetAsymmetricPublicKey() implementation. It first asks the crypto service in the infrastructure layer to generate the asymmetric keys. It then constructs a new GUID which will serve as the message ID, sets the appropriate properties of the GetAsymmetricPublicKeyResponse object and finally asks the repository to save the key pair and the message ID through the Create() method of the repository factory. We save any exceptions that may have been thrown along the way and return the response.

If you followed through the DDD project mentioned above, the next object will look familiar. Add a new folder called Exceptions to the project and insert the following custom Exception:

public class ResourceNotFoundException : Exception
{
	public ResourceNotFoundException(string message)
		: base(message)
	{ }

	public ResourceNotFoundException()
		: base("The requested resource was not found.")
	{ }
}

This will be used in cases where the resource requested by the Sender is not found by the Receiver.

This completes our service layer for the time being. In the next post we’ll start building the web service layer.

You can view the list of posts on Security and Cryptography here.

An encrypted messaging project in .NET with C# part 1: foundations

Introduction

In the past several posts we’ve discussed a number of issues in .NET cryptography. We’ll take now what we’ve learn and will apply it in a model project in .NET. We’ll focus mostly on symmetric and asymmetric encryption which we discussed here, here and here. The goals of the project are as follows:

  • Practice cryptography in a realistic web API project – at least as realistic as can be expected from a blog as opposed to an entire book
  • Show how asymmetric and symmetric encryption could be used in parallel to increase messaging security
  • Show how the public key of the asymmetric key pair can be used only once and refreshed for each new message
  • Be independent of digital certificates

You may be wondering about this last point so let me explain more. You may not always have access to a valid certificate from a CA. Also, a certificate has an expiry date and if you forget to renew it then messaging to and from your server can not be verified. So the goal here is to have secure messaging in place without having to purchase, install and maintain certificates.

Messaging flow

Recall the following from the posts on encryption mechanisms mentioned above:

  • Asymmetric encryption is safe but slow – in practice it is only used to encrypt short strings
  • Symmetric encryption has the problem of sharing public keys, but symmetric algorithms are fast

However, we still want to transfer large texts in a secure and fast way. The solution is to combine the two techniques. Imagine the following conversation between the Sender (S) and the Receiver (R):

S: Hello R, I want to send you a message so I need your asymmetric public key
R: Hello S, OK, here you are, you get two things: my asymmetric public key and a message ID. Use this message ID in your message to me
S: Thanks! I’ll encrypt my message using my symmetric public key, encrypt my symmetric public key with your asymmetric public key and attach the message ID as well. Here you are!
R: Great! I’ll verify if the message ID is still valid. If so, then I’ll decrypt your symmetric public key using my asymmetric private key and decrypt your message using the decrypted symmetric public key. I’ll then remove the asymmetric public key from the list of valid IDs.

I hope you could follow along. The process should be a lot clearer when we look at some code.

The front end of the receiver in this model project will be a Web API based web service. The overall structure of the application will follow that of the model DDD skeleton project we built up here although in a very simplified format. Here we don’t care about domains and domain logic, but we still want to build a layered application with good SOLID design. We could introduce a Domain project as well, but I don’t want to digress too much otherwise we’ll end up discussing stuff that’s not related to the main topic: entity base, value objects etc. In case you’d like to extend this cryptography project to a more Domain Driven Design type of application then check out the provided link – you’ll probably find enough information there to proceed.

We’ll of course test the application with a sender. The sender will be a simple console project, we don’t need anything more complicated.

The receiver

Open Visual Studio 2012/2013 and create a new blank solution called Receiver.

Add a class library called Receiver.Infrastructure to it. Delete Class1.cs and add a folder called Cryptography. If you don’t know the purpose of this layer, then in short the infrastructure layer is used to include classes that encapsulate cross-cutting concerns such as logging, caching, identification. It’s a container of objects and services that do not have any domain-specific roles and can be used in any other projects and layers.

The first function we want to implement in the project is the creation of a one-time asymmetric key pair that the sender can use. If you are familiar with good software engineering practices then you’ll know that it’s a good idea to abstract away dependencies. Here we want to hide the asymmetric key pair generation technique behind an interface. In most cases RSA will be the chosen technique, but there’s nothing stopping you from employing other algorithms such as DSA. Also, unit testing will be easier if you can inject any type of algorithm into the object that has this dependency. You can read more about unit testing and TDD here.

Add the following interface into the folder:

public interface IAsymmetricCryptographyService
{
	AsymmetricKeyPairGenerationResult GenerateAsymmetricKeys();
}

…where AsymmetricKeyPairGenerationResult looks like this:

public class AsymmetricKeyPairGenerationResult
{
	private XDocument _fullKeyPairXml;
	private XDocument _publicKeyOnlyXml;

	public AsymmetricKeyPairGenerationResult(XDocument fullKeyPairXml, XDocument publicKeyOnlyXml)
	{
		if (fullKeyPairXml == null) throw new ArgumentNullException("Full key pair XML");
		if (publicKeyOnlyXml == null) throw new ArgumentNullException("Public key only XML");
		_fullKeyPairXml = fullKeyPairXml;
		_publicKeyOnlyXml = publicKeyOnlyXml;
	}

	public XDocument FullKeyPairXml
	{
		get
		{
			return _fullKeyPairXml;
		}
	}

	public XDocument PublicKeyOnlyXml
	{
		get
		{
			return _publicKeyOnlyXml;
		}
	}
}

The purpose of the AsymmetricKeyPairGenerationResult object is to encapsulate the full asymmetric key pair and its public-key-only part in an object. If you recall from our discussion on asymmetric algorithms then the public key can be sent to anyone who wants to send a message to us. The full XML which includes the private key must stay safe. Therefore it’s reasonable to store them in two different XML objects.

You may be wondering why I chose to store them as XDocuments. I wanted to make sure that the implementing class returns the keys as valid XML so that it’s guaranteed that the sender will be able to extract the public key from it. The XDocument object will throw an error if you try to parse a string that’s not formatted correctly.

We know that RSA is supported in .NET. However, we cannot make the RSACryptoServiceProvider object implement our interface, right? The Adapter pattern is an easy way to bridge this problem. Insert the following implementation of this interface in the same folder:

public class RsaCryptographyService : IAsymmetricCryptographyService
{
	public AsymmetricKeyPairGenerationResult GenerateAsymmetricKeys()
	{
		RSACryptoServiceProvider myRSA = new RSACryptoServiceProvider();
		XDocument publicKeyXml = XDocument.Parse(myRSA.ToXmlString(false));
		XDocument fullKeyXml = XDocument.Parse(myRSA.ToXmlString(true));
		return new AsymmetricKeyPairGenerationResult(fullKeyXml, publicKeyXml);
	}
}

The RsaCryptographyService encapsulates the built-in RSACryptoServiceProvider object. With the RSACryptoServiceProvider object it’s very easy to generate new asymmetric key pair and export them to XML strings. The ‘false’ parameter means that we don’t want to put the private key into the XDocument object. We finally return the key generation result that holds the full key and the public key as XML.

In case you want to test a different asymmetric algorithm then you just create a different implementation of the IAsymmetricCryptographyService interface and encapsulate that algorithm.

That’s it for the Infrastructure layer. In the next post we’ll continue with the Repository layer.

You can view the list of posts on Security and Cryptography here.

Key size and key storage in .NET cryptography

Key size considerations

In the past several blog posts we talked a lot about how keys are used in symmetric and asymmetric cryptography. You’ve seen that they can come in different sizes – 128bit, 256bit etc.

There’s a trade-off between performance and security when it comes to key sizes. The larger the size the harder it is for an attacker to break it by brute force. However, large size keys make the encryption and decryption process slower, so you’ll need to consider just how important your data is. You’ll probably want to protect your bank account information as much as possible. Also, a bank account number is a short string so using asymmetric encryption in that case will not make must difference to the speed. On the other hand the contents of an unpublished book may not require the same degree of security.

If you go for a very small key, say 2 bits, then it will be easy to break as there are not many different values:

00,01,10,11

As you move up the bit size then the amount of different possibilities grows exponentially. A 512-bit key would take an immense amount of time to break by brute force. So for max security always take the highest available key size in .NET, such as a 256-bit key in Rijndael managed AES symmetric encryption. Then you can take up the fight with other developers who may be more concerned with performance. However, with the CPUs that are available today increasing the bit size from 128 to 256 will only decrease the performance by some milliseconds.

In other words if you are working with data that must be secured then make sure to set a high priority on the security implementation of your app. You can always make adjustments to this implementation if you see that your app is not as responsive as you want it to be.

RSA keys are normally a lot larger than those in AES: 1024, 2048 or 4096 bits. These sizes provide an enormous amount of bit combinations. In practice we take either the 2048 or 4096 bit key size.

Key storage

We mentioned key storage here and there throughout the posts on cryptography. Here again you’ll need to consider what type of blocking points you want to give to an attacker. In general never underestimate the tools available to an experienced hacker. What may seem impossible to extract to a normal user will be a piece of cake for a professional.

You may think that hardcoding your keys in your source files, such as…

private string _myKey = "234dfgdsfw4rfdvg";

…will be impossible to read on the server as you only deploy the compiled code, the DLLs, right? Well, there are disassemblers out there, such as ILDASM, that quickly uncover such values. There are many available tools that can do reflection on compiled code so if your keys are important then don’t save them in plain text in your source files.

Also, hard-coded strings can be read by other people in your organisation. Normally your source code is stored in some central storage such as GitHub or SVN so anyone who has access to those accounts can pull the data from it. I’m not saying that you should distrust your co-workers but if the keys are used to encrypt some vital data then again, don’t put them visible in a string.

We saw in the previous post how you can encrypt the appSettings section of the config file. You can then save the keys as app settings entries and encrypt the appSettings section. If you’re concerned that somebody may get access to the config file on the server then this is a good option as they will only get access to jumble of encrypted characters that they cannot read. Here again, other developers will be able to pull out sensitive data programmatically:

string key = ConfigurationManager.AppSettings["RsaKey"];

.NET will take care of the decryption automatically. We’re again talking about distrusting your colleagues, but when it comes to security then you’ll need to take on a “you never know” attitude if you’re the one responsible for writing the security part of the project.

You may even store the key in the Registry instead of the config file, that’s another option.

You can also have a remote service responsible for providing the correct key. In this scenario the key is not physically stored on the deployment server. The attacker who gained access to the server would need to be able to execute code from this server in order to get the key from the service.

With asymmetric encryption we can store the public key on the application server. It won’t do any harm if an attacker could read it as it’s only used for encryption. The private key can be stored on an intranet server that’s protected by the company firewall.

Other considerations

For even more security make sure you refresh your keys periodically. Don’t use the same keys for encryption and decryption for ever because if some hacker is watching this traffic then they will have a better starting point to guess what the keys are.

This point is important also because you may not even be aware that your cryptography has been broken. Some hacker may be happily sniffing your web traffic and extract all the data they need. They will most likely not tell you about it…

In the next post we’ll start looking at a simple cryptography project to see how a sender and a receiver can communicate using encrypted messages with symmetric and asymmetric techniques we’ve seen up to now.

You can view the list of posts on Security and Cryptography here.

How to protect your config file in .NET with cryptography

Introduction

In the past several blog posts we’ve looked at various cryptography techniques in .NET: hashing, symmetric and asymmetric encryption and digital signatures. Yet another application of encryption in .NET is protecting the config file of your project. The goal here is that if an attacker gains access to the file system on the application server then they shouldn’t be able to read any sensitive information from it.

The idea is that certain sensitive sections of the config file are encrypted and stored separate from the app.config or web.config files. These sections are then decrypted by ASP.NET automatically. We don’t need to worry about writing complicated decryption code ourselves. In practice this technique is applied to the app settings and connection settings section of the configuration. We can use encryption keys either at the machine or the user level.

We can take one of two approaches: DPAPI which is built-into Windows or RSA, which we discussed in the posts on asymmetric algorithms and digital signatures.

DPAPI

With DPAPI built into Windows we’ll use machine-specific keys so you don’t need to worry about key storage issues. Key storage is managed by DPAPI in a secure way. This approach is very straightforward to use on a single server as the key is specific to that machine. However, you cannot move that encrypted web.config to another server in a web farm as the other servers will have other keys. The RSA-based solution is better suited for web farms which we’ll look at shortly.

DPAPI demo

We’ll use the aspnet_regiis tool to encrypt and decrypt a file. You’ll need to have a project with either a web.config or app.config file. For this be meaningful insert a couple of app settings to the file, they don’t need to make any real sense:

<appSettings>
        <add key="secretKey" value="key" />
	<add key="rsaKey" value="rsaKey" />
	<add key="thisisgreat" value="true" />
	<add key="codetosavetheworld" value="secret" />
</appSettings>

The aspnet_regiis tool is usually located in one of these folders:

C:\Windows\Microsoft.NET\Framework\v4.0.30319
C:\Windows\Microsoft.NET\Framework64\v4.0.30319

Open a command prompt and navigate to the correct folder. Take note of the folder of your application where the config file is located. Enter the following command to encrypt the app settings section:

aspnet_regiis -pef “appSettings” C:\path-to-folder-with-config-file -prov “DataProtectionConfigurationProvider”

DataProtectionConfigurationProvider is the DPAPI provider so we ask the tool to encrypt the appSettings section of the config file with DPAPI.

If the process succeeded then open the config file and you should see some funny-looking EncryptedData and CipherData nodes:

<appSettings configProtectionProvider="DataProtectionConfigurationProvider">
  <EncryptedData>
   <CipherData>
    <CipherValue>AQAAANCMnd8BFdERjHoAwE/Cl+sBAAAARlLCV8A5OE2a9bhixy2JFwQAAAACAAAAAAADZgAAwAAAABAAAACtSLR5AiN84R+VKYn18+aPAAAAAASAAACgAAAAEAAAALygmbBS72xqElqrjz32sVmoAQAAFA+MvV+KYs/MZKMsCvYfapjetPvKgWjm/VNsyFkEaTx8A6z9PigAQdB/H64BOyTh5YVCcijhTrO8D6iU2LnXGwdhZeev4Rskk1AkliD+fLXvxfg7f9dnpjlI16694q60FrpDlIL9LQ9lqSUYgjsJvgZmfI48eXifGQ36HYTWYAWAjm2uQc6OUe2HlDdGr27nvZoVBZXy1Lho6JpiqRjD6VmbyH0TctysLCuzRrKx/8hPpIrrcvSVFcuNtFnbk2UGREt4Urh+TgMH8b5F2BM4jtN4jxblnyGbgwJKBMeheaypk2jctsKIkg6Ly8MhFDjgzJ/YqjV43ucnnt4HV13/TwHK1cvvfxQi5Xbs6vAqu4ZnaTfLdgecQ2JScTYbFoJKrti9quTKev3xOqtjj1vq2VC5mkTiSWxDfrVUH/nIZ3zXE6oGE1gQ9NXFZZ0iZ4casOe6Qq6u8hBLCTWVhdwlGftNAEbSILDdDMQUTCC8xeX2NHIukFRfCC9N6MoCqVFI6bkMj9ovDE//BqVGoLT/0VfmfzmDcXvV/PMJyLcuXnpHDJsPlgPyKxQAAADjr4S4XVr4grgNFiaLrr3waoMx3Q==</CipherValue>
   </CipherData>
  </EncryptedData>
 </appSettings>

Later when you try to extract some settings from the appsettings section in code then the decryption process will be performed for you so you can read values as before.

If you want to edit the app settings section then here’s the decryption command:

aspnet_regiis -pdf “appSettings” C:\path-to-folder-with-config-file

This will enable you to edit the appSettings section as normal.

RSA

If you want to reuse the same encrypted config file on multiple servers in a web farm then RSA is the best choice. The flow is the following from a high level:

  • Generate an RSA key-pair on the first server
  • Set up the local config provider for the customer key pair
  • Use aspnet_regiis to encrypt the sensitive sections in the config file
  • Grant access to the key for the Network Service account
  • Export the key pair for reuse on the other servers of the farm
  • On all other servers we import the key pair and grant Network Service access to it

RSA demo

In the post on asymmetric encryption we discussed how to generate and export RSA key pairs using aspnet_regiis. Make sure that the key-pair is exportable using the -exp flag. Let’s say that the key container is called “MyCustomKeys”:

aspnet_regiis -pc “MyCustomKeys” -exp

We need to set a reference to this container in the config file in a section called configProtectedData within the configuration root node. We also specify that we use RSA to do the file protection:

<configProtectedData>
	<providers>
		<add keyContainerName="MyCustomKeys"
				 useMachineContainer="true"
				 name="CustomProvider"
				 type="System.Configuration.RsaProtectedConfigurationProvider,System.Configuration, Version=2.0.0.0, Culture=neutral, PublicKeyToken=b03f5f7f11d50a3a"/>
	</providers>
</configProtectedData>

Again use aspnet_regiis to encrypt the appSettings section referring to the config protection provider we named “CustomProvider” in the configProtectedData:

aspnet_regiis -pef “appSettings” c:\path-to-folder-with-config-file -prov “CustomProvider”

You export those keys like this:

aspnet_regiis -px “CustomKeys” “c:\myCustomKeys.xml” -pri

This creates an XML file we’ve seen before.

This is how you import those keys on the other servers:

aspnet_regiis -pi “CustomKeys” “c:\myCustomKeys.xml”

Make sure to copy over the XML file of course.

Decrypting a config file is done the same way as before:

aspnet_regiis -pdf “appSettings” c:\path-to-folder-with-config-file

Just like with DPAPI you don’t need to set any decryption data yourself when you want to read some app settings in the config file, it’s performed for you automatically.

We also mentioned that Network Service will need access to those keys. Guess which tool can be used to achieve that… …aspnet_regiis of course!

The following command will do just that:

aspnet_regiis -pa “MyCustomKeys” “NT Authority\Network Service”

If this fails on one of the web farm machines then it might be that you need to grant access to the ID that the app-pool is running under:

aspnet_regiis -pa “CustomKeys” “IIS APPPOOL\.NET v4.5” -full

So in case decryption fails on the web servers then make sure you try both of these commands. You’ll obviously need to look up the app-pool ID for your website.

Protecting XML

To wrap up this post here comes a little note on XML strings in particular. The config file may not not be the only XML-formatted data the you want to protect. You may work a lot with XML in you code and you may want to protect portions of those strings. You can learn about the System.Security.Cryptography.Xml namespace on MSDN.

You can view the list of posts on Security and Cryptography here.

Elliot Balynn's Blog

A directory of wonderful thoughts

Software Engineering

Web development

Disparate Opinions

Various tidbits

chsakell's Blog

WEB APPLICATION DEVELOPMENT TUTORIALS WITH OPEN-SOURCE PROJECTS

Once Upon a Camayoc

ARCHIVED: Bite-size insight on Cyber Security for the not too technical.