Introduction to OAuth2 part 3: the code flow
January 27, 2014 1 Comment
Introduction
Flows are a very important concept in the OAuth2 security chain. Flows describe the way how a client can get hold of the identification token in order to access a protected resource.
There are four different flows according to the OAuth2 specification:
- Code flow
- Implicit flow
- Resource owner flow
- Client flow
Let’s look at the code flow first in a bit more detail. The posts that follow will discuss the other flows in the list.
Authorisation Code Flow
This flow is most often used for web application clients. The web application wants to access a resource owned by the resource owner. The owner doesn’t want to give a full-access password to the application. Instead they will rely on an OAuth2 service to retrieve a limited-access token.
The web application will first ask an authorisation server for the token via a GET request. A typical URI to get that token may look like this:
GET /auth?client_id=greatapp_id&scope=protected_resource&redirect_uri=http://greatapp/callback&response_type=code&state=123
the URI consists of the following elements:
- client_id: the name of the client that’s trying to access the resource. The client needs to be registered with the auth server. So before anything can happen the client needs to go through this registration step.
- scope: the name of the resource the client is trying to access
- redirect_uri: the URI to redirect to upon retrieving the resource. This is a callback URI through which the auth server will send back a so-called authorisation code
- state: an optional random number that the client provides. It can be stored locally and can be used as a correlation ID. The auth server will send back the state parameter in its response so that the client can match it up with what it has saved locally. This is a good protection against Cross Site Request Forgery
So the GET request arrives at the auth server. The client will need to authenticate itself. That’s when you see these login screens that are becoming ubiquitous in the world of Facebook, Twitter, Google etc. identification scenarios, e.g.:

Without this step the auth server will not be able to make any security decisions.
The full GET request by Google in this example looks like this:
https://accounts.google.com/o/oauth2/auth?response_type=code&client_id=108380595987-4e427srhd9jr0lsnohleutb2ilbuof70.apps.googleusercontent.com&redirect_uri=https%3A%2F%2Fpublic-api.wordpress.com%2Fconnect%2F%3Fmagic%3Dkeyring%26service%3Dgoogle_plus%26action%3Dverify&state=8183180&scope=https%3A%2F%2Fwww.googleapis.com%2Fauth%2Fplus.stream.write+https%3A%2F%2Fwww.googleapis.com%2Fauth%2Fplus.login&access_type=offline&approval_prompt=force&request_visible_actions=http%3A%2F%2Fschemas.google.com%2FCreateActivity
…which has the following – by now familiar – sections:
- response_type=code
- client_id=108380595987-4e427srhd9jr0lsnohleutb2ilbuof70.apps.googleusercontent.com
- scope=https%3A%2F%2Fwww.googleapis.com%2Fauth%2Fplus.stream.write+https%3A%2F%2Fwww.googleapis.com%2Fauth%2Fplus.login
- redirect_uri=https%3A%2F%2Fpublic-api.wordpress.com%2Fconnect%2F%3Fmagic%3Dkeyring%26service%3Dgoogle_plus%26action%3Dverify&state=8183180&scope=https%3A%2F%2Fwww.googleapis.com%2Fauth%2Fplus.stream.write+https%3A%2F%2Fwww.googleapis.com%2Fauth%2Fplus.login&access_type=offline
- state=8183180
…and some other sections as well, but these are the most important ones I believe.
Next, the client will have to give its consent on the so-called consent screen:

So you see that it is WordPress that’s making the request. An informative consent screen will also tell you which resources the requesting application wants to gain access to. This screen is a question to the user: do you agree that the WordPress client gains access to some specific Google+ resources about you? Then you can say yes or no.
If you say yes then Google auth server will give WordPress an auth token with just enough claims to access the requested resources.
Here’s another example by Twitter:
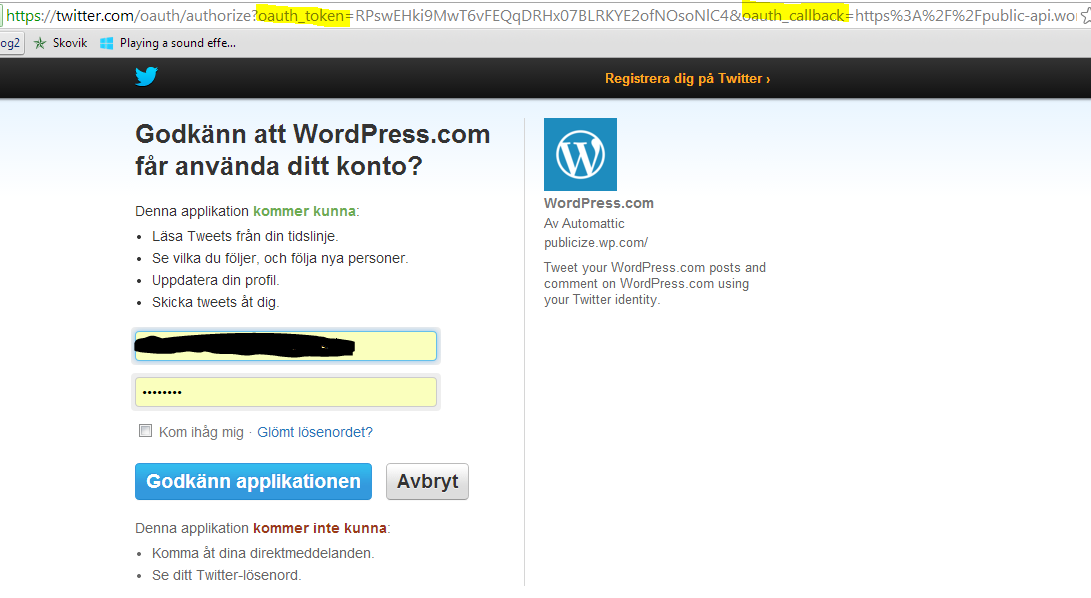
The point is that the requesting client – WordPress – will get some limited amount of access to resources owned by someone else without giving out the password which would give them full access.
The consent screen is a very important step. If you’re planning to build a custom OAuth server then make sure to make this screen as informative as possible. An extra option is setting a time limit to access rights.
If you click OK then the auth server will redirect you to the callback URI and present the authorisation code to the requesting application. The auth code is not yet the access token. The token is requested in the next step.
Now that the client application has the auth code it will directly ask the auth server for the token. The communication takes the form of a POST request that includes the following parameters:
grant_type=authorization_code&authorization_code=same_code_that_was_provided_in_the_first_response_from_auth_server&redirect_uri=must_be_same_as_before_so_that_auth_server_can_verify_validity
The client will have to authenticate with the auth server using the credentials it received during the initial registration process mentioned above. The client will send the auth code to the auth server. The auth server will verify its validity and that the code belongs to the original requesting application. If the auth server is happy then it sends back a JSON formatted token. In a reduced form it can look like the following:
{
"access_token" : "some name"
, "expires_in": "number of seconds"
, "token_type": "Bearer"
}
An access_token coupled with the expires_in parameter is a token with a time limit on its validity. The client will get access to the resource with this access token. We’ll discuss bearer tokens in a later post.
As you see the access token has a limit on its validity as defined by the expires_in parameter. If it’s set to 10 minutes then the client loses its access to the protected resource after 10 minutes. The user will then need to go through the consent process. The client will also need to ask for a new token. That’s certainly an option but it’s not very efficient. Imagine having to give consent to show your tweets on a page, such as here on WordPress, every 10 minutes otherwise the service stops.
Instead the JSON token can be extended with a refresh_token parameter:
{
"access_token" : "some name"
, "expires_in": "number of seconds"
, "token_type": "Bearer"
, "refresh_token": "some name"
}
With this extended token the application will be able to request new tokens without the user giving consent every time. It sends a POST request to the auth server with the following parameters:
grant_type=refresh_token&refresh_token=(same name as the refresh_token parameter in the JSON above)
The token will also contain a range of other things, such as claims and a signature. Please refer to this post for an introduction on JSON Web Tokens. Keep in mind that it’s up to you as the application developer to decide which claims need to be included in the full access token.
From this point on with refresh tokens the application will have access to the resource for ever which is not always desired. Normally an application will let you remove your consent, such as the following screen in WordPress:

Read the next part in this series here.
You can view the list of posts on Security and Cryptography here.


Hi, how can I pass state on request?