Introduction to Amazon Code Pipeline with Java part 4: comparison with TeamCity and Jenkins

Introduction

In the previous post we saw how to add a custom job runner of type Test to an existing pipeline. These runners cannot be added to a pipeline during the setup process, they can be applied when updating one instead. We went through an example with the Apica Loadtest job runner and saw how to specify the necessary inputs for the job that the runner executes.

In this post we’ll discuss some of the key differences between TeamCity/Jenkins and CodePipeline (CP). TeamCity (TC) and Jenkins are quite similar so I will treat them as a group for this discussion.

Read more of this post

Advertisement

Creating an Amazon Beanstalk wrapper around a Kinesis application in Java

Introduction

Suppose that you have a Java Amazon Kinesis application which handles messages from the Amazon message queue handler Kinesis. This means that you have a method that starts a Worker object in the com.amazonaws.services.kinesis.clientlibrary.lib.worker library.

If you are developing an application that is meant to process messages from Amazon Kinesis and you don’t know what I mean by a Kinesis app then check out the Amazon documentation on the Kinesis Client Library (KCL) here.

The starting point for this post is that you have a KCL application and want to host it somewhere. One possibility is to deploy it on Amazon Elastic Beanstalk. You cannot simply deploy a KCL application as it is. You’ll need to wrap it within a special Kinesis Beanstalk worker wrapper.

The Beanstalk wrapper application

The wrapper is a very thin Java Maven web application which can be deployed as a .war file. If you’ve done any web-based Java development then the .war file extension will be familiar to you. It’s really like a .zip file that contains the project – you can even rename a .war file to a .zip file and unpack it like you would do with any compressed .zip file.

The wrapper can be cloned from GitHub. Once you have cloned it onto your computer you can open with a Java IDE such as NetBeans or Eclipse. I personally use NetBeans so the snapshots will show that environment. You’ll see the following folders after opening the project:

Beanstalk wrapper in NetBeans

NetBeans will load the dependencies in the POM file automatically. If you’re using something else or prefer to run Maven from the command prompt then here’s the mvn command to execute:

mvn clean compile war:war

The .war file will be placed in the “target” folder as expected. The wrapper will have all the basic dependencies to run an Amazon app such as the AWS SDK, Jackson, various Apache packages etc. In case your KCL app has some external dependencies on its own then those will need to be part of the wrapper app as well. Example: in my case one dependency of my KCL app was commons-collections4-4.0.jar. As this particular Apache dependency wasn’t by default available in the Beanstalk KCL wrapper I had to add it to its POM file. Do that for any such dependency.

The Source Packages folder includes a single Java file called KinesisWorkerServletInitiator.java. It is very short and has the following characteristics:

  • The overridden contextInitialized method will be executed automatically upon application start
  • It will look for a value in a query parameter called “PARAM1”
  • PARAM1 is supposed to be a fully qualified class name
  • The class name refers to a class in the Kinesis application that includes a public parameterless method called “run”
  • KinesisWorkerServletInitiator.java will look for this method and execute it through Reflection

We’ll come back to PARAM1 shortly.

So you’ll need to have a public method called “run” in the KCL app that the wrapper can call upon. Note that you of course change the body of the Kinesis wrapper as you wish. In my case I had to pass in a string parameter to the “run” method so I modified the Reflection code to look for a “run” method which accept a single string argument:

final Class consumerClass = (Class) Class.forName(consumerClassName);
final Method runMethod = consumerClass.getMethod("run", String.class);
runMethod.setAccessible(true);
final Object consumer = consumerClass.newInstance();

.
.
.

@Override
public void run()
{
         try
         {
               m.invoke(o, messageType);
         } catch (Exception e)
         {
               e.printStackTrace();
               LOG.error(e);
         }
}

You can put the run method anywhere – or even change its name and the wrapper app implementation will need to follow. I’ve put mine in the same place as the main method – the “run” method is really nothing else than the KCL application entry point from the Beanstalk wrapper’s point of view. When you test the KCL app locally then the main method will be executed first. When you run it from Beanstalk “run” will be executed first. Therefore the easiest implementation is simply to call “run” from “main” but you may have different needs for local execution. Anyway, you probably get the idea with the “run” method: it will start a Worker which in turn will process the Kinesis messages as you implemented the IRecordProcessor.processRecords method.

Take note of the full name of the class that has the run method. Open the containing class and check the package name, say “com.company.kinesismessageprocessor”. Then check the class name such as KinesisApplication so the full name will be com.company.kinesismessageprocessor.KinesisApplication. You can even put this as a default consumer class name in the Beanstalk wrapper in case PARAM1 is not available:

@Override
public void contextInitialized(ServletContextEvent arg0)
{
        String consumerClassName = System.getProperty(param);
        if (consumerClassName == null) 
        {
            consumerClassName = defaultConsumingClass;
        }
.
.
.
}

…where defaultConsumingClass is a private String holding the above mentioned class name.

The actual wrapping

Now we need to put the KCL application into the wrapper. Compile the KCL app into a JAR file. Copy the JAR file into the following directory of the Beanstalk wrapper web app:

drive:\directory-to-wrapper\src\main\WebContent\WEB-INF\lib

The JAR file should be visible in the project. In my case it looks as follows:

Drop KCL app into Beanstalk wrapper

Compile the wrapper app and the .war file should be ready for upload

Upload

While creating a new application in Beanstalk you will be able to upload the .war file. You’ll be able to upload a new version through the UI of the application:

Beanstalk deployment UI

You’ll be able to configure the Beanstalk app using the Configuration link on the left hand panel:

Configuration link for a Beanstalk app

This is where you can set the value for PARAM1:

Software configuration link in Beanstalk

Define PARAM1 for Beanstalk app

You’ll be able to enter the fully qualified name of the consumer class with the method “run” in the above table. If you don’t like the name “PARAM1” you can add your own parameters in the bottom of the screen and modify the name in code as well.

Troubleshooting

You can always look at the logs:

Request logs from Beanstalk app

You can then search for “exception” or “error” in the log file to check if e.g. an unhandled exception occurred in the application which stops it from functioning correctly.

A common issue is related to roles. When you created the Beanstalk app you have to select a specific IAM role here:

Select IAM role in Beanstalk app

The Beanstalk app will run under the selected role. If the KCL app needs to access other Amazon services, such as S3 or DynamoDb then the selected role must have access to those resources at the level defined by the KCL app. E.g. if the KCL app needs to put a record into a DynamoDb table then the Beanstalk role must have “dynamodb:PutItem” defined. You can edit this in the IAM console available here. Select the appropriate role and extend the role JSON under “Manage policy”:

Modify role in IAM console

View all posts related to Amazon Web Services here.

An example of using ShellCommandActivity on Amazon Data Pipeline

Introduction

Amazon Data Pipeline helps you automate recurring tasks and data import/export in the AWS environment.

In this post we’ll go through a very specific example of using Data Pipeline: run an arbitrary JAR file from an EC2 instance through a bash script. This may not be something you do every single day but I really could have used an example when I went through this process in a recent project.

The scenario is the following:

  • You are working on a project within the Amazon web services environment
  • You have a compiled JAR file saved on S3
  • The JAR file can carry out ANY activity – it can range from printing “Hello world” to the console window to a complex application that interacts with databases and/or other Amazon components to perform some composite action
  • You’d like to execute this file automatically with logging and retries

In that case Data Pipeline is an option to consider. It has several so-called activity types, like CopyActivity, HiveActivity or RedShiftCopyActivity. I won’t go into any of these – I’m not sure how to use them and I’d like to concentrate on the solution to the problem outlined above.

Scripts

The activity type to pick in this case is ShellCommandActivity. It allows you to run a Linux bash script on an EC2 instance – or an Elastic MapReduce instance, but I didn’t see any use of that in my case. You’ll need at least 2 elements: the JAR file to be executed and a bash script which loads the JAR file onto the EC2 instance created by Data Pipeline and then executes it.

So say you have the following compiled Java application in S3:

JAR file in S3

The accompanying bash script is extremely simple but make sure you create it in a Linux-based editor or, if you want to edit the script in Windows, in a Windows-compatible bash script editor. Do not create the script in a Windows-based text editor like Notepad or Notepad++. The linefeed character won’t be properly recognised by the Linux EC2 instance trying to run the script. You may see some strange behaviour such as the JAR file is downloaded but then it cannot be located.

Create a bash script with the following 2 rows:

aws s3 cp s3://bucket-for-blog/SimpleModelJarForDataPipeline.jar /home/ec2-user/SimpleModelJarForDataPipeline.jar
java -jar /home/ec2-user/SimpleModelJarForDataPipeline.jar

The first line calls upon the Amazon CLI to copy a file located on S3 into the /home/ec2-user/ folder on the generated EC2 machine. Data Pipeline will access the new EC2 instance under the default “ec2-user” username, i.e. not admin which can lead to authorisation problems. E.g. if the ec2-user won’t be able to save the file to just any folder on the EC2 instance so it’s wise to select the default home directory of that user.

The second line then executes the JAR file with standard java -jar.

Save the script, upload it to S3 and take note of its URL, such as s3://scripts/taskrunner.sh

Setting up Data Pipeline

Then in the Data Pipeline console you can create a new pipeline as follows:

1. Click “Create new pipeline”: Create new pipeline button

2. Give it some name, description, a schedule and a bucket for the logs in the Create Pipeline window and click Create

3. A new screen will open where you can add Activities, data nodes and do some other stuff:

Create pipeline UI

You’ll see a panel on the right hand side of the screen with headers like Activities, DataNodes, Schedules etc.

4. Click the Add activity button. This will add a new activity with some default name like “DefaultActivity1” and the Activities section will open automatically.

5. Give the activity some name, select ShellCommandActivity as the type, the Schedule drop down should be populated with a name based on what type of schedule you created in the Create Pipeline window.

6. In the Add an optional field… drop-down select Script Uri and enter the S3 location of the bash script we created above.

7. In the Add an optional field… drop-down select Runs On. This will open a new drop-down list, select “Create new: Resource”. This will create a new Resource for you under the Resources tab although this is not visible for you at first. It will get the default name “DefaultResource1”.

8. Expand the Schedules tab and modify the schedule if necessary

9. Expand the Resources tab. Add the resource some name instead of “DefaultResource1”. This will automatically overwrite the resource name in the activity you created in step 7.

10. For the type select Ec2Resource. This will populate the Role and Resource Role drop down lists to DataPipelineDefaultRole and DataPipelineDefaultResourceRole. This means that the EC2 resource will execute the job with the rights defined for the DataPipelineDefaultResourceRole. We’ll come back to this a little later. You can leave these values as they are or change to a different role available among the drop-down values.

11. Add the following optional fields:

That’s it, click Save pipeline. DP will probably complain about some validation exceptions. Review them under Errors/Warnings. Example messages:

  • Insufficient permission to describe key pair
  • Insufficient permission to describe image id
  • resourceRole ‘…’ has insufficient permissions to run datapipeline due to…

This last message is followed by a long range of missing role types. Frankly, I don’t know why these messages appear and how to make them go away, but I simply chose to ignore them and the pipeline will still work.

Then click Save pipeline and you should be good to go. There will be stderr and stdout messages to review any messages and exceptions during the JAR file execution.

Before we finish here’s one tip regarding the DataPipelineDefaultResourceRole role. If your JAR file accesses other AWS resources, such as DynamoDb or S3, then it may fail. Review the stderr output after the job has been executed, you may see something similar:

IAM to be extended

You see that DataPipelineDefaultResourceRole has no rights to execute the ListClusters action on an Elastic MapReduce cluster. In this case you need to extend the permissions of the role in the IAM console. Click “Roles” on the left hand panel, select DataPipelineDefaultResourceRole and then click “Manage Policy”:

Manage role IAM

You’ll see a list of permissions as JSON. In the above case I would extend the JSON with the following:

“elasticmapreduce:ListClusters”

…i.e. exactly as it said in the exception message.

Depending on your exception you may need to add something else, like “dynamodb:Scan” or “cloudwatch:PutMetricData”.

View all posts related to Amazon Web Services here.

How to manage Amazon Machine Images with the .NET Amazon SDK Part 2: monitoring and terminating AMI instances, managing Security Groups

In the previous post we successfully sent a launch request to the selected AMI. We’ll now see how to monitor its status and terminate it.

Open up the Console application we worked on previously. We finished off where the user selected an AMI and we sent a launch request to EC2 in order to get one instance running of that AMI. The method that retrieves the status of the machine looks as follows:

private static string RetrieveInstanceStatus(string instanceId, Region selectedRegion)
{
	AmazonEC2Client amazonEc2client = GetAmazonClient(selectedRegion.Endpoint);
	try
	{
		DescribeInstancesRequest instancesRequest = new DescribeInstancesRequest();
		Filter filter = new Filter();
		filter.Name = "instance-id";
		filter.Value = new List<string>() { instanceId };
		instancesRequest.Filter = new List<Filter>() { filter };
		DescribeInstancesResponse instancesResponse = amazonEc2client.DescribeInstances(instancesRequest);
		DescribeInstancesResult instancesResult = instancesResponse.DescribeInstancesResult;
		Reservation reservations = instancesResult.Reservation[0];
		RunningInstance runningInstance = reservations.RunningInstance[0];
		return runningInstance.InstanceState.Name;
	}
	catch
	{
		throw;
	}
}

Most of the code will look familiar from the previous post. We send in the selected region and the ID of the instance of the selected AMI. Remember that we requested to start up exactly one instance of the AMI. When you launch that instance then the instance will get a unique id which is a property of the RunningInstance object. The LaunchImage method returned a list of RunningInstance objects where we’ll find that ID, we’ll get to that in a second. Back in the above method we’ll set a filter to the DescribeInstancesRequest object as we’re only interested in that very instance. We don’t care about the status of other instances. Again, as we know that we only launched one instance it’s OK to return the first element in the Reservation and RunningInstance collections which we get back from the DescribeInstancesResult object.

A short aside: it’s perfectly feasible to start multiple instances of the same image. You’ll need to set the MinCount and MaxCount properties of the RunInstancesRequest object accordingly. Take a look at the LaunchImage method we implemented earlier. This returns a list of RunningInstance objects that you can use to collect all the individual instance IDs. The instance ID list can be sent into a slightly modified RetrieveInstanceStatus method which accepts a list of instance ids instead of just one instance id as in this specific implementation. The filter value of the DescribeInstancesRequest will then be set to the list of IDs and you’ll get back the status of all instances.

Let’s add one more helper method to Program.cs that loops until the image instance has reached the “running” state:

private static void MonitorInstanceStartup(string instanceId, Region selectedRegion)
{
	string status = "N/A";
	while (status != "running")
	{
		status = RetrieveInstanceStatus(instanceId, selectedRegion);
		Console.WriteLine(string.Format("Current status of instance {0}: {1}", instanceId, status));
		Thread.Sleep(1000);
	}
}

So we simply wait for the machine to reach the “running” state. The extended Main method looks like this:

static void Main(string[] args)
{
	List<Region> amazonRegions = GetAmazonRegions();
	PrintAmazonRegions(amazonRegions);
	int usersChoice = GetSelectedRegionOfUser(amazonRegions);
	Region selectedRegion = amazonRegions[usersChoice - 1];
	List<Amazon.EC2.Model.Image> imagesInRegion = GetSuitableImages(selectedRegion);
	PrintAmis(imagesInRegion);
	int usersImageChoice = GetSelectedImageOfUser(imagesInRegion);
	Image selectedImage = imagesInRegion[usersImageChoice - 1];
	List<RunningInstance> launchedInstances = LaunchImage(selectedImage, selectedRegion);
	MonitorInstanceStartup(launchedInstances[0].InstanceId, selectedRegion);

	Console.ReadKey();
}

Let’s run the app. If everything goes well then you should see an output similar to this:

Polling instance until running

I’ll check in the EC2 management window as well:

Instance running in AWS manager

A word of caution: although the state of the machine is running it really should say ‘initialising’ at first and then running. You’ll notice that it doesn’t take long to reach the running state, maybe 10-15 seconds. However, the instance may not reach a truly usable “running” state until 2-3 more minutes. “Running” can be compared to the first blue screen on a Windows machine where it says “Starting Windows”. That is not really running yet, right? And then the startup process runs, extra applications and processes are loaded etc. and when all that’s done then you can start working on your machine normally.

Let’s see how we can terminate the instance:

private static Tuple<string, string> TerminateInstance(string instanceId, Region selectedRegion)
{
	AmazonEC2Client amazonEc2client = GetAmazonClient(selectedRegion.Endpoint);
	try
	{
		TerminateInstancesRequest terminateRequest = new TerminateInstancesRequest();
		terminateRequest.InstanceId = new List<string>() { instanceId };
		TerminateInstancesResponse terminateResponse = amazonEc2client.TerminateInstances(terminateRequest);
		TerminateInstancesResult terminateResult = terminateResponse.TerminateInstancesResult;
		List<InstanceStateChange> stateChanges = terminateResult.TerminatingInstance;
		return new Tuple<string, string>(stateChanges[0].CurrentState.Name, stateChanges[0].PreviousState.Name);
	}
	catch
	{
		throw;
	}
}

As usual we set the current region in the Amazon client. Then we send a TerminateInstancesRequest whose purpose is quite self-explanatory I believe. You can terminate multiple instances by sending in a list of instance ids. In our case it’s a list containing one element only. We get back a list of InstanceStateChange object where we can read among other things the current state of the Instance and the state that it had just before the termination request was made.

Run the application and you may see an output similar to the following:

Instance state shutting down

So you see that the “running” state changes to “shutting-down” after the termination request was issued. Let’s also monitor the shutting-down phase until the instance is fully terminated:

private static void MonitorInstanceShutdown(string instanceId, Region selectedRegion)
{
	string status = "N/A";
	while (status != "terminated")
	{
		status = RetrieveInstanceStatus(instanceId, selectedRegion);
		Console.WriteLine(string.Format("Current status of instance {0}: {1}", instanceId, status));
		Thread.Sleep(1000);
	}
}

Add the following to Main:

MonitorInstanceShutdown(launchedInstances[0].InstanceId, selectedRegion);

Run the application and you may see something similar to this:

Instance status terminated

Let’s check in the EC2 manager as well just to make sure it worked:

Instance state terminated in AWS manager

Security groups

A security group is a firewall to control the access to the instances. You can read about it on the AWS website here. You can control Security Groups programmatically.

Use the following code to search for a certain security group by name:

private static void SearchSecurityGroup(Region selectedRegion)
{
	DescribeSecurityGroupsRequest securityGroupRequest = new DescribeSecurityGroupsRequest();
	Filter groupNameFilter = new Filter();
	groupNameFilter.Name = "group-name";
	groupNameFilter.Value = new List<String>() { "Security group name" };
	List<Filter> securityGroupRequestFilter = new List<Filter>();
	securityGroupRequestFilter.Add(groupNameFilter);
	securityGroupRequest.Filter = securityGroupRequestFilter;
	DescribeSecurityGroupsResponse securityGroupResponse = GetAmazonClient(selectedRegion.Endpoint).DescribeSecurityGroups(securityGroupRequest);
	DescribeSecurityGroupsResult securityGroupResult = securityGroupResponse.DescribeSecurityGroupsResult;
	List<SecurityGroup> securityGroups = securityGroupResult.SecurityGroup;
}

The code follows the AWS SDK style we’ve seen so far: construct a Request object, set a Filter on it, send the request to the selected region and read the result from the Response. I encourage you to inspect the SecurityGroup object to see what properties can be extracted from it.

You can inspect the Ip permissions of the selected security group as follows:

private static void InspectIpPermissions(SecurityGroup selectedSecurityGroup)
{
	List<IpPermission> ipPermissions = selectedSecurityGroup.IpPermission;
	foreach (IpPermission ipPermission in ipPermissions)
	{
		StringBuilder ipRangeBuilder = new StringBuilder();
		foreach (String ipRange in ipPermission.IpRange)
		{
			ipRangeBuilder.Append(ipRange).Append(", ");
		}
		Console.WriteLine(string.Format("Protocol: {0}, from port: {1}, to port: {2}, ip range: {3}", ipPermission.IpProtocol	, ipPermission.FromPort, ipPermission.ToPort, ipRangeBuilder.ToString()));
	}
}

You can extract the IP and port ranges and some other properties of the IpPermission object.

The following method creates a new Security Group and opens up port HTTP and HTTPS traffic for all incoming IPs on the TCP protocol:

private static void CreateSecurityGroup(Region selectedRegion)
{
	CreateSecurityGroupRequest createGroupRequest = new CreateSecurityGroupRequest();
	createGroupRequest.GroupName = "Security group name";
	createGroupRequest.GroupDescription = "Security group description";
	AmazonEC2Client amazonEc2Client = GetAmazonClient(selectedRegion.Endpoint);
	amazonEc2Client.CreateSecurityGroup(createGroupRequest);
	int[] ports = { 80, 443 };
	foreach (int i in ports)
	{
		AuthorizeSecurityGroupIngressRequest ingressRequest = new AuthorizeSecurityGroupIngressRequest();
		ingressRequest.GroupName = "Security group name";
		ingressRequest.IpProtocol = "tcp";
		ingressRequest.FromPort = i;
		ingressRequest.ToPort = i;
		ingressRequest.CidrIp = "0.0.0.0/0";
		amazonEc2Client.AuthorizeSecurityGroupIngress(ingressRequest);
	}
}

You can also remove Security Groups using the following code:

private static void DeleteSecurityGroup(Region selectedRegion)
{
	AmazonEC2Client amazonEc2Client = GetAmazonClient(selectedRegion.Endpoint);
	DeleteSecurityGroupRequest deleteGroupRequest = new DeleteSecurityGroupRequest();
	deleteGroupRequest.GroupName = "Group name to be deleted";
	DeleteSecurityGroupResponse deleteGroupResponse = amazonEc2Client.DeleteSecurityGroup(deleteGroupRequest);
	
}

How to manage Amazon Machine Images with the .NET Amazon SDK Part 1: starting an image instance

If you have an access to Amazon Web Services (AWS) EC2 then you can manage Amazon Machine Images (AMI) in the cloud using this screen:

Aws Start Image screen

In case you are not familiar with AMIs then here‘s a short summary.

Amazon has created SDKs in for several different programming languages, such as Java, Python, Ruby, C# etc. by which you can manage the servers, AMIs etc. in an elegant way in code. You can check out the various packages on the AWS homepage:

Aws developer SDKs

In this post I’ll concentrate on the .NET package in a console application: how to start, monitor and shut down the AMI instances. Note that if you don’t have an Amazon account then it will be difficult to test the provided code samples. You will need both your Access Key ID and your Secret Access Key in order to communicate with AWS through the SDK.

Demo

In the demo I’ll concentrate on showing the functionality and ignore best practices such as SOLID, IoC containers, patterns, DRY etc. in order to eliminate the “noise”. I’ll put all code within Program.cs. It’s up to you how you organise it in your code later.

Open Visual Studio 2012 and create a new Console application. Add a reference to the AWS SDK using NuGet:

Amazon SDK package in NuGet

We’ll put the access keys in app.config:

<configuration>
	<appSettings>
		<add key="AmazonAccessKeyId" value="accesskeyid"/>
		<add key="AmazonSecretAccessKey" value="secretaccesskey"/>
	</appSettings>
    <startup> 
        <supportedRuntime version="v4.0" sku=".NETFramework,Version=v4.5" />
    </startup>
</configuration>

We’ll insert a simple method to retrieve the necessary AWS credentials as follows:

private static BasicAWSCredentials GetAmazonCredentials()
{
	string secretAccessKey = ConfigurationManager.AppSettings["AmazonSecretAccessKey"];
	string accessKeyId = ConfigurationManager.AppSettings["AmazonAccessKeyId"];
	BasicAWSCredentials basicAwsCredentials = new BasicAWSCredentials(accessKeyId, secretAccessKey);
	return basicAwsCredentials;
}

You’ll need to add a reference to the System.Configuration dll. BasicAWSCredentials is located in the Amazon namespace so you’ll need to reference that as well.

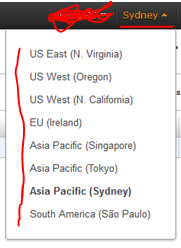
We’ll also need a HTTP client object which will communicate with AWS. This is represented by the AmazonEC2Client object. Now, if you log onto the AWS EC2 management web site then you’ll see that by default the region called US East 1 is selected:

Us East 1 as EC2 default region

The AmazonEC2Client object has a constructor where you don’t set the selected region in which case the selected region defaults to US East 1 – North Virginia, just like when you log onto the EC2 manager page and the page doesn’t remember what your previous selected region was. This object can be used to send region-independent queries as well, such as finding all available AWS regions, which we’ll look at in a second. Before that we’ll need a method to construct the AmazonEC2Client object:

private static AmazonEC2Client GetAmazonClient(string selectedAmazonRegionEndpoint)
{
	AmazonEC2Client amazonClient = null;
	if (string.IsNullOrEmpty(selectedAmazonRegionEndpoint))
	{
		amazonClient = new AmazonEC2Client(GetAmazonCredentials());
	}
	else
	{
		AmazonEC2Config amazonConfig = new AmazonEC2Config();
		amazonConfig.ServiceURL = "http://" + selectedAmazonRegionEndpoint;
		amazonClient = new AmazonEC2Client(GetAmazonCredentials(), amazonConfig);
	}
	return amazonClient;
}

You see that if you don’t specify a region we return a client specifying our credentials but not the region. Otherwise we provide the region using the AmazonEC2Config object. We’ll see how this section is used in a while, don’t worry about it yet.

Now we have the client object ready so let’s try to find the available regions in Amazon:

private static List<Region> GetAmazonRegions()
{
	AmazonEC2Client amazonEc2Client = GetAmazonClient(null);
	try
	{
		DescribeRegionsRequest describeRegionsRequest = new DescribeRegionsRequest();
		DescribeRegionsResponse describeRegionsResponse = amazonEc2Client.DescribeRegions(describeRegionsRequest);
		DescribeRegionsResult describeRegionsResult = describeRegionsResponse.DescribeRegionsResult;
		List<Region> regions = describeRegionsResult.Region;
		return regions;
	}
	catch
	{
		throw;
	}
}

You’ll see Request and Response objects quite a lot throughout the .NET SDK and this is a good example. We get hold of the list of regions using the request-response pattern. We’ll print the available regions in a separate method:

private static void PrintAmazonRegions(List<Region> regions)
{
	for (int i = 0; i < regions.Count; i++)
	{
		Region region = regions[i];
		Console.WriteLine(string.Format("{0}: Display name: {1}, http endpoint: {2}", i + 1, region.RegionName, region.Endpoint));
	}
}

Let’s connect our methods in Main as follows:

static void Main(string[] args)
{
	List<Region> amazonRegions = GetAmazonRegions();
	PrintAmazonRegions(amazonRegions);
	Console.ReadKey();
}

Run the programme and you should get a list of regions like this:

Amazon regions printout

So far so good! The next step is to find the available AMIs in the selected region. Before we do that let’s alter the existing code so that the user needs to pick a region. Add the following method to read the selected menu point of the user:

private static int GetSelectedRegionOfUser(List<Region> amazonRegions)
{
	Console.Write("Select a region: ");
	string selection = Console.ReadLine();
	int selectableMin = 1;
	int selectableMax = amazonRegions.Count;
	int selectedMenuPoint;
	bool validFormat = int.TryParse(selection, out selectedMenuPoint);
	while (!validFormat || (selectedMenuPoint < selectableMin || selectedMenuPoint > selectableMax))
	{
		Console.WriteLine("Invalid input.");
		Console.Write("Select a region: ");
		selection = Console.ReadLine();
		validFormat = int.TryParse(selection, out selectedMenuPoint);
	}

	return selectedMenuPoint;
}

The revised Main method looks as follows:

static void Main(string[] args)
{
	List<Region> amazonRegions = GetAmazonRegions();
	PrintAmazonRegions(amazonRegions);
	int usersChoice = GetSelectedRegionOfUser(amazonRegions);
        Region selectedRegion = amazonRegions[usersChoice - 1];
	Console.ReadKey();
}

So now we have the selected region. It’s time to look for a suitable AMI in that region. The easiest way to retrieve the list of available machines is the following method:

private static List<Amazon.EC2.Model.Image> GetSuitableImages(Region selectedRegion)
{
	AmazonEC2Client amazonEc2client = GetAmazonClient(selectedRegion.Endpoint);
	try
	{
		DescribeImagesRequest imagesRequest = new DescribeImagesRequest();
		DescribeImagesResponse imagesResponse = amazonEc2client.DescribeImages(imagesRequest);
		DescribeImagesResult imagesResult = imagesResponse.DescribeImagesResult;
		List<Amazon.EC2.Model.Image> images = imagesResult.Image;
		return images;
	}
	catch
	{
		throw;
	}
}

We send in the selected endpoint to the GetAmazonClient method. If you recall then this method will put the selected endpoint into the constructor of the AmazonEC2Client object thereby overriding the default US East 1 region. We then use the request-response objects to retrieve the AMIs from the selected endpoint. However, in its present form the method will return ALL available machines, meaning all public ones and any other that your account may have permission to use. That list is way too long so I recommend that you do not run this method without filtering. You can filter based on the properties of the AMI, e.g. the owner code or the current state. If you are looking for AMIs that belong to a certain owner then you’ll need the code of that owner:

List<String> owners = new List<string>();
owners.Add(ConfigurationManager.AppSettings["AmiSavOwnerId"]);
owners.Add(ConfigurationManager.AppSettings["AmiGclOwnerId"]);
owners.Add(ConfigurationManager.AppSettings["NewAmiOwnerId"]);
imagesRequest.Owner = owners;

As you see it’s possible to fill up a list of strings with the owner IDs which will be assigned to the Owner property of the DescribeImagesRequest object. Go through the available properties of this object to see what other filtering possibilities exist. If you don’t find a ready made property then you can still try the Filter object. Here we’ll filter the AMIs according to their current state:

Filter availabilityFilter = new Filter();
availabilityFilter.Name = "state";
List<String> filterValues = new List<string>();
filterValues.Add("available");
availabilityFilter.Value = filterValues;
List<Filter> filters = new List<Filter>();
filters.Add(availabilityFilter);
imagesRequest.Filter = filters;

It looks a bit cumbersome for a bit of filtering but it goes like this: you define the AMI property by which you want to filter the results in the Name property of the Filter object. Each Filter key can have multiple values hence you need to assign a list of strings. I’m only interested in those AMIs whose ‘state’ property has the value ‘available’. This list of strings will be assigned to the Value property of the Filter object. Then we add this specific filter to the list of filters of the request. So our revised method looks as follows:

private static List<Amazon.EC2.Model.Image> GetSuitableImages(Region selectedRegion)
{
	AmazonEC2Client amazonEc2client = GetAmazonClient(selectedRegion.Endpoint);
	try
	{
		DescribeImagesRequest imagesRequest = new DescribeImagesRequest();

		List<String> owners = new List<string>();
		owners.Add(ConfigurationManager.AppSettings["AmiSavOwnerId"]);
		owners.Add(ConfigurationManager.AppSettings["AmiGclOwnerId"]);
		owners.Add(ConfigurationManager.AppSettings["NewAmiOwnerId"]);
		imagesRequest.Owner = owners;

		Filter availabilityFilter = new Filter();
		availabilityFilter.Name = "state";
		List<String> filterValues = new List<string>();
		filterValues.Add("available");
		availabilityFilter.Value = filterValues;
		List<Filter> filters = new List<Filter>();
		filters.Add(availabilityFilter);
		imagesRequest.Filter = filters;

		DescribeImagesResponse imagesResponse = amazonEc2client.DescribeImages(imagesRequest);
		DescribeImagesResult imagesResult = imagesResponse.DescribeImagesResult;
		List<Amazon.EC2.Model.Image> images = imagesResult.Image;
		return images;
	}
	catch
	{
		throw;
	}
}

The following method will print the images in the Console:

private static void PrintAmis(List<Amazon.EC2.Model.Image> images)
{
	Console.WriteLine(Environment.NewLine);
	Console.WriteLine("Images in the selected region:");
	Console.WriteLine("------------------------------");
	for (int i = 0; i < images.Count; i++)
	{
		Image image = images[i];
		Console.WriteLine(string.Format("{0}: image location: {1}, architecture: {2}", i + 1, image.ImageLocation, image.Architecture));
	}
}

Note that I selected the ImageLocation and Architecture properties of the Image object but feel free to discover all other properties that you can extract from it. The extended Main method looks like this:

static void Main(string[] args)
{
	List<Region> amazonRegions = GetAmazonRegions();
	PrintAmazonRegions(amazonRegions);
	int usersChoice = GetSelectedRegionOfUser(amazonRegions);
	Region selectedRegion = amazonRegions[usersChoice - 1];
	List<Amazon.EC2.Model.Image> imagesInRegion = GetSuitableImages(selectedRegion);
	PrintAmis(imagesInRegion);
	Console.ReadKey();
}

Run the application and if everything goes well then you may see an output similar to the following:

Images in selected region

The names of the AMIs will of course be different in your case. We’re now ready to start an image. First let’s get the user’s choice:

private static int GetSelectedRegionOfUser(List<Region> amazonRegions)
{
	Console.Write("Select a region: ");
	string selection = Console.ReadLine();
	int selectableMin = 1;
	int selectableMax = amazonRegions.Count;
	int selectedMenuPoint;
	bool validFormat = int.TryParse(selection, out selectedMenuPoint);
	while (!validFormat || (selectedMenuPoint < selectableMin || selectedMenuPoint > selectableMax))
	{
		Console.WriteLine("Invalid input.");
		Console.Write("Select a region: ");
		selection = Console.ReadLine();
		validFormat = int.TryParse(selection, out selectedMenuPoint);
	}

	return selectedMenuPoint;
}

Main:

static void Main(string[] args)
{
	List<Region> amazonRegions = GetAmazonRegions();
	PrintAmazonRegions(amazonRegions);
	int usersChoice = GetSelectedRegionOfUser(amazonRegions);
	Region selectedRegion = amazonRegions[usersChoice - 1];
	List<Amazon.EC2.Model.Image> imagesInRegion = GetSuitableImages(selectedRegion);
	PrintAmis(imagesInRegion);
	int usersImageChoice = GetSelectedImageOfUser(imagesInRegion);
	Image selectedImage = imagesInRegion[usersImageChoice - 1];
	Console.ReadKey();
}

The code to launch one image instance looks as follows:

private static List<RunningInstance> LaunchImage(Image selectedImage, Region selectedRegion)
{
	AmazonEC2Client amazonEc2client = GetAmazonClient(selectedRegion.Endpoint);
	try
	{
		RunInstancesRequest runInstanceRequest = new RunInstancesRequest();
		runInstanceRequest.ImageId = selectedImage.ImageId;
		runInstanceRequest.InstanceType = "m1.large";
		runInstanceRequest.MinCount = 1;
		runInstanceRequest.MaxCount = 1;
		runInstanceRequest.SecurityGroup = new List<string>() { ConfigurationManager.AppSettings["AmazonSecurityGroupName"] };
		runInstanceRequest.DisableApiTermination = false;

		RunInstancesResponse runInstancesResponse = amazonEc2client.RunInstances(runInstanceRequest);
		RunInstancesResult runInstancesResult = runInstancesResponse.RunInstancesResult;
		Reservation reservation = runInstancesResult.Reservation;
	        List<RunningInstance> runningInstances = reservation.RunningInstance;
		return runningInstances;

	}
	catch
	{
		throw;
	}
}

As before we set the region in the AmazonEC2Client constructor. We then construct the RunInstanceRequest object: we set the selected image ID, the instance type – in this case a large instance -, the number of instances to start – we only want 1 -, and the security group name. We finally determine that we want to be able to terminate the image instance using the API. We then send the request to the AWS API and get a Reservation object back which includes the list of image instances we have started. If only 1 instance was requested then this list will only contain a single element.

Here’s the revised Main method:

static void Main(string[] args)
{
	List<Region> amazonRegions = GetAmazonRegions();
	PrintAmazonRegions(amazonRegions);
	int usersChoice = GetSelectedRegionOfUser(amazonRegions);
	Region selectedRegion = amazonRegions[usersChoice - 1];
	List<Amazon.EC2.Model.Image> imagesInRegion = GetSuitableImages(selectedRegion);
	PrintAmis(imagesInRegion);
	int usersImageChoice = GetSelectedImageOfUser(imagesInRegion);
	Image selectedImage = imagesInRegion[usersImageChoice - 1];
	List<RunningInstance> launchedInstances = LaunchImage(selectedImage, selectedRegion);
	Console.ReadKey();
}

Make your selections in the console. If everything went fine then you’ll see the instance starting up in the AWS console:

Image instance starting in AWS

In case you don’t see the instance starting up then it may be because you’re not viewing the same region as you selected in the console app. Make sure to select the same region in the AWS manager:

Select region in AWS

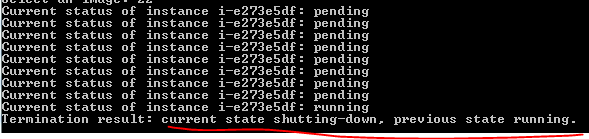
We’re doing good so far. The next step will be to monitor the status of the machine – pending, started etc. and to terminate it. This will be the topic of the next post.

Elliot Balynn's Blog

A directory of wonderful thoughts

Software Engineering

Web development

Disparate Opinions

Various tidbits

chsakell's Blog

WEB APPLICATION DEVELOPMENT TUTORIALS WITH OPEN-SOURCE PROJECTS

Once Upon a Camayoc

Bite-size insight on Cyber Security for the not too technical.

%d bloggers like this: