Using client certificates in .NET part 9: working with client certificates in OWIN/Katana III

Introduction

In the previous post we added a couple of components necessary to add client certificate authentication into the OWIN middleware chain. We haven’t yet put the elements to work though. That is the main topic of this post which will finish this series. We’ll also run a couple of tests.

Have the demo application open in Visual Studio in administrator mode.

Read more of this post

Wiring up a custom authentication method with OWIN in Web API Part 5: abstracting away the auth logic

Introduction

In the previous post we built the necessary OWIN components for our custom authentication logic: the middleware and the extension method that’s attached to the IAppBuilder object. We also diverged a little and discussed how to use the Use extension method to inject the necessary objects into the constructor of the middleware class.

In this post we’ll extend PinAuthenticationHandler so that the actual authentication logic can be easily changed.

Read more of this post

Wiring up a custom authentication method with OWIN in Web API Part 4: putting the components to work

Introduction

In the previous post we built two important components around the custom authentication logic. First off, we wrote a very simple implementation of the abstract AuthenticationOptions class where we only declared the name of the authentication mode. You can anyway add any extra property and overloaded constructors as you wish to this class. Then we built the custom authentication handler, i.e. PinAuthenticationHandler which derives from the abstract AuthenticationHandler class.

In this post we’ll add a couple more components specifically to add our authentication handler to the OWIN chain. We’ll also test the authentication logic.

Read more of this post

Wiring up a custom authentication method with OWIN in Web API Part 3: the components

Introduction

In the previous post we looked at HTTP headers in code. We saw how to collect the headers from a request and a response and how to check for the presence of a certain header type. We also built a simple tester C# console application that sends a web request to our Web API controller and sets the necessary custom authentication header.

In this post we’ll start building the components necessary for the OWIN middleware.

Read more of this post

Wiring up a custom authentication method with OWIN in Web API Part 2: the headers

Introduction

In the previous post we discussed the main topic of this series and started building a demo application with a single Customers controller. The goal of this series is to show how to register your custom authentication mechanism with OWIN as a Katana component.

In this post we’ll be concentrating on the request headers. We’ll also see a couple of functions that will later be part of the OWIN middleware when we’re ready to convert the code.

Read more of this post

Building a Web API 2 project from scratch using OWIN/Katana .NET Part 3: hosting on Helios

Introduction

In the previous post we discussed how to use OWIN host to self-host a Web API 2 application. We saw how easy and straightforward it was to install the OWIN hosting package with NuGet.

In this post we’ll look at another hosting option: Helios.

Read more of this post

Building a Web API 2 project from scratch using OWIN/Katana .NET Part 2: OWIN host

Introduction

In the previous post we saw how to build a simple Web API from scratch using a couple of OWIN/Katana components. We added a couple of Katana libraries from NuGet, wired up the routing from the Startup class and we were good to go.

In this post we’ll see one way to make the application run independently of IIS. As we stated before an important benefit of this new OWIN infrastructure is that you can make your ASP.NET web application run on multiple hosts, not only IIS. IIS is only one of the options.

Read more of this post

Building a Web API 2 project from scratch using OWIN/Katana .NET Part 1

Introduction

If you’re a .NET developer then you must have come across the new light-weight web framework standard called OWIN. Its implementation by Microsoft in .NET is called Katana. We’ve looked at OWIN/Katana on this blog already starting here. I won’t go through the same exact same topic in this new series. Instead we’ll concentrate on the basic components that are required at a minimum to build a functioning, platform independent Web API 2 project.

If you’ve read other posts on this blog then you’ll know about my preference for web services as opposed to shiny GUI development á la ASP.NET MVC. Also we’ll be looking into other Web API 2 features in OWIN later on so this will be a good foundation.

Read more of this post

OWIN and Katana part 4: Web API on top of OWIN

Introduction

In the previous post in this series we wrote a couple of OWIN middleware components and chained them together. We actually achieved quite a lot in a low level console application: it hosts a simple web server which receives HTTP requests, it processes the requests with Katana components and performs some elementary logging.

It’s now time to build an application on top of this environment. We’ll build upon the demo console app we’ve been working on so have it ready in Visual Studio. If you’ve read some other topics on this blog then you’ll note that I have a preference for the Web API as the server platform. So let’s see how we can build a Web API application on top of our little server.

Web API demo

Open the Console demo server in Visual Studio. We’ll need to install the following NuGet package:

Web API Owin Selfhost

As the package name implies this package will help us host a Web API 2.1 app using OWIN components. The package installs a number of other components such as WebApi.Core WebApi.Client, JSON.NET, etc. Open the References section in the Solution Explorer. If you’ve worked with the Web API before then some of those new libraries will be familiar to you: System.Net.Http, System.Web.Http and the like.

Add the following class to the project:

public class LatestNews
{
	public string Summary { get; set; }
}

We want our web service to show the latest news.

Let’s also add another class called LatestNewsController. It will be our first Web API controller. If you haven’t worked with the Web API before then a Web API controller has the same role as a “normal” controller in an MVC web app. It derives from the “ApiController” base class rather than the “Controller” class in MVC. The LatestNewsController class looks as follows:

public class LatestNewsController : ApiController
{
	public HttpResponseMessage Get()
	{
		LatestNews news = new LatestNews() { Summary = "The world is falling apart." };
		return Request.CreateResponse<LatestNews>(HttpStatusCode.OK, news);
	}
}

In Startup.Configuration comment out the Use method which dumps out the values in the Environment dictionary. The starting point for this exercise is the following “active” code, the rest should be commented out or removed:

public void Configuration(IAppBuilder appBuilder)
{
        appBuilder.Use(async (env, next) =>
	{
		Console.WriteLine(string.Concat("Http method: ", env.Request.Method, ", path: ", env.Request.Path));
		await next();
		Console.WriteLine(string.Concat("Response code: ", env.Response.StatusCode));
	});

	appBuilder.UseWelcomeComponent();			
}

Insert a new method stub in Startup.cs that will configure Web API:

private void RunWebApiConfiguration(IAppBuilder appBuilder)
{	
}

The key object to configuring the Web API is the HttpConfiguration object located in the System.Web.Http namespace. It opens, among a lot of other things, the gateway to the routing rules. Insert the following body to the above function:

HttpConfiguration httpConfiguration = new HttpConfiguration();
httpConfiguration.Routes.MapHttpRoute(
	name: "WebApi"
	, routeTemplate: "{controller}/{id}"
	, defaults: new { id = RouteParameter.Optional }
	);
appBuilder.UseWebApi(httpConfiguration);

This will look very familiar to you if you’ve done any MVC and/or Web API programming – which you probably have otherwise you wouldn’t be reading this post. So we set up out first routing rule using the MapHttpRoute method like in the standard Web API app template of Visual Studio. Finally we call upon the built-in extension of the IAppBuilder interface to declare that we want to use the Web API.

We should be ready to go. Add a call to this method from Configuration():

appBuilder.Use(async (env, next) =>
	{
		Console.WriteLine(string.Concat("Http method: ", env.Request.Method, ", path: ", env.Request.Path));
		await next();
		Console.WriteLine(string.Concat("Response code: ", env.Response.StatusCode));
	});

RunWebApiConfiguration(appBuilder);

appBuilder.UseWelcomeComponent();

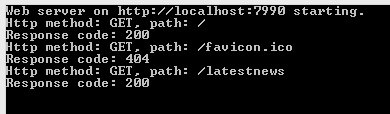
Run the demo app and navigate to localhost:7990/latestnews in a web browser. You should see that our Web API component is indeed responding to the request:

Web Api output in web browser

We got the latest news in an XML serialised format. Also, you’ll notice that the middleware that prints the incoming request data in the console window still works:

Logging middleware still running

Now navigate to localhost:7990, i.e. without any controller name. You’ll see that our WelcomeComponent responds with “Hello from the welcome component”. The reason is that the web api component couldn’t route the request to any controller so it let the next component take over. The next component in the pipeline is the WelcomeComponent which happily responds to any request with the same message.

We have just built the basics of a self hosted Web API application which is very light weight, easy to extend and responds to incoming HTTP requests with meaningful data.

Deployment

Let’s try to deploy this application on IIS. Install the following NuGet package:

Owin host system web NuGet package

This package ensures that we can plug in our application into the ASP.NET pipeline.

We’ll also need to change a couple of other things in the application. IIS cannot directly load executables so our setup code in Program.Main is not relevant. Comment out the following chunk of code, all of it, including the Program class declaration:

class Program
    {
        static void Main(string[] args)
        {
			string uri = "http://localhost:7990";

			using (WebApp.Start<Startup>(uri))
			{
				Console.WriteLine("Web server on {0} starting.", uri);
				Console.ReadKey();
				Console.WriteLine("Web server on {0} stopping.", uri);
			}
        }
    }

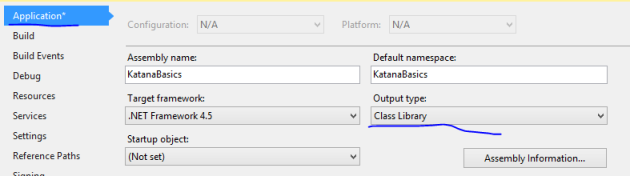
All the startup infrastructure will be handled by IIS. However, we still want to run the Configuration code in Startup.cs. Open the project properties and turn the project type into a class library:

Turn console app into class library

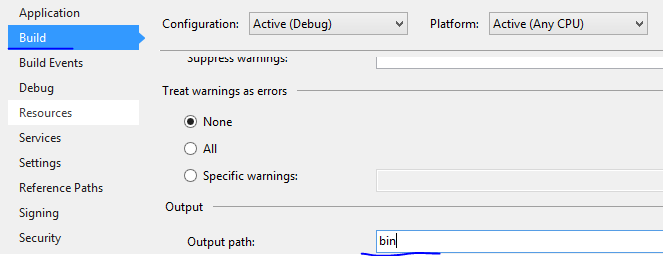
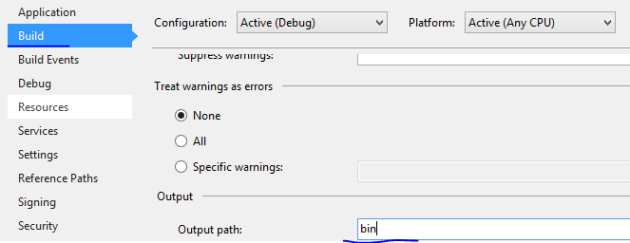
Also, change the output path to simply ‘bin’ as is expected by IIS:

Change output path to bin

Build the solution to make sure it still compiles without errors. Check in the bin folder of the project that the [projectname].dll file was created by the build process. I called my project KatanaBasics so I have a KatanaBasics.dll in the bin folder. You’ll need the path to the bin folder in the next step.

We’ll use the iisexpress.exe file to load our this dll. The iisexpress.exe file is usually found here:

IISexpress.exe location

Open a command prompt and enter the following command. Make sure you enter the correct path as it appears on your system:

IIS express command prompt startup

…where the “path” parameter is the path to the bin folder on my computer. Press Enter and if everything goes well then you’ll see the following response:

IIS running in command prompt

You’ll notice in the output that IIS will be listening on port 8080 for this application. Navigate to localhost:8080 in a web browser and you should see that… …we get an exception, or at least I got it:

Missing owin assembly

Owin assemblies are updated quite often so it’s almost expected to run into this classic “Could not load file or assembly” error, although it’s really irritating.

Stop the IIS application by pressing “Q” in the command prompt. The solution is quite easy actually. The solution contains an app.config file with the following bit of XML:

<assemblyIdentity name="Microsoft.Owin" publicKeyToken="31bf3856ad364e35" culture="neutral" />
<bindingRedirect oldVersion="0.0.0.0-2.1.0.0" newVersion="2.1.0.0" />

This should do the trick of redirecting old references to an updated one. However, IIS won’t read this file as it is looking for a web.config file instead of app.config. Rename app.config to web.config. Then rebuild the solution, issue the same IIS command as before in the command prompt and navigate to localhost:8080. The WelcomeComponent should respond with “Hello from the welcome component”. Also, you should see the logging output in the command prompt along with some output from IIS itself:

Logging output with IIS running

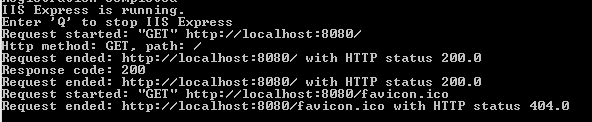
The output of our OWIN middleware has been successfully plugged into the IIS infrastructure. Now check if the web api controller is still responding on localhost:8080/latestnews. You should see that it does indeed.

The OWIN project we’ve built produces a dll which can be referenced from any type of application: console, WPF, WCF, etc., it will always produce valid XML.

How was our application configured correctly now that the Program class has been commented out? How was our Configuration method called now that there’s no code calling it directly? The Host.SystemWeb dll has a bit of code that will look for a class called Startup and run its Configuration method for you automatically.

You can specify the location of the Startup in the appSettings section of web/app.config:

<appSettings>
	<add key="owin.appStartup" value="KatanaBasics.Startup"/>
</appSettings>

…where the value is the fully qualified name of the Startup class.

You can also specify it in the AssemblyInfo file:

[assembly: OwinStartup(typeof(KatanaBasics.Startup))]

If you don’t specify these values then it will try to find the Startup class through Reflection in the namespace matching the project name, in this case KatanaBasics. Since there’s one such class in that namespace, the web hosting process found it and executed it.

OWIN, Katana and MVC

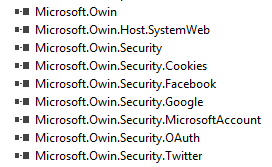
Let’s see how OWIN and Katana are incorporated into ASP.NET MVC. In Visual Studio 2013 create a new MVC5 web application. Open the references list and you’ll see that there are several Owin related packages included by default:

Owin references in MVC5

You’ll also notice that there’s a Startup.cs in the root of the application:

Startup.cs in MVC5

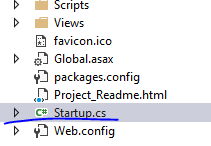
Open the file and you’ll see the Configuration method which accepts an IAppBuilder object, so it follows the same pattern as we saw in our console based server app. The Configure method calls upon a method called ConfigureAuth. You’ll also notice the assembly metadata above the namespace that tells Katana where to look for the Startup class.

Note that this is a partial class so there’s one more Startup class. You’ll find it in the App_Start folder in a file called Startup.Auth.cs. This is where the ConfigureAuth method is implemented. As the method name suggests ConfigureAuth defines some OWIN middleware that have to do with authentication.

Most of the code is commented out. The two middleware functions that are not commented out are:

  • UseCookieAuthentication: to implement cookie authentication, checks if there’s a valid authentication cookie
  • UseExternalSignInCookie: for external cookies for third party auth providers

You can uncomment the rest of the code to activate either of the 4 available authentication providers: Microsoft, Twitter, Facebook and/or Google for OAuth2. We will look at these in a later series dedicated to security in MVC5.

Katana sourcecode

If you’re interested in how the Katana components are built then you can check out the sourcecode on the Katana Codeplex page. You’ll see the code for all existing Katana components there:

Katana codeplex page

You can even load the entire code from Git. You’ll find the git clone command on the Codeplex page.

View the list of MVC and Web API related posts here.

OWIN and Katana part 3: more complex middleware

Introduction

We wrote our first OWIN component, a.k.a. middleware in the previous part of this series. We said that it’s called middleware because it sits somewhere in the invocation chain of elements. There may be other elements before and after the actual component.

We’ll write a somewhat more complex component this time. We’ll build upon the simple Console based server application we’ve been working on in this series.

Demo

Open the Console based web server demo in Visual Studio 2013. In Startup.Configuration we currently have a call to appBuilder.UseWelcomeComponent. We’ll now insert another component that will execute before the WelcomeComponent.

Keep in mind that not all OWIN components must be separate classes. We saw an example of an inline component when we looked at the Run extension method. Recall that we could reference the Response property of the OWIN context directly instead of how we pulled it from the environment dictionary in WelcomeComponent which is at a lower level. The Run extension method does actually the same thing behind the scenes, i.e. it checks the environment variable and pulls the Response property out of it so that it is readily available from the OWIN context. That’s an example of how Katana can build upon OWIN to simplify things.

This time we’ll look at the Use extension method of IAppBuilder. It comes in two versions: one that takes a Func delegate, i.e. we can write an inline lambda expression, and another one which takes an object and and array of objects. This latter version allows us to pass in low-level components such as WelcomeComponent. The Func delegate has the following definition:

Func<IOwinContext, Func<Task>, Task> handler;

So it’s a delegate that returns a Task and accepts two parameters: an IOwinContext and another delegate which returns a Task. The IOwinContext will be the Environment, and Func of Task corresponds to the next component in the invocation chain. Insert the following stub into Configuration before appBuilder.UseWelcomeComponent:

appBuilder.Use((env, next) =>
{

});

In case you’re not familiar with lambdas start here. ‘env’ and ‘next’ correspond to the two input parameters of the delegate. You’ll see that the compiler is complaining as there’s no return statement in the body of the delegate. We’ll simulate some kind of logging in the body: loop through the values in the Environment dictionary and show them in the console. The Use method implementation looks as follows:

appBuilder.Use(async (env, next) =>
	{
		foreach (KeyValuePair<string, object> kvp in env.Environment)
		{
			Console.WriteLine(string.Concat("Key: ", kvp.Key, ", value: ", kvp.Value));
		}

		await next();
	});

The call to ‘next’ returns a Task and can be awaited, hence the ‘await’ keyword. We can write ‘next()’ because it represents the application function of the next component in the pipeline. And since the application function is a delegate, it can be invoked like a normal method. In order for that to work properly we had to add the ‘async’ keyword in front of the delegate declaration. Also, the Func delegate has to return a Task, which next() does, so it fulfils the delegate signature.

That was an example of middleware. Run the web server demo app and navigate to localhost:7990 in a web browser. Watch the values in the console. Some dictionary values are objects so their string representation will simply be the type name. Still, most values will probably look familiar to you as a web developer who’s done some work with HTTP requests and responses.

Let’s add another piece of middleware using the same technique. Insert the following code after the one we’ve just written:

appBuilder.Use(async (env, next) =>
	{
		Console.WriteLine(string.Concat("Http method: ", env.Request.Method, ", path: ", env.Request.Path));
		await next();
		Console.WriteLine(string.Concat("Response code: ", env.Response.StatusCode));
	});

First we report the HTTP method and the request path using the Request property of the Environment variable. Then we let the next component run and be awaited upon. Finally we print out the response status code. You could also overwrite the status code of course in another component. E.g. if a new resource is created with a POST method then you might want to return 201 Created instead of the default 200 OK.

Run the application again and refresh the browser with localhost:7990. You’ll see the new piece of information printed in the console: the method (GET), the request path (favicon) and the response code (200). You’ll notice that the request path in the dictionary dump is simply “/”, i.e. the application root and the response code to that is 200. Then we see another request in the second Katana component for the favicon. Refresh the web page a couple of times and you’ll see that the browser will try to fetch the favicon every time and respond with status code 200. You can also test with a different URL such as localhost:7990/donaldduck. You’ll see that the first request comes in for /donaldduck and then a second request for the favicon again.

Let’s see what happens if we reorder the invocation list. Recall that WelcomeComponent.Invoke doesn’t call upon the next component in the pipeline. In Startup.Configuration put appBuilder.UseWelcomeComponent to the top of the middleware list, i.e. ahead of the first Use method. Run the application and refresh the browser. You should see that the WelcomeComponent component is invoked but not the other two. So you see how the modular setup allows you to control and finegrain what’s happening in a web server when it receives a HTTP call.

Read the last post in this series here.

View the list of MVC and Web API related posts here.

Elliot Balynn's Blog

A directory of wonderful thoughts

Software Engineering

Web development

Disparate Opinions

Various tidbits

chsakell's Blog

WEB APPLICATION DEVELOPMENT TUTORIALS WITH OPEN-SOURCE PROJECTS

Once Upon a Camayoc

Bite-size insight on Cyber Security for the not too technical.