Parallel stepped for loops in .NET C#

We saw in this post how to create a parallel for loop using the Parallel object in .NET. One drawback of that method is the we cannot create the parallel equivalent of a synchronous stepped for loop:

for (int i = 0; i < 20; i += 2)

Parallel.For accepts the start index and the end index but not the step value. Parallel.ForEach comes to the rescue: we create an integer list with only those values that should be processed. Create the stepped integer list as follows:

public IEnumerable<int> SteppedIntegerList(int startIndex,
			int endEndex, int stepSize)
{
        for (int i = startIndex; i < endEndex; i += stepSize)
	{
		yield return i;
	}
}

Then call Parallel.ForEach:

Parallel.ForEach(SteppedIntegerList(0, 20, 2), index =>
{
	Console.WriteLine("Index value: {0}", index);
});

View the list of posts on the Task Parallel Library here.

OWIN and Katana part 1: the basics

Introduction

Katana is a new light-weight web framework built by Microsoft. It is based on a specification called OWIN – Open Web Interface for .NET. The default MVC5 template in Visual Studio 2013 have elements of Katana and OWIN.

Think of Katana as a web framework such as ASP.NET which interacts with IIS as the hosting environment. IIS provides a rich set of features for logging, tracing, monitoring etc. These features are not always needed. With the advent of HTML5 and some very advanced JavaScript libraries like jQuery, Knockout.js, Angular.js etc. a lot of work has been delegated to the client. It is often no longer the server that produces HTML – it only responds to Ajax calls with JSON and it is up to the client to process it. This applies especially to mobile applications that consume cloud based web services which only respond with JSON. The goal is to simplify web hosts to make them more responsive, more scalable and cheaper to maintain as the processing time of a request will be a lot faster. Node.js is a JavaScript-based framework that you can use to build a very lean and efficient web server which only has a limited number of features compared to IIS but suits the needs of a large number of web service consuming applications.

Katana allows you to build web based applications, such as MVC or Web API (2) where you can decide which web features to include in the project. Katana features are highly modularised. Instead of including the entire System.Web library even in the smallest web applications, you can decide which features to include and exclude. As mentioned above, Katana builds on OWIN to achieve these goals. OWIN is a specification which defines an an easy and decoupled form of communication between frameworks and servers. With Katana you can build applications that only indirectly use the features in System.Web through OWIN interfaces. Such an application can be hosted on any server that supports OWIN so it is not tightly coupled to IIS.

Normally a .NET MVC web application references the entire System.Web namespace which has a very large amount of features of which your application may only need a fraction. Also, it will be tied to IIS. Katana takes an other approach with its portable, modular and lightweight components.

I won’t test your patience any longer – let’s see a demo! We’ll build both a Console and a Web application so I have downloaded Visual Studio Express for Web and Desktop. If you have the full version of VS 2013 then you’ll be fine.

Demo

Open Visual Studio 2013 for Windows and create a new Console application. Call it KatanaBasics. Install the following NuGet packages:

Owin hosting nuget package

HttpListener owin package

The Hosting package will also install a number of dependencies such as Owin and Microsoft.Owin. These are the core Katana libraries. Owin contains the core OWIN abstractions, whereas Microsoft.Owin is the Microsoft extension to OWIN. The HttpListener library includes classes to communicate with the operating system. It also enables us to build a small app that listens to HTTP requests on a port. Which is what we’re planning to build here.

Add a new class to the project called Startup which will configure Katana. Be exact and call it “Startup”. When working with Katana you’ll see these Startup classes all the time. The Startup class must have a Configuration method which accepts an IAppBuilder object which resides in the Owin namespace. Add the following stub to the Startup class:

public void Configuration(IAppBuilder appBuilder)
{

}

IAppBuilder includes methods that help us configure an application, in particular how it will respond to HTTP requests. There are a lot of extension methods to the IAppBuilder interface. They are available in different Owin-related libraries. So as you reference additional Owin packages from NuGet you’ll see new extension methods available for the IAppBuilder interface. This provides you a way to enable new features as they become necessary.

The Run() extension method helps us configure how the application will handle HTTP requests. Katana will call into this method to process the requests. It accepts a Func delegate which returns a Task object and accepts an IOwinContext object as parameter.

Start typing the following within the Configuration method:

appBuilder.Run(owinContext =>
	{
		owinContext.
	});

This is a lambda expression that accepts an IOwinContext object which will be inferred by the compiler. As you type “owinContext.” IntelliSense will provide a list of interesting properties:

  • Authentication: to access properties of the current user, such as Claims
  • Environment: helps you to retrieve a range of OWIN-related properties from the current OWIN context
  • Request: to access the properties related to the HTTP request such as headers and cookies
  • Response: to build and manipulate the HTTP response

The Environment property returns a type of IDictionary of string and object which is quite generic and is characteristic of OWIN. Normally in ASP.NET we have access to strongly typed classes when we extract information about the incoming HTTP request. Here, however, the information is stored in a generic dictionary of the very basic “string” and “object” objects. OWIN aims to provide a simple API without a lot of specialisation.

In this very first demo we’ll only return a simple string to all callers using the Response property:

appBuilder.Run(owinContext =>
	{
		return owinContext.Response.WriteAsync("Hello from OWIN web server.");
	});

WriteAsync returns a Task so it is perfectly suitable for our Func delegate.

We’ll define the URI and port number in the Main method where the console app will be listening. We’ll also use another object from OWIN called WebApp to set up our web server. It is a Katana component residing in the Microsoft.Owin.Hosting namespace. It has a Start method where you can specify the class that includes your configuration. Add the following code to Main:

string uri = "http://localhost:7990";

using (WebApp.Start<Startup>(uri))
{
        Console.WriteLine("Web server on {0} starting.", uri);
        Console.ReadKey();
	Console.WriteLine("Web server on {0} stopping.", uri);
}

If you have anything running on port 7990 then select something else. All we do within the using block is let the world know that we’re starting the server. We can stop the server by pressing a button which is what the ReadKey is waiting for. That’s it really, we have just written a web server. Press F5 to start the application. You should see a console window popping up with the start-up message. Then open a browser and navigate to http://localhost:7990. You should see the welcome message in the browser:

Console web server running in browser

Let’s make the welcome page a bit more interesting. Download the following NuGet package:

Owin diagnostics NuGet package

The Diagnostics package includes the components to build a default home page. The IAppBuilder interface has now a new extension method available called UseWelcomePage. Update the Configuration method as follows:

public void Configuration(IAppBuilder appBuilder)
{
	appBuilder.UseWelcomePage();			
}

Start the console app again and navigate to localhost:7990. You should see a nice blue page such as this one:

Owin default homepage

We’ll dig deeper into OWIN and Katana in the next post.

View the list of MVC and Web API related posts here.

Parallel for-each loops in .NET C#

It’s trivial to create parallel for-each loops in .NET using the built-in Parallel class. It has a ForEach() method with a wide range of overloaded varieties. One of the easier ones accepts 2 parameters:

  • An IEnumerable object
  • An Action of T which is used to process each item in the list

The parallel ForEach loop will process any type of object in an IEnumerable enumeration. Example:

List<string> dataList = new List<string> 
{
         "this", "is", "random", "sentence", "hello", "goodbye"
};

Parallel.ForEach(dataList, item =>
{
	Console.WriteLine("Item {0} has {1} characters",
		item, item.Length);
});

Run the code and you’ll see that the items in the string list are not processed sequentially.

View the list of posts on the Task Parallel Library here.

Introduction to .NET Web API 2 with C# Part 3: authentication

Introduction

So far in this intro course we haven’t discussed authentication although we enabled it when we created the demo Web Api app. In this demo we’ll see how to make an authenticated request to the API. Let’s imagine that our rockband data is top secret. Therefore not just anyone should gain access to it.

Open the demo app and the simple HTML web app we’ve been working on and let’s get started.

Authentication

Recall from the previous post in this series that we made an anonymous call to the API via the Get Rockbands button from the HTML web app. We’ll see how the need of authentication changes the picture.

Open RockbandsController.cs and place the following attribute over the class declaration:

[Authorize]
public class RockbandsController : ApiController

Run both apps. Have the Chrome developer tools open in the browser for default.html. Press the Get Rockbands button and you should get a 401 back:

Unauthorised Web API

So we’ll need to authenticate first. However, in order to authenticate we’ll need to sign up with the API app. However, there’s no familiar Signup link as the API page is not the usual MVC page with the login and sign-up links in the top right hand corner. Navigate to /Help on the Web API page to view the available HTTP endpoints. You’ll find a number of actions under the Account category. The POST api/account/register entry looks promising. Click on that link to view what we need to send to the service:

User registration inputs

That doesn’t look terribly difficult. Let’s build a simple UI for that in the HTML web app. Place the following HTML below the h1 tags:

<form id="userSignup">
        <input type="text" name="username" placeholder="Name" />
        <input type="password" name="password" placeholder="Password" />
        <input type="password" name="confirmpassword" placeholder="Confirm password" />
        <input type="submit" id="signup" value="Sign up" />
</form>

Note the “name” attributes of the input tags. They correspond to the properties in the JSON that the Register action expects. The case doesn’t matter: userName, USERNAME, etc. will all do the job.

We’ll now need some javascript to send the data to the service. It’s good that we set up CORS in the previous post so we can call the service from here. We already have some javascript on that page to get the rockband data. Place the following bit of code…

var register = function () {
                var registrationUrl = "http://localhost:50170/api/Account/Register";
                var registrationData = $("#userSignup").serialize();
                $.post(registrationUrl, registrationData).always(showRockbands);
                return false;
            };

$("#signup").click(register);

…above…

$("#getRockbands").click(getRockbands);

We call the Register controller with a POST request and send the serialised form data in the message body. We’ll show the response using the showRockbands method we defined earlier. Re-run default.html and try to register without filling in the form:

Validation exception

Not surprisingly we get a validation exception.

Fill in the text boxes and you should get an empty response which means that the request succeeded:

Web API signup OK

So we’re registered but we still cannot access the rockband data. We’ll need to send along an access token. In fact we need to send it along with every request that requires authentication. It’s not the same as a cookie in the case of forms authentication. Instead, we’ll need to send the token in the request header. This is done by logging in with the website using the login credentials and get hold of the access token from the website. If you look at the Help page again in the API app you won’t find any logical candidate for this task. There’s no “login” or “gettoken” endpoint.

The secret is hidden in a completely different place. Locate Startup.Auth.cs in the App_Start folder. This file uses OWIN technology. I’m planning to write a short series on OWIN and KATANA later in case you’re interested in those technologies. The interesting bit of code is the following:

OAuthOptions = new OAuthAuthorizationServerOptions
{
                TokenEndpointPath = new PathString("/Token"),
                Provider = new ApplicationOAuthProvider(PublicClientId, UserManagerFactory),
                AuthorizeEndpointPath = new PathString("/api/Account/ExternalLogin"),
                AccessTokenExpireTimeSpan = TimeSpan.FromDays(14),
                AllowInsecureHttp = true
};

The ‘/Token’ bit looks promising. We’ll need to send a POST to /Token with our credentials which will return an access token. You can even test it in a browser, but it won’t succeed of course:

Missing token

This means that we need to specify a grant type which is missing, hence the “unsupported grant type” error message. The endpoint is expecting some data called “grant_type=[type of grant]”. Let’s see how we can build that.

Add the following piece of HTML to the form on the HTML page:

<form id="userSignup">
        <input type="text" name="username" placeholder="Name" />
        <input type="password" name="password" placeholder="Password" />
        <input type="password" name="confirmpassword" placeholder="Confirm password" />
        <input type="submit" id="signup" value="Sign up" />
        <input type="submit" id="signin" value="Sign in" />
</form>

Our form will also function as a login form. Not a very practical solution but it will do for demo purposes.

Add the following bit of JavaScript…:

var signin = function () {
                var tokenUrl = "http://localhost:50170/Token";
                var loginData = $("#userSignup").serialize();
                loginData = loginData + "&grant_type=password";
                $.post(tokenUrl, loginData).always(showRockbands);
                return false;
            };

$("#signin").click(signin);

…above…

$("#signup").click(register);

We’re calling the /Token endpoint and send along a grant type of password. This is telling the endpoint that we need an access token based on the username and password in the form data.

Run both applications and fill in the username and password you signed up with in the previous step. You should see… …the same error as we saw before we enabled CORS. But didn’t we enable CORS already? Yes, but that was in the context of the Web API. We need to do something similar for the /Token endpoint which hides OWIN middleware. Locate ApplicationOAuthProvider.cs in the Providers folder of the Web API project. Search for the following method:

public override async Task GrantResourceOwnerCredentials(OAuthGrantResourceOwnerCredentialsContext context)

You’ll see a using block in the method body. Add the following code below the using block:

context.OwinContext.Response.Headers.Add("Access-Control-Allow-Origin", new[] { "*" });

Re-run the web api demo app and try to sign in. It should succeed and the token should be visible on the screen:

Bearer token from web api

You’ll find a short course on OAuth here which explains what the parts in this JSON mean if you’re curious. The most important bit of information is the access_token. We’ll need to extract it from the JSON and send it along with every subsequent request to the API. This will allow the request through the Authorize attribute. Modify the JavaScript code…

$.post(tokenUrl, loginData).always(showRockbands);

…to the following:

$.post(tokenUrl, loginData)
                    .success(saveAccessToken)
                    .always(showRockbands);

…where saveAccessToken is defined as follows:

var token = "";

var saveAccessToken = function (data) {
      token = data.access_token;
};

We save the access_token property from the JSON that came back from the web api auth request.

Replace…

var getRockbands = function () {
         $.get(rockbandSourceUrl).always(showRockbands);
         return false;
};

…with an AJAX request:

var getRockbands = function () {
                $.ajax(rockbandSourceUrl,
                {
                    type: "GET"
                    , headers: getHeaders()
                }).always(showRockbands);
                return false;
};

…where getHeaders() is defined as follows:

var getHeaders = function () {
                if (token){
                    return { "Authorization": "Bearer " + token };
                }
};

Re-run the HTML app and login first. Wait for the access token to appear. Then click Get Rockbands and there you are:

Rockbands OK after login

This is slightly more complicated than it should be but it may change in the future. There’s actually a readily available single-page version of we’ve just done among the MVC 5 templates.

If you create a new ASP.NET Web application in Visual Studio you can select the Single Page Application template:

Single page application

It will set up authentication, MVC, Web API, OWIN, jQuery and knockout.js for you for a fancy start-up single page application. Start the application and click on the links. It looks like you’re navigating through controllers but it’s really the same page where knockout.js takes care of showing and hiding different parts on the UI. You can sign up with a username and password and then you’ll see a familiar view but now with the usual welcome message and the Log off link in the top right hand corner:

Single page login Web API

The signup function uses the Account controller and a POST to the /Token endpoint like we did above.

You can view the list of posts on Security and Cryptography here.

View the list of MVC and Web API related posts here.

Parallel for loops in .NET C#

It’s trivial to start parallel loops in .NET using the built-in Parallel class. The class has a For() method with a wide variety of overloads. One of the easier ones accepts 3 parameters:

  • The start index: this is inclusive, i.e. this will be the first index value in the loop
  • The end index: this is exclusive, so it won’t be processed in the loop
  • An Action of int which represents the method that should be executed in each loop, where int is the actual index value

Example:

Parallel.For(0, 10, index =>
{
	Console.WriteLine("Task Id {0} processing index: {1}",
		Task.CurrentId, index);
});

If you run this code then you’ll see that the index values are indeed processed in a parallel fashion. The printout on the console windows may show that index 5 is processed a bit before 4 or that thread id 1 processed index 2 and thread #2 processed index 7. This all depends on the task scheduler so use parallel loops only in case you don’t care about the actual processing order.

View the list of posts on the Task Parallel Library here.

Parallel LINQ in .NET C#: the ForAll() extension

The ForAll() extension is part of the Linq to Objects library. It allows to execute an Action on each item in the query. It can be used in conjunction with parallel queries as well to perform actions such as filtering on each item of a ParallelQuery.

The following example takes each item in an integer array, selects only the even numbers and then prints each item and it square root:

int[] integerArray = new int[50];
for (int i = 0; i < integerArray.Length; i++)
{
	integerArray[i] = i;
}

integerArray.AsParallel()
	.Where(item => item % 2 == 0)
	.ForAll(item => Console.WriteLine("Item {0} Result {1}",
		item, Math.Sqrt(item)));

View the list of posts on the Task Parallel Library here.

Introduction to .NET Web API 2 with C# Part 2

Introduction

We finished the first part of this series with creating an in-memory data source and a Get() API method. The Get method returned the full list of Rockband records in the data repository.

We’re ready to move on to other aspects of this technology. So open the demo project we started previously. We’re going to look at the following elements:

  • Action method: get element by ID
  • Routing by attributes
  • Returning IHttpActionResult from controller action
  • Cross origin resource sharing

Get an element by id

Now we can retrieve all elements in from the API in an XML string. We also want to be able to get a single item by its ID. Open RockbandsController.cs and add the following stub:

public RockBand Get(int id)
{

}

We’ll be able to reach this action by the URL /api/rockbands/{id}. It couldn’t be easier. The most obvious way is to add the following method to InMemoryDatabaseObjectContext.cs:

public RockBand GetById(int id)
{
            return (from r in _rockBands where r.Id == id select r).FirstOrDefault();
}

The body of the Get(id) method will be as follows:

return _objectContextFactory.Create().GetById(id);

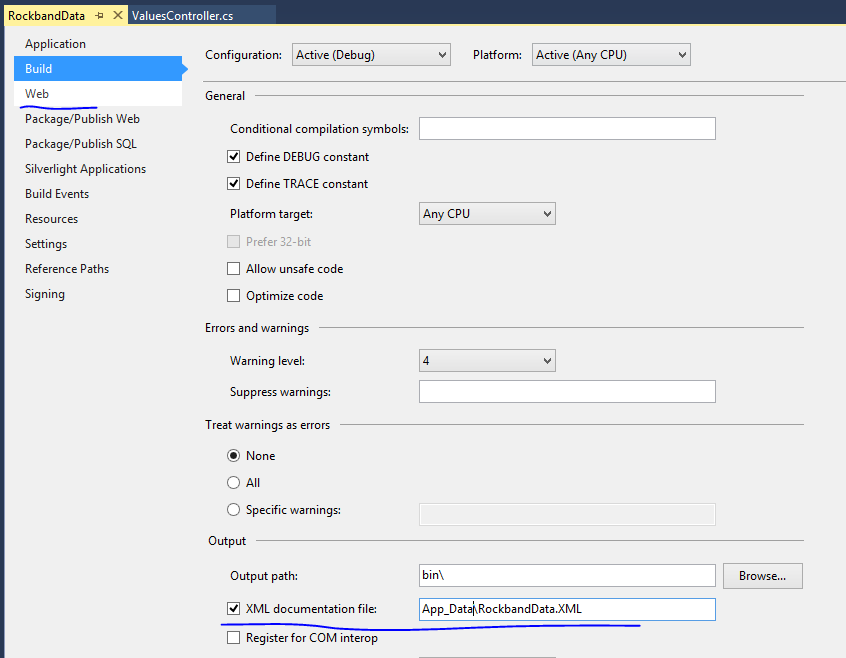
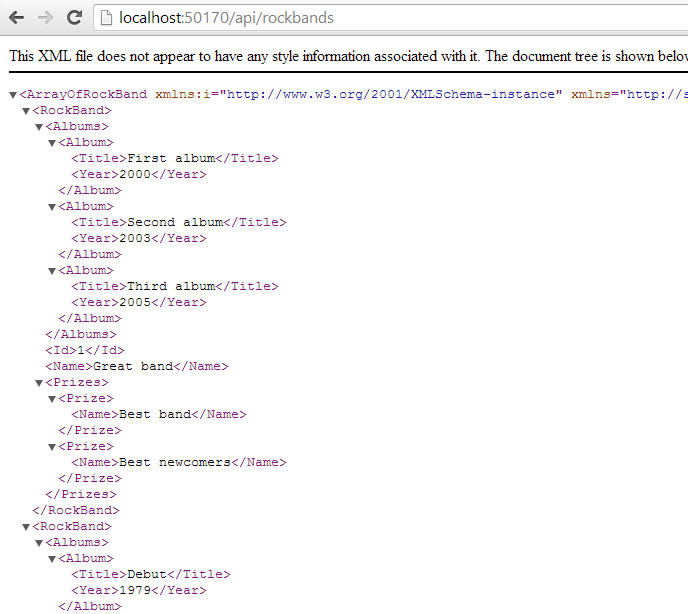
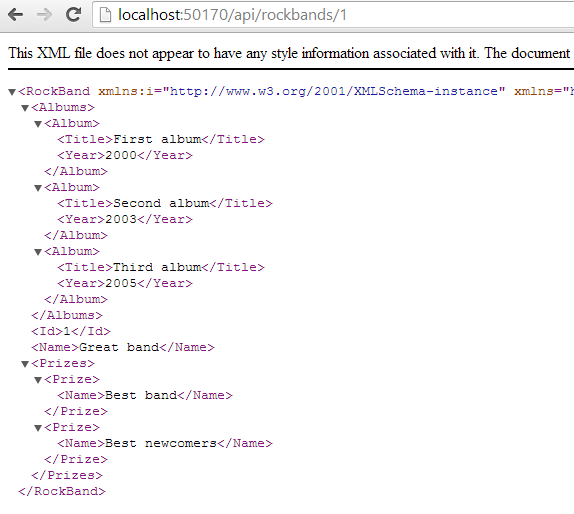
Run the application and navigate to /api/rockbands/1. You should get the XML representation of the rockband whose ID is 1:

Get by id XML

What happens if you type an ID of a nonexistent rockband, such as 7? You’ll get a null XML back:

Null XML of non-existent ID

Let’s make this a bit more obvious to the caller. Change the signature of the Get(id) method to return an HttpResponseMessage instead of a rockband:

public HttpResponseMessage Get(int id)

This object allows us to control the response message we return to the caller of the Get(id) method: the response code, the headers, the message content, i.e. all elements of a standard HTTP response. It is customary to let Web API actions return this object. In the body of the action we can return a 404 if the item wasn’t found. Otherwise we return a 200 OK with the Rockband object. Here’s one way to solve this:

public HttpResponseMessage Get(int id)
{
            RockBand rockband = _objectContextFactory.Create().GetById(id);
            if (rockband == null)
            {
                return Request.CreateErrorResponse(HttpStatusCode.NotFound, "No such rockband");
            }
            return Request.CreateResponse<RockBand>(HttpStatusCode.OK, rockband);
}

Re-run the demo app, try to get a rockband with an ID of 7 and you should get a XML formatted error message:

Xml formatted error message

The next operation that would be nice to implement is to retrieve the albums of a rockband by the URL api/rockbands/3/albums. Routing of such URLs in the previous version of the Web API was a bit tricky. You could set up your custom routes in WebApiConfig.cs, but it could get messy if you wanted to support extended urls beyond the basic /api/{controller}/{id} format. However, in Web API 2 there’s a different way.

Routing by attributes

There’s a new built-in feature in web api which lets you declare the routing rules by standard C# attributes. It started its life as a NuGet package but now it’s readily available in .NET. The attributes can be applied on the controller level as well. Examples:

[Route("rockbands/{id}/albums")] //nested route
[Route("rockbands/{id:int:min(1)}"] //constraint on the incoming ID: must be an integer and has a minimum value of 1
[Route("rockbands/{id?}"] //apply to entire controller. The default rules will apply to every method in the controller
[RoutePrefix("api/patients")] //prefix for all routes in controller

You can even declare multiple routes for a single action:

[Route("rockbands/{id:int}")]
[Route("rockbands/{name:hello}"]

Let’s see if can get the api/rockbands/{id}/albums url to work.

Add the following action to RockbandsController:

public HttpResponseMessage GetAlbums(int id)
{
            RockBand rockband = _objectContextFactory.Create().GetById(id);
            if (rockband == null)
            {
                return Request.CreateErrorResponse(HttpStatusCode.NotFound, "No such rockband");
            }
            return Request.CreateResponse<IEnumerable<Album>>(HttpStatusCode.OK, rockband.Albums);
}

Re-run the app and see if the api/rockbands/1 URL still works. It doesn’t. The problem is that we have two methods in the Controller whose name starts with “get” and accept a parameter of type int. The routing engine doesn’t know which one to call.

Inspect the WebApiConfig.cs file. Note the following call:

config.MapHttpAttributeRoutes();

This call comes before the standard…

config.Routes.MapHttpRoute(
                name: "DefaultApi",
                routeTemplate: "api/{controller}/{id}",
                defaults: new { id = RouteParameter.Optional }

…declaration. This will ensure that the routes defined in the attributes will take precedence: if the request URL matches one of the attribute URLs then the routing engine will not search any longer.

Add the following attribute over the GetAlbums action:

[Route("api/rockbands/{id:int:min(1)}/albums")]

Run the app again. First check if api/rockbands/1 works and it should. Now go to api/rockbands/1/albums and you should be presented with the XML representation of the albums of rockband 1. Also, try with an invalid ID, such as api/rockbands/0/albums. You should get a 404.0 error which tells you that the URL wasn’t found. This is because of the constraint we added to the attribute.

Returning IHttpActionResult

We mentioned above that the HttpResponseMessage object is a standard object to return from Web API actions. Web Api 2 introduces another type of object that you can return from an API action: IHttpActionResult. It is similar to ActionResult in standard ASP.NET MVC. In MVC you can return JsonResult, ContentResult and View objects. With this new return type in the Web API you can return similar objects that are specific to HTTP traffic:

  • OkResult
  • NotFoundResult
  • ExceptionResult
  • UnauthorizedResult
  • BadRequestResult
  • ConflictResult
  • RedirectResult
  • InvalidModelStateResult

…and many more. You can even create your custom Result object by deriving from an existing concrete object that implements the IHttpActionResult interface or by implementing the interface directly. Let’s see how we can transform our current code.

Let change…

public HttpResponseMessage Get(int id)

…to…

public IHttpActionResult Get(int id)

The code will not compile any more of course as the HttpResponseMessage object doesn’t implement this interface. It’s incredibly easy to send a NotFount and Ok response. Change the body of Get(id) to the following:

public IHttpActionResult Get(int id)
{
            RockBand rockband = _objectContextFactory.Create().GetById(id);
            if (rockband == null)
            {
                return NotFound();
            }
            return Ok<RockBand>(rockband);
}

We can change GetAlbums to the following:

public IHttpActionResult GetAlbums(int id)
{
            RockBand rockband = _objectContextFactory.Create().GetById(id);
            if (rockband == null)
            {
                return NotFound();
            }
            return Ok<IEnumerable<Album>>(rockband.Albums);
}

CORS: cross origin resource sharing

CORS allows JavaScript to call an API on a domain different from its origin. Normally this has been forbidden as it is considered a security risk. Nowadays the browser can let such a call go through as long as the target server allows the access. The server will let the browser know in a HTTP header if it accepts the HTTP request. The HTTP request must include an Origin header specifying the value where it’s coming from. If the server allows the access then the HTTP response will include an Access-Control-Allow-Origin header which will have the same value as the Origin header in the request, such as http://www.microsoft.com or some other URL. This header tells the browser that it’s OK to access the requested resource from the specified origin. If this header is missing then the browser will not allow JavaScript to receive the response.

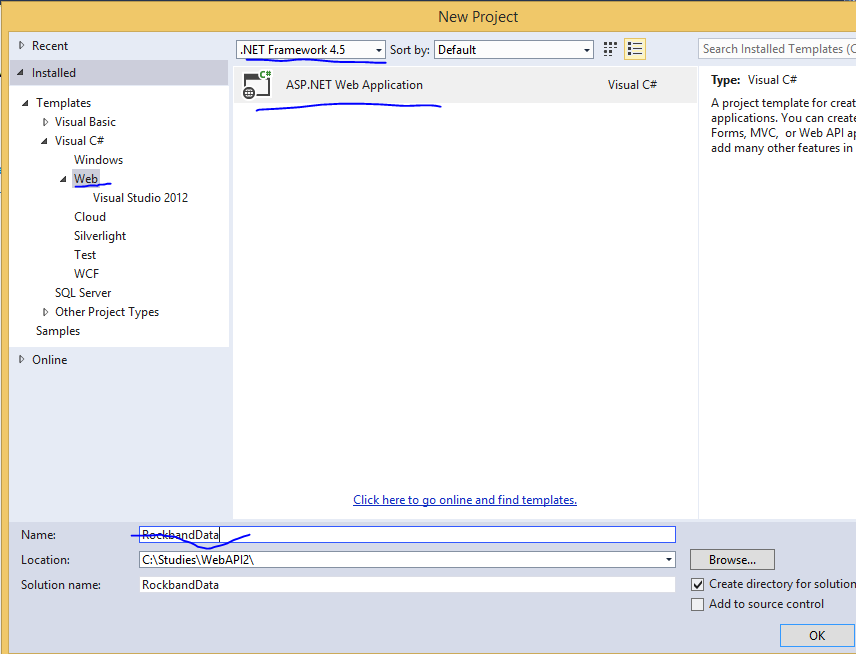
Open up another instance of Visual Studio and create a new ASP.NET Web application in called CorsDemo. In the New ASP.NET Project window select the Empty template as we won’t do much with this project. We’ll only use it as a dummy web site on a different origin. Right click this new project and add a new HTML Page called Default.html. Right-click the References tab and click Manage NuGet Packages. Search for the jQuery package and install it.

Open Default.html and add the following code in between the body tags:

<h1>CORS demo</h1>

    <button id="getRockbands">Get rockbands</button>

    <pre id="rockbands">

    </pre>

    <script src="Scripts/jquery-2.1.0.js"></script>
    <script>

    </script>

I hope this is not too complex. We’ll fill in the contents of our own JS within the script tags:

$(function ()
        {
            var rockbandSourceUrl = "http://localhost:50170/api/rockbands/";

            var getRockbands = function ()
            {
                $.get(rockbandSourceUrl).always(showRockbands);
                return false;
            };

            var showRockbands = function (obj)
            {
                $("#rockbands").text(JSON.stringify(obj, null, 3));
            };

            $("#getRockbands").click(getRockbands);
        });

Make sure to enter the correct port number for the rockbandSourceUrl URL. We simply want to retrieve the list of rockbands from the API and show the output in the “rockbands” element. Note that this simple web page will run on a different port so it is considered a different site from the browser’s point of view. This setup is a good candidate to test CORS. I’m going to run this demo in Chrome and use its developer tools but FireFox and IE have similar tools as well.

Start both the web api and the simple html app.

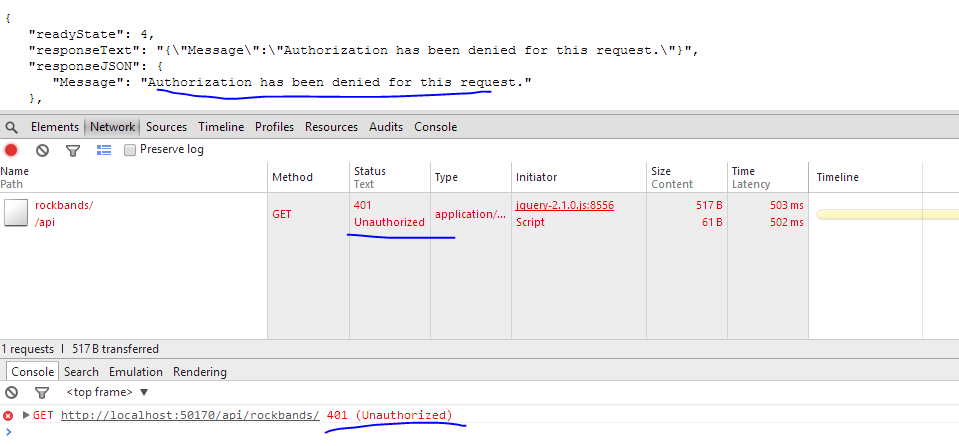
When the HTML page with the “get rockbands” button loads, press F12 to open the Chrome developer tools. Select the Network tab and press the button. You should see that the request was refused:

Connection refused

The Origin header was included in the headers collection but as the request came from a different domain and the api didn’t include the necessary Access-Control-Allow-Origin header the connection was refused:

Origin header

Let’s fix this.

Back in the API project right click References, Manage NuGet Packages. Make a search for “cors” and install the following package:

Web API Cors package

Next open the WebApiConfig.cs file and add the following before ‘config.MapHttpAttributeRoutes();’:

var cors = new EnableCorsAttribute("http://localhost:51737", "*", "GET");
config.EnableCors(cors);

This means that we want to enable CORS from http://localhost:51737 – which is the URL of the Html app – with any headers and only GET methods.

You can apply this attribute on a controller level like this:

[EnableCors("http://localhost:51737", "*", "GET")]
public class RockbandsController : ApiController

If you want to allow all origins then put a ‘ “*” ‘ as the first parameter in the constructor. You can allow multiple HTTP verbs by separating them with a comma: “GET,POST,PUT”.

Re-run the API and… …I don’t know about you but I got an exception:

System web exception

It’s great when an update from NuGet messes up other dependencies… I entered the following redirect in web.config and it worked again:

<dependentAssembly>
        <assemblyIdentity name="System.Web.Http" publicKeyToken="31bf3856ad364e35" />
        <bindingRedirect oldVersion="1.0.0.0-5.0.0.0" newVersion="5.1.0.0" />
</dependentAssembly>

The version of System.Web.Http in my project was 5.1 instead of 5.0. This entry redirects all calls to 5.1. I in fact had to do the same for the System.Net.Http.Formatting package:

<dependentAssembly>
        <assemblyIdentity name="System.Net.Http.Formatting" publicKeyToken="31bf3856ad364e35" />
        <bindingRedirect oldVersion="1.0.0.0-5.0.0.0" newVersion="5.1.0.0" />
</dependentAssembly>

Run the web API app and navigate to /api/rockbands/ just to make sure you get the correct XML.

Refresh the CorsDemo HTML page, leave the developer tools open and press the Get rockbands button. It should go through:

CORS ok

Locate the response header and you’ll see that it includes what we needed:

Header OK

Read the last post of this series here.

View the list of MVC and Web API related posts here.

Parallel LINQ in .NET C#: a basic example

Parallel LINQ – PLINQ – can be applied to LINQ to Objects. This type of LINQ which works with the IEnumerable and IEnumerable of T data types. There are extension methods in the PLINQ library that make parallel processing of the result from queries available. The result is that multiple data items are processed concurrently.

In fact it is not difficult to transform a “normal” LINQ statement to PLINQ.

Set up the data source:

int[] sourceData = new int[1000];
for (int i = 0; i < sourceData.Length; i++)
{
	sourceData[i] = i;
}

We want to extract all even numbers. We also want the items to be processed in a parallel fashion. The following query will do just that:

IEnumerable<int> parallelResults =
	from item in sourceData.AsParallel()
	where item % 2 == 0
	select item;

Note the AsParallel() extension method. Behind the scenes it creates an instance of the ParallelQuery class. Without the AsParallel extension you’d be using standard LINQ features hidden in the Enumerable class. This little extension makes sure that the parallel features are used instead.

Print the results:

foreach (int item in parallelResults)
{
	Console.WriteLine("Item {0}", item);
}

Run the code and you’ll see that the integers do not follow any particular order. This is the result of the parallel execution of the query. Remove the AsParallel extension from the query and integers will be presented in an ascending order. The method hides a lot of complexity from the programmer. It is up to PLINQ to decide how the query will be parallelised, we only indicate the request through the extension. PLINQ will try to optimise the query execution based on a range of parameters. If sequential execution seems to be a better fit then the items may still be processed sequentially despite your wish.

View the list of posts on the Task Parallel Library here.

Introduction to .NET Web API 2 with C# Part 1

Introduction

Web API has been around for some years now. It is a very efficient and lightweight technology to build RESTful web services in .NET. Web API is very similar to .NET MVC with its controllers and routing rules. Therefore if you are familiar with MVC then it’s not too difficult to get going with Web API either.

If you are not familiar with Web API at all then I suggest that you first go through the basics using the link provided above. There are some good courses available there as well.

In this short series on Web API 2 we’ll discuss some of the new options available compared to the “original” Web API package.

Demo

I’m building the demo using Visual Studio 2013 Express for Web. You can probably do the same in VS 2012 by downloading the MVC 5 templates. So open VS2013 and create a new ASP.NET web project called RockbandData:

Web API 2 new project

Click OK and then select the Web API template:

Web API 2  template

Notice that it says ‘No authentication’ on the right side of the window. We’ll change that so click Change Authentication. Select the Individual User Accounts option in the Change Authentication window and click OK. Click OK again on the New ASP.NET Project window so that Visual Studio can create the project. It takes some time but eventually you’ll have a project structure like this:

Default project structure Web API 2

You can immediately run the project by pressing F5 and you’ll see a default web site popping up in your browser:

Web API 2 default homepage

It looks like a normal MVC website. However, there are some differences between a “real” MVC default website and its Web API counterpart. Even if we stated that we require authentication there’s no link to log in or sign up new users anywhere. The reason is that the standard MVC AccountController controller is not available. User login and signup is handled in a slightly different way which we’ll explore later.

Documentation page

What’s new is a link that says ‘API’ up in the navigation bar. Click on it and you’ll see that a list of possible URLs appears in a table:

Web API 2 default help page

This is a documentation page for the available URL endpoints of the web service. Click on one of the URLs and you’ll see an example for the JSON and XML response structures:

Sample return values

If you check out one of the POST urls then the documentation will show you the expected request body format as well:

RequestBodyDocumentation

The documentation is provided by a pre-installed NuGet package: Microsoft.AspNet.WebApi.HelpPage. It will look for ApiControllers in your project and any documentation available on them using Reflection. You won’t find an assembly reference to this package under the References section so don’t look for it. However, there’s a HelpPage area in the solution:

Web API 2 Help Page area

The controllers, models and views in this area help construct the Documentation page we’ve just seen. Any new API controller you create will be added to the documentation. You can add comments in the usual way: just decorate the Controller with VS XML comments:

/// <summary>
/// This the Get all values method within the ValuesController
/// </summary>
/// <returns>A sequence of strings</returns>
public IEnumerable<string> Get()
{
     return new string[] { "value1", "value2" };
}

Also, you need to let VS generate an XML documentation file:

Add XML documentation to page

We’re not done yet. Locate the HelpPageConfig.cs file in the Areas/HelpPage/App_Start folder. There will be some code already but it’s all commented out. Uncomment the first line and modify the file name to match what you provided in the previous step:

config.SetDocumentationProvider(new XmlDocumentationProvider(HttpContext.Current.Server.MapPath("~/App_Data/RockbandData.xml")));

Rebuild and run the project. If you get a runtime exception saying that the documentation XML file wasn’t found then check the file URL again in the code we’ve just commented out. It may have been overwritten. The documentation page should show the new description:

Description updated

Values controller

You can call the values controller in the browser to check if the Get() method is working. The URL should be http://localhost:50170/api/values. The port number in your case may of course differ. At first you should get an error message saying that the request was unauthorised. That’s because the ValuesController has been decorated with the [Authorize] attribute. Uncomment it and refresh the page. You should see an XML with the default values returned.

Model data

Any demo on the Web API is futile without a data source. Let’s build a class hierarchy in the Models folder. Note that your domains should exist in a separate project of course but this post is not about layered architecture but the Web API. If you are interested in layered projects then check out the series on Domain Driven Design and/or SOA.

Also, to avoid wasting too much time setting up the data source in e.g. Entity Framework or MongoDb we’ll be working with in-memory data.

Locate the Models folder and add a new folder in it called Domain. We’ll build a simple data hierarchy around rock music. Add the following classes to the Domain folder:

public class Prize
{
    public string Name { get; set; }
}
public class Album
{
    public string Title { get; set; }
    public int Year { get; set; }
}
public class RockBand
{
    public int Id { get; set; }
    public string Name { get; set; }
    public ICollection<Album> Albums { get; set; }
    public ICollection<Prize> Prizes { get; set; }
}

Next we’ll set up the in-memory repository to get some data to start with. Again, all this is violating every principle behind SOLID and layered architectures but I don’t want to get sidetracked. We’ll set up an in-memory data context which has the same function as the DbContext object you might be familiar with from EntityFramework. We’ll use the singleton pattern to get hold of the object context instance.

Insert a new folder called Repository. Add the following object context “simulation”:

public class InMemoryDatabaseObjectContext
{
        private List<RockBand> _rockBands;

        public InMemoryDatabaseObjectContext()
        {
            _rockBands = InitialiseRockBands();
        }
        
        public IEnumerable<RockBand> GetAll()
        {
            return _rockBands;
        }

        public static InMemoryDatabaseObjectContext Instance
        {
	     get
	     {
		   return Nested.instance;
	     }
        }

        private class Nested
        {
	     static Nested()
	     {
	     }
	     internal static readonly InMemoryDatabaseObjectContext instance = new InMemoryDatabaseObjectContext();
        }

        private List<RockBand> InitialiseRockBands()
        {
            List<RockBand> rockbands = new List<RockBand>();

            RockBand greatBand = new RockBand();
            greatBand.Name = "Great band";
            greatBand.Id = 1;
            greatBand.Albums = new List<Album>(){new Album(){Title = "First album", Year = 2000}, new Album(){Title = "Second album", Year = 2003}
                , new Album(){Title = "Third album", Year=2005}};
            greatBand.Prizes = new List<Prize>() { new Prize() { Name = "Best band" }, new Prize(){Name = "Best newcomers"} };

            RockBand rockBand = new RockBand();
            rockBand.Name = "Funny band";
            rockBand.Id = 2;
            rockBand.Albums = new List<Album>(){new Album(){Title = "Debut", Year = 1979}, new Album(){Title = "Continuation", Year = 1980}
                , new Album(){Title = "New Year", Year=1982}, new Album(){Title ="Summer", Year=1985}};
            rockBand.Prizes = new List<Prize>() { new Prize() { Name = "Cool band" }, new Prize() { Name = "Best band" }, new Prize(){Name = "First choice"} };

            RockBand anotherBand = new RockBand();
            anotherBand.Name = "Sounds good";
            anotherBand.Id = 3;
            anotherBand.Albums = new List<Album>(){new Album(){Title = "The beginning", Year = 1982}, new Album(){Title = "The end", Year = 1986}};
            anotherBand.Prizes = new List<Prize>() {new Prize() { Name = "First choice" } };

            RockBand rb = new RockBand();
            rb.Name = "Sounds good";
            rb.Id = 4;
            rb.Albums = new List<Album>() { new Album() { Title = "Cool", Year = 1988 }, new Album() { Title = "Yeah", Year = 1989 }
                , new Album() { Title = "Oooooohhh", Year = 1990 }, new Album() { Title = "Entertain", Year = 1991 }, new Album() { Title = "Go home", Year = 1992 }};
            rb.Prizes = new List<Prize>() { new Prize() { Name = "First choice" }, new Prize() { Name = "Cool band" } };

            rockbands.Add(greatBand);
            rockbands.Add(rockBand);
            rockbands.Add(anotherBand);
            rockbands.Add(rb);

            return rockbands;
        }
}

Add the following components necessary for the thread safe lazy singleton pattern:

public interface IObjectContextFactory
{
        InMemoryDatabaseObjectContext Create();
}
public class LazySingletonObjectContextFactory : IObjectContextFactory
{
	public InMemoryDatabaseObjectContext Create()
	{
		return InMemoryDatabaseObjectContext.Instance;
	}
}

If you don’t know what these components mean the check out the link provided above about the singleton pattern. You can even ignore it for now as they are not important for the main discussion: the lazy singleton pattern will make sure that the data source will not be wiped out with every new HTTP request and that all requests will query the same object context. You’ll also see that we have some initial data with a couple of great rock bands.

We have our data store so we’d like to extract the rockband data via an API call.

Rockbands controller

Right click the Controllers folder and select Add and then Controller from the context menu. The Add Scaffold window will appear. Select the Web API 2 Controller – Empty option and click Add. In the Add Controller window insert the controller name: RockbandsController. The new controller will derive from ApiController as expected.

Add the following private field and constructor to the controller:

private IObjectContextFactory _objectContextFactory;

public RockbandsController()
{
     _objectContextFactory = new LazySingletonObjectContextFactory();
}

Another warning: DON’T DO THIS AT HOME! In a real project you’ll not consult the repository directly from a controller and you will inject the correct implementation of the IObjectContextFactory dependency through the controller constructor. If you’re wondering how to do this check out the links on DDD and SOLID provided above.

Insert the following Get() method into the controller:

public IEnumerable<RockBand> Get()
{
            return _objectContextFactory.Create().GetAll();
}

This method will be invoked if a GET request is directed to the RockbandsController using the URL /api/rockbands. Run the application and enter this URL into the browser: http://localhost:%5Byour port number]/api/rockbands. You should get an XML representation of the sequence of Rockbands:

Get all rockbands xml

Great! We have now the basis for moving forward. We’ll continue our investigation of the Web API in the next part.

View the list of MVC and Web API related posts here.

Lazy task execution in .NET C#

Tasks in .NET can be executed lazily, i.e. only at the time when the result is needed. This may never come in certain situations. You can build tasks that are not executed until a lazy variable is required. The lazy variable is not initialised until it is read.

You can construct a lazy task in two separate steps:

Func<string> functionBody = new Func<string>(() =>
{
	Console.WriteLine("Function initialiser starting...");
	return "Some return value from the function initialiser";
});

Lazy<Task<string>> lazyInitialiser = new Lazy<Task<string>>
	(() =>
		Task<string>.Factory.StartNew(functionBody)
	);

Here we first create a function which we then pass to the Lazy constructor. You can specify the type of object that will be lazily initialised. One of the overloaded constructors of Lazy accepts a Func of Task of T which will be the initialisation function. Task.Factory.StartNew comes in handy here as we can supply our function.

You can achieve the same initialisation in one step as follows:¨

Lazy<Task<string>> inlineLazyInitialiser = new Lazy<Task<string>>(
	() => Task<string>.Factory.StartNew(() =>
	{
		Console.WriteLine("Inline initialiser starting...");
		return "Some return value from the inline lazy initialiser.";
	}));

We read the results as follows:

Console.WriteLine("Calling function initialiser within Lazy...");
Console.WriteLine(string.Concat("Result from task: ", lazyInitialiser.Value.Result));

Console.WriteLine("Calling inline lazy initialiser...");
Console.WriteLine(string.Concat("Result from task: ", inlineLazyInitialiser.Value.Result));

View the list of posts on the Task Parallel Library here.

Elliot Balynn's Blog

A directory of wonderful thoughts

Software Engineering

Web development

Disparate Opinions

Various tidbits

chsakell's Blog

WEB APPLICATION DEVELOPMENT TUTORIALS WITH OPEN-SOURCE PROJECTS

Once Upon a Camayoc

ARCHIVED: Bite-size insight on Cyber Security for the not too technical.