Getting notified by a Windows process change in C# .NET

In this post we saw an example of using the ManagementEventWatcher object and and EventQuery query. The SQL-like query was used to subscribe to a WMI – Windows Management Instrumentation – level event, namely a change in the status of a Windows service. I won’t repeat the explanation here again concerning the techniques used. So if this is new to you then consult that post, the code is very similar.

In this post we’ll see how to get notified by the creation of a new Windows process. This can be as simple as starting up Notepad. A Windows process is represented by the Win32_Process WMI class which will be used in the query. We’ll take a slightly different approach and use the WqlEventQuery object which derives from EventQuery.

Consider the following code:

private static void RunManagementEventWatcherForWindowsProcess()
{
	WqlEventQuery processQuery = new WqlEventQuery("__InstanceCreationEvent", new TimeSpan(0, 0, 2), "targetinstance isa 'Win32_Process'");
	ManagementEventWatcher processWatcher = new ManagementEventWatcher(processQuery);
	processWatcher.Options.Timeout = new TimeSpan(0, 1, 0);
	Console.WriteLine("Open an application to trigger the event watcher.");
	ManagementBaseObject nextEvent = processWatcher.WaitForNextEvent();
	ManagementBaseObject targetInstance = ((ManagementBaseObject)nextEvent["targetinstance"]);
	PropertyDataCollection props = targetInstance.Properties;
	foreach (PropertyData prop in props)
	{
		Console.WriteLine("Property name: {0}, property value: {1}", prop.Name, prop.Value);
	}
	processWatcher.Stop();
}

In the Windows service example we used the following query:

SELECT * FROM __InstanceModificationEvent within 2 WHERE targetinstance isa ‘Win32_Service’

The WqlEventQuery constructor builds up a very similar statement. The TimeSpan refers to “within 2”, i.e. we want to be notified 2 seconds after the creation event. “targetinstance isa ‘Win32_Process'” corresponds to “WHERE targetinstance isa ‘Win32_Service'” of EventQuery.

Run this code and open an application. I got the following output for Notepad++:

NotepadPlusPlus process created

…and this for IE:

IE process created

You can view all posts related to Diagnostics here.

Getting notified by a Windows Service status change in C# .NET

The ManagementEventWatcher object in the System.Management namespace makes it possible to subscribe to events within the WMI – Windows Management Instrumentation – context. A change in the status of a Windows service is such an event and it’s possible to get notified when that happens.

We saw examples of WMI queries on this blog before – check the link below – and the ManagementEventWatcher object also requires an SQL-like query string. Consider the following function:

private static void RunManagementEventWatcherForWindowsServices()
{
	EventQuery eventQuery = new EventQuery();
	eventQuery.QueryString = "SELECT * FROM __InstanceModificationEvent within 2 WHERE targetinstance isa 'Win32_Service'";	
	ManagementEventWatcher demoWatcher = new ManagementEventWatcher(eventQuery);
	demoWatcher.Options.Timeout = new TimeSpan(1, 0, 0);
	Console.WriteLine("Perform the appropriate change in a Windows service according to your query");
	ManagementBaseObject nextEvent = demoWatcher.WaitForNextEvent();			
	ManagementBaseObject targetInstance = ((ManagementBaseObject)nextEvent["targetinstance"]);
	PropertyDataCollection props = targetInstance.Properties;
	foreach (PropertyData prop in props)
	{
		Console.WriteLine("Property name: {0}, property value: {1}", prop.Name, prop.Value);
	}

	demoWatcher.Stop();
}

We declare the query within an EventQuery object. Windows services are of type “Win32_Service” hence the “where targetinstance isa ‘Win32_Service'” clause. “within 2” means that we want to be notified 2 seconds after the status change has been detected. A change event is represented by the __InstanceModificationEvent class. There are many similar WMI system classes. A creation event corresponds to the __InstanceCreationEvent class. So the query is simply saying that we want to know of any status change in any Windows service 2 seconds after the change.

The timeout option means that the ManagementEventWatcher object will wait for the specified amount of time for the event to occur. After this a timeout exception will be thrown so you’ll need to handle that.

In order to read the properties of the Windows service we need to go a level down to “targetinstance” and read the properties of that ManagementBaseObject. Otherwise the “nextEvent” object properties are not too informative.

Run this code, open the Windows services window and stop or pause any Windows service. I stopped the Tomcat7 service running on my PC and got the following Console output:

Stopping any service caught by event watcher

You can of course refine your query using the property names of the target instance. You can always check the property names on MSDN. E.g. if you open the above link to the Win32_Service object then you’ll see that it has a “state” and a “name” property. So in case you’ll want to know that a service name “Tomcat7” was stopped then you can have the following query:

eventQuery.QueryString = "SELECT * FROM __InstanceModificationEvent within 2 WHERE targetinstance isa 'Win32_Service' and targetinstance.state = 'Stopped' and targetinstance.name = 'Tomcat7'";

In this case starting Tomcat7 won’t trigger the watcher. Neither will stopping any other Windows service. The event watcher will only react if a service names “Tomcat7” was stopped, i.e. the “Status” property of the target instance was set to “Stopped”.

You can view all posts related to Diagnostics here.

Building a web service with Node.js in Visual Studio Part 9: testing POST actions

Introduction

In the previous post we extended the service and repository to handle GET requests. We also managed to connect to the local MongoDb database. We can read all customers from the customers collection and we can also search by ID.

In this post we’ll set up a little test application that will call the Node.js service. We’ll also see how to insert a new customer in the database.

POST operations

Inserting a new resource is generally performed either via PUT or POST operations. Here we’ll adapt the following convention:

  • POST: insert a new resource
  • PUT: update an existing resource

We’ll build up the insertion logic from the bottom up, i.e. we’ll start with the repository. Open the CustomerOrdersApi demo application and locate customerRepository.js. Add the following module.exports statement to expose the insertion function:

module.exports.insertBrandNew = function (customerName, next) {
    databaseAccess.getDbHandle(function (err, db) {
        if (err) {
            next(err, null);
        }
        else {
            //check for existence of customer name
            var collection = db.collection("customers");
            collection.find({ 'name': customerName }).count(function (err, count) {
                if (err) {
                    next(err, null);
                }
                else {
                    if (count > 0) {
                        err = "Customer with this name already exists";
                        next(err, null);
                    }
                    else {
                        //insert new customer with empty orders array
                        var newCustomer = {
                            name : customerName
                            , orders : []
                        };
                        collection.insert(newCustomer, function (err, result) {
                            if (err) {
                                next(err, null);
                            }
                            else {
                                next(null, result);
                            }
                        });                        
                    }
                }
            });
        }
    });

Let’s go through this function step by step. The function accepts the “next” callback which we’re familiar with by now. It also accepts a parameter to hold the name of the new customer. The idea is that we’ll enter a new customer with an empty orders array so there’s no parameter for the orders.

You’ll recognise the top section of the function body, i.e. where we get hold of the database. If that process generates an error then we return it. Otherwise we continue with checking if there’s a customer with that name. We don’t want to enter duplicates so we check for the existence of the customer name first. The “count” function which also accepts a callback will populate the “count” parameter with the number of customers found by customerName. If “count” is larger than 0 then we return an error. Otherwise we construct a new customer object and insert it into the customers collection. The “insert” function accepts the customer object in JSON format and of course a callback with any error and result parameters. The “result” parameter in this case will hold the new customer we inserted into the database in case there were no exceptions. We return that object to the caller using the “next” callback.

customerService.js will also be extended accordingly. Add the following function to that file:

module.exports.insertNewCustomer = function (customerName, next) {
    if (!customerName) {
        var err = "Missing customer name property";
        next(err, null);
    }
    else {
        customerRepository.insertBrandNew(customerName, function (err, res) {
            if (err) {
                next(err, null);
            }
            else {
                next(null, res);
            }
        });
    }
};

We check if customerName is null. If not then we call upon the repository. index.js in the services folder will be extended as well with a new function:

module.exports.insertNewCustomer = function (customerName, next) {
    customerService.insertNewCustomer(customerName, function (err, res) {
        if (err) {
            next(err, null);
        }
        else {
            next(null, res);
        }
    });
};

Finally, we need to add a new route to the customersController.js:

app.post("/customers", function(req, res) {
        var customerName = req.body.customerName;
        customerService.insertNewCustomer(customerName, function (err, newCustomer) {
            if (err) {
                res.status(400).send(err);
            }
            else {
                res.set('Content-Type', 'application/json');
                res.status(201).send(newCustomer);
            }
        });

    });

POST actions are handled through the “post” method, just like GET actions are handled by “get”. We’ll need to POST to the “/customers” endpoint and send in the customer name in the request body. The request body can be retrieved using the “body” property of the request object. If the request body is JSON formatted then the individual JSON properties can be extracted like shown in the example. We then call upon the appropriate function in customerService. In case the customer was inserted we respond with HTTP 201, i.e. “Created” and return the new object in the response.

There’s one more thing we need to do. If we tested this code like it is now then req.body would be void or “undefined”. We need to add another middleware from npm to make the request body readable. Right-click “npm” and insert the following node.js middleware called “body-parser”:

body-parser middleware in NPM

We’ll need to reference this package in server.js as follows:

var http = require('http');
var express = require('express');
var controllers = require('./controllers');
var bodyParser = require('body-parser')

var app = express();
app.use(bodyParser.urlencoded({ extended: false }))
app.use(bodyParser.json())

controllers.start(app);

var port = process.env.port || 1337;
http.createServer(app).listen(port);

Testing with code

Let’s test what we have so far from a simple .NET application. Add a new C# Console application to the solution and call it ApiTester. Add references to the following libraries:

  • System.Net
  • System.Net.Http

These are necessary to make HTTP calls to the Node.js web service. We’ll be communicating a lot using JSON strings so add the following JSON package through NuGet:

json.net nuget

Next we’ll insert two C# classes that represent our thin domain layer, Customer and Order:

public class Customer
{
	[JsonProperty(PropertyName = "_id")]
	public String Id { get; set; }
	[JsonProperty(PropertyName="name")]
	public String Name { get; set; }
	[JsonProperty(PropertyName="orders")]
	public List<Order> Orders { get; set; }
}
public class Order
{
	[JsonProperty(PropertyName = "item")]
	public string Item { get; set; }
	[JsonProperty(PropertyName = "quantity")]
	public int Quantity { get; set; }
	[JsonProperty(PropertyName = "itemPrice")]
	public decimal Price { get; set; }
}

The JsonProperty attributes indicate the name of the JSON property that will be mapped against the C# object property. This mapping is necessary otherwise when we read the Customer objects from the service then properties in the JSON response must be translated into the properties of our domain objects.

Next add a new class called ApiTestService to the console app. Insert the following method to it that will call the Node.js web service to insert a new customer:

public Customer TestCustomerCreation(String customerName)
{
	HttpRequestMessage postRequest = new HttpRequestMessage(HttpMethod.Post, new Uri("http://localhost:1337/customers/"));
	postRequest.Headers.ExpectContinue = false;
	InsertCustomerRequest req = new InsertCustomerRequest() { CustomerName = customerName };
        string jsonBody = JsonConvert.SerializeObject(req);
	postRequest.Content = new StringContent(jsonBody, Encoding.UTF8, "application/json");
	HttpClient httpClient = new HttpClient();
	httpClient.Timeout = new TimeSpan(0, 10, 0);
	Task<HttpResponseMessage> httpRequest = httpClient.SendAsync(postRequest,
			HttpCompletionOption.ResponseContentRead, CancellationToken.None);
	HttpResponseMessage httpResponse = httpRequest.Result;
	HttpStatusCode statusCode = httpResponse.StatusCode;

	HttpContent responseContent = httpResponse.Content;
	if (responseContent != null)
	{
		Task<String> stringContentsTask = responseContent.ReadAsStringAsync();
		String stringContents = stringContentsTask.Result;
		if (statusCode == HttpStatusCode.Created)
		{
			List<Customer> customers = JsonConvert.DeserializeObject<List<Customer>>(stringContents);
			return customers[0];
		}
		else
		{
			throw new Exception(string.Format("No customer created: {0}", stringContents));
		}
	}
	throw new Exception("No customer created");
}

Note that you may need to change the port number in the URI if you have something different. We call the web service and send in our customer creation request as JSON in the request body. We then check the response message. If the response code is 201, i.e. Created then we translate the JSON string into a list of customers – MongoDb will respond with an array and it will include a single element. We extract the first and only element from the list and return it from the function. Otherwise we throw an exception. InsertCustomerRequest is just a data transfer object to convey our message:

public class InsertCustomerRequest
{
	[JsonProperty(PropertyName="customerName")]
	public String CustomerName { get; set; }
}

We set the JSON property name to “customerName” so that the web service will find it through req.body.customerService as we saw above.

Insert the following method to Program.cs:

private static void TestCustomerInsertion()
{
	Console.Write("Customer name: ");
	string customerName = Console.ReadLine();
	ApiTesterService service = new ApiTesterService();
	try
	{
		Customer customer = service.TestCustomerCreation(customerName);
		if (customer != null)
		{
			Console.WriteLine("New customer id: {0}", customer.Id);
		}
	}
	catch (Exception ex)
	{
		Console.WriteLine(ex.Message);
	}
}

This is very basic: we enter a customer name and print out the ID of the new customer or the exception that was thrown. Call this method from Main:

static void Main(string[] args)
{			
	TestCustomerInsertion();
	Console.WriteLine("Main done...");
	Console.ReadKey();
}

Start the application with F5. As the Node.js project is set as the startup project you’ll see it start in a browser as before. Do the following to start the tester console app:

  • Right-click it in Solution Explorer
  • Select Debug
  • Select Start new instance

Enter a customer name when prompted. If all goes well then you’ll get the ID of the new customer in MongoDb:

New customer added Id output from MongoDb

Test again with the same name, it should fail:

No customer created error message from nodejs

In the next post we’ll extend our test application to call the GET endpoints of the web service.

View all posts related to Node here.

Creating an Amazon Beanstalk wrapper around a Kinesis application in Java

Introduction

Suppose that you have a Java Amazon Kinesis application which handles messages from the Amazon message queue handler Kinesis. This means that you have a method that starts a Worker object in the com.amazonaws.services.kinesis.clientlibrary.lib.worker library.

If you are developing an application that is meant to process messages from Amazon Kinesis and you don’t know what I mean by a Kinesis app then check out the Amazon documentation on the Kinesis Client Library (KCL) here.

The starting point for this post is that you have a KCL application and want to host it somewhere. One possibility is to deploy it on Amazon Elastic Beanstalk. You cannot simply deploy a KCL application as it is. You’ll need to wrap it within a special Kinesis Beanstalk worker wrapper.

The Beanstalk wrapper application

The wrapper is a very thin Java Maven web application which can be deployed as a .war file. If you’ve done any web-based Java development then the .war file extension will be familiar to you. It’s really like a .zip file that contains the project – you can even rename a .war file to a .zip file and unpack it like you would do with any compressed .zip file.

The wrapper can be cloned from GitHub. Once you have cloned it onto your computer you can open with a Java IDE such as NetBeans or Eclipse. I personally use NetBeans so the snapshots will show that environment. You’ll see the following folders after opening the project:

Beanstalk wrapper in NetBeans

NetBeans will load the dependencies in the POM file automatically. If you’re using something else or prefer to run Maven from the command prompt then here’s the mvn command to execute:

mvn clean compile war:war

The .war file will be placed in the “target” folder as expected. The wrapper will have all the basic dependencies to run an Amazon app such as the AWS SDK, Jackson, various Apache packages etc. In case your KCL app has some external dependencies on its own then those will need to be part of the wrapper app as well. Example: in my case one dependency of my KCL app was commons-collections4-4.0.jar. As this particular Apache dependency wasn’t by default available in the Beanstalk KCL wrapper I had to add it to its POM file. Do that for any such dependency.

The Source Packages folder includes a single Java file called KinesisWorkerServletInitiator.java. It is very short and has the following characteristics:

  • The overridden contextInitialized method will be executed automatically upon application start
  • It will look for a value in a query parameter called “PARAM1”
  • PARAM1 is supposed to be a fully qualified class name
  • The class name refers to a class in the Kinesis application that includes a public parameterless method called “run”
  • KinesisWorkerServletInitiator.java will look for this method and execute it through Reflection

We’ll come back to PARAM1 shortly.

So you’ll need to have a public method called “run” in the KCL app that the wrapper can call upon. Note that you of course change the body of the Kinesis wrapper as you wish. In my case I had to pass in a string parameter to the “run” method so I modified the Reflection code to look for a “run” method which accept a single string argument:

final Class consumerClass = (Class) Class.forName(consumerClassName);
final Method runMethod = consumerClass.getMethod("run", String.class);
runMethod.setAccessible(true);
final Object consumer = consumerClass.newInstance();

.
.
.

@Override
public void run()
{
         try
         {
               m.invoke(o, messageType);
         } catch (Exception e)
         {
               e.printStackTrace();
               LOG.error(e);
         }
}

You can put the run method anywhere – or even change its name and the wrapper app implementation will need to follow. I’ve put mine in the same place as the main method – the “run” method is really nothing else than the KCL application entry point from the Beanstalk wrapper’s point of view. When you test the KCL app locally then the main method will be executed first. When you run it from Beanstalk “run” will be executed first. Therefore the easiest implementation is simply to call “run” from “main” but you may have different needs for local execution. Anyway, you probably get the idea with the “run” method: it will start a Worker which in turn will process the Kinesis messages as you implemented the IRecordProcessor.processRecords method.

Take note of the full name of the class that has the run method. Open the containing class and check the package name, say “com.company.kinesismessageprocessor”. Then check the class name such as KinesisApplication so the full name will be com.company.kinesismessageprocessor.KinesisApplication. You can even put this as a default consumer class name in the Beanstalk wrapper in case PARAM1 is not available:

@Override
public void contextInitialized(ServletContextEvent arg0)
{
        String consumerClassName = System.getProperty(param);
        if (consumerClassName == null) 
        {
            consumerClassName = defaultConsumingClass;
        }
.
.
.
}

…where defaultConsumingClass is a private String holding the above mentioned class name.

The actual wrapping

Now we need to put the KCL application into the wrapper. Compile the KCL app into a JAR file. Copy the JAR file into the following directory of the Beanstalk wrapper web app:

drive:\directory-to-wrapper\src\main\WebContent\WEB-INF\lib

The JAR file should be visible in the project. In my case it looks as follows:

Drop KCL app into Beanstalk wrapper

Compile the wrapper app and the .war file should be ready for upload

Upload

While creating a new application in Beanstalk you will be able to upload the .war file. You’ll be able to upload a new version through the UI of the application:

Beanstalk deployment UI

You’ll be able to configure the Beanstalk app using the Configuration link on the left hand panel:

Configuration link for a Beanstalk app

This is where you can set the value for PARAM1:

Software configuration link in Beanstalk

Define PARAM1 for Beanstalk app

You’ll be able to enter the fully qualified name of the consumer class with the method “run” in the above table. If you don’t like the name “PARAM1” you can add your own parameters in the bottom of the screen and modify the name in code as well.

Troubleshooting

You can always look at the logs:

Request logs from Beanstalk app

You can then search for “exception” or “error” in the log file to check if e.g. an unhandled exception occurred in the application which stops it from functioning correctly.

A common issue is related to roles. When you created the Beanstalk app you have to select a specific IAM role here:

Select IAM role in Beanstalk app

The Beanstalk app will run under the selected role. If the KCL app needs to access other Amazon services, such as S3 or DynamoDb then the selected role must have access to those resources at the level defined by the KCL app. E.g. if the KCL app needs to put a record into a DynamoDb table then the Beanstalk role must have “dynamodb:PutItem” defined. You can edit this in the IAM console available here. Select the appropriate role and extend the role JSON under “Manage policy”:

Modify role in IAM console

View all posts related to Amazon Web Services here.

The Java Stream API part 5: collection reducers

Introduction

In the previous post we saw how to handle an ambiguous terminal reduction result of a Stream. There’s in fact another type of reducer function in Java 8 that we haven’t discussed so far: collectors, represented by the collect() function available for Stream objects. The first overload of the collect function accepts an object that implements the Collector interface.

Implementing the Collector interface involves implementing 5 functions: a supplier, an accumulator, a combiner, a finisher and characteristics provider. At this point I’m not sure how to implement all those methods. Luckily for us the Collectors object provides a long range of ready-made implementing classes that can be supplied to the collect function.

Purpose and first example

Collectors are similar to Maps and the Reducers we’ve seen up to now in this series at the same time. Depending on the exact implementation you take the collect function can e.g. map a certain numeric field of a custom object into an intermediary stream and calculate the average of that field in one step.

Let’s see that in action. We’ll revisit our Employee class:

public class Employee
{
    private UUID id;
    private String name;
    private int age;

    public Employee(UUID id, String name, int age)
    {
        this.id = id;
        this.name = name;
        this.age = age;
    }
        
    public UUID getId()
    {
        return id;
    }

    public void setId(UUID id)
    {
        this.id = id;
    }

    public String getName()
    {
        return name;
    }

    public void setName(String name)
    {
        this.name = name;
    }    
    
    public int getAge()
    {
        return age;
    }

    public void setAge(int age)
    {
        this.age = age;
    }
    
    public boolean isCool(EmployeeCoolnessJudger coolnessJudger)
    {
        return coolnessJudger.isCool(this);
    }
    
    public void saySomething(EmployeeSpeaker speaker)
    {
        speaker.speak();
    }
}

We’ve seen that some aggregation functions have ready-made methods in the Stream class: min, max, count and some others. However, there’s nothing for counting the average. What if I’d like to calculate the average age of my employees?

List<Employee> employees = new ArrayList<>();
        employees.add(new Employee(UUID.randomUUID(), "Elvis", 50));
        employees.add(new Employee(UUID.randomUUID(), "Marylin", 18));
        employees.add(new Employee(UUID.randomUUID(), "Freddie", 25));
        employees.add(new Employee(UUID.randomUUID(), "Mario", 43));
        employees.add(new Employee(UUID.randomUUID(), "John", 35));
        employees.add(new Employee(UUID.randomUUID(), "Julia", 55));        
        employees.add(new Employee(UUID.randomUUID(), "Lotta", 52));
        employees.add(new Employee(UUID.randomUUID(), "Eva", 42));
        employees.add(new Employee(UUID.randomUUID(), "Anna", 20)); 

It may not be obvious at first but the collect function can perform that – and a lot more. The Collectors class includes a ready-made implementation of Collector: averagingInt which accepts a ToIntFunction of T. The ToIntFunction will return an integer from the T object. In our case we need the age values so we can calculate the average age as follows:

ToIntFunction<Employee> toInt = Employee::getAge;
Double averageAge = employees.stream().collect(Collectors.averagingInt(toInt));     

averageAge will be 37.78.

Other examples

Collect all the names into a string list:

List<String> names = employees.stream().map(Employee::getName).collect(Collectors.toList());     

Compute sum of all ages in a different way:

int totalAge = employees.stream().collect(Collectors.summingInt(Employee::getAge));

Let’s change the age values a little before the next example:

employees.add(new Employee(UUID.randomUUID(), "Elvis", 50));
        employees.add(new Employee(UUID.randomUUID(), "Marilyn", 20));
        employees.add(new Employee(UUID.randomUUID(), "Freddie", 20));
        employees.add(new Employee(UUID.randomUUID(), "Mario", 30));
        employees.add(new Employee(UUID.randomUUID(), "John", 30));
        employees.add(new Employee(UUID.randomUUID(), "Julia", 50));
        employees.add(new Employee(UUID.randomUUID(), "Lotta", 30));
        employees.add(new Employee(UUID.randomUUID(), "Eva", 40));
        employees.add(new Employee(UUID.randomUUID(), "Anna", 20));    

We can group the employees by age into a Map of Integers:

Map<Integer, List<Employee>> employeesByAge = employees.stream().collect(Collectors.groupingBy(Employee::getAge));  

Here you’ll see that the key 20 will have 3 employees, key 50 will have 2 employees etc.

You can also supply another Collector to the groupingBy function if you want to have some different type as the value in the Map. E.g. the following will do the same as above except that the value will show the number of employees within an age group:

Map<Integer, Long> employeesByAge = employees.stream().collect(Collectors.groupingBy(Employee::getAge, Collectors.counting()));

You can partition the collection based on some boolean condition. Here we build a Map by putting the employees into one of two groups: younger than 40 or older. The partitionBy function will help solve this:

Map<Boolean, List<Employee>> agePartitioning = employees.stream().collect(Collectors.partitioningBy(emp -> emp.getAge()>= 40));

agePartitioning will have 6 employees who are younger than 40 and 3 who are either 40 or older which is the correct result.

You can create something like an ad-hoc toString() function:

String allEmployees = employees.stream().map(emp -> emp.getName().concat(",  ").concat(Integer.toString(emp.getAge()))).collect(Collectors.joining(" | "));

The above function will go through each employee, create a “name + , + age” string of each of them and then join all individual strings by a pipe character. The result will look like this:

Elvis, 50 | Marilyn, 20 | Freddie, 20 | Mario, 30 | John, 30 | Julia, 50 | Lotta, 30 | Eva, 40 | Anna, 20

Notice that the collector was intelligent not to put the pipe character after the last element.

The Collectors class has a lot more ready-made collectors. Just type “Collectors.” in an IDE which supports IntelliSense and you’ll be able to view the whole list. Chances are that if you need to perform a composite MapReduce operation on a collection then you’ll find something useful here.

This post concludes our discussion on the new Stream API in Java 8.

View all posts related to Java here.

Finding all Windows Services using WMI in C# .NET

In this post we saw how to retrieve all logical drives using Windows Management Instrumentation – WMI -, and here how to find all network adapters.

Say you’d like to get a list of all Windows Services and their properties running on the local – “root” – machine, i.e. read the services listed here:

Services window

The following code will find all non-null properties of all Windows services found:

private static void ListAllWindowsServices()
{
	ManagementObjectSearcher windowsServicesSearcher = new ManagementObjectSearcher("root\\cimv2", "select * from Win32_Service");
	ManagementObjectCollection objectCollection = windowsServicesSearcher.Get();

	Console.WriteLine("There are {0} Windows services: ", objectCollection.Count);

	foreach (ManagementObject windowsService in objectCollection)
	{
		PropertyDataCollection serviceProperties = windowsService.Properties;
		foreach (PropertyData serviceProperty in serviceProperties)
		{
			if (serviceProperty.Value != null)
			{
				Console.WriteLine("Windows service property name: {0}", serviceProperty.Name);
				Console.WriteLine("Windows service property value: {0}", serviceProperty.Value);
			}
		}
		Console.WriteLine("---------------------------------------");
	}
}

At the time of writing this post I had 196 services running on my PC. Here’s an example of the output for the Adobe Flash Player Update service:

Adobe Flash Player service properties

Once you know the property names of the WMI class then you can extend the SQL query. E.g. here’s how to find all non-running services:

ManagementObjectSearcher windowsServicesSearcher = new ManagementObjectSearcher("root\\cimv2", "select * from Win32_Service where Started = FALSE");

You can view all posts related to Diagnostics here.

Building a web service with Node.js in Visual Studio Part 8: connecting to MongoDb

Introduction

In the previous post we gave some structure to our Node.js project by way of a service and a repository. We also discussed the role of callbacks in asynchronous code execution, i.e. the “next” parameter. However, we still return some hard-coded JSON to all queries. It’s time to connect to the MongDb database we set up in part 2. The goal of this post is to replace the following code…

module.exports.getAll = function () {
    return { name: "Great Customer", orders: "none yet" };
};

module.exports.getById = function (customerId) {
    return { name: "Great Customer with id " + customerId, orders: "none yet" }
};

…with real DB access code.

In addition, we’ll operate with callbacks all the way from the controller to the repository. It might be overkill for this small demo project but I wanted to demonstrate something that’s similar to the await-async paradigm in .NET. If you’ve worked with the await-async keywords in .NET then you’ll know that once you decorate a method with “async” then the caller of that method will be “async” as well, and so on all the way up on the call stack.

MongoDb driver

There’s no built-in library in Node to access data in a database. There’s however a number of drivers available for download through the Node Package Manager. Keep in mind that we’re still dealing with JSON objects so forget the mapping convenience you’ve got used to while working with Entity Framework in a .NET project. Some would on the other hand say that this is actually a benefit because we can work with data in a raw format without the level of abstraction imposed by an object relational mapper. So whether or not this is a (dis)advantage depends on your preferences.

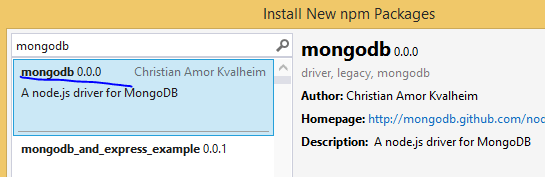
We’ll go for a simplistic driver for MongoDb which allows us to interact with the database at a low level, much like we did through the command line interface in parts 2 and 3 of this series. Open the project we’ve been working on and right-click npm. Select the driver called “mongodb”:

MongoDb driver for NodeJs

The central access

Add a new file called “access.js” to the repositories folder. Insert the following code in the file:

var mongoDb = require('mongodb');
var connectionString = "mongodb://localhost:27017/customers";
var database = null;

module.exports.getDbHandle = function (next) {
    if (!database) {
        mongoDb.MongoClient.connect(connectionString, function (err, db) {
            if (err) {
                next(err, null);
            }
            else {
                database = db;
                next(null, database);
            }
        });
    }
    else {
        next(null, database);
    }
};

The purpose of this file is to provide universal access to our MongoDb database to all our repositories. We first declare the following:

  • We import the mongodb library
  • We declare the connection string which includes the name of our database, i.e. “customers”
  • We set up a field that will be a reference to the database

The getDbHandle function accepts a callback function called “next” which we’re familiar with by now. We then check if the “database” field is null – we don’t want to re-open the database every time we need something, MongoDb handles connection pooling automatically. If “database” has been set then we simply return it using the “next” callback and pass in null for the exception.

Otherwise we use the “connect” function of the mongodb library to connect to the database using the connection string and a callback. The connect function will populate the “err” parameter with any error during the operation and the “db” parameter with a handle to the database. As we saw before we call the “next” callback with the error if there’s one otherwise we set our “database” field and pass it back to the “next” callback.

The new customer repository

The updated customer repository – customerRepository.js – looks as follows:

var databaseAccess = require('./access');

module.exports.getAll = function (next) {
    databaseAccess.getDbHandle(function (err, db) {
        if (err) {
            next(err, null);
        }
        else {
            db.collection("customers").find().toArray(function (err, res) {
                if (err) {
                    next(err, null);
                }
                else {
                    next(null, res);
                }
            });
        }
    });
};

module.exports.getById = function (customerId, next) {
    databaseAccess.getDbHandle(function (err, db) {
        if (err) {
            next(err, null);
        }
        else {
            var mongoDb = require('mongodb');
            var BSON = mongoDb.BSONPure;
            var objectId = new BSON.ObjectID(customerId);
            db.collection("customers").find({ '_id': objectId }).toArray(function (err, res) {
                if (err) {
                    next(err, null);
                }
                else {
                    next(null, res);
                }
            });
        }
    });
};

We import access.js to get access to the DB handle. The getAll function accepts a “next” callback and calls upon getDbHandle we’ve seen above. If there’s an error while opening the database we populate the error field of “next” and pass “null” as the result. Otherwise we can go on and query the database. We need to reference the “customers” collection within the database. Our goal is to find all customers and from part 2 of this series we know that the “find()” function with no parameters will do just that. So we call find(). We’re not done as we need to turn it into an array which also accepts a callback with the usual signature: error and result. As usual, if there’s an error, we call next with error and null otherwise we set null as the error and pass the result. If all went well then “res” will include all customers as JSON.

The getById function follows the same setup. Part 2, referred to above, showed how to pass a query to the find() method so this should be familiar. The only somewhat complex thing is that we need to turn the incoming “customerId” string parameter into an ObjectId object which MongoDb understands. We then pass the converted object id as the search parameter of the “_id” field.

Calling the repository from the service

The updated customerService code follows the same callback passing paradigm as we saw above:

var customerRepository = require('../repositories/customerRepository');

module.exports.getAllCustomers = function (next) {
    customerRepository.getAll(function (err, res) {
        if (err) {
            next(err, null);
        }
        else {
            next(null, res);
        }
    });
};

module.exports.getCustomerById = function (customerId, next) {
    customerRepository.getById(customerId, function (err, res) {
        if (err) {
            next(err, null);
        }
        else {
            next(null, res);
        }
    });
};

This doesn’t add much functionality to the service apart from calling the repository. Later on when we have the POST/PUT/DELETE functions in place we’ll be able to add validation rules.

index.js in the services folder will be updated accordingly:

var customerService = require('./customerService');

module.exports.getAllCustomers = function (next) {
    customerService.getAllCustomers(function (err, res) {
        if (err) {
            next(err, null);
        }
        else {
            next(null, res);
        }
    });
};

module.exports.getCustomerById = function (id, next) {
    customerService.getCustomerById(id, function (err, res) {
        if (err) {
            next(err, null);
        }
        else {
            next(null, res);
        }
    });
};

Updating the controller

Finally, we’ll extend the controller function to respond with a 400 in case of an error:

var customerService = require('../services');

module.exports.start = function (app) {
    app.get("/customers", function (req, res) {
        
        customerService.getAllCustomers(function (err, customers) {
            if (err) {
                res.status(400).send(err);
            }
            else {
                res.set('Content-Type', 'application/json');
                res.status(200).send(customers);
            }
        });
    });
    
    app.get("/customers/:id", function (req, res) {
        
        var customerId = req.params.id;        
        customerService.getCustomerById(customerId, function (err, customer) {
            if (err) {
                res.status(400).send(err);
            }
            else {
                res.set('Content-Type', 'application/json');
                res.status(200).send(customer);
            }
        });
        
    });
};

Note that we set the status code using the “status” function and the response body using the “send” function. In a real project you’d probably refine the response codes further but this will be fine for demo purposes.

Test

Run the application and navigate to /customers. Depending on how closely you followed part 2 and 3 of this series you can have different responses from the database. In my case I got the following:

[  
   {  
      "_id":"544cbaf1da8014d9145c85e7",
      "name":"Donald Duck",
      "orders":[  

      ]
   },
   {  
      "_id":"544cb61fda8014d9145c85e6",
      "name":"Great customer",
      "orders":[  
         {  
            "item":"Book",
            "quantity":2,
            "itemPrice":10
         },
         {  
            "item":"Car",
            "quantity":1,
            "itemPrice":2000
         }
      ]
   }
]

Copy the _id field and enter it as /customers/[id] in the browser, e.g. /customers/544cb61fda8014d9145c85e6 in the above case. The browser shows the following output:

[  
   {  
      "_id":"544cb61fda8014d9145c85e6",
      "name":"Great customer",
      "orders":[  
         {  
            "item":"Book",
            "quantity":2,
            "itemPrice":10
         },
         {  
            "item":"Car",
            "quantity":1,
            "itemPrice":2000
         }
      ]
   }
]

Great, we have the findAll and findById functionality in place.

We’ll continue with insertions in the next post.

View all posts related to Node here.

Finding all network adapters using WMI in C# .NET

In this post we saw how to retrieve all logical drives using Windows Management Intrumentation (WMI). We’ll follow a very similar technique to enumerate all network adapters.

The following code prints all non-null properties of all network drives found on the local – “root” – computer:

private static void ListAllNetworkAdapters()
{
	ManagementObjectSearcher networkAdapterSearcher = new ManagementObjectSearcher("root\\cimv2", "select * from Win32_NetworkAdapterConfiguration");
	ManagementObjectCollection objectCollection = networkAdapterSearcher.Get();

	Console.WriteLine("There are {0} network adapaters: ", objectCollection.Count);

	foreach (ManagementObject networkAdapter in objectCollection)
	{
		PropertyDataCollection networkAdapterProperties = networkAdapter.Properties;
		foreach (PropertyData networkAdapterProperty in networkAdapterProperties)
		{
			if (networkAdapterProperty.Value != null)
			{
				Console.WriteLine("Network adapter property name: {0}", networkAdapterProperty.Name);
				Console.WriteLine("Network adapter property value: {0}", networkAdapterProperty.Value);
			}
		}
		Console.WriteLine("---------------------------------------");
	}
}

Here’s an extract of the printout from my PC:

Network adapters extract console view

You can view all posts related to Diagnostics here.

Finding all WMI class properties with .NET C#

In this post we saw how to enumerate all WMI – Windows Management Intrumentation – namespaces and classes. Then in this post we saw an example of querying the system to retrieve all local drives:

ObjectQuery objectQuery = new ObjectQuery("SELECT Size, Name FROM Win32_LogicalDisk where DriveType=3");

The properties that we’re after are like “Size” and “Name” of Win32_LogicalDisk. There’s a straightforward solution as we can select all properties in the object query. The following method will print all properties available in the WMI class, their types and values:

private static void PrintPropertiesOfWmiClass(string namespaceName, string wmiClassName)
{
	ManagementPath managementPath = new ManagementPath();
	managementPath.Path = namespaceName;
	ManagementScope managementScope = new ManagementScope(managementPath);
	ObjectQuery objectQuery = new ObjectQuery("SELECT * FROM " + wmiClassName);
	ManagementObjectSearcher objectSearcher = new ManagementObjectSearcher(managementScope, objectQuery);
	ManagementObjectCollection objectCollection = objectSearcher.Get();
	foreach (ManagementObject managementObject in objectCollection)
	{
		PropertyDataCollection props = managementObject.Properties;
		foreach (PropertyData prop in props)
		{
			Console.WriteLine("Property name: {0}", prop.Name);
			Console.WriteLine("Property type: {0}", prop.Type);
			Console.WriteLine("Property value: {0}", prop.Value);
		}
	}
}

You’ll need to run this with VS as an administrator. Also, there’s no authentication so we’ll use this code to investigate the class properties on the local machine. Otherwise see the posts referred to above for an example to read WMI objects from another machine on your network.

Let’s see what’s there for us in the cimv2/Win32_LocalTime class:

PrintPropertiesOfWmiClass("root\\cimv2", "Win32_LocalTime");

I got the following output:

WMI class property name reader

Let’s see another one:

PrintPropertiesOfWmiClass("root\\cimv2", "Win32_BIOS");

Some interesting property values from the BIOS properties of my PC:

BIOS WMI properties

You can view all posts related to Diagnostics here.

Building a web service with Node.js in Visual Studio Part 7: service, repository and “next”

Introduction

In the previous post we looked at how to create controllers and routes in our Node.js project. We saw the controllers are normal JS classes that don’t need to follow any naming convention. We still give them names like “customersController” to indicate their purpose. We also saw what “module.exports” does and how it can be used to add functionality to a JS object. Lastly we looked at the role of “index.js” to reference a whole folder using the “require” function.

We ended up with a customers controller that directly sends back a JSON object. In a layered project, however, we should separate the roles as much as possible into controllers, services and repositories. The repository is responsible for data store operations such as insertions and queries. Services are the glue between controllers and repositories as controller normally do not contact the data store directly.

In a .NET project we’d hide the services and repositories behind abstractions like interfaces. In JS we don’t have interfaces so we’ll go for a simplified version. Still, the goal is to separate the roles and not let the controllers drive data access.

However, before that we need to look at asynchronous code execution in Node.js.

The “next” parameter

Have you checked out OWIN and Katana in .NET 4.5? If not, then you as a .NET developer should. It will help you understand the role of the “next” parameter in Node.js. There’s a course on OWIN on this blog starting here. Skim through it to get the idea. Take special note of the app builder object and the role of the “next” parameter in the following function:

appBuilder.Use(async (env, next)

In short “next” refers to the next action in the execution chain. The “next” parameter usually represents a function which can accept a number of parameters. Often it accepts an error parameter and some other objects that are returned from the callback function.

Note that “next” is only a parameter name. It could be called donaldduck or mickeymouse but apparently it’s quite often called “next” by default in Node.js projects to indicate its role to the caller.

The service

In this section we’ll first want to move the following dummy data extraction code from the controller to a service:

res.send({ name: "Great Customer with id " + customerId, orders: "none yet" });

Once that’s working we’ll move it further down to a repository. The controller we’ll interact with the service only.

Insert a new folder called “services” into the project and into that folder two JS files: one called index.js and another called customerService.js. Remember index.js from the previous post? It is a default file in a folder so that callers can refer to the folder through the require function without having exact knowledge of the folder’s contents beforehand.

We’ll start with customerService.js which at first won’t call any repository, we’ll do that in the next section. We must first understand how to chain the bits and pieces together. customerService.js is very simple:

module.exports.getAllCustomers = function () {
    return { name: "Great Customer", orders: "none yet" };  
};

module.exports.getCustomerById = function (customerId) {
    return { name: "Great Customer with id " + customerId, orders: "none yet" }
};

This should be fairly straightforward by now: we expose two methods, one for getting all customers and another for getting a single customer by id.

index.js is somewhat more exciting:

var customerService = require('./customerService');

module.exports.getAllCustomers = function (next) {
    next(null, customerService.getAllCustomers());
};

module.exports.getCustomerById = function (id, next) {
    next(null, customerService.getCustomerById(id));
};

We first make a reference to customerService. We then build the two methods that in turn will call the service functions in at first sight a funny way. We declare that the getAllCustomers function accepts a parameter called next. By the way we call “next” we imply the signature of “next” that must be passed into the function: a first parameter which we simply set to “null” here and the result of the customerService.getAllCustomers() operation. The first parameter will be an error parameter which is simply set to null for right now, we’ll keep it as a placeholder.

So in fact we’ll be soon passing in a function callback into the getAllCustomers function. By “next” we indicate to the caller that this might need to be executed asynchronously: data retrieval usually means consulting a database or a web service which involves some overhead. While that operation is ongoing the idle threads can perform something else.

Note, however, that in the above case we simply call “next” in a synchronous manner first to keep the example simple. This test method doesn’t involve any database operation yet but this implementation will change in future posts.

The getCustomerById is similar but we also pass in a customer ID, not only the next function to be called.

So how are these used from the controller? Consider the following code in customersController.js:

var customerService = require('../services');

module.exports.start = function (app) {
    app.get("/customers", function (req, res) {
        res.set('Content-Type', 'application/json');
        customerService.getAllCustomers(function (err, customers) {
            if (err) {

            }
            else {
                res.send(customers);
            }
        });
    });
    
    app.get("/customers/:id", function (req, res) {
        var customerId = req.params.id;
        res.set('Content-Type', 'application/json');
        customerService.getCustomerById(customerId, function (err, customer) {
            if (err) {
            }
            else {
                res.send(customer);
            }
        });
        
    });
};

We first reference the services folder. Notice the two dots as we need to leave the controllers folder first. We still set the routes as before but respond in a different manner which at first can seem confusing. We call getAllCustomers in the /customers endpoint and pass in a function for the “next” parameter. We know that the function needs to follow a certain signature: an error an a result placeholder. In the body of the implementation of “next” we check if there was any error – to be implemented later – otherwise we send back the result from the operation, i.e. “customers”. getCustomerById is the same but we also pass in the customer ID besides the “next” function implementation.

Run the application, navigate to /customers and /customers/123 and both should work as before.

The repositories

This step might be overkill at this stage but let’s see how a repository can be implemented. Add a new folder called “repositories” and a file called customerRepository into it:

module.exports.getAll = function () {
    return { name: "Great Customer", orders: "none yet" };
};

module.exports.getById = function (customerId) {
    return { name: "Great Customer with id " + customerId, orders: "none yet" }
};

This is the same as customerService above, only the exposed method names are different. customerService.js can be updated to:

var customerRepository = require('../repositories/customerRepository');

module.exports.getAllCustomers = function () {
    return customerRepository.getAll();  
};

module.exports.getCustomerById = function (customerId) {
    return customerRepository.getById(customerId);
};

There’s no need to change any other file.

Run the application and check if the above routes still work as before, they should.

In the next post we’ll connect to our customers database in MongoDb.

View all posts related to Node here.

Elliot Balynn's Blog

A directory of wonderful thoughts

Software Engineering

Web development

Disparate Opinions

Various tidbits

chsakell's Blog

WEB APPLICATION DEVELOPMENT TUTORIALS WITH OPEN-SOURCE PROJECTS

Once Upon a Camayoc

ARCHIVED: Bite-size insight on Cyber Security for the not too technical.