Introduction
In the previous post we added some validation to our demo message handling application. Validation adds some sanity checks to our logic so that bogus inputs are discarded.
In this post, which will be the last in the series on Amazon Kinesis, we’ll be looking at storage. We’ll save the data on disk, which in itself is not too interesting, but we’ll also discuss some formats that are suitable for further processing.
Formats
It is seldom that we’re saving data just to fill up a data store. This is true in our case as well. We’re getting the messages from the Kinesis stream and we’ll be soon saving them. However, we’ll certainly want to perform some actions on the data, such as data aggregations:
- Calculate the average response time for http://www.bbc.co.uk/africa between 12:15 to 12:30 on 13 January 2015 for users with Firefox 11
- Calculate max response time in week 45 2014 for the domain cnn.com for users located in Seattle
- Calculate the 99th percentile of the response time for http://www.twitter.com for February 2014
…etc. Regardless of where you’re planning to save the data, such as a traditional relational DB like MS SQL or a NoSql DB such as MongoDb, you’ll need to plan on the storage format i.e. what tables, collections, columns and datatypes you’ll need. As the next Amazon component we’ll take up on this blog is the blob storage S3 we’ll be concentrating on storing the raw data points in a text file. At first this may seem like a very bad idea but S3 is a very efficient, durable and scalable storage. However, don’t assume that this is a must for your Big Data system to work, you can save your data the way you want. Here we’re just paving the way for the next step.
As mentioned before in this series I have another, higher-level set of posts dedicated to Amazon architecture available here. I took up a similar topic there about message formats, I’ll re-use some of those explanations below.
The format will most likely depend on the mechanism that will eventually pull data from the raw data store. Data mining and analysis solutions such as Amazon RedShift or Elastic MapReduce (EMR) – which we’ll take up later on – will all need to work with the raw data. So at this stage you’ll need to do some forward thinking:
- A: What mechanism will need to read from the raw data store for aggregation?
- B: How can we easily – or relatively easily – read the raw data visually by just opening a raw data file?
B is important for debugging purposes if you want to verify the calculations. It’s also important if some customer is interested in viewing the raw data for some time period. For B you might want to store the raw data as it is, i.e. as JSON. E.g. you can have a text file with the following data points:
{"CustomerId": "abc123", "DateUnixMs": 1416603010000, "Activity": "buy", "DurationMs": 43253}
{"CustomerId": "abc123", "DateUnixMs": 1416603020000, "Activity": "buy", "DurationMs": 53253}
{"CustomerId": "abc123", "DateUnixMs": 1416603030000, "Activity": "buy", "DurationMs": 63253}
{"CustomerId": "abc123", "DateUnixMs": 1416603040000, "Activity": "buy", "DurationMs": 73253}
…i.e. with one data point per line.
However, this format is not really suitable for point A above. Other mechanisms will have a hard time understanding this data format. For RedShift and EMR to work most efficiently we’ll need to store the raw data in some delimited fields such as CSV or tab delimited fields. So the above data points will then be stored as follows in a tab-delimited file:
abc123     1416603010000    buy    43253
abc123     1416603020000    buy    53253
abc123     1416603030000    buy    63253
abc123     1416603040000    buy    73253
This is probably OK for point B above as well. It’s not too hard on your eyes to understand this data structure so we’ll settle for that. You might ask why we didn’t select some other delimiter, such as a pipe ‘|’ or a comma ‘,’. The answer is that our demo system is based on URLs and URLs can have pipes and commas in them making them difficult to split. Tabs will work better but you are free to choose whatever fits your system best.
Implementation
This time we’ll hide the implementation of the storage mechanism behind an interface. It will be a forward-looking solution where we’ll be able to easily switch between the concrete implementations. Open the demo C# application we’ve been working on so far and locate the WebTransaction object in the AmazonKinesisConsumer application. We’ll add a method to create a tab-delimited string out of its properties:
public string ToTabDelimitedString()
{
	StringBuilder sb = new StringBuilder();
	sb.Append(CustomerName)
		.Append("\t")
		.Append(Url)
		.Append("\t")
		.Append(WebMethod)
		.Append("\t")
		.Append(ResponseTimeMs)
		.Append("\t")
		.Append(UtcDateUnixMs);
	return sb.ToString();
}
Create a text file on your hard drive, like c:\raw-data\storage.txt. Add the following interface to AmazonKinesisConsumer:
public interface IRawDataStorage
{
	void Save(IEnumerable<WebTransaction> webTransactions);
}
…and also the following file based implementation:
public class FileBasedDataStorage : IRawDataStorage
{
	private readonly FileInfo _fileName;

	public FileBasedDataStorage(string fileFullPath)
	{
		if (string.IsNullOrEmpty(fileFullPath)) throw new ArgumentNullException("File full path");
		_fileName = new FileInfo(fileFullPath);
		if (!_fileName.Exists)
		{
			throw new ArgumentException(string.Concat("Provided file path ", fileFullPath, " does not exist."));
		}
	}

	public void Save(IEnumerable<WebTransaction> webTransactions)
	{
		StringBuilder stringBuilder = new StringBuilder();
		foreach (WebTransaction wt in webTransactions)
		{
			stringBuilder.Append(wt.ToTabDelimitedString()).Append(Environment.NewLine);
		}

		using (StreamWriter sw = File.AppendText(_fileName.FullName))
		{
			sw.Write(stringBuilder.ToString());
		}
	}
}
The implementation of the Save method should be quite straightforward. We build a string with the tab delimited representation of the WebTransaction object which is then appended to the source file.
Here comes the updated ReadFromStream() method:
private static void ReadFromStream()
{
IRawDataStorage rawDataStorage = new FileBasedDataStorage(@"c:\raw-data\storage.txt");
AmazonKinesisConfig config = new AmazonKinesisConfig();
config.RegionEndpoint = Amazon.RegionEndpoint.EUWest1;
AmazonKinesisClient kinesisClient = new AmazonKinesisClient(config);
String kinesisStreamName = ConfigurationManager.AppSettings["KinesisStreamName"];
DescribeStreamRequest describeRequest = new DescribeStreamRequest();
describeRequest.StreamName = kinesisStreamName;
DescribeStreamResponse describeResponse = kinesisClient.DescribeStream(describeRequest);
List<Shard> shards = describeResponse.StreamDescription.Shards;
foreach (Shard shard in shards)
{
GetShardIteratorRequest iteratorRequest = new GetShardIteratorRequest();
iteratorRequest.StreamName = kinesisStreamName;
iteratorRequest.ShardId = shard.ShardId;
iteratorRequest.ShardIteratorType = ShardIteratorType.TRIM_HORIZON;
GetShardIteratorResponse iteratorResponse = kinesisClient.GetShardIterator(iteratorRequest);
string iteratorId = iteratorResponse.ShardIterator;
while (!string.IsNullOrEmpty(iteratorId))
{
GetRecordsRequest getRequest = new GetRecordsRequest();
getRequest.Limit = 1000;
getRequest.ShardIterator = iteratorId;
GetRecordsResponse getResponse = kinesisClient.GetRecords(getRequest);
string nextIterator = getResponse.NextShardIterator;
List<Record> records = getResponse.Records;
if (records.Count > 0)
{
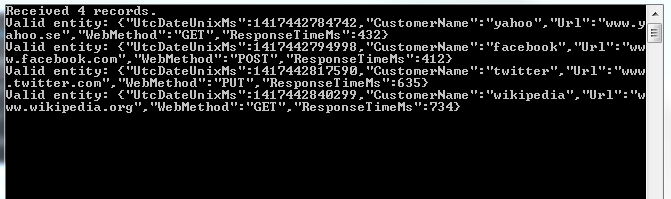
Console.WriteLine("Received {0} records. ", records.Count);
List<WebTransaction> newWebTransactions = new List<WebTransaction>();
foreach (Record record in records)
{
string json = Encoding.UTF8.GetString(record.Data.ToArray());
try
{
JToken token = JContainer.Parse(json);
try
{
WebTransaction wt = JsonConvert.DeserializeObject<WebTransaction>(json);
List<string> validationErrors = wt.Validate();
if (!validationErrors.Any())
{
Console.WriteLine("Valid entity: {0}", json);
newWebTransactions.Add(wt);
}
else
{
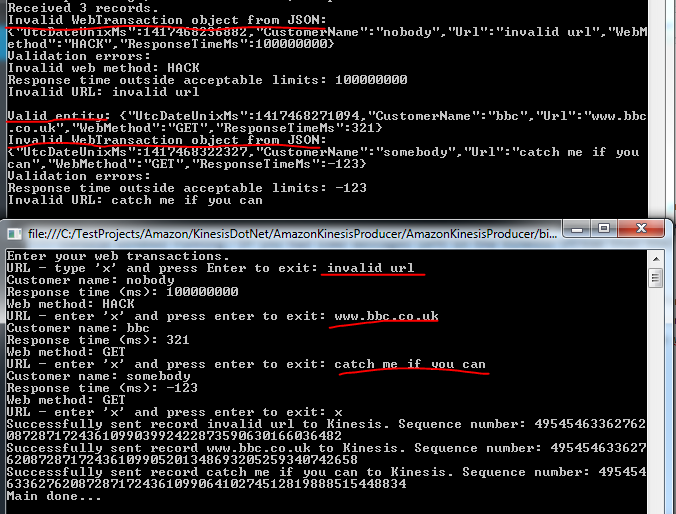
StringBuilder exceptionBuilder = new StringBuilder();
exceptionBuilder.Append("Invalid WebTransaction object from JSON: ")
.Append(Environment.NewLine).Append(json)
.Append(Environment.NewLine).Append("Validation errors: ")
.Append(Environment.NewLine);
foreach (string error in validationErrors)
{
exceptionBuilder.Append(error).Append(Environment.NewLine);
}
Console.WriteLine(exceptionBuilder.ToString());
}
}
catch (Exception ex)
{
//simulate logging
Console.WriteLine("Could not parse the following message to a WebTransaction object: {0}", json);
}
}
catch (Exception ex)
{
//simulate logging
Console.WriteLine("Could not parse the following message, invalid json: {0}", json);
}
}
if (newWebTransactions.Any())
{
try
{
rawDataStorage.Save(newWebTransactions);
Console.WriteLine("Saved all new web transactions to the data store.");
}
catch (Exception ex)
{
Console.WriteLine("Failed to save the web transactions to file: {0}", ex.Message);
}
}
}
iteratorId = nextIterator;
}
}
}
Run both the consumer and producer applications and send a couple of web transactions to Kinesis. You should end up with the tab delimited observations in the storage file. In my case I have the following:
yahoo http://www.yahoo.com GET 432 1417556120657
google http://www.google.com POST 532 1417556133322
bbc http://www.bbc.co.uk GET 543 1417556148276
twitter http://www.twitter.com GET 623 1417556264008
wiki http://www.wikipedia.org POST 864 1417556302529
facebook http://www.facebook.com DELETE 820 1417556319381
This concludes our discussion of Amazon Kinesis. We’ve also set the path for the next series where we’ll be looking into Amazon S3. If you’re interested in a full Big Data chain using cloud-based Amazon components then you’re more than welcome to read on.
View all posts related to Amazon Web Services and Big Data here.