Introduction to forms based authentication in ASP.NET MVC5 Part 3

Introduction

In the previous post we started digging into the components around Identity in MVC5. We looked at the default database and the Microsoft.AspNet.Identity.Core. We also saw how the MVC5 template with Forms based authentication creates a default UserManager class which can handle user creation, login, updates, claims etc.

We’ll continue our discussion with some other components around Identity in an MVC5 project.

We’ll build on the demo application from the previous two parts of this series.

EntityFramework

EntityFramework is the default choice for storing users in an MVC5 project. As far as identity is concerned EF is encapsulated in the Microsoft.AspNet.Identity.EntityFramework package. Do you recall the interfaces around user management in the Core assembly? IUserStore, IUserLoginStore, IUserClaimsStore etc. The EntityFramework assembly provides the out-of-the-box concrete implementation of each of those abstractions. Examples:

  • IdentityUser implements IUser
  • IdentityRole implements IRole
  • UserStore implements IUserStore, IUserLoginStore, IUserClaimsStore etc., so it contains a large amount of methods and properties which are implementations of the interfaces

IdentityUser and IdentityRole are entities that depend on EF for their persistence mechanism. Recall the database that MVC5 created for us in the local DB. Those are the DB representations of these identities. In AccountController.cs this UserStore is passed to the constructor of UserManager which in turn is passed into the constructor of AccountController. The UserManager will be responsible for all user-related operations through the UserStore implementation: insert, update, delete, add to role, read claims etc. If you navigate to AccountController.cs then you’ll see that the type of the user in the type definition is ApplicationUser. So what’s IdentityUser? If you locate the ApplicationUser class in Models/IdentityModels.cs then you’ll see that it derives from IdentityUser.

You can use the ApplicationUser class to extend the functionality of the default IdentityUser entity in EF with your custom properties.

There’s an additional important object in IdentityModels.cs: ApplicationDbContext which derives from IdentityDbContext of ApplicationUser. IdentityDbContext in turn derives from DbContext which is the standard object context in EntityFramework. Hence ApplicationDbContext is also a DbContext but it has access to the User related information that IdentityDbContext carries. We said that Users and Roles are entities so it’s just as well that ApplicationDbContext gets access to them. The constructor of the ApplicationDbContext object defines the name of the connection string, which is DefaultConnection. We saw this in the previous post but now we know where it is defined. In case you’ve renamed your connection string in web.config then you need to rename it here too.

ApplicationDbContext is also where you can add your custom DbSets so that EF can create the tables for you. We’ll go into EntityFramework in the series after this one so let’s not dive into that topic too much. It suffices to say the if you have a Customer domain then you can add a DbSet of Customer like this directly in ApplicationDbContext:

public class ApplicationDbContext : IdentityDbContext<ApplicationUser>
{
        public ApplicationDbContext()
            : base("DefaultConnection")
        {
        }

	public DbSet<Customer> Customers { get; set; }
}

If you go back to AccountController.cs you’ll notice that an ApplicationDbContext object is passed into the constructor of UserStore. Now we know that ApplicationDbContext derives from IdentityDbContext. IdentityDbContext is the EF object context which will carry out the actual DB operations of SELECT, UPDATE, DELETE etc. If you’re familiar with EF then this object context class will sound familiar.

You’ll also notice the TUser generic type argument. The actual type provided in all cases is ApplicationUser. You can define your own user type if you like but the following definitions force your implementation to implement IUser:

public class UserStore<TUser> : IUserLoginStore<TUser>, IUserClaimStore<TUser>, IUserRoleStore<TUser>, IUserPasswordStore<TUser>, IUserSecurityStampStore<TUser>, IUserStore<TUser>, IDisposable where TUser : global::Microsoft.AspNet.Identity.EntityFramework.IdentityUser

public class UserManager<TUser> : IDisposable where TUser : global::Microsoft.AspNet.Identity.IUser

I think it’s fine to have that constraint as IUser is an abstraction with minimal content:

string Id { get; }
string UserName { get; set; }

IdentityDbContext also provides the mapping between the entity classes and their DB representations. It also ensures that the tables are properly created when they are needed for the first time.

In summary we can say the Microsoft.AspNet.Identity.EntityFramework library provides the EntityFramework implementation of the abstractions in the Microsoft.AspNet.Identity.Core library. Let’s look at the concrete classes in some more detail.

First go at customisation

We’ve discussed the UserManager in some detail in the previous and this post. The Login action is represented by two methods in AccountController.cs:

[AllowAnonymous]
public ActionResult Login(string returnUrl)

[HttpPost]
[AllowAnonymous]
[ValidateAntiForgeryToken]
public async Task<ActionResult> Login(LoginViewModel model, string returnUrl)

The GET action method on top is fired when the user navigates to the Login page with the login form. The upon pressing the Log in button the POST action is invoked which accepts the LoginViewModel which in turn has 3 properties:

public string UserName { get; set; }
public string Password { get; set; }
public bool RememberMe { get; set; }

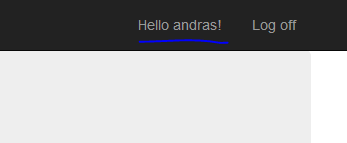
You’ll see that these are populated from the form. The POST Login method is the more interesting one as far as Identity is concerned. In the body of the method the UserManager will try to find the ApplicationUser with the FindAsync method. If the user exists, i.e. it is not null, then she is signed in and redirected to the return url. Otherwise the ModelState is invalidated.

Let’s see how we can add our custom property to the ApplicationUser object. Locate the object and add the following property:

public class ApplicationUser : IdentityUser
{
	public string FavouriteProgrammingLanguage { get; set; }
}

We’ll need to extend the corresponding view model if we want to collect this information from the user. Locate RegisterViewModel in Models/AccountViewModel.cs. It will have 3 fields: username, password and confirm password. Add a 4th one:

[Required]
[Display(Name="Favourite programming language")]
[DataType(DataType.Text)]
public string FavouriteProgrammingLanguage { get; set; }

Next open Register.cshtml in the Views/Account folder. You’ll see a form-group div where the user has to confirm the password. Just underneath add a new div:

<div class="form-group">
        @Html.LabelFor(m => m.FavouriteProgrammingLanguage, new { @class = "col-md-2 control-label" })
        <div class="col-md-10">
            @Html.TextBoxFor(m => m.FavouriteProgrammingLanguage, new { @class = "form-control" })
        </div>
</div>

Back in AccountController.cs locate the POST Register method that accepts a RegisterViewModel object. You’ll see the following bit of code after the if statement:

var user = new ApplicationUser() { UserName = model.UserName };

Extend the object as follows:

var user = new ApplicationUser() { UserName = model.UserName, FavouriteProgrammingLanguage = model.FavouriteProgrammingLanguage };

Let’s run the app and see what happens. Don’t log in with the user you created before. Instead, click on the Register link. The Register page should show the new text field. Create a new user, provide a programming language and press the Register button and.. …the yellow screen of death appears:

Yellow screen of death for code first migration

We’ve changed the entity structure but the database isn’t recreated for us on the fly of course. We’ll rectify this problem in the next post which will discuss DB migrations with EF in the User data context. We’ll revisit migrations in a greater detail in a planned series on EntityFramework which will follow this series.

The new field needs to be included elsewhere like on the Manage.cshtml view for completeness, but you can do that as an exercise.

Read the next post in this series here.

You can view the list of posts on Security and Cryptography here.

Introduction to forms based authentication in ASP.NET MVC5 Part 2

Introduction

In the previous part of this series we looked at the absolute basics of Forms Based Authentication in MVC5. Most of what we’ve seen is familiar from MVC4.

It’s time to dive into what’s behind the scenes so that we gain a more in-depth understanding of the topic.

We’ll start with the database part: where are users stored by default and in what form? We created a user in the previous post so let’s see where it had ended up.

Demo

Open the project we started building previously.

By default if you have nothing else specified then MVC will create a database for you in the project when you created your user – we’ll see how in the next series devoted to EntityFramework. The database is not visible at first within the project. Click on the Show All Files icon in the solution explorer…:

Show all files icon in solution explorer

…and you’ll see an .mdf file appear in the App_Data folder:

Database file in App_Data folder

The exact name will differ in your case of course. Double-click that file. The contents will open in the Server Explorer:

Membership tables in MVC 5

Some of these tables might look at least vaguely familiar from the default ASP.NET Membership tables in MVC4. However, you’ll see that there are a lot fewer tables now so that data is stored in a more compact format. A short summary of each table – we’ll look at some of them in more detail later:

  • _MigrationHistory: used by EntityFramework when migrating users – migrations to be discussed in the next series
  • AspNetRoles: where the roles are stored. We have no roles defined yet so it’s empty
  • AspNetUserClaims: where the user’s claims are stored with claim type and claim value. New to claims? Start here.
  • AspNetUserLogins: used by external authentication providers, such as Twitter or Google
  • AspNetUserRoles: the many-to-many mapping table to connect users and roles
  • AspNetUsers: this is where all site users are stored with their usernames and hashed passwords

As you can see the membership tables have been streamlined a lot compared to what they looked like in previous versions. They have a lot fewer columns and as we’ll see later they are very much customisable with EntityFramework.

Right-click the AspNetUsers table and select Show Table Data. You’ll see the user you created before along with the hashed password.

Database details

Go back to the Solution explorer and open up web.config. Locate the connectionStrings section. That’s where the default database connection string is stored with that incredibly sexy and easy-to-remember name. So the identity components of MVC5 will use DefaultConnection to begin with. We can see from the connection string that a local DB will be used with no extra login and password.

You can in fact change the connection string to match the real requirements of your app of course. The SQL file name is defined by the AttachDbFilename parameter. The Initial Catalog parameter denotes the database name as it appears in the SQL management studio. Change both to AwesomeDatabase:

AttachDbFilename=|DataDirectory|\AwesomeDatabase.mdf;Initial Catalog=AwesomeDatabase;

Run the application. Now two things can happen:

  • If you continued straight from the previous post of the series then you may still be logged on – you might wonder if the app is still using the old database, but it’s not the case. The application has picked up the auth cookie available in the HTTP request. In this case press Log Off to remove that cookie.
  • Otherwise you’re not logged in and you’ll see the Register and Log in links

Try to log in, it should fail. This is because the new database doesn’t have any users in it yet and the existing users in the old database haven’t been magically transported. Stop the application, press Refresh in Solution Explorer and you’ll see the new database file:

New database created automatically

Communication with the database

We’ve seen where the database is created and how to control the connection string. Let’s go a layer up and see which components communicate with the database. Identity data is primarily managed by the Microsoft.AspNet.Identity.Core NuGet library. It is referenced by the any MVC5 app where you run forms based authentication. It contains – among others – abstractions for the following identity-related elements:

  • IUser with ID and username
  • IRole with ID and role name
  • IUserStore: interface to abstract away various basic actions around a user, such as creating, deleting, finding and updating a user
  • IUserPasswordStore which implements IUserStore: interface to abstract away password related actions such as getting and setting the hashed password of the user and determining – on top all functions of an IUserStore

There’s also a corresponding abstraction for storing the user roles and claims and they all derive from IUserStore. IUserStore is the mother interface for a lot of elements around user management in the new Identity library.

There are some concrete classes in the Identity.Core library, such as UserManager and RoleManager. You can see the UserManager in action in various methods of AccountController.cs:

var result = await UserManager.CreateAsync(user, model.Password);
IdentityResult result = await UserManager.ChangePasswordAsync(User.Identity.GetUserId(), model.OldPassword, model.NewPassword);
IdentityResult result = await UserManager.AddPasswordAsync(User.Identity.GetUserId(), model.NewPassword);

The default UserManager is set in the constructor of the AccountController object:

public AccountController()
           : this(new UserManager<ApplicationUser>(new UserStore<ApplicationUser>(new ApplicationDbContext())))
{
}

public AccountController(UserManager<ApplicationUser> userManager)
{
     UserManager = userManager;
}

public UserManager<ApplicationUser> UserManager { get; private set; }

You see that we supply a UserStore object which implements a whole range of interfaces:

  • IUserLoginStore
  • IUserClaimStore
  • IUserRoleStore
  • IUserPasswordStore
  • IUserSecurityStampStore
  • IUserStore

So the default built-in UserManager object will be able to handle a lot of aspects around user management: passwords, claims, logins etc. As a starting point the UserManager will provide all domain logic around user management, such as validation, password hashing etc.

In case you want to have your custom solution to any of these components then define your solution so that it implements the appropriate interface and then you can plug it into the UserManager class. E.g. if you want to store your users in MongoDb then implement IUserStore, define your logic there and pass it in as the IUserStore parameter to the UserManager object. It’s a good idea to implement as many sub-interfaces such as IUserClaimsStore and IUserRoleStore as possible so that your custom UserStore that you pass into UserManager will be very “clever”: it will be able to handle a lot of aspects around user management. And then when you call upon e.g. UserManager.CreateAsync then UserManager will pick up your custom solution to create a user.

However, if you’re happy with an SQL server solution governed by EntityFramework then you may consider the default setup and implementations inserted by the MVC5 template. We’ll investigate those in the next post.

You can view the list of posts on Security and Cryptography here.

Introduction to forms based authentication in ASP.NET MVC5 Part 1

Introduction

ASP.NET MVC5 comes with a number of new elements regarding user management and security. When you create a new MVC 5 web app you’ll be able to choose between 4 default authentication types:

  • No authentication, i.e. anonymous users can access your site
  • Individual user accounts: the traditional way to log onto the site using a login form. The user store is backed by SQL identity tables. You can also enable some well known auth providers: Twitter, Google, Facebook and Microsoft where you don’t need to worry about the password
  • Organisational accounts: Active Directory Federation Services (ADFS), used within organisations that manage their users in ADFS, typically coupled with Single SignOn for the applications within the organisation. You can enable Azure-based ADFS as well
  • Windows auth: Windows Active Directory authentication for intranet apps. Your Windows login credentials will be used to access the internal applications of your company. This is somewhat like a stripped down version of the organisational accounts option

In this blog series we’ll look at the new identity features of MVC5.

Forms based authentication

Fire up Visual Studio 2013 and select the ASP.NET Web Application template in the New Project window. Give the project some name and click OK. A new window will open where you can select additional templates. Pick MVC. Press the ‘Change authentication’ button and make sure that ‘Individual user accounts’ is selected:

Individual user accounts option

Visual Studio will set up a forms-enabled MVC app for you without any extra effort. Run the web app and you’ll be directed to the default home page. You’ll see that it comes with the Register and Log in links:

Register and log in links in MVC 5 web app

If you used Forms based auth in MVC 4 then this is of course no surprise to you. Click Register and create a user. If everything goes well you’ll be automatically logged in and you’ll see your username instead of “Register”:

User registered and logged in

You can click on “Hello (your name)” to manage save your password if you want. Click Log off and then log in again with your credentials to check if it works fine. It should.

The Layout view

The top menu of the MVC 5 template is controlled by _Layout.cshtml in the Views/Shared folder. Open that file. You’ll see the links for Home, About and Contact. Below those links you’ll have a partial view called _LoginPartial. _LoginPartial is located in the same folder. Open it and let’s see what it contains.

There’s an if-else statement which tweaks what the user sees based on the Request.IsAuthenticated property. This property is set by the framework depending on whether the current user has logged on or not.

The user name is extracted using the User.Identity.GetUserName() method. User is an IPrincipal object and represents the currently logged-on user. Identity is the IIdentity belonging to the user which contains a small set of information about the user such as the user name or the authentication type. User.Identity is also set by the framework just like with the IsAuthenticated property.

You can read the User object anywhere within the controllers and views, i.e. where a valid HTTP session is available. Open Controllers/HomeController.cs and add the following code to Index() just above the return statement:

string userName = User.Identity.Name;

Set a breakpoint within Index and run the application. You’ll see that the username can be easily extracted this way.

Restrict access

There’s little point in authenticating users if you don’t limit the access to certain parts of your website to authenticated users only.

Right-click the Controllers folder and select Add, Controller. In the Add Scaffold window select the topmost option, i.e. Empty. Call it CustomersController. Add the following two methods to the controller:

public string SecretName()
{
	return "This is the secret customer name.";
}

public string PublicName()
{
	return "This is the public customer name.";
}

The goal is to protect access to the SecretName action and only let anonymous users read the public name.

Run the application and log off if you’re still logged in. Then navigate to the above actions:

  • localhost:xxxx/Customers/publicname
  • localhost:xxxx/Customers/secretname

Not surprisingly you can access both methods without having to log in first.

If your only requirement is to restrict access to a controller action to authenticated users only then you can use the Authorize attribute like this:

[Authorize]
public string SecretName()
{
	return "This is the secret customer name.";
}

Re-run the app and navigate to the secretname action. You should see that you’re redirected to the login page. Log in and you’ll see the secret. Note the URL of the Login page: Account/Login. It is defined in a Katana component in Startup.Auth.cs in the App_Start folder:

app.UseCookieAuthentication(new CookieAuthenticationOptions
{
          AuthenticationType = DefaultAuthenticationTypes.ApplicationCookie,
          LoginPath = new PathString("/Account/Login")
});

If you don’t know what OWIN and Katana mean then you can start here.

The ReturnUrl query string in the URL will store which controller and action you’ve tried to access. It will be fed to the POST Login action of AccountController:

public async Task<ActionResult> Login(LoginViewModel model, string returnUrl)

Now log off and navigate to /Customers/publicname. It should still be available to anonymous users.

What if you want to restrict access to all actions within the controller? You can apply the Authorize attribute on the controller level:

[Authorize]
public class CustomersController : Controller

Run the app again and navigate to /Customers/publicname. It is now also a restricted site so you’ll be redirected to the login page.

You can override the controller level Authorize attribute by decorated the individual action(s) with the AllowAnonymous attribute:

[AllowAnonymous]
public string PublicName()
{
	return "This is the public customer name.";
}

Run the app and verify that /Customers/publicname is publicly available again.

The Authorize attribute accepts a couple of parameters to further refine the access filter. Examples:

[Authorize(Users="andras,admin")]
[Authorize(Roles="admin,poweruser")]

You can probably guess what they mean: allow users with specific user names – andras and admin – or only allow users who have either admin and power user role to access an action.

You can test this as follows. Add the following attribute to SecretName:

[Authorize(Users = "elvis,bob")]
public string SecretName()
{
	return "This is the secret customer name.";
}

Run the app and navigate to the secret name action. Log in with your user. You should see that you’re immediately redirected back to the Login page – unless you selected ‘elvis’ or ‘bob’ as the user name in the sign up process. In that case the great secret will be revealed to you.

We’ve now seen the basics of forms based authentication in MVC5. We’ll dig much deeper in the coming blog posts.

Read the next post in this series here.

You can view the list of posts on Security and Cryptography here.

Introduction to WebSockets with SignalR in .NET Part 6: the basics of publishing to groups

Introduction

So far in this series on SignalR we’ve published all messages to all connected users. The goal of this post is to show how you can direct messages to groups of people. It is based on a request of a commenter on part 5. You can think of groups as chat rooms in a chat application. Only members of the chat room should see messages directed at that room. All other rooms should remain oblivious of those messages.

We’ll build upon the SignalR demo app we’ve been working on in this series. So have it open in Visual Studio. We’ll simulate the following scenario:

  • When a client connects for the first time they are assigned a random age between 6 and 100 inclusive
  • The client joins a “chat room” based on this age by calling a function in ResultsHub
  • When the client sends a message then only those already in the chat room will be notified

The real-life version would of course involve some sign-up page where the user can define which room to join or what their age is. You can also store those users if the chat application is closed to unanonymous users. However, all that would involve too much extra infrastructure irrelevant to the main goals.

Joining a group

We first need to assign an age to the client when they navigate to the Home page. Locate HomeController.cs. The Index action currently only returns a View. Extend it as follows:

public ActionResult Index()
{
	Random random = new Random();
	int next = random.Next(6, 101);
	ViewBag.Age = next;
        return View();
}

Normally you’d pass the age into the View in a view-model object but ViewBag will do just fine. In Index.cshtml add the following markup just below the Register message header:

<div>
    Your randomised age is <span id="ageSpan">@ViewBag.Age</span>
</div>

Now we want to call a specific Hub function as soon as the connection with the hub has been set up. The server side function will put the user in the appropriate chat room based on their age. Insert the following code into results.js just below the call to hub.start():

$.connection.hub.start().done(function ()
{        
        var age = $("#ageSpan").html();
        resultsHub.server.joinAppropriateRoom(age);
});  

When the start() function has successfully returned we’ll read the age from the span element and run a method called joinAppropriateRoom in ResultsHub. Open ResultsHub.cs and define the function and some private helpers as follows:

public void JoinAppropriateRoom(int age)
{
	string roomName = FindRoomName(age);
	string connectionId = Context.ConnectionId;
	JoinRoom(connectionId, roomName);
	string completeMessage = string.Concat("Connection ", connectionId, " has joined the room called ", roomName);
	Clients.All.registerMessage(completeMessage);
}

private Task JoinRoom(string connectionId, string roomName)
{			
	return Groups.Add(connectionId, roomName);
}	

private string FindRoomName(int age)
{
	string roomName = "Default";
	if (age < 18)
	{
		roomName = "The young ones";
	}
	else if (age < 65)
	{
		roomName = "Still working";
	}
	else
	{
		roomName = "Old age pensioners";
	}
	return roomName;
}

We’ll first find the appropriate room for the user based on the age. We’ve defined 3 broad groups: youngsters, employed and old age pensioners. We extract the connection ID and put it into the correct room. Note that we didn’t need to define a group beforehand. It will be set up automatically as soon as the first member is added to it. We then also notify every client that there’s a new member.

While we’re at it let’s define the function that will be called by the client to register the message together with their age. The age is again needed to locate the correct group. Add the following method to ResultsHub.cs:

public void DispatchMessage(string message, int age)
{			
	string roomName = FindRoomName(age);			
	string completeMessage = string.Concat(Context.ConnectionId
		, " has registered the following message: ", message, ". Their age is ", age, ". ");
	Clients.Group(roomName).registerMessage(completeMessage);
}

We again find the correct group, construct a message and send out the message to everyone in that group.

There’s one last change before we can test this. Locate the newMessage function definition of the messageModel prototype in results.js. It currently calls the simpler sendMessage function of ResultsHub. Comment out that call. Update the function definition as follows:

newMessage: function () {
            var age = $("#ageSpan").html();
            //resultsHub.server.sendMessage(this.registeredMessage());
            resultsHub.server.dispatchMessage(this.registeredMessage(), age);
            this.registeredMessage("");
        },
.
.
.

Run the application. The first client should see that they have joined some room based on their age. In my case it looks as follows:

First client joining a group

Open some more browser windows with the same URL and all of them should be assigned an age and a group. The very first client should see them all. In my test I got the following participants:

First client sees all subsequent chat participants

I started up 6 clients: 3 old age pensioners, 2 youngsters and 1 still working. It’s not easy to copy all windows so that we can see everything but here are the 6 windows:

All clients joining some group and conversing

The top left window was the very first client, a 77-year-old who joined the pensioners’ room. The one below that is a 65-year-old pensioner. Under that we have a 24-year-old worker. Then on the right hand side from top to bottom we have a 15-year-old, a 90-year-old and finally a 6-year-old client. Then the 65-year-old client sent a message which only the other pensioners have receiver. Check the last message in each window: the clients of 24, 6 and 15 years of age cannot see the message. Then the 6-year-old kid sent a message. This time only the 2 youngsters were sent the message. You’ll see that the 24-year old worker has not received any of the messages.

We’ve seen a way how you can direct messages based on group membership. You can define the names of the rooms in advance, e.g. in a database, so that your users can pick one upon joining your chat application. Then instead of sending in their age they can send the name of the room which to join. However, if you’re targeting specific users without them being aware of these groups you’ll need to collect the criteria from them based on which you can decide where to put them. In the above example the only criteria was their age. In other case it can be a more elaborate list of conditions.

View the list of posts on Messaging here.

OWIN and Katana part 4: Web API on top of OWIN

Introduction

In the previous post in this series we wrote a couple of OWIN middleware components and chained them together. We actually achieved quite a lot in a low level console application: it hosts a simple web server which receives HTTP requests, it processes the requests with Katana components and performs some elementary logging.

It’s now time to build an application on top of this environment. We’ll build upon the demo console app we’ve been working on so have it ready in Visual Studio. If you’ve read some other topics on this blog then you’ll note that I have a preference for the Web API as the server platform. So let’s see how we can build a Web API application on top of our little server.

Web API demo

Open the Console demo server in Visual Studio. We’ll need to install the following NuGet package:

Web API Owin Selfhost

As the package name implies this package will help us host a Web API 2.1 app using OWIN components. The package installs a number of other components such as WebApi.Core WebApi.Client, JSON.NET, etc. Open the References section in the Solution Explorer. If you’ve worked with the Web API before then some of those new libraries will be familiar to you: System.Net.Http, System.Web.Http and the like.

Add the following class to the project:

public class LatestNews
{
	public string Summary { get; set; }
}

We want our web service to show the latest news.

Let’s also add another class called LatestNewsController. It will be our first Web API controller. If you haven’t worked with the Web API before then a Web API controller has the same role as a “normal” controller in an MVC web app. It derives from the “ApiController” base class rather than the “Controller” class in MVC. The LatestNewsController class looks as follows:

public class LatestNewsController : ApiController
{
	public HttpResponseMessage Get()
	{
		LatestNews news = new LatestNews() { Summary = "The world is falling apart." };
		return Request.CreateResponse<LatestNews>(HttpStatusCode.OK, news);
	}
}

In Startup.Configuration comment out the Use method which dumps out the values in the Environment dictionary. The starting point for this exercise is the following “active” code, the rest should be commented out or removed:

public void Configuration(IAppBuilder appBuilder)
{
        appBuilder.Use(async (env, next) =>
	{
		Console.WriteLine(string.Concat("Http method: ", env.Request.Method, ", path: ", env.Request.Path));
		await next();
		Console.WriteLine(string.Concat("Response code: ", env.Response.StatusCode));
	});

	appBuilder.UseWelcomeComponent();			
}

Insert a new method stub in Startup.cs that will configure Web API:

private void RunWebApiConfiguration(IAppBuilder appBuilder)
{	
}

The key object to configuring the Web API is the HttpConfiguration object located in the System.Web.Http namespace. It opens, among a lot of other things, the gateway to the routing rules. Insert the following body to the above function:

HttpConfiguration httpConfiguration = new HttpConfiguration();
httpConfiguration.Routes.MapHttpRoute(
	name: "WebApi"
	, routeTemplate: "{controller}/{id}"
	, defaults: new { id = RouteParameter.Optional }
	);
appBuilder.UseWebApi(httpConfiguration);

This will look very familiar to you if you’ve done any MVC and/or Web API programming – which you probably have otherwise you wouldn’t be reading this post. So we set up out first routing rule using the MapHttpRoute method like in the standard Web API app template of Visual Studio. Finally we call upon the built-in extension of the IAppBuilder interface to declare that we want to use the Web API.

We should be ready to go. Add a call to this method from Configuration():

appBuilder.Use(async (env, next) =>
	{
		Console.WriteLine(string.Concat("Http method: ", env.Request.Method, ", path: ", env.Request.Path));
		await next();
		Console.WriteLine(string.Concat("Response code: ", env.Response.StatusCode));
	});

RunWebApiConfiguration(appBuilder);

appBuilder.UseWelcomeComponent();

Run the demo app and navigate to localhost:7990/latestnews in a web browser. You should see that our Web API component is indeed responding to the request:

Web Api output in web browser

We got the latest news in an XML serialised format. Also, you’ll notice that the middleware that prints the incoming request data in the console window still works:

Logging middleware still running

Now navigate to localhost:7990, i.e. without any controller name. You’ll see that our WelcomeComponent responds with “Hello from the welcome component”. The reason is that the web api component couldn’t route the request to any controller so it let the next component take over. The next component in the pipeline is the WelcomeComponent which happily responds to any request with the same message.

We have just built the basics of a self hosted Web API application which is very light weight, easy to extend and responds to incoming HTTP requests with meaningful data.

Deployment

Let’s try to deploy this application on IIS. Install the following NuGet package:

Owin host system web NuGet package

This package ensures that we can plug in our application into the ASP.NET pipeline.

We’ll also need to change a couple of other things in the application. IIS cannot directly load executables so our setup code in Program.Main is not relevant. Comment out the following chunk of code, all of it, including the Program class declaration:

class Program
    {
        static void Main(string[] args)
        {
			string uri = "http://localhost:7990";

			using (WebApp.Start<Startup>(uri))
			{
				Console.WriteLine("Web server on {0} starting.", uri);
				Console.ReadKey();
				Console.WriteLine("Web server on {0} stopping.", uri);
			}
        }
    }

All the startup infrastructure will be handled by IIS. However, we still want to run the Configuration code in Startup.cs. Open the project properties and turn the project type into a class library:

Turn console app into class library

Also, change the output path to simply ‘bin’ as is expected by IIS:

Change output path to bin

Build the solution to make sure it still compiles without errors. Check in the bin folder of the project that the [projectname].dll file was created by the build process. I called my project KatanaBasics so I have a KatanaBasics.dll in the bin folder. You’ll need the path to the bin folder in the next step.

We’ll use the iisexpress.exe file to load our this dll. The iisexpress.exe file is usually found here:

IISexpress.exe location

Open a command prompt and enter the following command. Make sure you enter the correct path as it appears on your system:

IIS express command prompt startup

…where the “path” parameter is the path to the bin folder on my computer. Press Enter and if everything goes well then you’ll see the following response:

IIS running in command prompt

You’ll notice in the output that IIS will be listening on port 8080 for this application. Navigate to localhost:8080 in a web browser and you should see that… …we get an exception, or at least I got it:

Missing owin assembly

Owin assemblies are updated quite often so it’s almost expected to run into this classic “Could not load file or assembly” error, although it’s really irritating.

Stop the IIS application by pressing “Q” in the command prompt. The solution is quite easy actually. The solution contains an app.config file with the following bit of XML:

<assemblyIdentity name="Microsoft.Owin" publicKeyToken="31bf3856ad364e35" culture="neutral" />
<bindingRedirect oldVersion="0.0.0.0-2.1.0.0" newVersion="2.1.0.0" />

This should do the trick of redirecting old references to an updated one. However, IIS won’t read this file as it is looking for a web.config file instead of app.config. Rename app.config to web.config. Then rebuild the solution, issue the same IIS command as before in the command prompt and navigate to localhost:8080. The WelcomeComponent should respond with “Hello from the welcome component”. Also, you should see the logging output in the command prompt along with some output from IIS itself:

Logging output with IIS running

The output of our OWIN middleware has been successfully plugged into the IIS infrastructure. Now check if the web api controller is still responding on localhost:8080/latestnews. You should see that it does indeed.

The OWIN project we’ve built produces a dll which can be referenced from any type of application: console, WPF, WCF, etc., it will always produce valid XML.

How was our application configured correctly now that the Program class has been commented out? How was our Configuration method called now that there’s no code calling it directly? The Host.SystemWeb dll has a bit of code that will look for a class called Startup and run its Configuration method for you automatically.

You can specify the location of the Startup in the appSettings section of web/app.config:

<appSettings>
	<add key="owin.appStartup" value="KatanaBasics.Startup"/>
</appSettings>

…where the value is the fully qualified name of the Startup class.

You can also specify it in the AssemblyInfo file:

[assembly: OwinStartup(typeof(KatanaBasics.Startup))]

If you don’t specify these values then it will try to find the Startup class through Reflection in the namespace matching the project name, in this case KatanaBasics. Since there’s one such class in that namespace, the web hosting process found it and executed it.

OWIN, Katana and MVC

Let’s see how OWIN and Katana are incorporated into ASP.NET MVC. In Visual Studio 2013 create a new MVC5 web application. Open the references list and you’ll see that there are several Owin related packages included by default:

Owin references in MVC5

You’ll also notice that there’s a Startup.cs in the root of the application:

Startup.cs in MVC5

Open the file and you’ll see the Configuration method which accepts an IAppBuilder object, so it follows the same pattern as we saw in our console based server app. The Configure method calls upon a method called ConfigureAuth. You’ll also notice the assembly metadata above the namespace that tells Katana where to look for the Startup class.

Note that this is a partial class so there’s one more Startup class. You’ll find it in the App_Start folder in a file called Startup.Auth.cs. This is where the ConfigureAuth method is implemented. As the method name suggests ConfigureAuth defines some OWIN middleware that have to do with authentication.

Most of the code is commented out. The two middleware functions that are not commented out are:

  • UseCookieAuthentication: to implement cookie authentication, checks if there’s a valid authentication cookie
  • UseExternalSignInCookie: for external cookies for third party auth providers

You can uncomment the rest of the code to activate either of the 4 available authentication providers: Microsoft, Twitter, Facebook and/or Google for OAuth2. We will look at these in a later series dedicated to security in MVC5.

Katana sourcecode

If you’re interested in how the Katana components are built then you can check out the sourcecode on the Katana Codeplex page. You’ll see the code for all existing Katana components there:

Katana codeplex page

You can even load the entire code from Git. You’ll find the git clone command on the Codeplex page.

View the list of MVC and Web API related posts here.

Parallel LINQ in .NET C#: keeping the order

In this post we saw a simple example of PLINQ. We saw that the items are processed in an arbitrary order.

Consider the following:

int[] sourceData = new int[10];
for (int i = 0; i < sourceData.Length; i++)
{
	sourceData[i] = i;
}

IEnumerable<int> parallelResults =
	from item in sourceData.AsParallel()
	where item % 2 == 0
	select item;

foreach (int item in parallelResults)
{
	Console.WriteLine("Item {0}", item);
}

When I ran the code on my machine I got the following output:

0, 4, 6, 8, 2

What if you want the items to be processed in an ascending order? Just append the AsOrdered() extension method:

IEnumerable<int> parallelResults =
	from item in sourceData.AsParallel().AsOrdered()
	where item % 2 == 0
	select item;

This produces the same order as a sequential query execution but with the benefits of parallel execution. However, there’s a small cost to this. Without ordering PLINQ could freely decide how to start and optimise the threads. Now there’s a performance cost to restore the order with the AsOrdered extension method. Keep this in mind and only use ordering if it really matters. Otherwise you can order the resulting list with “normal” LINQ afterwards.

View the list of posts on the Task Parallel Library here.

OWIN and Katana part 3: more complex middleware

Introduction

We wrote our first OWIN component, a.k.a. middleware in the previous part of this series. We said that it’s called middleware because it sits somewhere in the invocation chain of elements. There may be other elements before and after the actual component.

We’ll write a somewhat more complex component this time. We’ll build upon the simple Console based server application we’ve been working on in this series.

Demo

Open the Console based web server demo in Visual Studio 2013. In Startup.Configuration we currently have a call to appBuilder.UseWelcomeComponent. We’ll now insert another component that will execute before the WelcomeComponent.

Keep in mind that not all OWIN components must be separate classes. We saw an example of an inline component when we looked at the Run extension method. Recall that we could reference the Response property of the OWIN context directly instead of how we pulled it from the environment dictionary in WelcomeComponent which is at a lower level. The Run extension method does actually the same thing behind the scenes, i.e. it checks the environment variable and pulls the Response property out of it so that it is readily available from the OWIN context. That’s an example of how Katana can build upon OWIN to simplify things.

This time we’ll look at the Use extension method of IAppBuilder. It comes in two versions: one that takes a Func delegate, i.e. we can write an inline lambda expression, and another one which takes an object and and array of objects. This latter version allows us to pass in low-level components such as WelcomeComponent. The Func delegate has the following definition:

Func<IOwinContext, Func<Task>, Task> handler;

So it’s a delegate that returns a Task and accepts two parameters: an IOwinContext and another delegate which returns a Task. The IOwinContext will be the Environment, and Func of Task corresponds to the next component in the invocation chain. Insert the following stub into Configuration before appBuilder.UseWelcomeComponent:

appBuilder.Use((env, next) =>
{

});

In case you’re not familiar with lambdas start here. ‘env’ and ‘next’ correspond to the two input parameters of the delegate. You’ll see that the compiler is complaining as there’s no return statement in the body of the delegate. We’ll simulate some kind of logging in the body: loop through the values in the Environment dictionary and show them in the console. The Use method implementation looks as follows:

appBuilder.Use(async (env, next) =>
	{
		foreach (KeyValuePair<string, object> kvp in env.Environment)
		{
			Console.WriteLine(string.Concat("Key: ", kvp.Key, ", value: ", kvp.Value));
		}

		await next();
	});

The call to ‘next’ returns a Task and can be awaited, hence the ‘await’ keyword. We can write ‘next()’ because it represents the application function of the next component in the pipeline. And since the application function is a delegate, it can be invoked like a normal method. In order for that to work properly we had to add the ‘async’ keyword in front of the delegate declaration. Also, the Func delegate has to return a Task, which next() does, so it fulfils the delegate signature.

That was an example of middleware. Run the web server demo app and navigate to localhost:7990 in a web browser. Watch the values in the console. Some dictionary values are objects so their string representation will simply be the type name. Still, most values will probably look familiar to you as a web developer who’s done some work with HTTP requests and responses.

Let’s add another piece of middleware using the same technique. Insert the following code after the one we’ve just written:

appBuilder.Use(async (env, next) =>
	{
		Console.WriteLine(string.Concat("Http method: ", env.Request.Method, ", path: ", env.Request.Path));
		await next();
		Console.WriteLine(string.Concat("Response code: ", env.Response.StatusCode));
	});

First we report the HTTP method and the request path using the Request property of the Environment variable. Then we let the next component run and be awaited upon. Finally we print out the response status code. You could also overwrite the status code of course in another component. E.g. if a new resource is created with a POST method then you might want to return 201 Created instead of the default 200 OK.

Run the application again and refresh the browser with localhost:7990. You’ll see the new piece of information printed in the console: the method (GET), the request path (favicon) and the response code (200). You’ll notice that the request path in the dictionary dump is simply “/”, i.e. the application root and the response code to that is 200. Then we see another request in the second Katana component for the favicon. Refresh the web page a couple of times and you’ll see that the browser will try to fetch the favicon every time and respond with status code 200. You can also test with a different URL such as localhost:7990/donaldduck. You’ll see that the first request comes in for /donaldduck and then a second request for the favicon again.

Let’s see what happens if we reorder the invocation list. Recall that WelcomeComponent.Invoke doesn’t call upon the next component in the pipeline. In Startup.Configuration put appBuilder.UseWelcomeComponent to the top of the middleware list, i.e. ahead of the first Use method. Run the application and refresh the browser. You should see that the WelcomeComponent component is invoked but not the other two. So you see how the modular setup allows you to control and finegrain what’s happening in a web server when it receives a HTTP call.

Read the last post in this series here.

View the list of MVC and Web API related posts here.

OWIN and Katana part 2: the Application Function

Introduction

In the previous post of this series we started looking into OWIN and Katana. We also looked at a small, very basic Console based web server to see them in action.

We’ll continue digging into how these technologies work. We’ll build upon the demo application we started working on in the previous post so have it ready in Visual Studio.

The Application Function

The application function, or AppFunc is a tool that defines how elements process incoming HTTP requests to the server. It provides a delegate which returns a Task and accepts an IDictionary of string and object. We saw an example of such a Func in the first post of this series. The dictionary represents the request environment. Recall the Environment property of the IAppBuilder interface which is also of the same dictionary type. We also said that this structure is characteristic of OWIN as it lacks any higher level abstraction. It is not a dictionary of, say, RequestParameter and RequestKey with built-in properties which we could expect in a built-in object oriented .NET class. This particular dictionary includes all types of data about the request from and the response to the client: headers, cookies, server variables etc.

The application function delegate always returns a Task to adhere to the asynchronous programming model of modern .NET applications. At this point you should be familiar with the await-async keywords in C#. If not, then start here.

You’ll probably notice that this is quite low-level programming compared to writing a “normal” ASP.NET web application where you get all HTTP related tasks for free from the System.Web library and IIS as the default server. In OWIN you are free to build all components required to fulfil a request. The components will be independent from each other but still able to work together in a decoupled fashion. One component may check the request headers, another one the authentication cookies etc. Every component will have an application function that can be invoked externally. The components form a chain of actions where each component calls upon the next component’s application function in the pipeline using the data in the Environment dictionary mentioned above. As the dictionary object only contains strings and objects the chain remains very loosely coupled.

Demo

Open the console web server we started working on previously in Visual Studio. If you recall then we tested two methods of IAppBuilder: UseWelcomePage and Run. We’ll try something different this time. Add a new class to the solution called WelcomeComponent. Our goal is to write some greeting to every request at a lower level than we did previously. The class will need to come in contact with the IAppBuilder somehow. We’ll need to add a method that matches the Func delegate signature of AppFunc. Insert the following method stub into WelcomeComponent:

public Task Invoke(IDictionary<string, object> environment)
{
    throw new NotImplementedException();
}

Locate Startup.Configuration, comment out the call to appBuilder.UseWelcomePage and insert the following call instead:

appBuilder.Use<WelcomeComponent>();

The Use method will insert a component into the OWIN pipeline. Run the application and you should get an exception: MissingMethodException. The compiler is testing the OWIN components that you wired up using Reflection. If it finds any missing element it will tell you about it. In this case the error message says that “WelcomeComponent does not have a constructor taking 1 argument”. That argument is the AppFunc for the next component in the invocation chain. By now we know what an AppFunc delegate looks like so insert the following constructor stub:

public WelcomeComponent(Func<IDictionary<string, object>, Task> appFunc)
{
}

As an aside: there’s a little trick to make this constructor more concise. Add the following using statement underneath the others:

using ApplicationFunction = System.Func<System.Collections.Generic.IDictionary<string, object>, System.Threading.Tasks.Task>;

…the constructor becomes…:

public WelcomeComponent(ApplicationFunction appFunc)
{
}

The incoming appFunc variable represents the next component in the component chain. Add the following private field to the class:

private readonly ApplicationFunction _nextComponent;

…and so the constructor will look like the following:

public WelcomeComponent(ApplicationFunction appFunc)
{
	if (appFunc == null) throw new ArgumentNullException("AppFunc of next component");
	_nextComponent = appFunc;
}

We’ll also implement the Invoke method in a simplistic way:

public async Task Invoke(IDictionary<string, object> environment)
{
	await _nextComponent(environment);
}

So we await the next component and pass along the incoming environment variable to its constructor, just like the way how WelcomeComponent would be called in the pipeline.

A short aside: the Invoke method must be called Invoke, so I didn’t just pick this name. Change the method to something else, like MickeyMouse and then run the application. You should get a System.ArgumentException complaining about a conversion error.

Rename the method to ‘Invoke’. Add a breakpoint within the Invoke method and run the application. You should see a console window with the message that the web server has started. Navigate to localhost:7990 in a web browser and code execution should stop at the break point. Hover over the incoming ‘environment’ variable with the mouse to inspect its contents. In particular take a look at what’s available in the dictionary:

AppFunc dictionary contents

So there are 29 keys and 29 values – this number may change in future updates to the OWIN-related assemblies. Looking through the key names it will be clear immediately that it’s possible to extract just about any information related to the HTTP request: path, headers, request method, request body etc. This environment variable will make sure that the HTTP request properties will be available to every component in the chain. Some of them are actually specified as compulsory elements by the OWIN specification.

You can in fact stop the invocation chain right here and return a response to the caller already now. In that case you’ll need to access the “owin.ResponseBody” dictionary element. Stop the application and comment out the await statement in the Invoke method. The response body will be a Stream so we’ll extract it from the environment dictionary as follows:

Stream responseBody = environment["owin.ResponseBody"] as Stream;

We then construct a StreamWriter out of this and write to the response stream:

using (StreamWriter responseWriter = new StreamWriter(responseBody))
{
	return responseWriter.WriteAsync("Hello from the welcome component");
}

Remove the ‘async’ from the method declaration as the WriteAsync method already returns a Task. Run the application and navigate to localhost:7990 in a browser. You should see the plain message we provided above to the WriteAsync method. This was in fact a very low level Katana component, probably the lowest level possible.

The methods we tested with IAppBuilder, i.e. Run and UseWelcomePage, use the same technique behind the scenes. They are simply wrappers around a much more elaborate Invoke method.

We can make it so that our glorious implementation of the Invoke method becomes available to other programmers using an extension method. Add a new class to the project called AppBuilderExtensions:

public static class AppBuilderExtensions
{
	public static void UseWelcomeComponent(this IAppBuilder appBuilder)
	{
		appBuilder.Use<WelcomeComponent>();
	}
}

We can call this extension method in Startup.Configuration as follows:

appBuilder.UseWelcomeComponent();

This produces the same behaviour as before, just with a little nicer syntax. You’ll notice that the UseWelcomeComponent method call looks very much like UseWelcomePage – the implementation of the latter is probably slightly more involved however.

Components in OWIN are also called middleware as they sit in the middle of the processing pipeline. We’ll keep looking at OWIN middleware in the next post.

View the list of MVC and Web API related posts here.

OWIN and Katana part 1: the basics

Introduction

Katana is a new light-weight web framework built by Microsoft. It is based on a specification called OWIN – Open Web Interface for .NET. The default MVC5 template in Visual Studio 2013 have elements of Katana and OWIN.

Think of Katana as a web framework such as ASP.NET which interacts with IIS as the hosting environment. IIS provides a rich set of features for logging, tracing, monitoring etc. These features are not always needed. With the advent of HTML5 and some very advanced JavaScript libraries like jQuery, Knockout.js, Angular.js etc. a lot of work has been delegated to the client. It is often no longer the server that produces HTML – it only responds to Ajax calls with JSON and it is up to the client to process it. This applies especially to mobile applications that consume cloud based web services which only respond with JSON. The goal is to simplify web hosts to make them more responsive, more scalable and cheaper to maintain as the processing time of a request will be a lot faster. Node.js is a JavaScript-based framework that you can use to build a very lean and efficient web server which only has a limited number of features compared to IIS but suits the needs of a large number of web service consuming applications.

Katana allows you to build web based applications, such as MVC or Web API (2) where you can decide which web features to include in the project. Katana features are highly modularised. Instead of including the entire System.Web library even in the smallest web applications, you can decide which features to include and exclude. As mentioned above, Katana builds on OWIN to achieve these goals. OWIN is a specification which defines an an easy and decoupled form of communication between frameworks and servers. With Katana you can build applications that only indirectly use the features in System.Web through OWIN interfaces. Such an application can be hosted on any server that supports OWIN so it is not tightly coupled to IIS.

Normally a .NET MVC web application references the entire System.Web namespace which has a very large amount of features of which your application may only need a fraction. Also, it will be tied to IIS. Katana takes an other approach with its portable, modular and lightweight components.

I won’t test your patience any longer – let’s see a demo! We’ll build both a Console and a Web application so I have downloaded Visual Studio Express for Web and Desktop. If you have the full version of VS 2013 then you’ll be fine.

Demo

Open Visual Studio 2013 for Windows and create a new Console application. Call it KatanaBasics. Install the following NuGet packages:

Owin hosting nuget package

HttpListener owin package

The Hosting package will also install a number of dependencies such as Owin and Microsoft.Owin. These are the core Katana libraries. Owin contains the core OWIN abstractions, whereas Microsoft.Owin is the Microsoft extension to OWIN. The HttpListener library includes classes to communicate with the operating system. It also enables us to build a small app that listens to HTTP requests on a port. Which is what we’re planning to build here.

Add a new class to the project called Startup which will configure Katana. Be exact and call it “Startup”. When working with Katana you’ll see these Startup classes all the time. The Startup class must have a Configuration method which accepts an IAppBuilder object which resides in the Owin namespace. Add the following stub to the Startup class:

public void Configuration(IAppBuilder appBuilder)
{

}

IAppBuilder includes methods that help us configure an application, in particular how it will respond to HTTP requests. There are a lot of extension methods to the IAppBuilder interface. They are available in different Owin-related libraries. So as you reference additional Owin packages from NuGet you’ll see new extension methods available for the IAppBuilder interface. This provides you a way to enable new features as they become necessary.

The Run() extension method helps us configure how the application will handle HTTP requests. Katana will call into this method to process the requests. It accepts a Func delegate which returns a Task object and accepts an IOwinContext object as parameter.

Start typing the following within the Configuration method:

appBuilder.Run(owinContext =>
	{
		owinContext.
	});

This is a lambda expression that accepts an IOwinContext object which will be inferred by the compiler. As you type “owinContext.” IntelliSense will provide a list of interesting properties:

  • Authentication: to access properties of the current user, such as Claims
  • Environment: helps you to retrieve a range of OWIN-related properties from the current OWIN context
  • Request: to access the properties related to the HTTP request such as headers and cookies
  • Response: to build and manipulate the HTTP response

The Environment property returns a type of IDictionary of string and object which is quite generic and is characteristic of OWIN. Normally in ASP.NET we have access to strongly typed classes when we extract information about the incoming HTTP request. Here, however, the information is stored in a generic dictionary of the very basic “string” and “object” objects. OWIN aims to provide a simple API without a lot of specialisation.

In this very first demo we’ll only return a simple string to all callers using the Response property:

appBuilder.Run(owinContext =>
	{
		return owinContext.Response.WriteAsync("Hello from OWIN web server.");
	});

WriteAsync returns a Task so it is perfectly suitable for our Func delegate.

We’ll define the URI and port number in the Main method where the console app will be listening. We’ll also use another object from OWIN called WebApp to set up our web server. It is a Katana component residing in the Microsoft.Owin.Hosting namespace. It has a Start method where you can specify the class that includes your configuration. Add the following code to Main:

string uri = "http://localhost:7990";

using (WebApp.Start<Startup>(uri))
{
        Console.WriteLine("Web server on {0} starting.", uri);
        Console.ReadKey();
	Console.WriteLine("Web server on {0} stopping.", uri);
}

If you have anything running on port 7990 then select something else. All we do within the using block is let the world know that we’re starting the server. We can stop the server by pressing a button which is what the ReadKey is waiting for. That’s it really, we have just written a web server. Press F5 to start the application. You should see a console window popping up with the start-up message. Then open a browser and navigate to http://localhost:7990. You should see the welcome message in the browser:

Console web server running in browser

Let’s make the welcome page a bit more interesting. Download the following NuGet package:

Owin diagnostics NuGet package

The Diagnostics package includes the components to build a default home page. The IAppBuilder interface has now a new extension method available called UseWelcomePage. Update the Configuration method as follows:

public void Configuration(IAppBuilder appBuilder)
{
	appBuilder.UseWelcomePage();			
}

Start the console app again and navigate to localhost:7990. You should see a nice blue page such as this one:

Owin default homepage

We’ll dig deeper into OWIN and Katana in the next post.

View the list of MVC and Web API related posts here.

Introduction to .NET Web API 2 with C# Part 3: authentication

Introduction

So far in this intro course we haven’t discussed authentication although we enabled it when we created the demo Web Api app. In this demo we’ll see how to make an authenticated request to the API. Let’s imagine that our rockband data is top secret. Therefore not just anyone should gain access to it.

Open the demo app and the simple HTML web app we’ve been working on and let’s get started.

Authentication

Recall from the previous post in this series that we made an anonymous call to the API via the Get Rockbands button from the HTML web app. We’ll see how the need of authentication changes the picture.

Open RockbandsController.cs and place the following attribute over the class declaration:

[Authorize]
public class RockbandsController : ApiController

Run both apps. Have the Chrome developer tools open in the browser for default.html. Press the Get Rockbands button and you should get a 401 back:

Unauthorised Web API

So we’ll need to authenticate first. However, in order to authenticate we’ll need to sign up with the API app. However, there’s no familiar Signup link as the API page is not the usual MVC page with the login and sign-up links in the top right hand corner. Navigate to /Help on the Web API page to view the available HTTP endpoints. You’ll find a number of actions under the Account category. The POST api/account/register entry looks promising. Click on that link to view what we need to send to the service:

User registration inputs

That doesn’t look terribly difficult. Let’s build a simple UI for that in the HTML web app. Place the following HTML below the h1 tags:

<form id="userSignup">
        <input type="text" name="username" placeholder="Name" />
        <input type="password" name="password" placeholder="Password" />
        <input type="password" name="confirmpassword" placeholder="Confirm password" />
        <input type="submit" id="signup" value="Sign up" />
</form>

Note the “name” attributes of the input tags. They correspond to the properties in the JSON that the Register action expects. The case doesn’t matter: userName, USERNAME, etc. will all do the job.

We’ll now need some javascript to send the data to the service. It’s good that we set up CORS in the previous post so we can call the service from here. We already have some javascript on that page to get the rockband data. Place the following bit of code…

var register = function () {
                var registrationUrl = "http://localhost:50170/api/Account/Register";
                var registrationData = $("#userSignup").serialize();
                $.post(registrationUrl, registrationData).always(showRockbands);
                return false;
            };

$("#signup").click(register);

…above…

$("#getRockbands").click(getRockbands);

We call the Register controller with a POST request and send the serialised form data in the message body. We’ll show the response using the showRockbands method we defined earlier. Re-run default.html and try to register without filling in the form:

Validation exception

Not surprisingly we get a validation exception.

Fill in the text boxes and you should get an empty response which means that the request succeeded:

Web API signup OK

So we’re registered but we still cannot access the rockband data. We’ll need to send along an access token. In fact we need to send it along with every request that requires authentication. It’s not the same as a cookie in the case of forms authentication. Instead, we’ll need to send the token in the request header. This is done by logging in with the website using the login credentials and get hold of the access token from the website. If you look at the Help page again in the API app you won’t find any logical candidate for this task. There’s no “login” or “gettoken” endpoint.

The secret is hidden in a completely different place. Locate Startup.Auth.cs in the App_Start folder. This file uses OWIN technology. I’m planning to write a short series on OWIN and KATANA later in case you’re interested in those technologies. The interesting bit of code is the following:

OAuthOptions = new OAuthAuthorizationServerOptions
{
                TokenEndpointPath = new PathString("/Token"),
                Provider = new ApplicationOAuthProvider(PublicClientId, UserManagerFactory),
                AuthorizeEndpointPath = new PathString("/api/Account/ExternalLogin"),
                AccessTokenExpireTimeSpan = TimeSpan.FromDays(14),
                AllowInsecureHttp = true
};

The ‘/Token’ bit looks promising. We’ll need to send a POST to /Token with our credentials which will return an access token. You can even test it in a browser, but it won’t succeed of course:

Missing token

This means that we need to specify a grant type which is missing, hence the “unsupported grant type” error message. The endpoint is expecting some data called “grant_type=[type of grant]”. Let’s see how we can build that.

Add the following piece of HTML to the form on the HTML page:

<form id="userSignup">
        <input type="text" name="username" placeholder="Name" />
        <input type="password" name="password" placeholder="Password" />
        <input type="password" name="confirmpassword" placeholder="Confirm password" />
        <input type="submit" id="signup" value="Sign up" />
        <input type="submit" id="signin" value="Sign in" />
</form>

Our form will also function as a login form. Not a very practical solution but it will do for demo purposes.

Add the following bit of JavaScript…:

var signin = function () {
                var tokenUrl = "http://localhost:50170/Token";
                var loginData = $("#userSignup").serialize();
                loginData = loginData + "&grant_type=password";
                $.post(tokenUrl, loginData).always(showRockbands);
                return false;
            };

$("#signin").click(signin);

…above…

$("#signup").click(register);

We’re calling the /Token endpoint and send along a grant type of password. This is telling the endpoint that we need an access token based on the username and password in the form data.

Run both applications and fill in the username and password you signed up with in the previous step. You should see… …the same error as we saw before we enabled CORS. But didn’t we enable CORS already? Yes, but that was in the context of the Web API. We need to do something similar for the /Token endpoint which hides OWIN middleware. Locate ApplicationOAuthProvider.cs in the Providers folder of the Web API project. Search for the following method:

public override async Task GrantResourceOwnerCredentials(OAuthGrantResourceOwnerCredentialsContext context)

You’ll see a using block in the method body. Add the following code below the using block:

context.OwinContext.Response.Headers.Add("Access-Control-Allow-Origin", new[] { "*" });

Re-run the web api demo app and try to sign in. It should succeed and the token should be visible on the screen:

Bearer token from web api

You’ll find a short course on OAuth here which explains what the parts in this JSON mean if you’re curious. The most important bit of information is the access_token. We’ll need to extract it from the JSON and send it along with every subsequent request to the API. This will allow the request through the Authorize attribute. Modify the JavaScript code…

$.post(tokenUrl, loginData).always(showRockbands);

…to the following:

$.post(tokenUrl, loginData)
                    .success(saveAccessToken)
                    .always(showRockbands);

…where saveAccessToken is defined as follows:

var token = "";

var saveAccessToken = function (data) {
      token = data.access_token;
};

We save the access_token property from the JSON that came back from the web api auth request.

Replace…

var getRockbands = function () {
         $.get(rockbandSourceUrl).always(showRockbands);
         return false;
};

…with an AJAX request:

var getRockbands = function () {
                $.ajax(rockbandSourceUrl,
                {
                    type: "GET"
                    , headers: getHeaders()
                }).always(showRockbands);
                return false;
};

…where getHeaders() is defined as follows:

var getHeaders = function () {
                if (token){
                    return { "Authorization": "Bearer " + token };
                }
};

Re-run the HTML app and login first. Wait for the access token to appear. Then click Get Rockbands and there you are:

Rockbands OK after login

This is slightly more complicated than it should be but it may change in the future. There’s actually a readily available single-page version of we’ve just done among the MVC 5 templates.

If you create a new ASP.NET Web application in Visual Studio you can select the Single Page Application template:

Single page application

It will set up authentication, MVC, Web API, OWIN, jQuery and knockout.js for you for a fancy start-up single page application. Start the application and click on the links. It looks like you’re navigating through controllers but it’s really the same page where knockout.js takes care of showing and hiding different parts on the UI. You can sign up with a username and password and then you’ll see a familiar view but now with the usual welcome message and the Log off link in the top right hand corner:

Single page login Web API

The signup function uses the Account controller and a POST to the /Token endpoint like we did above.

You can view the list of posts on Security and Cryptography here.

View the list of MVC and Web API related posts here.

Elliot Balynn's Blog

A directory of wonderful thoughts

Software Engineering

Web development

Disparate Opinions

Various tidbits

chsakell's Blog

WEB APPLICATION DEVELOPMENT TUTORIALS WITH OPEN-SOURCE PROJECTS

Once Upon a Camayoc

ARCHIVED: Bite-size insight on Cyber Security for the not too technical.