Using client certificates in .NET part 6: setting up client certificates for local test usage
January 28, 2016 10 Comments
Introduction
In the previous post we investigated how to attach a client certificate to the web request and how to extract it in a controller. We faced an issue that by default client certificates are ignored by IIS so we couldn’t actually read the certificate.
We’ll solve that problem in this post.
A general notice: be patient when working with certificates. The experience can be frustrating and things most often don’t work out on the first try. Also, the steps will be different depending on the exact IIS and Visual Studio version you have. I have used an “ancient” combination of IIS 7.5 and Visual Studio 2012 so that the solution will be applicable to a wide audience. However, it took me hours of trial and error and research to come to a working solution in IIS and in C# code.
Let me share with you two very good alternative sources. They can be helpful if the steps presented in this post don’t work out as expected:
- Configure IIS to use your self signed certificates with your application: a very detailed guide of the subject, definitely worth going through if you need to dig deeper
- Enabling SSL client certificates in asp.net web API
You’ll need to have IIS on your computer for this solution. If you don’t have it or cannot find it then you’ll need to activate it as described here. It’s a very short process and only involves the activation of a Windows feature.
Allowing client certificates for IIS Express is a clumsy and error-prone process. We’ll instead deploy our test web application to IIS locally so that we have easier control over the relevant security settings. Note that you’ll need to enable HTTPS for a web site in order to use client certificates.
Creating an SSL certificate
We’ll need to diverge a little and create an SSL certificate first before we can continue. We cannot enable HTTPS without an SSL certificate so this is a necessary step.
The steps are virtually identical to how we created a client cert so I won’t provide as many details. We’ll reuse the same root certificate for this purpose.
Open a Visual Studio command prompt as an administrator and navigate to the folder where you saved the root certificate, e.g. c:\certificates. Run the following makecert command:
makecert.exe -ic RootCertificate.cer -iv RootCertificate.pvk -pe -sv mylocalsite.local.pvk -a sha1 -n “CN=mylocalsite.local” -len 2048 -b 01/01/2015 -e 01/01/2030 -sky exchange mylocalsite.local.cer -eku 1.3.6.1.5.5.7.3.1
Note the -eku option, it is set to SSL. Also take note of the name of the certificate: mylocalsite.local.
Next we’ll package it:
pvk2pfx.exe -pvk mylocalsite.local.pvk -spc mylocalsite.local.cer -pfx mylocalsite.local.pfx
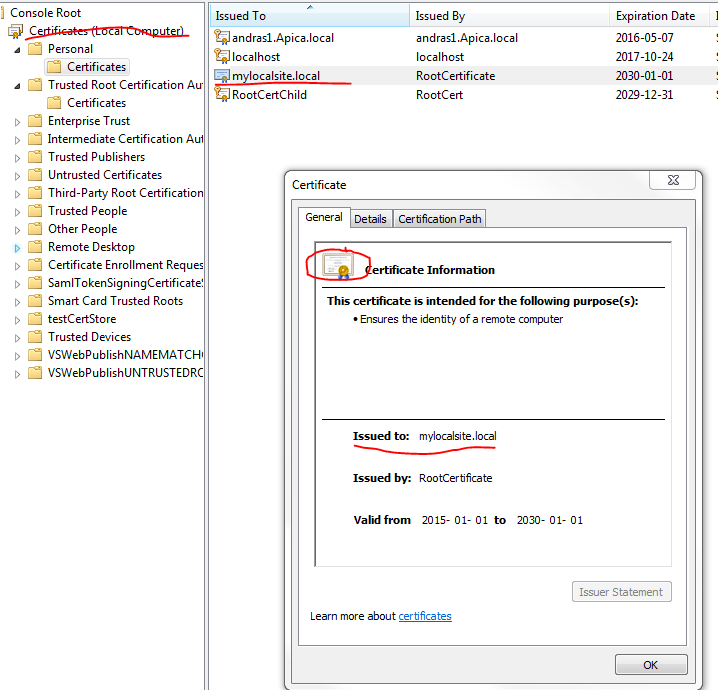
Open MMC, select to add a new snap-in and then click the Certificates option. In the “Certificates snap-in” window choose the “Computer account” option as opposed to “My user account” which we had for the client certificate. Leave the “Local computer” option untouched in the next window and click Finish, and then OK to finally open the certificate handler. Import RootCertificate to the “Trusted Root Certification Authority” folder just like we did before. Then import mylocalsite.local to the Personal folder. At the end of the process you should have a trusted SSL certificate in the Personal folder of the Local Computer account:
IIS
Open IIS and right-click the Sites node in the left-hand panel. Select the “Add web site” option. The Add Web Site window will open. Fill it in as follow with special attention to the Binding section where you must choose https and pick the self-signed SSL certificate we’ve just created. The Physical path option must point to the folder where Visual Studio stores the web project, e.g. in my case it is C:\TestProjects\Certificates\Client\ClientCertTests\ClientCertTests :

Importance notice: in IIS 7.5, the version I use for this demo, you cannot specify a host name for HTTPS bindings. It will default to the wildcard *:443, which will only allow a single host on port 443 across IIS. In later versions of IIS you can supply a host name. If that option is enabled in your setup then go ahead an insert “mylocalsite.local” as the host name. I have no choice but to leave it untouched.
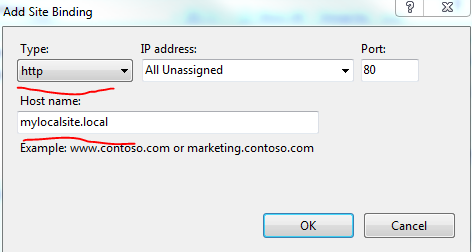
Click OK. You’ll see the new site under the Sites folder in IIS. Next right-click the mylocalsite web site node and click Edit Bindings. There will be one binding, the https one we’ve just added. Click Add… and we’ll also define a HTTP binding with a host name:
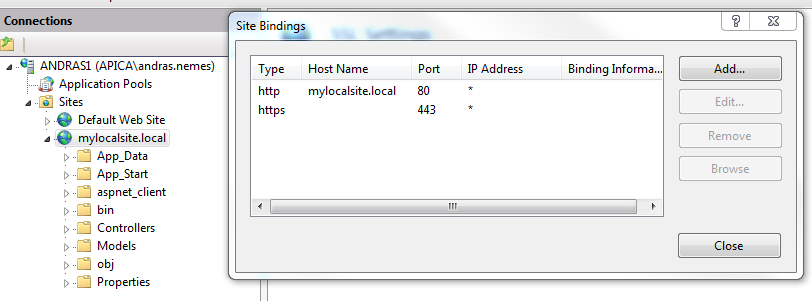
At this point we have 2 bindings, one HTTP and one HTTPS:
Next we need to make sure that the application pool associated with mylocalsite.local is configured for the .NET 4 version. Our test web API application is based on .NET 4, or 4.5, doesn’t matter, and we want it to be in sync with the web site. This next step is also required so that we can debug the web site from Visual Studio.
Click on the “Application Pools” node in IIS and locate the app pool called “mylocalsite.local”. Click on it and then select “Basic Settings…” on the right hand side. Select the latest .NET framework:

Click OK.
We’ll also need to define the mapping for the host “mylocalsite.local”. Open the hosts file located under C:\Windows\System32\drivers\etc with a text editor in administrator mode. It’s a file that’s only called “hosts”, not “hosts.txt”. It has no file extension but can be opened in a text editor. If you happen to have a hosts file there with some file extension then it won’t work. You’ll need to get rid of the extension first. Add the following entry to the end of the file:
127.0.0.1 mylocalsite.local
This means that when we enter “mylocalsite.local” in the web browser then it will understand that it needs to look for it on localhost. Without this step you’ll get an error message. The exact message differs from browser to browser but it can be something like “it’s not possible to solve the DNS address” as there’s no mylocalsite.local registered anywhere outside our local IIS.
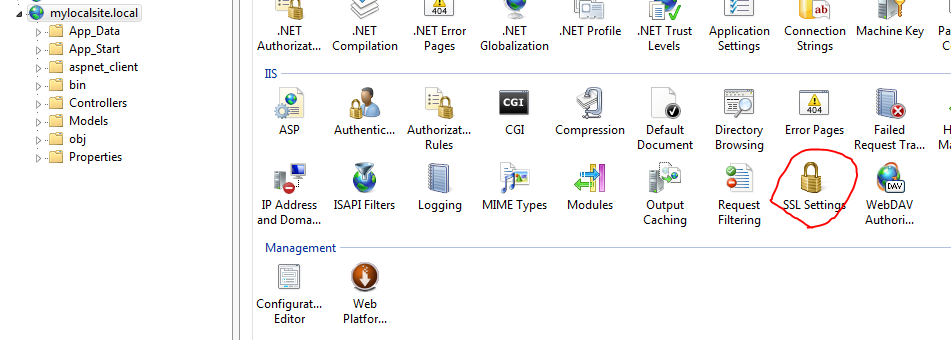
Next we’ll enable client certificates for our web site. Click the web site node in IIS and double-click on the SSL Settings option:
We’ll go with the “do not require SSL” and “accept client certificates” combination:

Click Apply on the right hand side of the screen to save the changes.
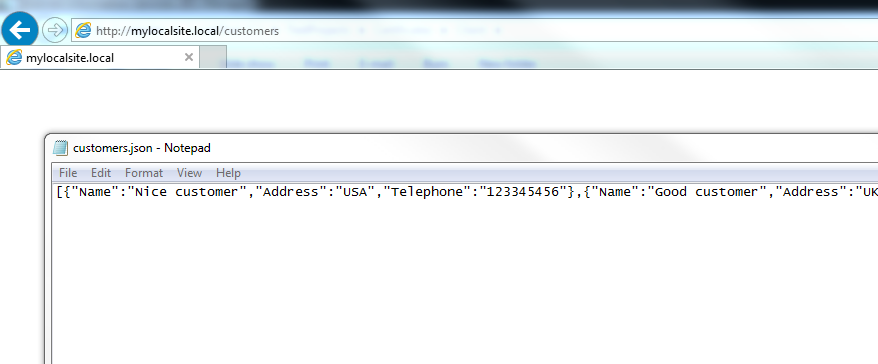
We’re done with IIS for the time being. Let’s run a couple of tests. Right-click the “localsite.local” node, select Manage Web Site, Browse. At first a browser will open with the http://mylocalsite.local/ address in the URL. Extend the URL to http://mylocalsite.local/customers and press Enter. You should get an empty screen. The reason is that we have not attached any client certificate to the request so we cannot view the list of customers.
Change the URL to https://mylocalsite.local/customers instead. If all goes well then you should be prompted for a client certificate and our local test client certificate should be listed among the options. This is what it looks like in IE:

The web site will then respond with the customers list. IE responds with a JSON file for some reason:
Let’s see how we can debug all this in Visual Studio.
Visual Studio
Start Visual Studio in Administrator mode and open the test solution we’ve been working on. Right-click the ClientCertTests node – or whatever you called your web API project – and click Properties. Select the Web tab and select the “Use Local IIS Web server” option. Make sure you unclick the Use IIS Express check box. The Project URL should be “http://mylocalsite.local/”. Click the “Create Virtual Directory” button:

This step succeeded because we’ve defined the HTTP host name as “mylocalsite.local” in IIS. Otherwise you would get an exception message similar to the following:
“Unable to create the virtual directory. Could not find the server ‘http://mylocalsite.local/’ on the local machine. Creating a virtual directory is only supported on the local IIS server.”
I’ve also tested setting the HTTPS address for the project URL, i.e. https://mylocalsite.local/ but it also fails with the following message:
“Unable to create the virtual directory. Could not find the server ‘http://mylocalsite.local/’ on the local machine. Make sure the local IIS server has been configured to support secure communications.”
I’m not sure why exactly we get that exception message since we’ve just configured IIS to accept HTTPS calls. I’m guessing it’s because we could not set a host name for the HTTPS binding in IIS. It doesn’t really matter now, we can continue.
Save your changes and build the solution. Set a break point within the Customers controller GET method. Hit F5 to start the project. If we had not modified the application pool to go with the .NET 4 framework then we would have got an error message saying “the web server has not been configured properly”.
Again, modify the URL address to https://mylocalsite.local/customers. The break point will be reached and you should see that the clientCertInRequest variable is not null any more. It was populated with the local test client certificate. This is what it looks like in Chrome:
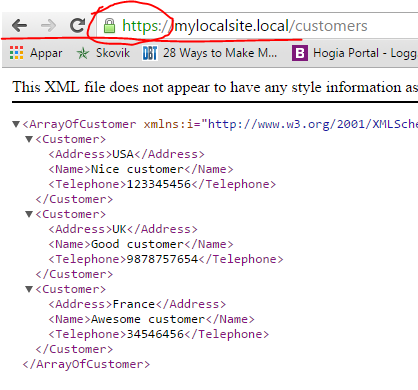
As a “side effect” you’ll see that the local SSL certificate is trusted by IIS. In Chrome it’s indicated by the green “https” protocol in the URL along with a green lock icon. Therefore we haven’t just achieved that client certs are accepted but that our local test site is secured with SSL.
Testing attachment of client cert in web request
The last missing step to complete this post is to test the caller console application. We want to make sure that we can send our client certificate in code, right? There’s one change that we need to make in the code we have in the Main function: the base address of the web request must point to https://mylocalsite.local/ as follows:
HttpClient client = new HttpClient(requestHandler)
{
	BaseAddress = new Uri("https://mylocalsite.local/")
};
Run the web API app first and then the tester console as usual. You should see that the clientCertInRequest variable in the Get method of the customers controller is correctly populated.
In the next post we’ll develop this code further and see how to include client certificate checks in the OWIN pipeline.
You can view the list of posts on Security and Cryptography here.


I tried you solution using a Put operation and I got an error of 405 method now allowed. ANY REASON WHY this occurred?
That’s an iis issue, all verbs must be allowed in the config file. Try a google search, there will be lots of posts regarding this issue
I’m using IIS 10 on windows 10 machine.
Followed this url: https://blogs.msdn.microsoft.com/asiatech/2016/08/22/how-to-create-an-iis-website-that-requires-client-certificate-using-self-signed-certificates/
To add the website certificate to IIS and bind it with mylocalsite.local and tried with and without editing “system.webServer/security/authentication/iisClientCertificateMappingAuthentication”.
But i’m getting 403 forbidden error. Is there something else also that I have configure for it to run in IIS 10.
Hi Did you figure out a fix to your problem?
Great post! Maybe can you help me with my problem, I need to use client certificates to validate the request, my problem is in IIS my site is configure to use http and I cannot configure a binding to https because those task is on the load balancer, in this case when I try to read the ClientCertificate always is null, if I add the https binding all is going fine…
Thanks!
That is very useful! Thank you.
Thanks for the post. I followed all the steps till here, i always get the RequestContext.ClientCertificate as null , no matter what. what am i missing?
Small remark about not being able to use hostnames with those certificates. If in the certificate store you change the friendly name and make it start with a * IIS will actually allow you to set a hostname.
Thank you Andreas! This helped me a lot!
Hi Andreas
Great article.
I can ask for help.
I would like to create a web app that I will host on a web server, and in this app I need to read the certificate of the client’s local machine that accesses the web app.
Is this possible?
in C #?
Thank you.