Symmetric encryption algorithms in .NET cryptography part 1

Introduction

Symmetric encryption and decryption are probably what most people understand under “cryptography”. A symmetric algorithm is one where the encryption and decryption key is the same and is shared among the parties involved in the encryption/decryption process.

Ideally only a small group of reliable people should have access to this key. Attackers typically use brute force to find the key in an attempt to decipher an encrypted message rather than defeating the algorithm itself. The key can vary in size so the attacker will need to know this first. Once they know this then they will try combinations of possible key characters.

A clear disadvantage with this approach is that distributing and storing keys in a safe and reliable manner is difficult. On the other hand symmetric algorithms are fast.

Here’s the graphical representation of the algorithm at work:

Symmetric algorithm flow

We start with the plain text to be encrypted. The encryption algorithm runs using the common secret key. The plain text becomes cyphertext which is decrypted using the same secret key and algorithm.

A common algorithm is called AES – Advanced Encryption Standard. This has been a US government standard since 2001 when it replaced DES – Data Encryption Standard.

AES uses the so-called Rijndael algorithm with 128 bit block sizes. You can read about the details of the algorithm here. If you need to work with external partners that use disparate systems then AES is a good choice as it’s widely supported in different encryption libraries in Java, Ruby, .NET, Objective C, etc.

In .NET all symmetric algorithms derive from the SymmetricAlgorithm abstract class. AES with Rijndael is not the only implementation available, here are some others:

  • Triple DES: applies DES encryption 3 times
  • DES: used to be the standard but there were successful approaches to break the key due to its small key size of 56 bits. It is not recommended to use this algorithm in new systems – use it only if you have to support backward-compatibility or legacy systems
  • RC2: this was another competitor to replace DES

There are other symmetric algorithms out there, such as Mars, RC6, Serpent, TwoFish, but there’s no .NET implementation of them at the time of writing this post. Make sure to pick AES/Rijndael as your first choice if you need to select a symmetric algorithm in your project.

In .NET

The .NET implementations if symmetric algorithm are called block ciphers. This only means that the encryption process takes the provided plain text and breaks it up into fixed size blocks, such as 128 mentioned above. The algorithm is performed on each individual block.

It is of course difficult to guarantee that the plain text will fit into those exact block boundaries – this is where padding enters the scene. Padding is data added to fill the last block to the correct size where if it doesn’t fit the given bit size. We need to fill up this last block as the algorithm requires fix sized blocks.

Padding data can be a bunch of zeros. Another approach is called PKCS7. This one says that if there are e.g. 8 bits remaining to fill the block we’ll use that number for each one of those spots. Yet another way to fill the missing spots is called ISO10126, which fills that block with random data. This is also the recommended approach as it provides more randomness in the process which is always a good way to put extra layers of protection on your encryption mechanism.

Mode is also a factor in these algorithms. The most common one is called ECB which means that each block of the plain text will be encrypted independently of all the others. The recommended approach here is CBC – this means that a block will not only be encrypted but that a given block will be used as input to encrypt the subsequent block. So CBC adds some more randomness to the process which is always good.

In case you go with CBC then another term you’ll need to be familiar with is the IV – Initialization Vector. The IV determines what kind of random data you’re going to use for the first block simply because there’s no block before the first block to be used as input. The IV is just some random data that will be used as input in the encryption of the first block. The IV doesn’t need to be some secret string – it must be redistributed along with the cipher text to the receiver of our message. The only rule is not to reuse the IV to keep the randomness that comes with it.

Demo

Now it’s time see some code after all the theory. Create a Console application in Visual Studio. We first want to set up the Rijndael encryption mechanism with its properties. Consider the following code:

private RijndaelManaged CreateCipher()
{
	RijndaelManaged cipher = new RijndaelManaged();
	cipher.KeySize = 256;
	cipher.BlockSize = 128;
	cipher.Padding = PaddingMode.ISO10126;
	cipher.Mode = CipherMode.CBC;
	byte[] key = HexToByteArray("B374A26A71490437AA024E4FADD5B497FDFF1A8EA6FF12F6FB65AF2720B59CCF");
	cipher.Key = key;
	return cipher;
}

We instantiate a RijndaelManaged class which I guess you know what it might represent. We then set its key and block size. As mentioned above padding is set to ISO10126 and mode to CBC. The encryption key must be a valid AES key that you can find plenty of on the Internet. Note that you can set a lower key size, e.g 128, but make sure that the AES key is a valid 128 bit array in that case. Here I set the block size to 128 to be fully AES compliant, but generally the higher the key and block size the more secure the message. I’ve put the key as plain text into the code but it can be stored in the web.config file, in the database, it’s up to you. However, this key must remain secret, so storage is not a trivial issue.

The HexToByteArray method may look familiar from the previous post on hashing:

public byte[] HexToByteArray(string hexString)
{
	if (0 != (hexString.Length % 2))
	{
		throw new ApplicationException("Hex string must be multiple of 2 in length");
	}

	int byteCount = hexString.Length / 2;
	byte[] byteValues = new byte[byteCount];
	for (int i = 0; i < byteCount; i++)
	{
		byteValues[i] = Convert.ToByte(hexString.Substring(i * 2, 2), 16);
	}
	return byteValues;
}

In the below method we perform the actual encryption:

public void Encrypt(string plainText)
{
	RijndaelManaged rijndael = CreateCipher();
	Console.WriteLine(Convert.ToBase64String(rijndael.IV));
	ICryptoTransform cryptoTransform = rijndael.CreateEncryptor();
	byte[] plain = Encoding.UTF8.GetBytes(plainText);
	byte[] cipherText = cryptoTransform.TransformFinalBlock(plain, 0, plain.Length);
	Console.WriteLine(Convert.ToBase64String(cipherText));
}

We let the IV and the cipher text be printed on the Console window. The IV is randomly generated by .NET, you don’t need to set it yourself. We get hold of the encryptor using the CreateEncryptor method as it is implemented by the RijndaelManaged object. It implements the ICryptoTransform interface. We use this object to transform the plain text bytes to the AES-encrypted cipher text.

Run the application and inspect the IV and cipher text values. Save those values in class properties:

public string IV { get; set; }
public string CipherText { get; set; }

You can save these in the Encrypt method:

CipherText = Convert.ToBase64String(cipherText);
IV = Convert.ToBase64String(rijndael.IV);

The Decrypt method is the exact reverse of Encrypt():

public void Decrypt(string iv, string cipherText)
{
	RijndaelManaged cipher = CreateCipher();
	cipher.IV = Convert.FromBase64String(iv);
	ICryptoTransform cryptTransform = cipher.CreateDecryptor();
	byte[] cipherTextBytes = Convert.FromBase64String(cipherText);
	byte[] plainText = cryptTransform.TransformFinalBlock(cipherTextBytes, 0, cipherTextBytes.Length);

	Console.WriteLine(Encoding.UTF8.GetString(plainText));
}

We’ll need the cipher text and the IV we saved in the Encrypt method. This time we construct a Decryptor and decrypt the cipher text using the provided key and IV. It’s important to set up the Rijndael managed object the same way as during the encryption process – key and block size, same mode etc. – otherwise the decryption will fail.

Test the entire cycle with some text, such as “Hello Crypto” and you’ll see that it’s correctly encrypted and decrypted.

You can view the list of posts on Security and Cryptography here.

Hashing algorithms and their practical usage in .NET Part 2

In the previous post we looked at hashing in general and its usage in hashing query strings. In this post we’ll look at some other areas of applicability.

Passwords

Storing passwords in clear text is obviously not a good idea. If an attacker gets hold of your user data then it should not be easy for them to retrieve user names and passwords. It’s a well-established practice to store passwords in a hashed format as they cannot be deciphered. When your user logs onto your site the provided password is hashed using the same algorithm that was employed when the same user signed up with your site. The hashed values, i.e. not the plain text passwords will be compared upon log-in. Not even you as the database owner will be able to read the password selected by the user.

However, you must still be careful to protect the hashed passwords. As we mentioned in the previous post there are not too many hashing algorithms available. So if an attacker has access to the hashed passwords then they can simply get a list of the most common passwords – ‘secret’, ‘password’, ‘passw0rd’, etc. – from the internet, iterate through the available hashing algorithms and compare them to the hashed values in your user data store. They can even write a small piece of software that loops through an online dictionary and hashes those words. This is called a “dictionary attack”. It’s only a matter of time before they find a match. Therefore it may not be a blocking point that an attacker cannot reverse a hashed password.

Hashing passwords can be done in the same way as hashing a query string which we looked at previously. Here comes a reminder showing how to hash a plain text value using the SHA1 algorithm:

byte[] textBytes = Encoding.UTF8.GetBytes("myPassword123");
SHA1 hashAlgorithm = new SHA1Managed();
byte[] hash = hashAlgorithm.ComputeHash(textBytes);
string hashedString = BitConverter.ToString(data);

Salted passwords

So you see that storing hashed values like that may not be secure enough for the purposes of your application. An extra level of security comes in the form of salted passwords which means adding some unique random data to each password. This unique data is called ‘salt’. So we take the password and the salt and hash their joint value. This increases the work required from the attacker to perform a dictionary attack against all passwords. They would need to compute salt values as well.

Again, keep in mind that if you don’t protect your user data store then the attacker will gain access to the salt values as well and again it will be a matter of time before they find a match. It may take longer of course but they can concentrate on some specific valuable accounts, like the Administrator, instead of spending time trying to find the password of a ‘normal’ user.

This is how you can generate a salt:

private static string GenerateSalt(int byteCount)
{
	RNGCryptoServiceProvider rng = new RNGCryptoServiceProvider();
	byte[] salt = new byte[byteCount];
	rng.GetBytes(salt);
	return Convert.ToBase64String(salt);
}

You’ll need cryptographically strong salt values. One of the available strong random number generators in .NET is the RNGCryptoServiceProvider class. Here we’re telling it that we need a ‘byteCount’-length of random salt. The salt is then saved along with the computed hash in the database.

The extended ComputeHash method accepts this salt:

public static string ComputeHash(string password, string salt)
{
	SHA512Managed hashAlg = new SHA512Managed();
	byte[] hash = hashAlg.ComputeHash(Encoding.UTF8.GetBytes(password + salt));
	return Convert.ToBase64String(hash);
}

So when the user logs in then you must first find the user in the database for the given username. If the user exists, then you have to retrieve the salt generated at the sign-up phase. Finally take the password provided in the login form, compute the hash using the ComputeHash method which accepts the salt and compare the hashed values.

We can add an extra layer or security by providing entropy – a term we mentioned in the previous post. We can extend the ComputeHash method as follows:

public static string ComputeHash(string password, string salt, string entropy)
{
	SHA512Managed hashAlg = new SHA512Managed();
	byte[] hash = hashAlg.ComputeHash(Encoding.UTF8.GetBytes(password + salt + entropy));
	return Convert.ToBase64String(hash);
}

The entropy can be a constant that is common to all users, e.g. another cryptographically strong salt that is not stored in the user database. We can take a random value such as ‘xl1k5ss5NTE=’. The updated ComputeHash function can be called as follows:

string salt = GenerateSalt(8);
Console.WriteLine("Salt: " + salt);
string password = "secret";
string constant = "xl1k5ss5NTE=";
string hashedPassword = ComputeHash(password, salt, constant);

Console.WriteLine(hashedPassword);
Console.ReadKey();

Alternatively you can use a Keyed Hash Algorithm which we also discussed in the previous post.

Examples from .NET

The .NET framework uses hashing in a couple of places, here are some examples:

  • ViewState in ASP.NET web forms is hashed using the MAC address of the server so that an attacker cannot tamper with this value between the server and the client. This feature is turned on by default.
  • ASP.NET Membership: if you have worked with the built-in Membership features of ASP.NET then you’ll know that both the username and password are hashed and that a salt is saved along with the hashed password in the ASP.NET membership tables
  • Minification and boundling: if you don’t know what these terms mean then start here. Hashing in this case is used to differentiate between the versions of the bundled files, such as JS and CSS so that the browser ‘knows’ that there’s a new version to be collected from the server and not use the cached one

We’ll start looking at symmetric encryption in the next post.

You can view the list of posts on Security and Cryptography here.

Hashing algorithms and their practical usage in .NET Part 1

Introduction

Cryptography is an exciting topic. It has two sides: some people try to hide some information and some other people try to uncover it. The information hiding, i.e. hiding some plain text, often happens using some encryption method. Then you have hackers, security experts and the like that try to decrypt the encrypted value.

Hashing is one such encryption algorithm. It converts some string input which can vary in size into a fixed length value, also called a “digest” or a “data fingerprint”. It’s called a fingerprint because the encrypted value can represent data that is much larger in size. You can take an entire book and create a short hash value out of its entire text.

Hashing is a one-way encryption method that cannot be deciphered (reversed) making it a standard way for storing passwords and usernames.

Note that in the demos I’ll concentrate on showing functionality, I won’t care about design practices and principles – that’s beside the point and it’s up to you to create the proper abstractions and services in your own solution. E.g. static helper classes shouldn’t be the norm to create services, but they are very straightforward for demo purposes. You’ll find many recommendations in among my glob posts on how to orginise your classes into loosely coupled elements.

I’ll concentrate on various topics within cryptography in this and the next several blog posts:

  • Hashing
  • Symmetric encryption
  • Asymmetric encryption
  • Digital signatures

After that we’ll take a look at a model application that makes use of asymmetric and symmetric encryption techniques.

Hashing in .NET

Common hash algorithms derive from the HashAlgorithm abstract base class. The most important concrete implementations out of the box include:

  • MD5 which creates a 128 bit hash – this algorithm is not considered secure any more so use it only if you need to ensure backward compatibility
  • SHA – Secure Hash Algorithm which comes in different forms: SHA1 (160bit), SHA256, SHA384 and SHA512 where the numbers correspond to the bit size of the hash created – the larger the value the harder it is to compromise the hashed value.
  • KeyedHashAlgorithms (Message Authentication Code): HMACSHA and MACTripleDES

Demo: plain text hashing

Open Visual Studio and create a new Console application. Enter the following code in Main:

string plainTextOne = "Hello Crypto";
string plainTextTwo = "Lorem ipsum dolor sit amet, consectetur adipisicing elit, sed do eiusmod tempor incididunt ut labore et dolore magna aliqua.";

SHA512Managed sha512 = new SHA512Managed();

byte[] hashedValueOfTextOne = sha512.ComputeHash(Encoding.UTF8.GetBytes(plainTextOne));
byte[] hashedValueOfTextTwo = sha512.ComputeHash(Encoding.UTF8.GetBytes(plainTextTwo));

string hexOfValueOne = BitConverter.ToString(hashedValueOfTextOne);
string hexOfValueTwo = BitConverter.ToString(hashedValueOfTextTwo);

Console.WriteLine(hexOfValueOne);
Console.WriteLine(hexOfValueTwo);
Console.ReadKey();

So we use the most secure version of the SHA family, the one that creates a 512 bit hash. We take a short and a long string to demonstrate that the hash size will be the same. The ComputeHash method will return a byte array with 64 elements, i.e. 64 bytes which is exactly 512 bits. This method accepts a byte array input hence the call to the GetBytes method. We then show a hex string representation of the byte arrays. You’ll see in the console output that this string is grouped into 2 hex characters per byte. Each pair represents the byte value of 0-255. This is typical behaviour of the BitConverter class. There are other ways though to view a byte array in a string format.

You’ll also see that the hashed value length is the same for both strings. I encourage you to change those strings, even by only a single letter, and you’ll see very different hashed values every time.

Other hash algorithms in .NET work in a similar way:

  • MD5CryptoServiceProvider
  • SHA1Managed
  • SHA256Managed
  • SHA384Managed
  • SHA512Managed
  • MACTripleDES
  • HMACMD5
  • HMACSHA256
  • HMACMD5
  • HMACRIPEMD160
  • HMACSHA512

These are all concrete classes that derive from HashAlgorithm and implement the ComputHash(byte[]) method. All of them are quite fast. Actually SHA512Managed is among the fastest among the implementations so you don’t need to worry about execution speed if you go for this very strong algorithm.

Demo: tamperproof query strings

You must have seen websites that have URLs with some long and – at first sight – meaningless query string parameters. The goal is often to construct tamperproof query strings to protect the integrity of the parameters such as a customer id. The goal is make sure that this parameter has not been modified on the client side. Note that the actual ID will still be visible in the query string, e.g. /Customers.aspx?cid=21 but we extend this URL to include a special hash: /Customers.aspx?cid=21&hash=sdfhshmfuismfsdhmf. If the client modifies either the ‘cid’ or the ‘h’ parameter then the request will be rejected.

It’s customary to use a Hash-based Message Authentication Code (HMAC), not one of the other hashing algorithms. It computes the hash of a query string when constructed on the server. When the client sends another request to the server we check that the query string was not modified by comparing it to the original hashed value. If they don’t match then we know that the client or a man-in-the-middle has tampered with the query string values and reject the request.

We’ll also use a key so that the attacker wouldn’t be able to create his own valid hash – which is why HMAC is the better choice.

Create an ASP.NET web forms app in Visual Studio. Insert a hyperlink server control somewhere on Default.aspx:

<asp:HyperLink ID="lnkAbout" runat="server">Go to about page</asp:HyperLink>

Add a new helper class called HashingHelper. Insert the following public constants:

public static readonly string _hashQuerySeparator = "&h=";
public static readonly string _hashKey = "C2CE6ACD";

The hash query separator stores the hash param identifier in the query string. The key will be used to stop an attacker from creating an own hash as mentioned above.

The following method will create the hashed query:

public static string CreateTamperProofQueryString(string basicQueryString)
{
	return string.Concat(basicQueryString, _hashQuerySeparator, ComputeHash(basicQueryString));
}

…where ComputeHash is a private method within this class:

private static string ComputeHash(string basicQueryString)
{
        byte[] textBytes = Encoding.UTF8.GetBytes(basicQueryString);
	HMACSHA1 hashAlgorithm = new HMACSHA1(Conversions.HexToByteArray(_hashKey));
	byte[] hash = hashAlgorithm.ComputeHash(textBytes);
	return Conversions.ByteArrayToHex(hash);
}

…where Conversions is a static utility class:

public static class Conversions
{
	public static byte[] HexToByteArray(string hexString)
	{
		if (0 != (hexString.Length % 2))
		{
			throw new ApplicationException("Hex string must be multiple of 2 in length");
		}

		int byteCount = hexString.Length / 2;
		byte[] byteValues = new byte[byteCount];
		for (int i = 0; i < byteCount; i++)
		{
			byteValues[i] = Convert.ToByte(hexString.Substring(i * 2, 2), 16);
		}

		return byteValues;
	}

	public static string ByteArrayToHex(byte[] data)
	{			
        	return BitConverter.ToString(data);
	}
}

This will look familiar from the previous demo. We’re using a keyed algorithm – HMACSHA1 – which is based on SHA1 but can accept a key in the form of a byte array. Hence the conversion to a byte array in the Conversions helper.

In the Default.aspx.cs file add the following code:

protected void Page_Load(object sender, EventArgs e)
{
	if (!IsPostBack)
	{
		lnkAbout.NavigateUrl = string.Concat("/About.aspx?", HashingHelper.CreateTamperProofQueryString("cid=21&pid=43"));
	}
}

Run the project and hover over the generated link. You should see in the bottom of the web browser that the cid and pid parameters have been extended with the extra ‘h’ hash parameter.

Add a label control somewhere on the About page:

<asp:Label ID="lblQueryValue" runat="server" Text=""></asp:Label>

Put the following in the code behind:

protected override void OnLoad(EventArgs e)
{
	HashingHelper.ValidateQueryString();
	base.OnLoad(e);
}

…where ValidateQueryString looks as follows:

public static void ValidateQueryString()
{
	HttpRequest request = HttpContext.Current.Request;

	if (request.QueryString.Count == 0)
	{
		return;
	}

	string queryString = request.Url.Query.TrimStart(new char[] { '?' });

	string submittedHash = request.QueryString["h"];
	if (submittedHash == null)
	{
		throw new ApplicationException("Querystring validation hash missing!");
	}

	int hashPos = queryString.IndexOf(_hashQuerySeparator);
	queryString = queryString.Substring(0, hashPos);

	if (submittedHash != ComputeHash(queryString))
	{
		throw new ApplicationException("Querystring hash value mismatch");
	}
}

We retrieve the current HTTP request and check its query string contents. If there are no query strings then there’s nothing to validate. We then extract the entire query string bar the starting ‘?’ character from the URL. We check if any hash parameter has been sent – if not then we throw an exception. We then need to recompute the hash of the cid and pid parameters and compare that value with what’s been sent in the URL. If they don’t match then we throw an exception.

Run the application and click the link on the Home page. You’ll be directed to the About page. On the About page modify the URL in the web browser: change either query string parameter, reload the page and you should get an exception saying the hash values don’t match.

Why did we use a keyed algorithm? Let’s see first what may happen if you use a different one. In HashingHelper.ComputeHash comment out the line that creates a HMACSHA1 object and add a new line:

SHA1 hashAlgorithm = new SHA1Managed();

Run the application and you’ll see that it still works fine, the hashed value is generated and compared to the submitted value. Try changing the query parameter values and you should get the same exception as before. An attacker will look at this URL will know that this is some protected area. They will quickly figure out that this is some type of hash and they’ll start going through the different hash algorithms available out there. There aren’t that many – look at the list above with the ones built-into -.NET. It’s a matter of a couple of lines to generate hash values in a console app:

SHA1 hashAlgorithm = new SHA1Managed();
//calculate hash of cid=123&pid=32
//convert to string
//call the web site

If it doesn’t work then they’ll try a SHA256 and then SHA512 etc. It doesn’t take too long for an experienced hacker to iterate through the available implementations and eventually find the correct algorithm. They can then look at any protected value on the About page by replacing the query parameters and the hash they calculated using the little console application.

With the keyed algorithm we built in an extra blocking point for the attacker. So now the attacker will need to know the key as well as the hashing algorithm.

However, in some situations this may not be enough. If the query string parameter values are limited, such as a bit param 0 or 1 then even the keyed hash value will always only have two values: one for ‘0’ and another one for ‘1’. An attacker that’s watching the web traffic can after some time figure out what a ‘0’ hash and a ‘1’ hash looks like and they won’t need to deal with any secret keys.

Therefore we need some way to differentiate between two requests with the same parameter. We need to add some randomness to our hashing algorithm – this is called adding some “entropy”. In ASP.NET we can use the IP address of the client, their user agent, the session information and other elements that can differentiate one request from another. This is how you can add the unique session key to the data that’s being hashed:

HttpSessionState httpSession = HttpContext.Current.Session;
basicQueryString += httpSession.SessionID;
httpSession["HashIndex"] = 10;

Add this to the beginning of the HashingHelper.ComputeHash method. This will ensure that it’s not only ‘0’ or ‘1’ being hashed but some other information as well that varies a lot and is difficult to get access to. You can test it with the current setup as well. Run the application and you’ll get some hash in the query string. Stop the app, change the browser type in the Visual Studio app bar:

Change browser type in visual studio

Make sure it’s different from what you had in the previous run. Click the link on the default page and you should see that the hash value is different for the same combination of cid and pid query string values.

You can view the list of posts on Security and Cryptography here.

The Don’t-Repeat-Yourself (DRY) design principle in .NET Part 3

We’ll finish up the DRY series with the Repeated Execution Pattern. This pattern can be used when you see similar chunks of code repeated at several places. Here we talk about code bits that are not 100% identical but follow the same pattern and can clearly be factored out.

Here’s an example:

static void Main(string[] args)
{
	Console.WriteLine("About to run the DoSomething method");
	DoSomething();
	Console.WriteLine("Finished running the DoSomething method");
	Console.WriteLine("About to run the DoSomethingAgain method");
	DoSomethingAgain();
	Console.WriteLine("Finished running the DoSomethingAgain method");
	Console.WriteLine("About to run the DoSomethingMore method");
	DoSomethingMore();
	Console.WriteLine("Finished running the DoSomethingMore method");
	Console.WriteLine("About to run the DoSomethingExtraordinary method");
	DoSomethingExtraordinary();
	Console.WriteLine("Finished running the DoSomethingExtraordinary method");
	
	Console.ReadLine();
}

private static void DoSomething()
{
	WriteToConsole("Nils", "a good friend", 30);
}

private static void DoSomethingAgain()
{
	WriteToConsole("Christian", "a neighbour", 54);
}

private static void DoSomethingMore()
{
	WriteToConsole("Eva", "my daughter", 4);
}

private static void DoSomethingExtraordinary()
{
	WriteToConsole("Lilly", "my daughter's best friend", 4);
}

private static void WriteToConsole(string name, string description, int age)
{
	Console.WriteLine(format, name, description, address, age);
}

We’re simulating a simple logging function every time we run we run one of these “dosomething” methods. The pattern is clear: write a message to the console, carry out an action and write another message to the console. The actions have an identical void, parameterless signature. The logging message all have the same format, it’s only the method name that varies. If this chain of actions continues to grow then we have to come back here and add the same type of logging messages. Also, if you later wish to change the logging message format then you’ll have to do it in many different places.

The first step is to factor out a single console-action-console chunk to its own method:

private static void ExecuteStep()
{
	Console.WriteLine("About to run the DoSomething method");
	DoSomething();
	Console.WriteLine("Finished running the DoSomething method");
}

This is of course not good enough as the method is very rigid. It is hard coded to execute the first step only. We can vary the action to be executed using the Action object:

private static void ExecuteStep(Action action)
{
	Console.WriteLine("About to run the DoSomething method");
	action();
	Console.WriteLine("Finished running the DoSomething method");
}

We can call this method as follows:

static void Main(string[] args)
{
	ExecuteStep(DoSomething);
	ExecuteStep(DoSomethingAgain);
	ExecuteStep(DoSomethingExtraordinary);
	ExecuteStep(DoSomethingMore);
	Console.ReadLine();
}

Except that we’re not logging the method names correctly. That’s still hard coded to “DoSomething”. That’s easy to fix as the Action object has public properties to read off the method name:

private static void ExecuteStep(Action action)
{
	string methodName = action.Method.Name;
	Console.WriteLine("About to run the {0} method", methodName);
	action();
	Console.WriteLine("Finished running the {0} method", methodName);
}

We’re almost done. If you look at the Main method then the ExecuteStep(somemethod) is called 4 times. That is also a form of DRY-violation. Imagine that you have a long workflow, such as the steps in a chemical experiment. In that case you may need to repeat the call to ExecuteStep many times.

We can instead put the methods to be executed in a collection of actions:

private static IEnumerable<Action> GetExecutionSteps()
{
	return new List<Action>()
	{
		DoSomething
		, DoSomethingAgain
		, DoSomethingExtraordinary
		, DoSomethingMore
	};
}

You can use this from within Main as follows:

static void Main(string[] args)
{
	IEnumerable<Action> actions = GetExecutionSteps();
	foreach (Action action in actions)
	{
		ExecuteStep(action);
	}
	Console.ReadLine();
}

Now it’s not the responsibility of the Main method to define the steps to be executed. It only iterates through a loop and calls ExecuteStep for each action.

View the list of posts on Architecture and Patterns here.

The Don’t-Repeat-Yourself (DRY) design principle in .NET Part 2

We’ll continue with our discussion of the Don’t-Repeat-Yourself principle where we left off in the previous post. The next issue we’ll consider is repetition of logic.

Repeated logic

Consider that you have the following two domain objects:

public class Product 
{
	public long Id { get; set; }
	public string Description { get; set; }
}
public class Order
{
	public long Id { get; set; }
}

Let’s say that the IDs are not automatically assigned when inserting a new row in the database. Instead, it must be calculated. So you come up with the following function to construct an ID which is probably unique:

private long CalculateId()
{
	TimeSpan ts = DateTime.UtcNow - (new DateTime(1970, 1, 1, 0, 0, 0));
	long id = Convert.ToInt64(ts.TotalMilliseconds);
	return id;
}

You might include this type of logic in both domain objects:

public class Product 
{
	public long Id { get; set; }
	public string Description { get; set; }

	public Product()
	{
		Id = CalculateId();
	}

	private long CalculateId()
	{
		TimeSpan ts = DateTime.UtcNow - (new DateTime(1970, 1, 1, 0, 0, 0));
		long id = Convert.ToInt64(ts.TotalMilliseconds);
		return id;
	}
}
public class Order
{
	public long Id { get; set; }

	public Order()
	{
		Id = CalculateId();
	}

	private long CalculateId()
	{
		TimeSpan ts = DateTime.UtcNow - (new DateTime(1970, 1, 1, 0, 0, 0));
		long id = Convert.ToInt64(ts.TotalMilliseconds);
		return id;
	}
}

This situation may arise if the two domain objects have been added to your application with a long time delay and you’ve forgotten about the ID generation solution. Also, if you want to keep the ID generation logic independent for each object, then you might continue with this solution thinking that some day the ID generation strategies may be different. However, at some point the rules change and all IDs of type long must be constructed using the CalculateId method. Then you absolutely want to have this logic in one place only. Otherwise if the rule changes, then you probably don’t want to make the same change for every single domain object, right?

Probably a very common solution would be to factor out this logic to a static method:

public class IdHelper
{
	public static long CalculateId()
	{
		TimeSpan ts = DateTime.UtcNow - (new DateTime(1970, 1, 1, 0, 0, 0));
		long id = Convert.ToInt64(ts.TotalMilliseconds);
		return id;
	}
}

The updated objects look as follows:

public class Order
{
	public long Id { get; set; }

	public Order()
	{
		Id = IdHelper.CalculateId();
	}
}
public class Product 
{
	public long Id { get; set; }
	public string Description { get; set; }

	public Product()
	{
		Id = IdHelper.CalculateId();
	}
}

If you’ve followed through the discussion on the SOLID design principles then you’ll know by now that static methods can be a design smell that indicate tight coupling. In this case there’s a hard dependency of the Product and Order classes on IdHelper.

If all objects in your domain must have an ID of type long then you may let every object derive from a superclass such as this:

public abstract class EntityBase
{
	public long Id { get; private set; }

	public EntityBase()
	{
		Id = CalculateId();
	}

	private long CalculateId()
	{
		TimeSpan ts = DateTime.UtcNow - (new DateTime(1970, 1, 1, 0, 0, 0));
		long id = Convert.ToInt64(ts.TotalMilliseconds);
		return id;
	}
}

The Product and Order objects will derive from this class:

public class Product : EntityBase
{
	public string Description { get; set; }

	public Product()
	{}
}
public class Order : EntityBase
{
	public Order()
	{}
}

Then if you construct a new Order or Product class elsewhere then the ID will be assigned by the EntityBase constructor automatically.

In case you don’t like the base class approach then Constructor injection is another approach that can work. We delegate the ID generation logic to an external class which we hide behind an interface:

public interface IIdGenerator
{
	long CalculateId();
}

We have the following implementing class:

public class DefaultIdGenerator : IIdGenerator
{
	public long CalculateId()
	{
		TimeSpan ts = DateTime.UtcNow - (new DateTime(1970, 1, 1, 0, 0, 0));
		long id = Convert.ToInt64(ts.TotalMilliseconds);
		return id;
	}
}

You can inject the interface dependency into the Order object as follows:

public class Order
{
	private readonly IIdGenerator _idGenerator;
	public long Id { get; private set; }

	public Order(IIdGenerator idGenerator)
	{
		if (idGenerator == null) throw new ArgumentNullException();
		_idGenerator = idGenerator;
		Id = _idGenerator.CalculateId();
	}
}

You can apply the same method to the Product object. Of course you can mix the above two solutions with the following EntityBase superclass:

public abstract class EntityBase
{
	private readonly IIdGenerator _idGenerator;

	public long Id { get; private set; }

	public EntityBase(IIdGenerator idGenerator)
	{
		if (idGenerator == null) throw new ArgumentNullException();
		_idGenerator = idGenerator;
		Id = _idGenerator.CalculateId();
	}
}

These are some of the possible solutions that you can employ to factor out common logic so that it becomes available for different objects. Obviously if this logic occurs only within the same class then just simply create a private method for it:

private void DoRepeatedLogic()
{
	Order order = new Order();
	TimeSpan ts = DateTime.UtcNow - (new DateTime(1970, 1, 1, 0, 0, 0));
	long orderId = Convert.ToInt64(ts.TotalMilliseconds);
	order.Id = orderId;

	Product product = new Product();
	ts = DateTime.UtcNow - (new DateTime(1970, 1, 1, 0, 0, 0));
	long productId = Convert.ToInt64(ts.TotalMilliseconds);
	product.Id = productId;
}

This is of course not very clever and you can quickly make it better:

private void DoRepeatedLogic()
{
	Order order = new Order();
	order.Id = CalculateId();

	Product product = new Product();
	product.Id = CalculateId();
}

private long CalculateId()
{
	TimeSpan ts = DateTime.UtcNow - (new DateTime(1970, 1, 1, 0, 0, 0));
	long id = Convert.ToInt64(ts.TotalMilliseconds);
	return id;
}

This is more likely to occur in long classes and methods where you lose track of all the code you’ve written. At some point you realise that some logic is repeated over and over again but it’s rooted deeply nested in a long, complicated method.

If statements

If statements are very important building blocks of an application. It would probably be impossible to write any real life app without them. However, it does not mean they should be used without any limitation. Consider the following domains:

public abstract class Shape
{
}

public class Triangle : Shape
{
	public int Base { get; set; }
	public int Height { get; set; }
}

public class Rectangle : Shape
{
	public int Width { get; set; }
	public int Height { get; set; }
}

Then in Program.cs of a Console app we can simulate a database lookup as follows:

private static IEnumerable&lt;Shape&gt; GetAllShapes()
{
	List&lt;Shape&gt; shapes = new List&lt;Shape&gt;();
	shapes.Add(new Triangle() { Base = 5, Height = 3 });
	shapes.Add(new Rectangle() { Height = 6, Width = 4 });
	shapes.Add(new Triangle() { Base = 9, Height = 5 });
	shapes.Add(new Rectangle() { Height = 3, Width = 2 });
	return shapes;
}

Say you want to calculate the total area of the shapes in the collection. The first approach may look like this:

private static double CalculateTotalArea(IEnumerable&lt;Shape&gt; shapes)
{
	double area = 0.0;
	foreach (Shape shape in shapes)
	{
		if (shape is Triangle)
		{
			Triangle triangle = shape as Triangle;
			area += (triangle.Base * triangle.Height) / 2;
		}
		else if (shape is Rectangle)
		{
			Rectangle recangle = shape as Rectangle;
			area += recangle.Height * recangle.Width;
		}
	}
	return area;
}

This is actually quite a common approach in a software design where our domain objects are mere collections of properties and are void of any self-contained logic. Look at the Triangle and Rectangle classes, they contain no logic whatsoever, they only have properties. They are reduced to the role of data-transfer-objects (DTOs). If you don’t understand at first what’s wrong with the above solution then I suggest you go through the Liskov Substitution Principle here. I won’t repeat what’s written in that post.

This post is about DRY so you may ask what this method has to do with DRY at all as we do not seem to repeat anything. Yes we do, although indirectly. Our initial intention was to create a class hierarchy so that we can work with the abstract class Shape elsewhere. Well, guess what, we’ve failed miserably. In this method we need to reveal not only the concrete implementation types of Shape but we’re forcing an external class to know about the internals of those concrete types.

This is a typical example for how not to use if statements in software. In the posts on the SOLID design principles we mentioned the Tell-Don’t-Ask (TDA) principle. It basically states that you should not ask an object questions about its current state before you ask it to perform something. Well, this piece of code is a clear violation of TDA although the lack of logic in the Triangle and Rectangle classes forced us to ask these questions.

The solution – or at least one of the viable solutions – will be to hide this calculation logic behind each concrete Shape class:

public abstract class Shape
{
	public abstract double CalculateArea();
}

public class Triangle : Shape
{
	public int Base { get; set; }
	public int Height { get; set; }

	public override double CalculateArea()
	{
		return (Base * Height) / 2;
	}
}

public class Rectangle : Shape
{
	public int Width { get; set; }
	public int Height { get; set; }

	public override double CalculateArea()
	{
		return Width * Height;
	}
}

The updated total area calculation looks as follows:

private static double CalculateTotalArea(IEnumerable&lt;Shape&gt; shapes)
{
	double area = 0.0;
	foreach (Shape shape in shapes)
	{
		area += shape.CalculateArea();
	}
	return area;
}

We’ve got rid of the if statements, we don’t violate TDA and the logic to calculate the area is hidden behind each concrete type. This allows us even to follow the above mentioned Liskov Substitution Principle.

View the list of posts on Architecture and Patterns here.

The Don’t-Repeat-Yourself (DRY) design principle in .NET Part 1

Introduction

The idea behind the Don’t-Repeat-Yourself (DRY) design principle is an easy one: a piece of logic should only be represented once in an application. In other words avoiding the repetition of any part of a system is a desirable trait. Code that is common to at least two different parts of your system should be factored out into a single location so that both parts call upon in. In plain English all this means that you should stop doing copy+paste right away in your software. Your motto should be the following:

Repetition is the root of all software evil.

Repetition does not only refer to writing the same piece of logic twice in two different places. It also refers to repetition in your processes – testing, debugging, deployment etc. Repetition in logic is often solved by abstractions or some common service classes whereas repetition in your process is tackled by automation. A lot of tedious processes can be automated by concepts from Continuous Integration and related automation software such as TeamCity. Unit testing can be automated by testing tools such as nUnit. You can read more on Test Driven Development and unit testing here.

In this ahort series on DRY I’ll concentrate on the ‘logic’ side of DRY. DRY is known by other names as well: Once and Only Once, and Duplication is Evil (DIE).

Examples

Magic strings

These are hard-coded strings that pop up at different places throughout your code: connection strings, formats, constants, like in the following code example:

class Program
{
	static void Main(string[] args)
	{
		DoSomething();
		DoSomethingAgain();
		DoSomethingMore();
		DoSomethingExtraordinary();
		Console.ReadLine();
	}

	private static void DoSomething()
	{
		string address = "Stockholm, Sweden";
		string format = "{0} is {1}, lives in {2}, age {3}";
		Console.WriteLine(format, "Nils", "a good friend", address, 30);
	}

	private static void DoSomethingAgain()
	{
		string address = "Stockholm, Sweden";
		string format = "{0} is {1}, lives in {2}, age {3}";
		Console.WriteLine(format, "Christian", "a neighbour", address, 54);
	}

	private static void DoSomethingMore()
	{
		string address = "Stockholm, Sweden";
		string format = "{0} is {1}, lives in {2}, age {3}";
		Console.WriteLine(format, "Eva", "my daughter", address, 4);
	}

	private static void DoSomethingExtraordinary()
	{
		string address = "Stockholm, Sweden";
		string format = "{0} is {1}, lives in {2}, age {3}";
		Console.WriteLine(format, "Lilly", "my daughter's best friend", address, 4);
	}
}

This is obviously a very simplistic example but imagine that the methods are located in different sections or even different modules in your application. In case you want to change the address you’ll need to find every hard-coded instance of the address. Likewise if you want to change the format you’ll need to update it in several different places. We can put these values into a separate location, such as Constants.cs:

public class Constants
{
	public static readonly string Address = "Stockholm, Sweden";
	public static readonly string StandardFormat = "{0} is {1}, lives in {2}, age {3}";
}

If you have a database connection string then that can be put into the configuration file app.config or web.config.

The updated programme looks as follows:

class Program
{
	static void Main(string[] args)
	{
		DoSomething();
		DoSomethingAgain();
		DoSomethingMore();
		DoSomethingExtraordinary();
		Console.ReadLine();
	}

	private static void DoSomething()
	{
		string address = Constants.Address;
		string format = Constants.StandardFormat;
		Console.WriteLine(format, "Nils", "a good friend", address, 30);
	}

	private static void DoSomethingAgain()
	{
		string address = Constants.Address;
		string format = Constants.StandardFormat;
		Console.WriteLine(format, "Christian", "a neighbour", address, 54);
	}

	private static void DoSomethingMore()
	{
		string address = Constants.Address;
		string format = Constants.StandardFormat;
		Console.WriteLine(format, "Eva", "my daughter", address, 4);
	}

	private static void DoSomethingExtraordinary()
	{
		string address = Constants.Address;
		string format = Constants.StandardFormat;
		Console.WriteLine(format, "Lilly", "my daughter's best friend", address, 4);
	}
}

This is a step to the right direction. If we change the constants in Constants.cs then the change will be propagated through the application. However, we still repeat the following bit over and over again:

string address = Constants.Address;
string format = Constants.StandardFormat;

The VALUES of the constants are now stored in one place, but what if we change the location of our constants to a different file? Or decide to read them from a file or a database? Then again we’ll need to revisit all these locations. We can move those variables to the class level and use them in our code as follows:

class Program
	{
		private static string address = Constants.Address;
		private static string format = Constants.StandardFormat;

		static void Main(string[] args)
		{
			DoSomething();
			DoSomethingAgain();
			DoSomethingMore();
			DoSomethingExtraordinary();
			Console.ReadLine();
		}

		private static void DoSomething()
		{
			Console.WriteLine(format, "Nils", "a good friend", address, 30);
		}

		private static void DoSomethingAgain()
		{
			Console.WriteLine(format, "Christian", "a neighbour", address, 54);
		}

		private static void DoSomethingMore()
		{
			Console.WriteLine(format, "Eva", "my daughter", address, 4);
		}

		private static void DoSomethingExtraordinary()
		{
			Console.WriteLine(format, "Lilly", "my daughter's best friend", address, 4);
		}
	}

We’ve got rid of the magic string repetition, but we can do better. Notice that each method performs basically the same thing: write to the console. This is an example of duplicate logic. The data written to the console is very similar in each case, we can factor it out to another method:

private static void WriteToConsole(string name, string description, int age)
{
	Console.WriteLine(format, name, description, address, age);
}

The updated Program class looks as follows:

class Program
	{
		private static string address = Constants.Address;
		private static string format = Constants.StandardFormat;

		static void Main(string[] args)
		{
			DoSomething();
			DoSomethingAgain();
			DoSomethingMore();
			DoSomethingExtraordinary();
			Console.ReadLine();
		}

		private static void DoSomething()
		{
			WriteToConsole("Nils", "a good friend", 30);
		}

		private static void DoSomethingAgain()
		{
			WriteToConsole("Christian", "a neighbour", 54);
		}

		private static void DoSomethingMore()
		{
			WriteToConsole("Eva", "my daughter", 4);
		}

		private static void DoSomethingExtraordinary()
		{
			WriteToConsole("Lilly", "my daughter's best friend", 4);
		}

		private static void WriteToConsole(string name, string description, int age)
		{
			Console.WriteLine(format, name, description, address, age);
		}
	}

Magic numbers

It’s not only magic strings that can cause trouble but magic numbers as well. Imagine that you have the following class in your application:

public class Employee
{
	public string Name { get; set; }
	public int Age { get; set; }
	public string Department { get; set; }
}

We’ll imitate a database lookup as follows:

private static IEnumerable<Employee> GetEmployees()
{
	return new List<Employee>()
	{
		new Employee(){Age = 30, Department="IT", Name="John"}
		, new Employee(){Age = 34, Department="Marketing", Name="Jane"}
		, new Employee(){Age = 28, Department="Security", Name="Karen"}
		, new Employee(){Age = 40, Department="Management", Name="Dave"}
	};
}

Notice the usage of the index 1 in the following method:

private static void DoMagicInteger()
{
	List<Employee> employees = GetEmployees().ToList();
	if (employees.Count > 0)
	{
		Console.WriteLine(string.Concat("Age: ", employees[1].Age, ", department: ", employees[1].Department
			, ", name: ", employees[1].Name));
	}
}

So we only want to output the properties of the second employee in the list, i.e. the one with index 1. One issue is a conceptual one: why are we only interested in that particular employee? What’s so special about him/her? This is not clear for anyone investigating the code. The second issue is that if we want to change the value of the index then we’ll need to do it in three places. If this particular index is important elsewhere as well then we’ll have to visit those places too and update the index.

We can solve both issues using the same simple techniques as in the previous example. Set a new constant in Constants.cs:

public class Constants
{
	public static readonly string Address = "Stockholm, Sweden";
	public static readonly string StandardFormat = "{0} is {1}, lives in {2}, age {3}";
	public static readonly int IndexOfMyFavouriteEmployee = 1;
}

Then introduce a new class level variable in Program.cs:

private static int indexOfMyFavouriteEmployee = Constants.IndexOfMyFavouriteEmployee;

The updated DoMagicInteger() method looks as follows:

private static void DoMagicInteger()
{
	List<Employee> employees = GetEmployees().ToList();
	if (employees.Count > 0)
	{
		Employee favouriteEmployee = employees[indexOfMyFavouriteEmployee];
		Console.WriteLine(string.Concat("Age: ", favouriteEmployee.Age, 
			", department: ", favouriteEmployee.Department
			, ", name: ", favouriteEmployee.Name));
	}
}

View the list of posts on Architecture and Patterns here.

A model .NET web service based on Domain Driven Design Part 10: tests and conclusions

Introduction

In the previous post we’ve come as far as implementing all Get, Post, Put and Delete methods. We also tested the Get methods as the results could be viewed in the browser alone. In order to test the Post, Put and Delete methods we’ll need to do some more work.

Demo

There are various tools out there that can generate any type of HTTP calls for you where you can specify the JSON inputs, HTTP headers etc. However, we’re programmers, right? We don’t need no tools, we can write a simple one ourselves! Don’t worry, I only mean a GUI-less throw-away application that consists of a few lines of code, not a complete Fiddler.

Fire up Visual Studio and create a new Console application. Add a reference to the System.Net.Http library. Also, add a NuGet package reference to Json.NET:

Newtonsoft Json.NET in NuGet

System.Net.Http includes all objects necessary for creating Http messages. Json.NET will help us package the input parameters in the message body.

POST

Let’s start with testing the insertion method. Recall from the previous post that the Post method in CustomersController is expecting an InsertCustomerRequest object:

public HttpResponseMessage Post(CustomerPropertiesViewModel insertCustomerViewModel)

We’ll make this easy for us and create an identical CustomerPropertiesViewModel in the tester app so that the Json translation will be as easy as possible. So insert a class called CustomerPropertiesViewModel into the tester app with the following properties:

public string Name { get; set; }
public string AddressLine1 { get; set; }
public string AddressLine2 { get; set; }
public string City { get; set; }
public string PostalCode { get; set; }

Insert the following method in order to test the addition of a new customer:

private static void RunPostOperation()
{
	HttpRequestMessage requestMessage = new HttpRequestMessage(HttpMethod.Post, _serviceUri);
	requestMessage.Headers.ExpectContinue = false;
	CustomerPropertiesViewModel newCustomer = new CustomerPropertiesViewModel()
	{
		AddressLine1 = "New address"
		, AddressLine2 = string.Empty
		, City = "Moscow"
		, Name = "Awesome customer"
		, PostalCode = "123987"
	};
	string jsonInputs = JsonConvert.SerializeObject(newCustomer);
	requestMessage.Content = new StringContent(jsonInputs, Encoding.UTF8, "application/json");
	HttpClient httpClient = new HttpClient();
	httpClient.Timeout = new TimeSpan(0, 10, 0);
	Task<HttpResponseMessage> httpRequest = httpClient.SendAsync(requestMessage,
			HttpCompletionOption.ResponseContentRead, CancellationToken.None);
	HttpResponseMessage httpResponse = httpRequest.Result;
	HttpStatusCode statusCode = httpResponse.StatusCode;
	HttpContent responseContent = httpResponse.Content;
	if (responseContent != null)
	{
		Task<String> stringContentsTask = responseContent.ReadAsStringAsync();
		String stringContents = stringContentsTask.Result;
		Console.WriteLine("Response from service: " + stringContents);
	}
	Console.ReadKey();
}

…where _serviceUri is a private Uri:

private static Uri _serviceUri = new Uri("http://localhost:9985/customers");

This is the URL that’s displayed in the browser when you start the web API project. The port number may of course differ from yours, so adjust it accordingly.

This is of course not a very optimal method as it carries out a lot of things, but that’s beside the point right now. We only a need a simple tester, that’s all.

If you don’t know the HttpClient and the related objects in this method, then don’t worry, you’ve just learned something new. We set the web method to POST and assign the string contents to the JSONified version of the CustomerPropertiesViewModel object. We also set the request timeout to 10 minutes so that you don’t get a timeout exception as you slowly jump through the code in the web service in a bit. The application type is set to JSON so that the web service understands which media type converter to take. We then send the request to the web service using the SendAsynch method and wait for a reply.

Make sure to insert a call to this method from within Main.

Open CustomersController in the DDD skeleton project and set a breakpoint within the Post method here:

InsertCustomerResponse insertCustomerResponse = _customerService.InsertCustomer(new InsertCustomerRequest() { CustomerProperties = insertCustomerViewModel });

Start the skeleton project. Then run the tester. If everything went well then execution should stop at the breakpoint. Inspect the contents of the incoming insertCustomerViewModel parameter. You’ll see that the parameter properties have been correctly assigned by the JSON formatter.

From this point on I encourage you to step through the web service call with F11. You’ll see how the domain object is created and validated – including the Address property, how it is converted into the corresponding database type, how the IUnitOfWork implementation – InMemoryUnitOfWork – registers the insertion and how it is persisted. You’ll also see that all abstract dependencies have been correctly instantiated by StructureMap, we haven’t got any exceptions along the way which may point to some null dependency problem.

When the web service call returns the you should see that it returned an Exception == null property to the caller, i.e. the tester app. Now refresh the browser and you’ll see the new customer just inserted into memory.

Let’s try something else: assign an empty string to the Name property of the CustomerPropertiesViewModel object in the tester app. We know that a customer must have a name so we’re expecting some trouble. Run the tester app and you should see an exception being thrown at this code line:

throw new Exception(brokenRulesBuilder.ToString());

…within CustomerService.cs. This is because the BrokenRules list of the Customer domain contains one broken rule. Let the code execute and you’ll see in the tester app that we received the correct exception message:

Validation exception from web service

Now assign an empty string to the City property as we know that an Address must have a city. You’ll see a similar response:

Address must have a city validation exception

PUT

We’ll follow the same analogy as above in order to update a customer. Insert the following object into the tester app:

public class UpdateCustomerViewModel : CustomerPropertiesViewModel
{
	public int Id { get; set; }
}

Insert the following method into Program.cs:

private static void RunPutOperation()
{
	HttpRequestMessage requestMessage = new HttpRequestMessage(HttpMethod.Put, _serviceUri);
	requestMessage.Headers.ExpectContinue = false;
	UpdateCustomerViewModel updatedCustomer = new UpdateCustomerViewModel()
	{
		Id = 2
		, AddressLine1 = "Updated address line 1"
		, AddressLine2 = string.Empty
		, City = "Updated city"
		, Name = "Updated customer name"
		, PostalCode = "0988765"
	};

	string jsonInputs = JsonConvert.SerializeObject(updatedCustomer);
	requestMessage.Content = new StringContent(jsonInputs, Encoding.UTF8, "application/json");
	HttpClient httpClient = new HttpClient();
	httpClient.Timeout = new TimeSpan(0, 10, 0);
	Task<HttpResponseMessage> httpRequest = httpClient.SendAsync(requestMessage,
			HttpCompletionOption.ResponseContentRead, CancellationToken.None);
	HttpResponseMessage httpResponse = httpRequest.Result;
	HttpStatusCode statusCode = httpResponse.StatusCode;
	HttpContent responseContent = httpResponse.Content;
	if (responseContent != null)
	{
		Task<String> stringContentsTask = responseContent.ReadAsStringAsync();
		String stringContents = stringContentsTask.Result;
		Console.WriteLine("Response from service: " + stringContents);
	}
	Console.ReadKey();
}

This is almost identical to the Post operation method except that we set the http verb to PUT and we send a JSONified UpdateCustomerViewModel object to the service. You’ll notice that we want to update the customer with id = 2. Comment out the call to RunPostOperation() in Main and add a new call to RunPutOperation() instead. Set a breakpoint within the Put method in CustomersController of the skeleton web service. Jump through the code execution with F11 as before and follow along how the customer is found and updated. Refresh the browser to see the updated values of Customer with id = 2. Run the same test as above: set the customer name to an empty string and try to update the resource. The request should fail in the validation phase.

DELETE

The delete method is a lot simpler as we only need to send an id to the web Delete method of the web service:

private static void RunDeleteOperation()
{
	HttpRequestMessage requestMessage = new HttpRequestMessage(HttpMethod.Delete, string.Concat(_serviceUri, "/3"));
	requestMessage.Headers.ExpectContinue = false;
	HttpClient httpClient = new HttpClient();
	httpClient.Timeout = new TimeSpan(0, 10, 0);
	Task<HttpResponseMessage> httpRequest = httpClient.SendAsync(requestMessage,
			HttpCompletionOption.ResponseContentRead, CancellationToken.None);
	HttpResponseMessage httpResponse = httpRequest.Result;
	HttpStatusCode statusCode = httpResponse.StatusCode;
	HttpContent responseContent = httpResponse.Content;
	if (responseContent != null)
	{
		Task<String> stringContentsTask = responseContent.ReadAsStringAsync();
		String stringContents = stringContentsTask.Result;
		Console.WriteLine("Response from service: " + stringContents);
	}
	Console.ReadKey();
}

You’ll see that we set the http method to DELETE and extended to service Uri to show that we’re talking about customer #3.

Set a breakpoint within the Delete method in CustomersController.cs and as before step through the code execution line by line to see how the deletion is registered and persisted by IUnitOfWork.

Analysis and conclusions

That actually completes the first version of the skeleton project. Let’s see if we’re doing any better than the tightly coupled solution of the first installment of this series.

Dependency graph

If you recall from the first part of this series then the greatest criticism against the technology-driven layered application was that all layers depended on the repository layer and that EF-related objects permeated the rest of the application.

We’ll now look at an updated dependency graph. Before we do that there’s a special group of dependency in the skeleton app that slightly distorts the picture: the web layer references all other layers for the sake of StructureMap. StructureMap needs some hints as to where to look for implementations so we had to set a library reference to all other layers. This is not part of any business logic so a true dependency graph should, I think, not consider this set of links. If you don’t like this coupling then it’s perfectly reasonable to create a separate very thin layer for StructureMap and let that layer reference infra, repo, domains and services.

If we start from the top then we see that the web layer talks to the service layer through the ICustomerService interface. The ICustomerService interface uses RequestResponse objects to communicate with the outside world. Any implementation of ICustomerService will communicate through those objects so their use within CustomersController is acceptable as well. The Service doesn’t spit out Customer domain objects directly. Instead it wraps CustomerViewModels that are wrapped within the corresponding GetCustomersResponse object. Therefore I think we can conclude that the Web layer only depends on the service layer and that this coupling is fairly loose.

The application service layer has a reference to the Infrastructure layer – through the IUnitOfWork interface – and the Domain layer. In a full-blown project there will be more links to the Infrastructure layer – logging, caching, authentication etc. – but as longs as you hide those concerns behind abstractions you’ll be fine. The Customer repository is only propagated in the form of an interface – ICustomerRepository. Otherwise the domain objects are allowed to bubble up to the Service layer as they are the central elements of the application.

The Domain layer has a dependency on the Infrastructure layer through abstractions such as EntityBase, IAggregateRoot and IRepository. That’s all fine and good. The only coupling that’s tighter than these is the BusinessRule object where we construct a new BusinessRule in the CustomerBusinessRule class. In retrospect it may have been a better idea to have an abstract BusinessRule class in the infrastructure layer with concrete implementations of it in the domain layer.

The repository layer has a reference to the Infrastructure layer – again through abstractions such as IAggregateRoot and IUnitOfWorkRepository – and the Domain layer. Notice that we changed the direction of the dependency compared to the how-not-to-do mini-project of the first post in this series: the domain layer does not depend on the repository but the repository depends on the domain layer.

Here’s the updated dependency graph:

DDD improved dependency graph

I think the most significant change compared to where we started is that no single layer is directly or indirectly dependent on the concrete repository layer. You can test and unload the project from the solution – right-click, select Unload Project. There will be a broken reference in the Web layer that only exists for the sake of StructureMap, but otherwise the solution survives this “amputation”. We have successfully hidden the most technology-driven layer behind an abstraction that can be replaced at ease. You need to implement the IUnitOfWork and IUnitOfWorkRepository interfaces and you should be fine. You can then instruct StructureMap to use the new implementation instead. You can even switch between two or more different implementations to test how the different technologies work before you go for a specific one in your project. Of course writing those implementations may not be a trivial task but switching from one technology to another will certainly be.

Another important change is that the domain layer is now truly the central one in the solution. The services and data access layers directly reference it. The UI layer depends on it indirectly through the service layer.

That’s all folks. I hope you have learned new things and can use this skeleton solution in some way in your own project.

The project has been extended. Read the first extension here.

View the list of posts on Architecture and Patterns here.

A model .NET web service based on Domain Driven Design Part 9: the Web layer

Introduction

We’re now ready to build the ultimate consumer of the application, the web layer. As we said before this layer can be any type of presentation layer: MVC, a web service interface, WPF, a console app, you name it. The backend design that we’ve built up so far should be flexible enough to support either a relatively simple switch of UI type or the addition of new types. You may want to have several multiple entry points into your business app so it’s good if they can rely on the same foundations. Otherwise you may need to build different apps just to support different presentation methods, which is far from optimal.

Here we’ll build a web service layer powered by Web API. If you don’t know what it is you can read about it on its official homepage. Here comes a summary:

In short the Web API is a technology by Microsoft to build HTTP-based web services. Web Api uses the standard RESTful way of building a web service with no SOAP overhead; only plain old HTTP messages are exchanged between the client and the server. The client sends a normal HTTP request to a web service with some URI and receives a HTTP response in return.

The technology builds heavily on MVC: it has models and controllers just like a normal MVC web site. It lacks any views of course as a web service provides responses in JSON, XML, plain text etc., not HTML. There are some other important differences:

  • The actions in the controllers do not return Action Results: they can return any string based values and HttpResponse objects
  • The controllers derive from the ApiController class, not the Controller class as in standard MVC

The routing is somewhat different:

  • In standard MS MVC the default routing may look as follows: controller/action/parameters
  • In Web API the ‘action’ is omitted by default: Actions will be routed based on the HTTP verb of the incoming HTTP message: GET, POST, PUT, DELETE, HEAD, OPTIONS
  • The action method signatures follow this convention: Get(), Get(int id), Post(), Put(), Delete(int id)
  • As long as you keep to this basic convention the routing will work without changing the routing in WebApiConfig.cs in the App_Start folder

Routing example: say that the client wants to get data on a customer with id 23. They will send a GET request to our web service with the following URI: http://www.api.com/customers/21. The Web API routing engine will translate this into a Get(int id) method within the controller called CustomersController. If however they want to delete this customer then he will send a DELETE request to the same URI and the routing engine will try to find a Delete(int id) method in CustomersController.

In other words: the supported HTTP verbs have a corresponding method in the correct controller. If a resource does not support a specific verb, e.g. a Customer cannot be deleted, then just omit the Delete(int id) method in the CustomersController and Web API will return a HTTP exception message saying that there’s no suitable method.

The basic convention allows some freedom of naming your action methods. Get, Post etc. can be named Get[resource], Post[resource], e.g. GetCustomer, PostCustomer, DeleteCustomer and the routing will still work. If for any reason you don’t like the default naming conventions you can still use the standard HttpGet, HttpPost type of attributes known from MS MVC.

I won’t concentrate on the details of Web API in this post. If there’s something you don’t understand along the way then make sure to check out the link provided above.

We’ll also see how the different dependencies can be injected into the services, repositories and other items that are dependent upon abstractions. So far we have diligently given room for injecting dependencies according to the letter ‘D‘ in SOLID, like here:

public CustomerService(ICustomerRepository customerRepository, IUnitOfWork unitOfWork)

However, at some point we’ll need to inject these dependencies, right? We could follow poor man’s DI by constructing a new CustomerRepository and a new InMemoryUnitOfWork object as they implement the necessary ICustomerRepository and IUnitOfWork interfaces. However, modern applications use one of the many available Inversion-of-Control containers to take care of these plumbing tasks. In our case we’ll use StructureMap which is quite common to and works very well with .NET projects. IoCs can be difficult to grasp at first as they seem to do a lot of magic, but don’t worry much about them. StructureMap can do a lot for you without having to dig deep into the details on how it works as it’s easy to install and get started with using NuGet.

The web layer

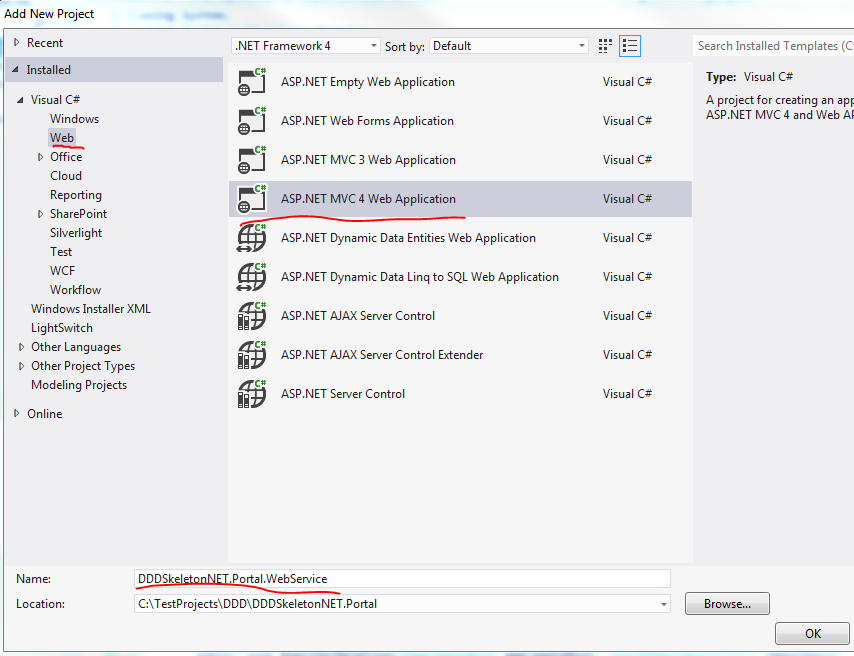
Add a new Web API project by taking the following steps.

1. Add new project

2. Select Web/MVC 4 web application:

Add new MVC project

Call it DDDSkeletonNET.Portal.WebService.

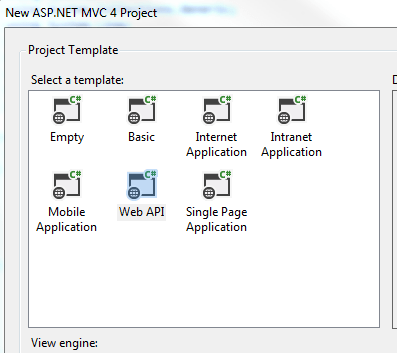
3. Select Web API in the Project template:

Web API in project template

The result is actually a mix between an MVC and a Web API project. Take a look into the Controllers folder. It includes a HomeController which derives from the MVC Controller class and a ValuesController which derives from the Web API ApiController. The project also includes images, views and routing related to MVC. The idea is that MVC views can also consume Web API controllers. Ajax calls can also be directed towards Web API controllers. However, our goal is to have a pure web service layer so let’s clean this up a little:

  • Delete the Content folder
  • Delete the Images folder
  • Delete the Views folder
  • Delete the Scripts folder
  • Delete both controllers from the Controllers folder
  • Delete favicon.ico
  • Delete BundleConfig.cs from the App_Start folder
  • Delete RouteConfig.cs from the App_Start folder
  • Delete the Models folder
  • Delete the Areas folder
  • In WebApiConfig.Register locate the routeTemplate parameter. It says “api/…” by default. Remove the “api/” bit so that it says {controller}/{id}
  • Locate Global.asax.cs. It is trying to call RouteConfig and BundleConfig – remove those calls

The WebService layer should be very slim at this point with only a handful of folders and files. Right-click the Controllers folder and add a new empty API controller called CustomersController:

Add api controller to web api layer

We’ll need to have an ICustomerService object in the CustomersController so add a reference to the ApplicationServices layer.

Add the following private backing field and constructor to CustomersController:

private readonly ICustomerService _customerService;

public CustomersController(ICustomerService customerService)
{
	if (customerService == null) throw new ArgumentNullException("CustomerService in CustomersController");
	_customerService = customerService;
}

We’ll want to return Http messages only. Http responses are represented by the HttpResponseMessage object. As all our contoller methods will return a HttpResponseMessage we can assign an extension method to build these messages. Insert a folder called Helpers in the web layer. Add the following extension method to it:

public static class HttpResponseBuilder
{
	public static HttpResponseMessage BuildResponse(this HttpRequestMessage requestMessage, ServiceResponseBase baseResponse)
	{
		HttpStatusCode statusCode = HttpStatusCode.OK;
		if (baseResponse.Exception != null)
		{
			statusCode = baseResponse.Exception.ConvertToHttpStatusCode();
			HttpResponseMessage message = new HttpResponseMessage(statusCode);
			message.Content = new StringContent(baseResponse.Exception.Message);
			throw new HttpResponseException(message);
		}
		return requestMessage.CreateResponse<ServiceResponseBase>(statusCode, baseResponse);
	}
}

We’re extending the HttpRequestMessage object which represents the http request coming to our web service. We build a response based on the Response we received from the service layer. We assume that the http status is OK (200) but if there’s been any exception then we adjust that status and throw a HttpResponseException exception. Make sure to set the namespace to DDDSkeletonNET.Portal so that the extension is visible anywhere in the project without having to add using statements.

ConvertToHttpStatusCode() is also an extension method. Add another class called ExceptionDictionary to the Helpers folder:

public static class ExceptionDictionary
{
	public static HttpStatusCode ConvertToHttpStatusCode(this Exception exception)
	{
		Dictionary<Type, HttpStatusCode> dict = GetExceptionDictionary();
		if (dict.ContainsKey(exception.GetType()))
		{
			return dict[exception.GetType()];
		}
		return dict[typeof(Exception)];
	}

	private static Dictionary<Type, HttpStatusCode> GetExceptionDictionary()
	{
		Dictionary<Type, HttpStatusCode> dict = new Dictionary<Type, HttpStatusCode>();
		dict[typeof(ResourceNotFoundException)] = HttpStatusCode.NotFound;
		dict[typeof(Exception)] = HttpStatusCode.InternalServerError;
		return dict;
	}
}

Here we maintain a dictionary of Exception/HttpStatusCode pairs. It would be nicer of course to read this directly from the Exception object possibly through an Adapter but this solution is OK for now.

Let’s implement the get-all-customers method in CustomersController. So we’ll need a Get method without any parameters that corresponds to the /customers route. That should be as easy as the following:

public HttpResponseMessage Get()
{
	ServiceResponseBase resp = _customerService.GetAllCustomers();
	return Request.BuildResponse(resp);
}

We ask the service to retrieve all customers and convert that response into a HttpResponseMessage object.

We cannot yet use this controller as ICustomerService is null, there’s no concrete type behind it yet within the controller. This is where StructureMap enters the scene. Open the Manage NuGet Packages window and install the following package:

Install StructureMap IoC in web api layer

The installer adds a couple of new files to the web service layer:

  • 3 files in the DependencyResolution folder
  • StructuremapMvc.cs in the App_Start folder

The only file we’ll consider in any detail is IoC.cs in the DependencyResolution folder. Don’t worry about the rest, they are not important to our main discussion. Here’s a short summary:

StructuremapMvc was auto-generated by the StructureMap NuGet package and it can safely be ignored, it simply works.

DependencyResolution folder: IoC.cs is important to understand, the other auto-generated classes can be ignored. In IoC.cs we declare which concrete types we want StructureMap to inject in place of the abstractions. If you are not familiar with IoC containers then you may wonder how ICustomerService is injected in CustomerController and how ICustomerRepository is injected in CustomerService. This is achieved automagically through StructureMap and IoC.cs is where we instruct it where to look for concrete types and in special cases tell it explicitly which concrete type to take.

StructureMap follows a simple built-in naming convention: if it encounters an interface starting with an ‘I’ it will look for a concrete type with the same name without the ‘I’ in front. Example: if it sees that an ICustomerService interface is needed then it will try to fetch a CustomerService object. This is expressed by the scan.WithDefaultConventions() call. It is easy to register new naming conventions for StructureMap if necessary – let me know in the comment section if you need any code sample.

We also need to tell StructureMap where to look for concrete types. It won’t automatically find the implementations of our abstractions, we need to give it some hints. We can declare this in the calls to scan.AssemblyContainingType of type T. Example: scan.AssemblyContainingType() of type CustomerRepository means that StructureMap should go and look in the assembly which contains the CustomerRepository object. Note that this does not mean that CustomerRepository must be injected at all times. It simply says that StructureMap will look in that assembly for concrete implementations of an abstraction. I could have picked any object from that assembly, it doesn’t matter. So these calls tell StructureMap to look in each assembly that belong to the same solution.

There are cases where the standard naming convention is not enough. Then you can explicitly tell StructureMap which concrete type to inject. Example: x.For()[abstraction].Use()[implementation]; means that if StructureMap sees a dependency on ‘abstraction’ then it should inject a new ‘implementation’ type.

ObjectFactory.AssertConfigurationIsValid() will make sure that an exception is thrown during project start-up if StructureMap sees a dependency for which it cannot find any suitable implementation.

Update the Initialize() method in IoC.cs to the following:

public static IContainer Initialize()
{
	ObjectFactory.Initialize(x =>
	{
        	x.Scan(scan =>
		{
	        	scan.TheCallingAssembly();
			scan.AssemblyContainingType<ICustomerRepository>();
		        scan.AssemblyContainingType<CustomerRepository>();
			scan.AssemblyContainingType<ICustomerService>();
			scan.AssemblyContainingType<BusinessRule>();
			scan.WithDefaultConventions();
		});
		x.For<IUnitOfWork>().Use<InMemoryUnitOfWork>();
		x.For<IObjectContextFactory>().Use<LazySingletonObjectContextFactory>();
	});
	ObjectFactory.AssertConfigurationIsValid();
	return ObjectFactory.Container;
}

You’ll need to reference all other layers from the Web layer for this to work. We’re telling StructureMap to scan all other assemblies by declaring all types that are contained in those assemblies – again, I could have picked ANY type from the other projects, so don’t get hung up on questions like “Why did he choose BusinessRule?”. These calls will make sure that the correct implementations will be found based on the default naming convention mentioned above. There are two cases where this convention is not enough: IUnitOfWork and IObjectContextFactory. Here we use the For and Use extension methods to declare exactly what we need. Finally we want to assert that all implementations have been found. You can test it for yourself: comment out the line on IUnitOfWork, start the application – make sure to set the web layer as the startup project – and you should get a long exception message, here’s the gist of it:

StructureMap.Exceptions.StructureMapConfigurationException was unhandled by user code
No Default Instance defined for PluginFamily DDDSkeletonNET.Infrastructure.Common.UnitOfWork.IUnitOfWork

StructureMap couldn’t resolve the IUnitOfWork dependency so it threw an error.

Open the properties window of the web project and specify the route to customers:

Specify starting route in properties window

Set a breakpoint at this line in CustomersController:

ServiceResponseBase resp = _customerService.GetAllCustomers();

…and press F5. Execution should stop at the break point. Hover over _customerService with the mouse to check the status of the dependency. You’ll see it is not null, so StructureMap has correctly found and constructed a CustomerService object for us. Step through the code with F11 to see how it is all connected. You’ll see that all dependencies have been resolved correctly.

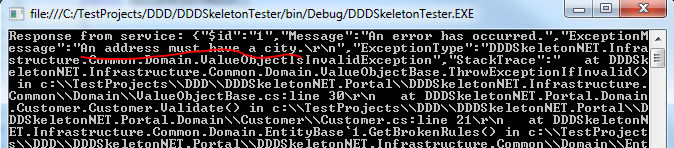
However, at the end of the loop, when the 3 customers that were retrieved from memory should be presented, we get the following exception:

The ‘ObjectContent`1’ type failed to serialize the response body for content type ‘application/xml; charset=utf-8’.

Open WebApiConfig and add the following lines of code to the Register method:

var json = config.Formatters.JsonFormatter;
json.SerializerSettings.PreserveReferencesHandling = Newtonsoft.Json.PreserveReferencesHandling.Objects;
config.Formatters.Remove(config.Formatters.XmlFormatter);

This will make sure that we return our responses in JSON format.

Re-run the app and you should see some JSON on your browser:

Json response from get all customers

Yaaay, after much hard work we’re getting somewhere at last! How can we retrieve a customer by id? Add the following overloaded Get method to the Customers controller:

public HttpResponseMessage Get(int id)
{
	ServiceResponseBase resp = _customerService.GetCustomer(new GetCustomerRequest(id));
	return Request.BuildResponse(resp);
}

Run the application and enter the following route in the URL window: customers/1. You should see that the customer with id 1 is returned:

Get one customer JSON response

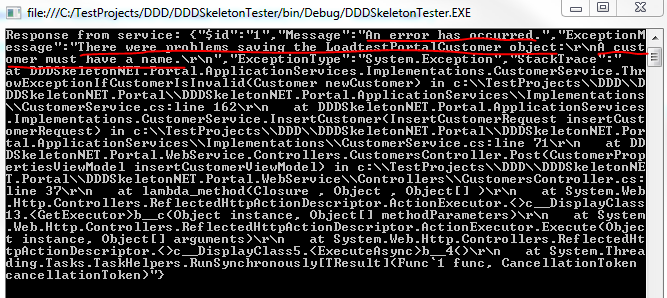
Now try this with an ID that you know does not exist, such as customers/5. An exception will be thrown in the application. Let the execution continue and you should see the following exception message in your web browser:

Resource not found JSON

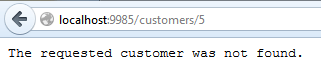
This is the message we set in the code if you recall.

What if we want to format the data slightly differently? It’s good that we have a customer view model and request-response objects where we are free to change what we want without modifying the corresponding domain object. Open the application services layer and add a reference to the System.Runtime.Serialization library. Modify the CustomerViewModel object as follows:

[DataContract]
public class CustomerViewModel
{
	[DataMember(Name="Customer name")]
	public string Name { get; set; }
	[DataMember(Name="Address")]
	public string AddressLine1 { get; set; }
	public string AddressLine2 { get; set; }
	[DataMember(Name="City")]
	public string City { get; set; }
	[DataMember(Name="Postal code")]
	public string PostalCode { get; set; }
	[DataMember(Name="Customer id")]
	public int Id { get; set; }
}

Re-run the application and navigate to customers/1. You should see the updated property names:

Data member and data contract attribute

You can decorate the Response objects as well with these attributes.

This was a little change in the property names only but feel free to add extra formats to the view model, it’s perfectly fine.

We’re missing the insert, update and delete methods. Let’s implement them here and we’ll test them in the next post.

As far as I’ve seen there’s a bit of confusion over how the web methods PUT and POST are supposed to be used in web requests. DELETE is clear, we want to delete a resource. GET is also straightforward. However, PUT and POST are still heavily debated. This post is not the time and place to decide once and for all what their roles are, so I’ll take the following approach:

  • POST: insert a resource
  • PUT: update a resource

Here come the implementations:

public HttpResponseMessage Post(CustomerPropertiesViewModel insertCustomerViewModel)
		{
			InsertCustomerResponse insertCustomerResponse = _customerService.InsertCustomer(new InsertCustomerRequest() { CustomerProperties = insertCustomerViewModel });
			return Request.BuildResponse(insertCustomerResponse);
		}

public HttpResponseMessage Put(UpdateCustomerViewModel updateCustomerViewModel)
{
	UpdateCustomerRequest req =
		new UpdateCustomerRequest(updateCustomerViewModel.Id)
		{
			CustomerProperties = new CustomerPropertiesViewModel()
			{
				AddressLine1 = updateCustomerViewModel.AddressLine1
				,AddressLine2 = updateCustomerViewModel.AddressLine2
				,City = updateCustomerViewModel.City
				,Name = updateCustomerViewModel.Name
				,PostalCode = updateCustomerViewModel.PostalCode
			}
		};
	UpdateCustomerResponse updateCustomerResponse =	_customerService.UpdateCustomer(req);
	return Request.BuildResponse(updateCustomerResponse);
}

public HttpResponseMessage Delete(int id)
{
	DeleteCustomerResponse deleteCustomerResponse = _customerService.DeleteCustomer(new DeleteCustomerRequest(id));
	return Request.BuildResponse(deleteCustomerResponse);
}

…where UpdateCustomerViewModel derives from CustomerPropertiesViewModel:

public class UpdateCustomerViewModel : CustomerPropertiesViewModel
{
	public int Id { get; set; }
}

We’ll test these in the next post where we’ll also draw the conclusions of what we have achieved to finish up the series.

View the list of posts on Architecture and Patterns here.

A model .NET web service based on Domain Driven Design Part 8: the concrete Service

We’ll continue where we left off in the previous post. It’s time to implement the first concrete service in the skeleton application: the CustomerService.

Open the project we’ve been working on in this series. Locate the ApplicationServices layer and add a new folder called Implementations. Add a new class called CustomerService which implements the ICustomerService interface we inserted in the previous post. The initial skeleton will look like this:

public class CustomerService : ICustomerService
{
	public GetCustomerResponse GetCustomer(GetCustomerRequest getCustomerRequest)
	{
		throw new NotImplementedException();
	}

	public GetCustomersResponse GetAllCustomers()
	{
		throw new NotImplementedException();
	}

	public InsertCustomerResponse InsertCustomer(InsertCustomerRequest insertCustomerRequest)
	{
		throw new NotImplementedException();
	}

	public UpdateCustomerResponse UpdateCustomer(UpdateCustomerRequest updateCustomerRequest)
	{
		throw new NotImplementedException();
	}

	public DeleteCustomerResponse DeleteCustomer(DeleteCustomerRequest deleteCustomerRequest)
	{
		throw new NotImplementedException();
	}
}

We know that the service will need some repository to retrieve the requested records. Which repository is it? The abstract one of course: ICustomerRepository. It represents all operations that the consumer is allowed to do in the customer repository. The service layer doesn’t care about the exact implementation of this interface.

We’ll also need a reference to the unit of work which will maintain and persist the changes we make. Again, we’ll take the abstract IUnitOfWork object.

These abstractions must be injected into the customer service class through its constructor. You can read about constructor injection and the other types of dependency injection here.

Add the following backing fields and the constructor to CustomerService.cs:

private readonly ICustomerRepository _customerRepository;
private readonly IUnitOfWork _unitOfWork;

public CustomerService(ICustomerRepository customerRepository, IUnitOfWork unitOfWork)
{
	if (customerRepository == null) throw new ArgumentNullException("Customer repo");
	if (unitOfWork == null) throw new ArgumentNullException("Unit of work");
	_customerRepository = customerRepository;
	_unitOfWork = unitOfWork;
}

Let’s implement the GetCustomer method first:

public GetCustomerResponse GetCustomer(GetCustomerRequest getCustomerRequest)
{
	GetCustomerResponse getCustomerResponse = new GetCustomerResponse();
	Customer customer = null;
	try
	{
		customer = _customerRepository.FindBy(getCustomerRequest.Id);
		if (customer == null)
		{
			getCustomerResponse.Exception = GetStandardCustomerNotFoundException();
		}
                else
		{
			getCustomerResponse.Customer = customer.ConvertToViewModel();
		}
	}
	catch (Exception ex)
	{
		getCustomerResponse.Exception = ex;
	}
	return getCustomerResponse;
}

…where GetStandardCustomerNotFoundException() looks like this:

private ResourceNotFoundException GetStandardCustomerNotFoundException()
{
	return new ResourceNotFoundException("The requested customer was not found.");
}

…where ResourceNotFoundException looks like the following:

public class ResourceNotFoundException : Exception
{
	public ResourceNotFoundException(string message)
		: base(message)
	{}

	public ResourceNotFoundException()
		: base("The requested resource was not found.")
	{}
}

There’s nothing too complicated in the GetCustomer method I hope. Note that we use the extension method ConvertToViewModel() we implemented in the previous post to return a customer view model. We call upon the FindBy method of the repository to locate the resource and save any exception thrown along the way.

GetAllCustomers is equally simple:

public GetCustomersResponse GetAllCustomers()
{
	GetCustomersResponse getCustomersResponse = new GetCustomersResponse();
	IEnumerable<Customer> allCustomers = null;

	try
	{
		allCustomers = _customerRepository.FindAll();
                getCustomersResponse.Customers = allCustomers.ConvertToViewModels();
	}
	catch (Exception ex)
	{
		getCustomersResponse.Exception = ex;
	}	
	return getCustomersResponse;
}

In the InsertCustomer method we create a new Customer domain object, validate it, call the repository to insert the object and finally call the unit of work to commit the changes:

public InsertCustomerResponse InsertCustomer(InsertCustomerRequest insertCustomerRequest)
{
	Customer newCustomer = AssignAvailablePropertiesToDomain(insertCustomerRequest.CustomerProperties);
	ThrowExceptionIfCustomerIsInvalid(newCustomer);
	try
	{
		_customerRepository.Insert(newCustomer);				
		_unitOfWork.Commit();
		return new InsertCustomerResponse();
	}
	catch (Exception ex)
	{
		return new InsertCustomerResponse() { Exception = ex };
	}
}

…where AssignAvailablePropertiesToDomain looks like this:

private Customer AssignAvailablePropertiesToDomain(CustomerPropertiesViewModel customerProperties)
{
	Customer customer = new Customer();
	customer.Name = customerProperties.Name;
	Address address = new Address();
	address.AddressLine1 = customerProperties.AddressLine1;
	address.AddressLine2 = customerProperties.AddressLine2;
	address.City = customerProperties.City;
	address.PostalCode = customerProperties.PostalCode;
	customer.CustomerAddress = address;
	return customer;
}

So we simply dress up a new Customer domain object based on the properties of the incoming CustomerPropertiesViewModel object. In the ThrowExceptionIfCustomerIsInvalid method we validate the Customer domain:

private void ThrowExceptionIfCustomerIsInvalid(Customer newCustomer)
{
	IEnumerable<BusinessRule> brokenRules = newCustomer.GetBrokenRules();
	if (brokenRules.Count() > 0)
	{
		StringBuilder brokenRulesBuilder = new StringBuilder();
		brokenRulesBuilder.AppendLine("There were problems saving the LoadtestPortalCustomer object:");
		foreach (BusinessRule businessRule in brokenRules)
		{
			brokenRulesBuilder.AppendLine(businessRule.RuleDescription);
		}

		throw new Exception(brokenRulesBuilder.ToString());
	}
}

Revisit the post on EntityBase and the Domain layer if you’ve forgotten what the BusinessRule object and the GetBrokenRules() method are about.

In the UpdateCustomer method we first check if the requested Customer object exists. Then we change its properties based on the incoming UpdateCustomerRequest object. The process after that is the same as in the case of InsertCustomer:

public UpdateCustomerResponse UpdateCustomer(UpdateCustomerRequest updateCustomerRequest)
{
	try
	{
		Customer existingCustomer = _customerRepository.FindBy(updateCustomerRequest.Id);
		if (existingCustomer != null)
		{
			Customer assignableProperties = AssignAvailablePropertiesToDomain(updateCustomerRequest.CustomerProperties);
			existingCustomer.CustomerAddress = assignableProperties.CustomerAddress;
			existingCustomer.Name = assignableProperties.Name;
			ThrowExceptionIfCustomerIsInvalid(existingCustomer);
			_customerRepository.Update(existingCustomer);
			_unitOfWork.Commit();
			return new UpdateCustomerResponse();
		}
		else
		{
			return new UpdateCustomerResponse() { Exception = GetStandardCustomerNotFoundException() };
		}
	}
	catch (Exception ex)
	{
		return new UpdateCustomerResponse() { Exception = ex };
	}
}

In the DeleteCustomer method we again first retrieve the object to see if it exists:

public DeleteCustomerResponse DeleteCustomer(DeleteCustomerRequest deleteCustomerRequest)
{
	try
	{
		Customer customer = _customerRepository.FindBy(deleteCustomerRequest.Id);
		if (customer != null)
		{
			_customerRepository.Delete(customer);
			_unitOfWork.Commit();
			return new DeleteCustomerResponse();
		}
		else
		{
			return new DeleteCustomerResponse() { Exception = GetStandardCustomerNotFoundException() };
		}
	}
	catch (Exception ex)
	{
		return new DeleteCustomerResponse() { Exception = ex };
	}
}

That should be it really, this is the implementation of the CustomerService class.

In the next post we’ll start building the ultimate consumer of the application: the web layer which in this case will be a Web API web service. However, it could equally be a Console app, a WPF desktop app, a Silverlight app or an MVC web app, etc. It’s up to you what type of interface you build upon the backend skeleton.

View the list of posts on Architecture and Patterns here.

FIFO data structure in .NET: Queue of T

If you need a generic collection where you are forced to handle the elements on a first come first served basis then Queue will be your friend. There’s no Insert, Add or Delete method and you cannot access just any particular element by some index, like [2]. This data structure is most applicable in First-in-first-out – FIFO – scenarios.

To initialise:

Queue<Client> clientsQueueingInShop = new Queue<Client>();

To add objects:

clientsQueueingInShop.Enqueue(new Client {Name = "Nice person"});
clientsQueueingInShop.Enqueue(new Client {Name = "My friend"});
clientsQueueingInShop.Enqueue(new Client {Name = "My neighbour"});

To retrieve the first object in the queue:

Client nextUp = clientsQueueingInShop.Dequeue();

This will not only get the first client – “Nice person” – in the queue but also remove it from the collection. So that the next time you call Dequeue() it will return “My friend”.

You can look at the next item in the queue by calling the Peek() method. It doesn’t remove the object from the collection, in other words it will return the same object on subsequent calls:

Client nextUp = clientsQueueingInShop.Peek();

You can query the queue to see if it contains a particular element:

bool contains = clientsQueueingInShop.Contains(myFavouriteClient);

You will need to make sure of course that the objects are comparable in the queue.

In case you absolutely must access an object in the queue by some index one option is to convert the queue to an array:

Client[] clientArrays = clientsQueueingInShop.ToArray();

This will create a copy of the queue as an array, the original queue remains intact.

Elliot Balynn's Blog

A directory of wonderful thoughts

Software Engineering

Web development

Disparate Opinions

Various tidbits

chsakell's Blog

WEB APPLICATION DEVELOPMENT TUTORIALS WITH OPEN-SOURCE PROJECTS

Once Upon a Camayoc

ARCHIVED: Bite-size insight on Cyber Security for the not too technical.