Using webpack 2 and NPM to bundle various resources of a web application part 2: code beginnings
August 23, 2017 Leave a comment
Introduction
In the previous post we introduced the topic of this series which is the basics of webpack. Webpack is a bundling and packaging tool whose primary goal is to bundle the various JS and CSS scripts and images into minimised files that are faster to download in a web browser. Webpack is often associated with Single Page Applications that heavily rely on JavaScript to render and re-render the same page according to the actions of the website user. To be more exact, the various popular JS frameworks like React or Vue use webpack behind the scenes to build a deployable package out of a set of components of an SPA. Normally the command line tools associated with these frameworks, like the React command line interface (CLI), already have webpack configured that fits most needs but it’s still good to understand how webpack works and what it does in isolation. Otherwise newcomers to the technology don’t even dare to touch the webpack configuration file since it seems to perform a lot of woodoo magic.
In this post we’ll set up a minimal environment and start coding.
Node Package Manager (npm)
Before we start we need to install the Node Package Manager on our machine. NPM is a package manager for JavaScript applications that comes with a command line interface (CLI). NPM is similar to NuGet in the .NET world and Maven in Java. The NPM repository contains a very large amount of JavaScript plugins that can be registered in your JS application. Webpack is also such a plugin that can be added to an NPM project.
When working with the fashionable JS frameworks we mentioned before NPM is usually the place to start with. NPM must be installed and a new NPM project instantiated. If you already know NPM and have it installed on your computer then it’s safe to skip to the next section.
To be more precise NPM is part of Node.js. So in fact we install Node.js which in turn will include the NPM tool. Go to the Node.js installation page. I’m doing this exercise on Windows so I see the following link:

If you’re on a different OS then your screen will look different of course. Also, the Node.js version number may be higher by the time you read this post.
Node.js will normally be installed in either the “Program Files” or “Program Files (x86)” folder in a sub-folder called nodejs. This nodejs folder will in turn include the NPM tool called npm.cmd. Open a command prompt and type
npm -v
This should respond with the version number of NPM. If you see an error message that the file specified cannot be found then the installation root folder where NPM is located must be added to the list of Path environment variables:

Then close and re-open a command prompt and run the same command again. It should work fine.
Creating an NPM project
Create a folder where the new NPM project will be stored, e.g. C:\WebpackTutorial\demo. Open a command prompt and navigate to this folder. Run the following command:
npm init
NPM will then ask a series of questions where it’s fine to assume the default values by pressing Enter. E.g. if you see the following in the command prompt…
version: (1.0.0)
…then just press Enter without typing anything. Feel free to override the default values if you wish. The final step will show a JSON document that will be included in a file called package.json and a question:
Is this ok? (yes)
Just press Enter to create the NPM project.
We’ve successfully created an NPM project with a single file called package.json. This file contains all the dependencies that the project needs and which will be loaded from the Node module repository.
Open the folder in your favourite text editor. I will use Visual Studio Code but it really doesn’t make any difference whatsoever. Use Atom or Brackets or whatever you prefer.
As we said there will be a single file in the root folder which in my case is called BlogTutorial:

Install webpack
Webpack is also a plugin that can be installed using NPM just like how dependencies are installed via NuGet in .NET and Maven in Java. Let’s install webpack in our NPM project. Make sure that the command prompt has the demo project root as its directory and run the following command:
npm install –save-dev webpack
This will start the installation process and present a dependency tree at the end. Webpack itself depends on a range of other modules which in turn can depend on various other modules and so on.
If you haven’t used NPM before then you may wonder what “–save-dev” means. Note that it’s a double-dash + save + single-dash + dev. This option means that this dependency is only required during development and should not be distributed when building the final production version of the project. Webpack is such a dependency, it’s not needed in the finished deployment package but it’s required during development.
Another option is –save which will include the dependency in the production-ready package. Both –save and –save-dev will extend the package.json file with the name and version of the dependency. Here’s how package.json shows the development dependencies in its JSON document:
"devDependencies": {
    "webpack": "^3.5.5"
  }
Production dependencies will be added to the “dependencies” section.
A final option is to only write “npm install [module name]” without any flag but that’s generally not a good idea. It installs the package but there will be no trace of it in package.json. You’ll end up with the classic case of “but it works on my machine”. There will be at least two problems you’ll face later on:
- If the dependency is needed on the production server then the application will fail to work since it will be missing
- Normally if an NPM project is source controlled in Git(hub) then the downloaded dependencies are not checked in. Instead, we check in package.json with the information about the dependencies. Then another developer can checkout the project and initialise the dependencies locally. If package.json doesn’t show all the dependencies then the application won’t work on the other developer’s machine
Therefore make sure you either go with the –save-dev or –save flag when installing dependencies in NPM.
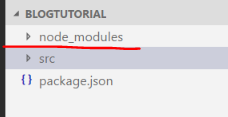
Where are the Node modules added? They are saved in a folder called node_modules:
If you open that folder you’ll see a long range of dependencies installed. That’s the entire dependency tree required by webpack. Webpack has its own folder with its own package.json file where you can view its direct dependencies.
Extend the project slightly
Next add a new folder called src within the root folder, e.g. C:\WebpackTutorial\demo\src:

This is where we’ll put our JavaScript files. Although it’s not a must, you’ll often see this convention that the JS source files are placed within a folder called src.
The first file we’ll need to add is index.js. It is the entry point of the application as defined in package.json:
"main": "index.js"
So add a file called index.js and leave it empty to begin with. Then add another file called utils.js and leave it also empty.
We’ll add some content in the next post. We’ll also create a dependency between the two and see how to link them using ES2015 and webpack.
View all posts related to JavaScript here.

