Introduction to ASP.NET Core part 25: user management cont’d
March 20, 2017 Leave a comment
Introduction
In the previous post we started looking into user management in .NET Core MVC. .NET Core provides a number of built-in objects for this purpose: so far we’ve seen IdentityUser to represent the properties of a typical application user, IdentityRole to represent roles and the generic IdentityDbContext of T class to easily connect the application with an SQL Server based identity provider. The built in objects can be customised by deriving a class from them like we did with our UserManagementDbContext and User classes. We also saw how to install and register the EF based identity provider in Startup.cs via the Configure and ConfigureServices methods. We keep the user management related elements separate from the bookstore domain so that users, claims, roles etc. do not intermingle with our core domain.
Currently our demo application doesn’t do anything with users. Any visitor can do anything on the books related pages. We’ll start building out our application around that in this post.
The user management tables
The first thing we need to sort out is the database where the user related records will be stored. We’ll repeat the EF data migration steps we performed earlier when we created the Books table.
As we have two DB contexts it’s now compulsory to provide the -Context parameter. Open the NuGet package manager console and issue the following command:
Add-Migration “FirstUserManagementTablesCreation” -Context “DotNetCoreBookstore.UserManagement.UserManagementDbContext”
This will create the migration file called FirstUserManagementTablesCreation in the Migrations/UserManagementDb folder. Go ahead and view the migration file, it should be quite easy to follow which tables, columns, IDs, indexes etc. will be created:
- AspNetUsers and AspNetRoles: the tables to store the users and roles
- AspNetUserRoles: the many-to-many relationship table between users and roles
- AspNetUserClaims: to store claims, i.e. key-value pairs of statements about the user’s characteristics. For a lot more information about claims start here.
- AspNetRoleClaims: in the world of claims-based authentication there aren’t supposed to be Roles, but rather key-value pair statements, like “Age”: 38, “Country”: Algeria etc. However, it is still fine to work with roles as many developers are familiar with it and role-based authentication might be the preferred choice. Here’s a good thread on stack overflow related to this topic. Even if there are no Roles in claims-based authentication we can still have claims-based authentication with roles mixed in where the claim key will be “Role” and the claim value will be an array of roles of the user. However, in a pure role-based authorisation mechanism it may be difficult to work with claims since a role simply describes which role a user has, like Administrators, PowerUsers, etc.
- AspNetUserTokens: for security token based authentication. This page provides a good guide on this topic. As of .NET Core 1.1 there’s an important issue related to the lack of secondary key to the AspNetUsers table: AspNetUserTokens is not connected to users in the database
- AspNetUserLogins: quote from this thread on stack overflow: “In Asp.net Identity, the Identity system uses the AspNetUserLogins table to hold information about 3rd party/external logins, for example users who login into your site via google, facebook, twitter etc.”. If you want to know more how to enable these external login providers in a .NET Core MVC application then consult this documentation page.
Let’s continue by creating the database. Execute the following command in the Package Manager Console:
Update-Database -Migration “FirstUserManagementTablesCreation” -Context “DotNetCoreBookstore.UserManagement.UserManagementDbContext”
We specified which migration to run as there are multiple. Also, we had to provide the DB context fully qualified name again. If everything went fine then the console should respond with “Done.”. Let’s check if the tables have been created. Indeed they have and now we have two separate databases for Books and User Management:

User creation
Let’s create a form where users can register to our website. Add a class called AccountController to the Controllers folder:
using Microsoft.AspNetCore.Mvc;
using System;
using System.Collections.Generic;
using System.Linq;
using System.Threading.Tasks;

namespace DotNetCoreBookstore.Controllers
{
    public class AccountController : Controller
    {
		[HttpGet]
		public IActionResult Register()
		{
			return View();
		}
    }
}
We’ll also need a view model to build the user interface. We need three properties: username, password and the year of birth. Add the following class to the Models folder:
using System;
using System.Collections.Generic;
using System.ComponentModel.DataAnnotations;
using System.Linq;
using System.Threading.Tasks;

namespace DotNetCoreBookstore.Models
{
    public class UserRegistrationViewModel
    {
		[Required]
		public string Username { get; set; }
		[Required, DataType(DataType.Password)]
		public string Password { get; set; }
		[Required(ErrorMessage = "Year of birth is required"), Range(1900, 2015)]
		public int YearOfBirth { get; set; }
	}
}
We can now build the matching view. Add a folder called Account to the Views folder and then add an MVC view page called Register.cshtml:
@model DotNetCoreBookstore.Models.UserRegistrationViewModel

<h1>Add new user</h1>

<form method="post" asp-antiforgery="true">
    <div asp-validation-summary="All"></div>

    <div>
        <label asp-for="Username"></label>
        <input asp-for="Username" />
        <span asp-validation-for="Username"></span>
    </div>

    <div>
        <label asp-for="Password"></label>
        <input asp-for="Password" />
        <span asp-validation-for="Password"></span>
    </div>

    <div>
        <label asp-for="YearOfBirth"></label>
        <input asp-for="YearOfBirth" />
        <span asp-validation-for="YearOfBirth"></span>
    </div>

    <div>
        <input type="submit" value="Add" />
    </div>

</form>
So we handle user registration in a simple form which will lead to a POST Register function in the Account controller. It doesn’t exist yet so we’ll add a skeleton first:
[HttpPost, ValidateAntiForgeryToken]
public IActionResult Register(UserRegistrationViewModel registrationViewModel)
{
	return null;
}
For user creation we can use another built-in class called UserManager of T which is located in the Microsoft.AspNetCore.Identity namespace. The type parameter declares the user class we want to use, i.e. User in our case. UserManager offers a wide range of useful functions related to users: get a user by ID, find an email, add claims to a user, confirm email, add a user to a role and many more. In other words it provides a gateway to the user management database so that we don’t have to waste our precious time on this type of functions. So keep in mind that UserManager handles the database portion of user management. Logging in and logging out is provided by another class called SignInManager which we’ll look at in the next post.
The AccountController class will need a UserManager injected through its constructor. We can simply extend the constructor and add a private backing field. Since we registered all the necessary elements in Startup.cs MVC will be able to inject an instance for us. User creation is performed via the CreateAsync function which returns a Task of IdentityResult. IdentityResult contains the user creation result and any exception messages in form of IdentityError objects. Since CreateAsync is an asynchronous function we’ll need to modify the POST Register function to return a Task of IActionResult and add the async keyword to its signature. Here’s the revised AccountController class:
using DotNetCoreBookstore.Models;
using DotNetCoreBookstore.UserManagement;
using Microsoft.AspNetCore.Identity;
using Microsoft.AspNetCore.Mvc;
using System;
using System.Collections.Generic;
using System.Linq;
using System.Threading.Tasks;

namespace DotNetCoreBookstore.Controllers
{
    public class AccountController : Controller
    {
		private readonly UserManager<User> _userManager;

		public AccountController(UserManager<User> userManager)
		{
			if (userManager == null) throw new ArgumentNullException("User manager");
			_userManager = userManager;
		}

		[HttpGet]
		public IActionResult Register()
		{
			return View();
		}

		[HttpPost, ValidateAntiForgeryToken]
		public async Task<IActionResult> Register(UserRegistrationViewModel registrationViewModel)
		{
			if (ModelState.IsValid)
			{
				IdentityResult userCreationResult =
					await _userManager.CreateAsync(new User() { UserName = registrationViewModel.Username, YearOfBirth = registrationViewModel.YearOfBirth }, registrationViewModel.Password);
				if (userCreationResult.Succeeded)
				{
					return RedirectToAction("Index", "Books");
				}
				else
				{
					IEnumerable<string> userCreationErrors = from e in userCreationResult.Errors select e.Description;
					string concatenatedErrors = string.Join(Environment.NewLine, userCreationErrors);
					ModelState.AddModelError("", concatenatedErrors);
				}
			}
			return View();
		}
    }
}
CreateAsync expects a new User object where we set two of its properties: user name and the year of birth which is a custom property. Since User is derived from IdentityUser we could add more properties to it here, such as the email address and the user’s roles. If the user creation was successful then we redirect the user to the books index page. Normally we would sign in the new user but we’ll do that later. If the user creation didn’t succeed then we collect the errors and add them to the model state so that they can appear in the validation summary.
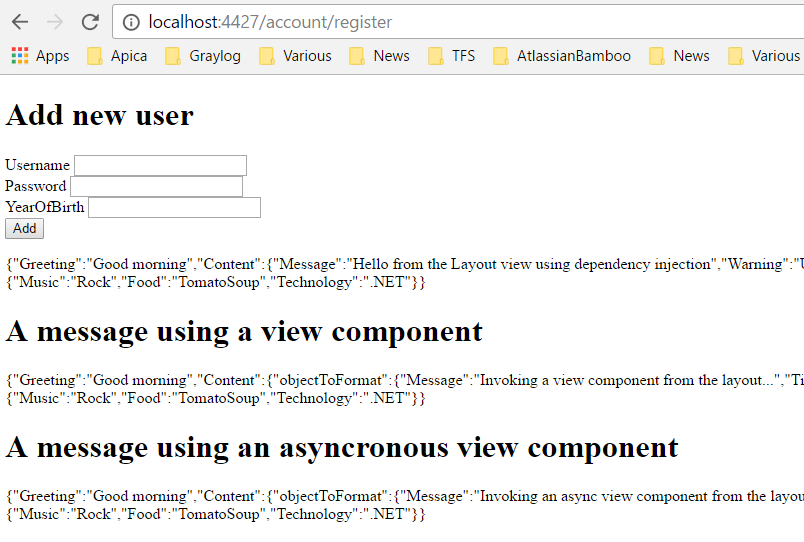
So let’s test all this. Start the application and navigate to /Account/Register. The user registration form should appear along with all the funny stuff we added earlier using view components:
Fill in the text boxes and press the Add button to see what happens. I actually got a validation error at first:
Passwords must have at least one non alphanumeric character.
Passwords must have at least one uppercase (‘A’-‘Z’).
OK, I’ll try again… …and it seems to have gone fine, at least userCreationResult.Succeeded is true and I am redirected to the books index page. We can check the AspNetUsers table in the SQL Server Object Manager as well and there should be our first user:
![]()
Awesome, this is good progress. We’ll continue with log in and log out in the next post.
View the list of MVC and Web API related posts here.

