Introduction to ASP.NET Core part 6: environments and settings
January 27, 2017 Leave a comment
Introduction
In the previous post we looked at how to deal with static files in .NET Core. Examples of static files include JS, CSS files, images and HTML pages such as index.html. They are normally placed within the web root folder called wwwroot in an ASP.NET project although we can configure other folders in code. These static files are not reachable via a URL at first. Navigation needs to be turned on in Startup.cs using specialised middleware. Hence handling static files is a good example of the modularity that .NET Core claims to display. We also saw how to activate the built-in welcome page via another middleware. It is also a static page and its main purpose is to check whether our ASP.NET web application has been correctly started by the web server. We also saw how to serve up a default and a customised home page for the site visitors.
In this post we’ll investigate the various environments available for an ASP.NET Core project.
Environment
By environment we mean the type of environment the application is running in. Typical environment types are Production, Staging, Testing, Development, Alpha, Beta and the like. It’s normal that developers first test a new feature in the Alpha/Testing/Development environment, then if it’s approved the application is deployed to Beta/Staging and if all looks good then all new features and bug-fixes are deployed to Production. The environment chain may have more steps, such as Dev, Alpha, Beta, PreProd and Prod.
The point for our current discussion is that the settings applied in each environment will invariably differ by environment. A good example is the database connection string. Each environment will get its data from separate databases with their respective connection strings. Customisation is therefore highly appropriate when talking about application environments and their settings. The goal of this post is to explore what’s available in .NET Core in this regard.
We’ll be working in our demo application DotNetCoreBookstore. Another source of information on this topic is the relevant Microsoft information page available here.
Determining the environment
The Configure method in Startup.cs includes the following bit of code:
if (env.IsDevelopment())
{
	app.UseDeveloperExceptionPage();
}
We’ve already seen what the UseDeveloperExceptionPage extension method does but how does the injected IHostingEnvironment object know whether the application is running in the development environment? The answer is quite simple actually. Check out the properties of the project and the environment is set as Development for the environment variable called ASPNETCORE_ENVIRONMENT:

The predefined magic string for the development environment is exactly “Development”. That’s how the IsDevelopment function determines whether the application is running in the dev environment. There are two more predefined environment types: Staging and Production. The corresponding boolean functions of IHostingEnvironment are called IsStaging and IsProduction. It’s a good idea to show the full exception details in the development environment so that the developers know where to start with the bug hunt. However, in production we certainly don’t want to show that type of information for the clients. One option is to insert a generic error page and show that in the production environment. The following section describes a minimalist solution for this problem.
Insert a HTML page into the wwwroot folder called Error.html with the following markup:
<!DOCTYPE html>
<html>
<head>
    <meta charset="utf-8" />
    <title>Generic error page</title>
</head>
<body>
    <p>An exception has occurred. Please contact admin@nosuchcompany.com for assistance.</p>
</body>
</html>
There’s a middleware called ExceptionHandler to activate exception handling. The UseExceptionHandler extension method accepts a URL path such as /Error.html. Here’s the update Configure method where we show the basic usage of UseExceptionHandler and also deliberately throw an exception in the Run middleware:
public void Configure(IApplicationBuilder app, IHostingEnvironment env, ILoggerFactory loggerFactory,
	IStringFormatter stringFormatter)
{
	loggerFactory.AddConsole();

	app.UseLoggerComponent("Elvis Presley", DateTime.UtcNow);

	if (env.IsDevelopment())
	{
		app.UseDeveloperExceptionPage();
	}
	else if (env.IsProduction())
	{
		app.UseExceptionHandler("/Error.html");
	}

	app.UseFileServer();

	app.UseWelcomePage("/hello");

	app.Run(async (context) =>
	{
		throw new ArgumentException("NONO!");
		await context.Response.WriteAsync(stringFormatter.FormatMe(new { Message = "Hello World!" }));
	});
}
Next change the environmental variable ASPNETCORE_ENVIRONMENT to Production in the Properties window and save all changes:

Run the application. You will at first be directed to the home page after our discussion in the previous post. However, update the URL to something for which we have no valid routing such as /whatever. This is so that we hit the Run extension where the exception is thrown. You should now definitely see the contents of Error.html:

An alternative solution is to use the ExceptionHandlerOptions object where we can declare the URL path and/or a delegate to be called. The following is equivalent to the above solution with the string parameter overload of UseExceptionHandler:
if (env.IsDevelopment())
{
	app.UseDeveloperExceptionPage();
}
else if (env.IsProduction())
{
	app.UseExceptionHandler(new ExceptionHandlerOptions()
	{
		ExceptionHandlingPath = new PathString("/Error.html")
	});
}
ExceptionHandlerOptions has another property where we can set a lambda expression for a request delegate. That’s the same type of function that the Run extension accepts in the bottom of the Configure method. Here’s how to return a plain text through the exception handler delegate:
app.UseExceptionHandler(new ExceptionHandlerOptions()
{
	//ExceptionHandlingPath = new PathString("/Error.html"),
	ExceptionHandler = context => context.Response.WriteAsync("An exception has occurred. Please contact admin@nosuchcompany.com for assistance.")
});
Custom environments
We’re not restricted to the values Development, Staging and Production for the environment. We can easily create our own environment. Just provide any name for the aforementioned environment variable, like DonaldDuck:

The IsEnvironment method of IHostingEnvironment accepts a string as the environment name to check:
if (env.IsEnvironment("DonaldDuck"))
{
	Debug.WriteLine("QuackQuack");
}
Separate environments – separate settings
As mentioned in the beginning of this post it’s very likely that some settings will have different values across different environments. In traditional ASP.NET with a web.config we could have an appSettings section like this:
<appSettings>
   <add key="MongoDbUserName" value="username" />
   <add key="MongoDbPassword" value="passw0rd" />
   <add key="MongoDbAuthMechanism" value="MONGODB-CR" />
   <add key="ReplicaSetInUse" value="1" />
   <add key="MongoDbSelfServiceTableName" value="tableName" />
</appSettings>
We can imagine that the MongoDb auth mechanism is the same across all environments and a replica set is also used everywhere. However, we want to modify the other three values for each environment. One solution is to have separate config files with names like web.alpha.config, web.release.config, web.production.config etc., where these files only include the modified values to be overwritten when the application is compiled for a specific environment:
<appSettings>
   <add key="MongoDbUserName" value="usr_production" xdt:Transform="SetAttributes" xdt:Locator="Match(key)"/>
   <add key="MongoDbPassword" value="pw_production123" xdt:Transform="SetAttributes" xdt:Locator="Match(key)"/>
   <add key="MongoDbSelfServiceTableName" value="realTableName" xdt:Transform="SetAttributes" xdt:Locator="Match(key)"/>
</appSettings>
So when the application is compiled for this specific environment then those three setting values are overwritten with the help of the XML transformation attributes. The MongoDbAuthMechanism and ReplicaSetInUse settings remain untouched.
We can achieve something similar with the new appsettings.json files as well. Recall that we inserted the following JSON property in appsettings.json previously:
“Mood”: “Optimist”
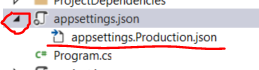
Insert a new JSON file to the project root and call it appsettings.Production.json. The file will appear like a sub-item of appsettings.json:
Add a single JSON property to the new file:
{
"Mood" : "FeelingGreat"
}
Recall how we loaded appsettings.json in the Startup constructor and checked the value of “Mood” earlier in this series:
ConfigurationBuilder configBuilder = new ConfigurationBuilder();
configBuilder
	.SetBasePath(hostingEnvironment.ContentRootPath)
	.AddJsonFile("appsettings.json", optional: false, reloadOnChange: true)
	.AddEnvironmentVariables();
IConfiguration configRoot = configBuilder.Build();

string currentMood = configRoot["Mood"];
Current mood will be “Optimist” as expected.
The good news is that we can call AddJsonFile as many times as we want. Existing setting values will be overridden if they appear more than once. The last entry will “win” just like when assigning different values to the same key in a dictionary. Adding the environment specific json file is simple:
configBuilder
	.SetBasePath(hostingEnvironment.ContentRootPath)
	.AddJsonFile("appsettings.json", optional: false, reloadOnChange: true)
	.AddJsonFile($"appsettings.{hostingEnvironment.EnvironmentName}.json", optional: false, reloadOnChange: true)
	.AddEnvironmentVariables();
If ASPNETCORE_ENVIRONMENT is set to Production then currentMood will get the value FeelingGreat.
This system is similar to cascading style sheets. We start with a general set of rules which are overridden by specific style attributes further down the chain. Due to this cascading effect if the environment variables of the computer includes one called “Mood” then its value will override the value stored in appsettings.Production.json. Therefore one way to designate the environment of a server is to set the ASPNETCORE_ENVIRONMENT as an environment variable:

The value set in the project properties window overrides the environment variables. If you want to see the value you set for the computer then you’ll need to remove the property from the properties window:

If you re-run the application now then you should get an exception:
The configuration file ‘appsettings.MickeyMouse.json’ was not found and is not optional.
We set the “optional” variable to false. Since we have no such file we get the exception.
That’s all about the basics of environments and settings in ASP.NET Core. We’ll continue in the next post.
View the list of MVC and Web API related posts here.

