Introduction to ASP.NET Core part 1: anatomy of an empty web project
January 16, 2017 7 Comments
Introduction
ASP.NET Core is a brand new portable web framework by Microsoft. It is similar to the “normal” ASP.NET versions we’ve seen so far, such as ASP.NET 4.5. ASP.NET 4.5 targets the .NET 4.5 framework and conversely ASP.NET Core is primarily targeted at the .NET Core framework. However, it can also target the other .NET frameworks like .NET 4.5 or 4.6. It is currently in preview mode at the time of writing this post but developers are free to play around with it already now. It’s good to get familiar with the new features because .NET Core is meant to be the future direction of .NET development. There’s a number of significant changes compared to the earlier versions of ASP.NET that .NET developers will need to get used to.
Currently .NET Core is a subset of the full-blown .NET framework meaning that not all features of .NET are available in it. However, as the product matures the gap between .NET Core and full .NET should diminish. Eventually all new .NET projects should target .NET Core.
.NET Core marks a significant shift from Microsoft’s past policies and attitude of targeting Windows only and keeping as much as possible secret and paid. .NET Core is cross-platform and designed to run on multiple operating systems: Windows, Mac OS and Linux. It is also open-source, you can view its public GitHub repository here.
Another important change is the level of modularity of .NET Core projects. With .NET Core we are free to import those libraries and dependencies that are used in our project. .NET Core is lean and we don’t have to drag along all the services offered by .NET that we might not even need. Dependencies can be installed in various ways but the default is to go through NuGet. Also, the default web server for ASP.NET Core applications is still IIS but we have other options as well.
In this series we’ll go through the anatomy of a .NET Core application. I’m planning to have multiple series on various topics such as the foundations, MVC, Identity etc. Those are large topics that deserve their own sub-series instead of rushing through them in 1-2 posts. I’m very new to .NET Core myself so I’ll try to go as slowly as possible with a lot of details. As mentioned above this product is still in preview mode but hopefully the information will still be relevant when the final version is published.
Setup
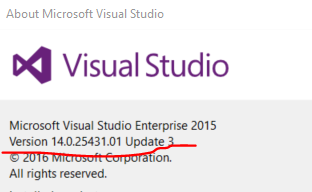
We’ll need to have Visual Studio 2015 for testing. It’s fine to start with the Community edition. The important thing is that VS 2015 Update 3 be installed. If you have Visual Studio open then go to Help, About Microsoft Visual Studio and check which Update you currently have installed:
If you see something lower then go to Tools, Extensions and Updates and expand the Updates section. You should see that Update 3 is available for download:

Download and install the update. It will probably take several minutes so be patient.
We can download the necessary VS templates starting on the .NET Core homepage. The home page includes a lot of good information on the platform. Right now we’ll go to the Getting Started page:

The getting started page has a link that leads us to the necessary downloads:

The installation guide has instructions to various operating systems. I’m on Windows so I’ll choose that:

Since I have VS 2015 and I’ve already installed Update 3 I’ll jump to step 2:

This downloads an .exe file which installs the necessary tools and templates to work with .NET in Visual Studio. Start the setup progress and let it finish. It will take some minutes so again, be patient.
The first web project
When done then open Visual Studio, start a New Project and the ASP.NET Core template targeting the .NET Core framework should be available in the Web section:

Note that there’s a similar template underneath which is an ASP.NET Core project targeting the full .NET framework. However, we want to explore .NET Core so we’ll select the template highlighted above. Give the project some name, such as DotNetCoreBookstore. The next window will give you the choice of 3 templates: Empty, Web API and Web Application. We’ll go for the Empty template so that we’re not overwhelmed with a lot of new things to go through at once. We’ll expand on this minimal setup gradually. So select the Empty template, make sure that authentication is set to No Authentication and that the Host in the cloud option is unchecked:

Click OK to let Visual Studio create the project.
I don’t know about you but I got the following warning:

I*m not sure why that package didn’t load but restarting Visual Studio solved the problem.
Project structure
We’re starting off with the following files and folders:

For developers that have worked with “normal” ASP.NET there are some items that immediately catch the eye such as the global.json file and the wwwroot folder. The lack of Global.asax and the relative emptiness of web.config are paramount to a cultural shock. Let’s start from above. The Solution Items folder includes the files that are stored within the top project folder. Here’s what it looks like in a file explorer:

Open global.json in the VS editor and you’ll see two JSON properties: “projects” and “sdk”. The “sdk” property shows the SDK version which is set to “1.0.0-preview2-003131” in my case. You may get something different by the time you read this post. The “projects” property has a string array with “src” and “test” as default members. Those are the folder names where the solution items are stored. These subfolders of the top solution folder will contain all the files that are necessary for the compilation. You’ll see the “src” folder both in the file explorer and the solution explorer in Visual Studio. It’s OK to include folder names in this array that don’t exist, just like we have no “test” folder.
Next we have the source folder “src”. Expand the Properties node and you’ll see that we have another json file to deal with: launchSettings.json. As noted above the default web server for an ASP.NET Core project is IIS and this settings file includes a number of settings related to IIS. E.g. the “applicationUrl” node will show which URL the web page will get once launched. The value I have is “http://localhost:20151/”. The port number will most likely differ in your case. If you press F5 to launch the application then a new browser window will open up with this URL and print “Hello World!” in the screen. If you double click the Properties node then you’ll see the some of the same JSON values of launchSettings.json in a visual way like we’re used to in Visual Studio. However, some attributes have a different source. Open the Application node and click the Assembly Information button. Add some value in the Copyright text box and click OK:

Where is that information stored? We used to have an assembly .cs file with project metadata but it’s not there any more. We’ll soon find out.
The References node can also be expanded and this is where the project dependencies are listed. The top node will show the target framework, in our case .NetCoreApp with a version number. Expanding the framework node will give us the default dependencies. There are not many of them to start with: diagnostics, IIS, Kestrel – which is a web server for ASP.NET core -, logging and ASP.NET Core. This is quite a small list, but keep in mind that this application doesn’t really do anything yet.
It’s even possible to expand each dependency node to see what they in turn depend on. If you are familiar with Java Maven projects then this will look familiar to you. The POM file will include the necessary dependencies where each dependency has its own POM file with its dependencies in a dependency chain.
Next we have the web root folder “wwwroot” which is currently empty. This folder will usually contain static files, such as a default static Home page of a web application. We’ll explore the role of this folder at a later stage.
Further down we have the Program.cs file with the usual Main method, except that it’s unusual to see Program.cs in an ASP.NET web project. This is where the web host represented by an IWebHost object is built using the fluent API of a WebHostBuilder. The most important piece of information for the time being is the UseStartup extension method which accepts an object where the web application startup code is stored. If you look at the solution files then you’ll see Startup.cs therefore this is the Startup object that Program.cs refers to.
Let’s not rush ahead and instead we’ll take a look at project.json. This is also a new element and is roughly equivalent to the Assembly.cs file we used to have in ASP.NET projects. The copyright information we added some minutes ago will also be stored here under the “copyright” property. The “dependencies” node reflects what we have as dependencies under the References node we looked at above. You’ll see the fully qualified names and versions such as “Microsoft.AspNetCore.Server.IISIntegration”: “1.0.0” in this section. Later on when we add new dependencies through NuGet they will be added here. We can also add dependencies by manually typing in its fully qualified name. The framework is reflected in the “frameworks” node where “netcoreapp1.0” refers to .NET Core 1.0 like “net45” is a short name for .NET 4.5. An interesting feature of project.json is that we get IntelliSense. If you start typing a quotation mark, i.e. ‘”‘, then you’ll get a list of possible values like “authors”, “licenseUrl” and “version”. We can even hover over a JSON property name with the mouse and we’ll see some popup with some basic information. We also get good IntelliSence when typing the name of a new dependency in the “dependencies” section. The available dependencies are extracted from NuGet. We even get help with the version numbers.
Next we have a readme file “Project_Readme.html” with some basic information about .NET Core and direct links to various sources and tutorials.
Then comes Startup.cs which is not new, it’s been available in ASP.NET projects before since the inception of OWIN. Therefore if you’re familiar with OWIN and Katana at least at a basic level then you’ll also recognise Startup.cs. This is the new Global.asax.cs. Global.asax and Startup.cs coexist in traditional full-blown ASP.NET projects but in ASP.NET Core we only have Startup.cs. By default Startup.cs has two methods that are invoked every time the web project starts up: ConfigureServices and Configure. Don’t worry too much about what they do for the time being, we’ll look at them in a lot more detail later on. For right now it’s enough to identify where the “Hello World!” in the default screen we saw above comes from:
await context.Response.WriteAsync("Hello World!");
This bit of code means that all HTTP requests will get a simple string response “Hello World!”. Change this string and rerun the application to see the modified response.
Finally we have the web.config file. You might have a feeling that we finally have some connection with traditional ASP.NET but that feeling is deceptive. This web.config only contains some information for IIS to hand over all HTTP requests handling to a handler called aspNetCore. Otherwise the web.config file has an important comment:
“Configure your application settings in appsettings.json.”
Therefore even the web.config file as we knew it has been replaced by a JSON file. We’ll see how to add a settings file and how to read from it later on. I know I’ve made a lot of promises here with “later on” attached but .NET Core comes with a lot of changes and I think it’s worth the time to go slowly step by step.
Let’s round up this post with two interesting details.
Runtime editing of source files
Start the application in “Start without debugging” mode ctrl+F5. Go to Startup.cs and update the string response of each HTTP request. Save Startup.cs and refresh the browser. You should see the updated string. Visual Studio automatically recompiles the project if there’s a change in one of the source files. Earlier when we tried to edit a C# file while the application was running then we got an error message in Visual Studio. That behaviour has been largely improved.
Adding new files externally
We can create a new file in the source folder and it will be part of the solution and visible in Visual Studio immediately. E.g. I added a new text file in the source folder…:
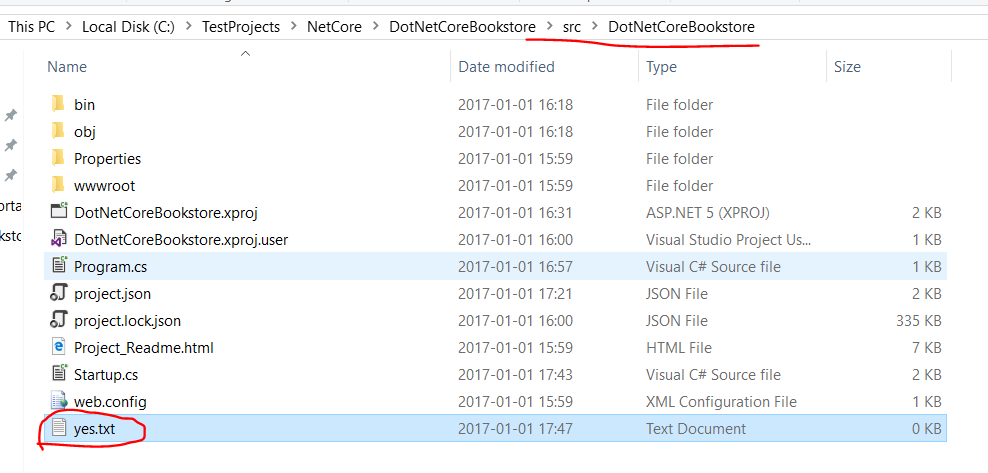
The file will immediately be part of the project:
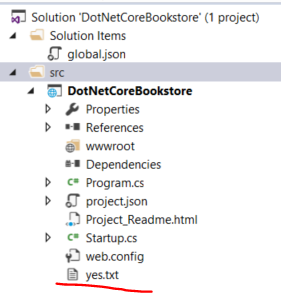
I.e. we don’t need to actively make it part of the project like before, it happens automatically. We can still ask Visual Studio to ignore the file. Right-click the file and click the “Hide from Solution Explorer” option. Deleting the file directly in a file explorer will also remove it from the solution explorer in VS.
The important thing to note from the above short examples that Visual Studio monitors the file system of the solution more closely than before and also recompiles the project if it sees a change in one of the source files.
We’ll stop here and continue in the next part soon.
View the list of MVC and Web API related posts here.


This is an great idea Andras. There are a lot of half-hearted tutorials for this around the web. Thanks!
Thanks Andras, very informative
Really very happy to see your new series on ASP.NET Core part 1–to– Asp.net core part 100.
i am very excited for this new series.
Thanks Naveen, I hope you’ll like it.
//Andras
Thanks, Andras
This post should be updated for VS2017 and new tooling. For example, project property is removed from global.json. It’s now within solution file. Also many other things have changed.
Give me 3-4 hours of extra free time per day and i’ll look into it.