Introduction to MongoDb with .NET part 2: installation on Windows
March 17, 2016 1 Comment
Introduction
In the previous post we discussed the basic characteristics of MongoDb. We said that it was a NoSql database that stores its data in binary JSON, i.e. BSON documents. These documents contain collections that are somewhat like tables in relational databases. In theory any data structure that can be represented by JSON can be stored in a BSON documents. There’s no database schema, there are no constraints, you can store any (un)structured object graph in a collection as long as it can be represented in JSON. MongoDb is also highly scalable and queries have a good performance, especially if the database is tuned well. MongoDb also comes with a couple of drawbacks, such as the lack of stored procedures and transactions. You’ll need to weigh all the proc and cons before you decide which data store technology to use in your project.
In this post we’ll first install the MongoDb executables on the local machine. We’ll then see a couple of basic examples of interacting with the database server from the MongoDb client.
Installation
We’ll install MongoDb on our local computer. The MongoDb installation packages can be downloaded from this link: MongoDb download page

At the time of writing this post the stable release had version 3.2.4. By the time you read this post you may see a higher version number. I have a 64-bit Windows 10 machine so I’ll download the 64-bit version for Windows using the Version drop down list and the “download .msi” button. Note that MongoDb can be installed on 32-bit machines but here comes a warning from the MongoDb installation guidelines page:
“32-bit versions of MongoDB are only intended for older systems and for use in testing and development systems. 32-bit versions of MongoDB only support databases smaller than 2GB.”
So click the download button which will download the .msi file which will install MongoDb on Windows. Run the installation:
- Accept the licence terms, click Next
- Select the Complete installation option
- Confirm that the MongoDb can get admin rights to save data in the Program Files folder
- Click Finish
That was it, MongoDb is now installed on your computer.
MongoDb is by default installed in the “Program Files” folder. That folder will have the following folder hierarchy related to MongoDb:
- Server
- then a folder named after the version of MongoDb, in my case “3.2”
- then comes the bin folder with all the MongoDb database tools in the form of various exe files, such as mongo.exe
There’s actually nothing magic about this folder structure. The bin folder contains all the tools to run the MongoDb client and server. There are no hidden dependencies anywhere, it’s a self contained set of files. You could just copy the bin folder and put it to another folder with a simpler path, such as c:\MongoDb\bin. I won’t do that in this series so that we keep to the standard options as much as possible, but I wanted to mention this option too.
The two most important executables in the bin folder are mongo.exe and mongod.exe. Mongod.exe starts the database server and mongo.exe starts a client that can connect to the server. We can start them by simply double-clicking them in this folder but our goal is rather to start them from the command line. However, it’s tedious to always navigate to the bin folder and then call “mongo.exe” in a command prompt so we’ll declare the full path to it in the Path environment variable.
I assume you know what environment variables are. The way to find the Environment Variables window depends on the version of Windows but the goal is to get to the following screen:

Select the Path variable and click Edit. Windows 10 lets me add a new path in a neater way than earlier versions of Windows. The goal is the same: add the full path to the MongoDb executables in the Path variable. In my case it is “C:\Program Files\MongoDB\Server\3.2\bin” :

In earlier versions you’d need to add that folder path to the end of the string that’s already there in the Path delimited by a semicolon ‘;’. Click the OK buttons until all the windows related to environment variables are closed.
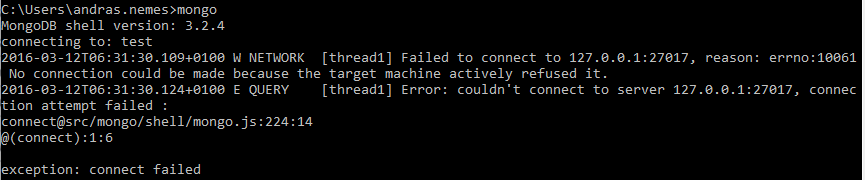
Open a command prompt, type “mongo” and press Enter. It will try to connect to the MongoDb server. However, since there is none we’ll get an exception:
Leave the current command prompt open and also open a new one. Type “mongod” in the new one and this time we’ll get another exception:

It’s complaining about a missing folder: c:\data\db. If your main drive is not C: then the folder path may look different. By default MongoDb will save the BSON documents in the c:\data\db folder on Windows. Go ahead and create a folder called “data” on C: and another folder called “db” within the data folder.
Enter the “mongod” command again and it should succeed without exceptions:

It is now waiting for connections on port 27017. You may get a warning from Windows that mongod has been blocked by the firewall but you can safely select the Allow option.
Note that MongoDb is highly customisable. The data folder path and a range of other options can be configured. However, this is not a course dedicated to MongoDb database administration so I’ll try to stay with the default options as much as possible.
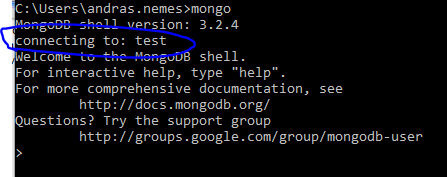
Now try the “mongo” command from the client window. You should see that mongod responds with “connection accepted…”:

The client will indicate that it has managed to connect to the Mongo server. More specifically it has connected to the default database “test”:
This client is called the MongoDb shell and it is the default way to interface with the MongoDb server. Get ready for a lot of JavaScript and JSON if you’d like to interact with the MongoDb server directly from the client. The query language is JavaScript and the arguments supplied to the JS functions are usually JSON formatted.
Let’s try a couple of commands from the client. Let’s switch to the “loadtest” database by…
use loadtest
The client will respond with “switched to db loadtest”.
We didn’t need to create the database before. In fact the “use dbname” command won’t create a new database yet if one doesn’t exist by the supplied name. It will be created on the fly as soon as we enter a new record to a collection of the current database. Likewise we don’t need to create the collection upfront either.
So we’re currently on the loadtest database. Let’s enter a simple object to the customers collection:
db.customers.insert({“name” : “Nice people”, “status” : “active”, “address” : “California”})
The above command will create a collection called “customers” in the current database, i.e. “loadtest” if one doesn’t exist. We also insert a new JSON document by providing the JSON argument to the insert function. The client will respond with a so-called WriteResult:
WriteResult({ “nInserted” : 1 })
We’ll look at write results later on. The above output simply means that the number of inserted objects was 1.
Since MongoDb collections are schemaless we’re free to enter anything into the customers collection, e.g.:
db.customers.insert({“a” : “x”, “b” : “y”, “c” : “z”})
Mongod won’t complain about any missing “column” or any violated constraint.
Let’s print the documents in the collection:
db.customers.find()
Here’s the output:
{ "_id" : ObjectId("56e480a77cf412a2ee6bfc5a"), "name" : "Nice people", "status" : "active", "address" : "California" }
{ "_id" : ObjectId("56e481e47cf412a2ee6bfc5b"), "a" : "x", "b" : "y", "c" : "z" }
The “_id” field is new. Every document has a default ID attribute called “_id”. It is of type ObjectId which is a type built into MongoDb and looks vaguely like a GUID. MongoDb will create one for you every time you enter a document with no id field. The ObjectId values will most certainly be different in your case.
Let’s limit the search by finding all the documents where the field “a” has the value “x”:
db.customers.find({“a” : “x”})
It will find the second document. As you see we provided a filter in JSON format to the find function. As noted above JSON arguments are prevalent in MongoDb.
Let’s get rid of this faulty document:
db.customers.remove({“a” : “x”})
The shell will again respond with a write result:
WriteResult({ “nRemoved” : 1 })
Let’s list the available collections in the current database:
show collections
There will be only one: customers.
Finally we’ll retrieve the list of available databases on the database server:
show dbs
Here are the current databases and their sizes:
loadtest 0.000GB
local 0.000GB
We’ll look at a lot more commands and queries throughout this series. Read the next part here where we look at how to insert documents.
You can view all posts related to data storage on this blog here.


Hi Andras, Thanks for the post, it has really helped me to get started with mongodb. Keep up the good work