Monitor the file system with FileSystemWatcher in C# .NET Part 4: other features

In the first three parts of this mini-series – starting here – we looked at how to subscribe to the events raised by a FileSystemWatcher object. FileSystemWatcher has a couple more properties that can be interesting.

Consider the following code:

static void Main(string[] args)
{
	RunVariousFeaturesExample();
	Console.ReadKey();
}

private static void RunVariousFeaturesExample()
{
	FileSystemWatcher watcher = new FileSystemWatcher();
	watcher.Path = @"c:\mydirectory";
	watcher.Filter = "*.txt";
	watcher.IncludeSubdirectories = true;
	watcher.NotifyFilter = NotifyFilters.Security | NotifyFilters.Size;
	watcher.Changed += watcher_Changed;
	watcher.EnableRaisingEvents = true;
}

static void watcher_Changed(object sender, FileSystemEventArgs e)
{
	Console.WriteLine("A change occurred in the monitored directory. Change type: {0}, file name: {1}", e.ChangeType, e.Name);
}

We set the path to be monitored as usual. We can filter the file names to be monitored. Here we’re interested in text files only. We also specify that we want to monitor all subfolders of the “Path” directory through the IncludeSubdirectories property. With NotifyFilter we can further refine the cases when we want to be notified of a file change. Here we want to be notified if either the file size changes or the security properties have been updated. Then we subscribe to the generic Changed event which is raised in case an existing file changes.

In the below example I’ve updated the security settings of a file and it successfully raised the Changed event:

File change monitored by filesystemwatcher

Read all posts dedicated to file I/O here.

Monitor the file system with FileSystemWatcher in C# .NET Part 3: errors

In this and this post we looked at how to use FileSystemWatcher to monitor the creation, deletion and update of files within a directory. It can happen that there are more changes than the FileSystemWatcher object can handle. In that case FileSystemWatcher raises the Error event which you can subscribe to as follows:

static void Main(string[] args)
{
	RunErrorExample();
	Console.ReadKey();
}

private static void RunErrorExample()
{
	FileSystemWatcher watcher = new FileSystemWatcher();
	watcher.Path = @"c:\mydirectory";
	watcher.Error += watcher_Error;
	watcher.EnableRaisingEvents = true;
}

static void watcher_Error(object sender, ErrorEventArgs e)
{
	Exception ex = e.GetException();
	Console.WriteLine(ex.Message);
	if (ex.InnerException != null)
	{
		Console.WriteLine(ex.InnerException);
	}
}

Read the next and last installment on this topic here.

Read all posts dedicated to file I/O here.

Using Amazon S3 with the AWS.NET API Part 4: working with folders in code

Introduction

In the previous post we looked at some more basic code examples to work with Amazon S3. In the first part we saw how to create folders within a bucket in the S3 GUI. We haven’t yet seen how to create and delete folders in code and that’s the goal of this post.

We’ll extend our demo application AmazonS3Demo so have it open in Visual Studio 2012/2013.

Creating folders

So far we’ve seen that it’s fairly simple and self-explanatory to work with objects in S3: PutObjectRequest, ListObjectsRequest etc. were easy to handle. However, there’s no special C# object for folders in the SDK, like PutFolderRequest. The PutObjectRequest is used to create folders but they need to be used in a special way.

Locate S3DemoService.cs in the demo app and add the following method:

public void RunFolderCreationDemo()
{
	using (IAmazonS3 s3Client = GetAmazonS3Client())
	{
		try
		{					
			PutObjectRequest folderRequest = new PutObjectRequest();					
			String delimiter = "/";
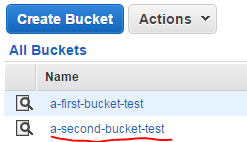
			folderRequest.BucketName = "a-second-bucket-test";
			String folderKey = string.Concat("this-is-a-subfolder", delimiter);
			folderRequest.Key = folderKey;
			folderRequest.InputStream = new MemoryStream(new byte[0]);
			PutObjectResponse folderResponse = s3Client.PutObject(folderRequest);
                }
		catch (AmazonS3Exception e)
		{
			Console.WriteLine("Folder creation has failed.");
			Console.WriteLine("Amazon error code: {0}",
				string.IsNullOrEmpty(e.ErrorCode) ? "None" : e.ErrorCode);
			Console.WriteLine("Exception message: {0}", e.Message);
		}
	}
}

Most of the code looks probably familiar from the RunFileUploadDemo() method. The way to indicate that we’re intending to create a demo is to attach a “/” delimiter to the key name and set the content input stream to an empty byte array. Run this code from Main…:

static void Main(string[] args)
{
	S3DemoService demoService = new S3DemoService();
	demoService.RunFolderCreationDemo();

	Console.WriteLine("Main done...");
	Console.ReadKey();
}

…and the folder should be visible in S3:

Folder created in Amazon S3 bucket

What if you’d like to add another folder within this folder? It’s the same code as above, you just need to attach the name of the subfolder and the delimiter to the object key:

String folderKey = string.Concat("this-is-a-subfolder", delimiter, "another-subfolder",delimiter);
					folderRequest.Key = folderKey;

…and there it is:

Folder within a folder in Amazon S3 bucket

Checking if a folder exists

Say you’d like to find out whether the “this-is-a-subfolder/another-subfolder/” folder path exists. The following code snippet will first check if “this-is-a-subfolder” exists:

public void RunFolderExistenceCheckDemo()
{
	using (IAmazonS3 s3Client = GetAmazonS3Client())
	{
		try
		{
			ListObjectsRequest findFolderRequest = new ListObjectsRequest();
			findFolderRequest.BucketName = "a-second-bucket-test";
			findFolderRequest.Delimiter = "/";
			findFolderRequest.Prefix = "this-is-a-subfolder";
			ListObjectsResponse findFolderResponse = s3Client.ListObjects(findFolderRequest);
			List<String> commonPrefixes = findFolderResponse.CommonPrefixes;
			Boolean folderExists = commonPrefixes.Any();
		}
		catch (AmazonS3Exception e)
		{
			Console.WriteLine("Folder existence check has failed.");
			Console.WriteLine("Amazon error code: {0}",
				string.IsNullOrEmpty(e.ErrorCode) ? "None" : e.ErrorCode);
			Console.WriteLine("Exception message: {0}", e.Message);
		}
	}
}

This is similar to what we had in RunObjectListingDemo. However, we don’t check for the existence of file objects but so-called prefixes. Folder names will be part of the full path to the object and the folder names will be the prefixes in that full path. If the CommonPrefixes string list is empty then the folder doesn’t exist.

Running this code will result in “true” for the folderExists variable.

Checking whether the subfolder within the folder exists requires just a minor change:

findFolderRequest.Prefix = "this-is-a-subfolder/another-subfolder";

Again, folderExists will be true.

Adding files to folders

Let’s add a file to the folders. The following code will insert c:\logfile.txt to “this-is-a-subfolder”:

public void RunObjectInsertionToFolderDemo()
{
	FileInfo filename = new FileInfo(@"c:\logfile.txt");
	string contents = File.ReadAllText(filename.FullName);
	using (IAmazonS3 s3Client = GetAmazonS3Client())
	{
		try
		{
			PutObjectRequest putObjectRequest = new PutObjectRequest();
			putObjectRequest.ContentBody = contents;
			String delimiter = "/";
			putObjectRequest.BucketName = string.Concat("a-second-bucket-test", delimiter, "this-is-a-subfolder"); 					
			putObjectRequest.Key = filename.Name;
			PutObjectResponse putObjectResponse = s3Client.PutObject(putObjectRequest);
		}
		catch (AmazonS3Exception e)
		{
			Console.WriteLine("File creation within folder has failed.");
			Console.WriteLine("Amazon error code: {0}",
				string.IsNullOrEmpty(e.ErrorCode) ? "None" : e.ErrorCode);
			Console.WriteLine("Exception message: {0}", e.Message);
		}
	}
}

The only difference to the RunFileUploadDemo() method we saw before is that we need to extend the bucket name with the delimiter and the folder name, i.e. the prefix. Here’s the file in S3:

File within a folder in Amazon S3 bucket

You can probably guess how to upload the file to “this-is-a-subfolder/another-subfolder/”:

putObjectRequest.BucketName = string.Concat("a-second-bucket-test", delimiter, "this-is-a-subfolder", delimiter, "another-subfolder"); 					

…and here it is:

File within a folder within a folder in Amazon S3 bucket

List objects in a folder

Listing file objects within a folder is a bit tricky as even the folders themselves are objects so they will be returned by the following query:

ListObjectsRequest listObjectsRequest = new ListObjectsRequest();
String delimiter = "/";
listObjectsRequest.BucketName = "a-second-bucket-test";
listObjectsRequest.Prefix = string.Concat("this-is-a-subfolder", delimiter, "another-subfolder");				    
ListObjectsResponse listObjectsResponse = s3Client.ListObjects(listObjectsRequest);
foreach (S3Object entry in listObjectsResponse.S3Objects)
{
	if (entry.Size > 0)
	{
		Console.WriteLine("Found object with key {0}, size {1}, last modification date {2}", entry.Key, entry.Size, entry.LastModified);
	}
}					

The S3Objects list will hold 2 objects:

this-is-a-subfolder/another-subfolder/ of size 0
this-is-a-subfolder/another-subfolder/logfile.txt of size greater than 0

Hence we test for the size being greater than 0 to find “real” files. The output will be similar to the following:

Found object with key this-is-a-subfolder/another-subfolder/logfile.txt, size 44
90, last modification date 2014-12-09 22:26:39

Deleting folders

The following method will attempt to delete the this-is-a-subfolder/another-subfolder/ folder:

public void RunFolderDeletionDemo()
{
	using (IAmazonS3 s3Client = GetAmazonS3Client())
	{
		try
		{
			DeleteObjectRequest deleteFolderRequest = new DeleteObjectRequest();
			deleteFolderRequest.BucketName = "a-second-bucket-test";
			String delimiter = "/";
			deleteFolderRequest.Key = string.Concat("this-is-a-subfolder", delimiter, "another-subfolder", delimiter);
			DeleteObjectResponse deleteObjectResponse = s3Client.DeleteObject(deleteFolderRequest);					
		}
		catch (AmazonS3Exception e)
		{
			Console.WriteLine("Folder deletion has failed.");
			Console.WriteLine("Amazon error code: {0}",
				string.IsNullOrEmpty(e.ErrorCode) ? "None" : e.ErrorCode);
			Console.WriteLine("Exception message: {0}", e.Message);
		}
	}
}							

If you run this code then seemingly everything’s gone fine, there are no exceptions thrown. However, the folder is still visible in the UI. The reason is that at present there’s a file within the folder and folders must not be deleted if they are not empty. So in order for the above code to succeed we need to first check it has any objects in it using ListObjectsRequest code snippet above. Then all those elements must be deleted. Only then can the folder itself be deleted.

In the next post we’ll connect all this to our previous demo on Amazon Kinesis where we want to save the incoming URL response time observations in S3 in an organised manner.

View all posts related to Amazon Web Services and Big Data here.

Monitor the file system with FileSystemWatcher in C# .NET Part 2: updates

In this post we saw how to set up a FileSystemWatcher to monitor a directory for file insertions and creations.

The FileSystemWatcher object also lets you monitor a given directory for file updates. The following code is very similar to the one referred to in the above link. The difference is that we subscribe to the Renamed event:

static void Main(string[] args)
{
	RunUpdateExample();
	Console.ReadKey();
}

private static void RunUpdateExample()
{
	FileSystemWatcher watcher = new FileSystemWatcher();
	watcher.Path = @"c:\mydirectory";
	watcher.Renamed += watcher_Renamed;
	watcher.EnableRaisingEvents = true;
}

static void watcher_Renamed(object sender, RenamedEventArgs e)
{
	Console.WriteLine("File updated. Old name: {0}, new name: {1}", e.OldName, e.Name);
}

Again, we have the Console.ReadKey(); in Main to make sure that the console app doesn’t just quit, otherwise the file system watcher process dies.

If you run this code and rename a file in the monitored directory you may see an output similar to the following:

File name change monitored by filesystemwatcher

Read the next installment here.

Read all posts dedicated to file I/O here.

Using Amazon S3 with the AWS.NET API Part 3: code basics cont’d

Introduction

In the previous post we looked at some basic code examples for Amazon S3: list all buckets, create a new bucket and upload a file to a bucket.

In this post we’ll continue with some more code examples: downloading a resource, deleting it and listing the available objects.

We’ll extend the AmazonS3Demo C# console application with reading, listing and deleting objects.

Listing files in a bucket

The following method in S3DemoService.sc will list all objects within a bucket:

public void RunObjectListingDemo()
{
	using (IAmazonS3 s3Client = GetAmazonS3Client())
	{
		try
		{
			ListObjectsRequest listObjectsRequest = new ListObjectsRequest();
			listObjectsRequest.BucketName = "a-second-bucket-test";
			ListObjectsResponse listObjectsResponse = s3Client.ListObjects(listObjectsRequest);
			foreach (S3Object entry in listObjectsResponse.S3Objects)
			{
				Console.WriteLine("Found object with key {0}, size {1}, last modification date {2}", entry.Key, entry.Size, entry.LastModified);
			}
		}
		catch (AmazonS3Exception e)
		{
			Console.WriteLine("Object listing has failed.");
			Console.WriteLine("Amazon error code: {0}",
				string.IsNullOrEmpty(e.ErrorCode) ? "None" : e.ErrorCode);
			Console.WriteLine("Exception message: {0}", e.Message);
		}
	}
}

We use a ListObjectsRequest object to retrieve all objects from a bucket by providing the bucket name. For each object we print the key name, the object size and the last modification date, simple as that. In the previous post I uploaded a file called logfile.txt to the bucket called “a-second-bucket-test”. Accordingly, calling this method from Main…

static void Main(string[] args)
{
	S3DemoService demoService = new S3DemoService();
	demoService.RunObjectListingDemo();

	Console.WriteLine("Main done...");
	Console.ReadKey();
}

…yields the following output:

Found object with key logfile.txt, size 4490, last modification date 2014-12-06 13:25:45.

The ListObjectsRequest function provides some basic search functionality. The “Prefix” property will limit the search results to those objects whose names start with that prefix, e.g.:

listObjectsRequest.Prefix = "log";

That will find all objects whose key names start with “log”, i.e. logfile.txt is still listed.

You can list a limited number of elements, say 5:

listObjectsRequest.MaxKeys = 5;

You can also set a marker, meaning that the request will only list the files whose keys come after the marker value alphabetically:

listObjectsRequest.Marker = "leg";

This will find “logfile.txt”. However a marker value of “lug” won’t.

Download a file

Downloading a file from S3 involves reading from a Stream, a standard operation in the world of I/O. The following function will load the stream from logfile.txt, print its metadata and convert the downloaded byte array into a string:

public void RunDownloadFileDemo()
{
	using (IAmazonS3 s3Client = GetAmazonS3Client())
	{
		try
		{
			GetObjectRequest getObjectRequest = new GetObjectRequest();
			getObjectRequest.BucketName = "a-second-bucket-test";
			getObjectRequest.Key = "logfile.txt";
			GetObjectResponse getObjectResponse = s3Client.GetObject(getObjectRequest);
			MetadataCollection metadataCollection = getObjectResponse.Metadata;

			ICollection<string> keys = metadataCollection.Keys;
			foreach (string key in keys)
			{
				Console.WriteLine("Metadata key: {0}, value: {1}", key, metadataCollection[key]);
			}

			using (Stream stream = getObjectResponse.ResponseStream)
			{
				long length = stream.Length;
				byte[] bytes = new byte[length];
				int bytesToRead = (int)length;
				int numBytesRead = 0;
				do
				{
					int chunkSize = 1000;
					if (chunkSize > bytesToRead)
					{
						chunkSize = bytesToRead;
					}
					int n = stream.Read(bytes, numBytesRead, chunkSize);
					numBytesRead += n;
					bytesToRead -= n;
				}
				while (bytesToRead > 0);
				String contents = Encoding.UTF8.GetString(bytes);
				Console.WriteLine(contents);
			}
		}
		catch (AmazonS3Exception e)
		{
			Console.WriteLine("Object download has failed.");
			Console.WriteLine("Amazon error code: {0}",
				string.IsNullOrEmpty(e.ErrorCode) ? "None" : e.ErrorCode);
			Console.WriteLine("Exception message: {0}", e.Message);
		}
	}
}

Run it from Main:

demoService.RunDownloadFileDemo();

In my case there was only one metadata entry:

Metadata key: x-amz-meta-type, value: log

…which is the one I attached to the file in the previous post.

In the above case we know beforehand that we’re reading text so the bytes could be converted into a string. However, this is of course not necessarily the case as you can store any file type on S3. The GetObjectResponse has a method which allows you to save the stream into a file:

getObjectResponse.WriteResponseStreamToFile("full file path");

…which has an overload to append the stream contents to an existing file:

getObjectResponse.WriteResponseStreamToFile("full file path", true);

Deleting a file

Deleting an object from S3 is just as straightforward as uploading it:

public void RunFileDeletionDemo()
{
	using (IAmazonS3 s3Client = GetAmazonS3Client())
	{
		try
		{
			DeleteObjectRequest deleteObjectRequest = new DeleteObjectRequest();
			deleteObjectRequest.BucketName = "a-second-bucket-test";
			deleteObjectRequest.Key = "logfile.txt";
			DeleteObjectResponse deleteObjectResponse = s3Client.DeleteObject(deleteObjectRequest);
		}
		catch (AmazonS3Exception e)
		{
			Console.WriteLine("Object deletion has failed.");
			Console.WriteLine("Amazon error code: {0}",
				string.IsNullOrEmpty(e.ErrorCode) ? "None" : e.ErrorCode);
			Console.WriteLine("Exception message: {0}", e.Message);
		}
	}
}

Calling this from Main…

demoService.RunFileDeletionDemo();

…removes the previously uploaded logfile.txt from the bucket:

File removed from Amazon S3 bucket

In the next post we’ll see how to work with folders in code.

View all posts related to Amazon Web Services and Big Data here.

Monitor the file system with FileSystemWatcher in C# .NET Part 1

In this mini-series we’ll look at how you can use the FileSystemWatcher object to monitor the Windows file system for various changes.

A FileSystemWatcher object enables you to be notified when some change occurs in the selected part of the file system. This can be any directory, such as “c:\” or any subdirectory under the C: drive. So if you’d like to make sure you know if a change occurs on e.g. “c:\myfolder” – especially if it’s editable by your colleagues – then FileSystemWatcher is a good candidate.

Consider the following Console application:

class Program
{
	static void Main(string[] args)
	{
		RunFirstExample();
		Console.ReadKey();
	}

	private static void RunFirstExample()
	{
		FileSystemWatcher watcher = new FileSystemWatcher();
		watcher.Path = @"c:\mydirectory";
		watcher.Created += watcher_Created;
		watcher.Deleted += watcher_Deleted;
		watcher.EnableRaisingEvents = true;			
	}

	static void watcher_Deleted(object sender, FileSystemEventArgs e)
	{
		Console.WriteLine("File deleted. Name: {0}", e.Name);
	}

	static void watcher_Created(object sender, FileSystemEventArgs e)
	{
		Console.WriteLine("File created. Name: {0}", e.Name);
	}
}

In RunFirstExample we specify that we’re interested in monitoring the c:\mydirectory directory. Then we subscribe to the Created and Deleted events which represent the insertion of a new file and the deletion of an existing file in the directory. The FileSystemEventArgs has a couple of properties to show the event type, such as “Created” or “Deleted” in a WatcherChangeTypes enumeration, the file name and the file full path. We then start running the monitoring process by setting EnableRaisingEvents to true.

Note the call to Console.ReadKey(); in Main. The process won’t magically run in the background once Main is done. The FileSystemWatcher must sit within a continuous process, such as a Windows service.

Run the above code and insert a new file into the monitored directory. Then delete the file and watch the console output. Insertion example:

File creation monitored by filesystemwatcher

File deleted:

File deletion monitored by filesystemwatcher

Read the next part here.

Read all posts dedicated to file I/O here.

Inspecting the directories on the local PC using C# .NET

In this post we saw how to enumerate all the drives on your Windows machine. Once you have the drive name, such as C:\ you can start digging into it to see what files and folders it contains.

The DirectoryInfo object is the entry point to the exercise:

DirectoryInfo directoryInfo = new DirectoryInfo(@"c:\");

The empty GetDirectories() method will find all subfolders directly under “c:\” i.e. exclude the subfolders within the folders on c:\

DirectoryInfo[] allSubFolders = directoryInfo.GetDirectories();
foreach (DirectoryInfo subFolder in allSubFolders)
{
	Console.WriteLine("Sub directory name: {0}", subFolder.Name);
        Console.WriteLine("Sub directory creation time: {0}", subFolder.CreationTimeUtc);
}

DirectoryInfo has several other properties such as last access time that can be interesting for you.

GetDirectories has two overloads which let you search for a folder. The following will list all subdirectories whose name starts with an “a”:

DirectoryInfo[] searchedFolders = directoryInfo.GetDirectories("a*");

…and this is how you extend the search to all directories under c:\

DirectoryInfo[] searchedFolders = directoryInfo.GetDirectories("a*", SearchOption.AllDirectories);

The search is case-insensitive so this returns all folders starting with “a” and “A”.

You can search for files in much the same way. The file-equivalent class of DirectoryInfo is FileInfo. This is how to list all files available directly within a directory:

FileInfo[] filesInDir = directoryInfo.GetFiles();

GetFiles() also has overloads similar to GetDirectories that enable you to search for files.

Read all posts dedicated to file I/O here.

Using Amazon S3 with the AWS.NET API Part 2: code basics

Introduction

In the previous post we looked at an overview of Amazon S3 and we also tried a couple of simple operations on the GUI. In this post we’ll start coding. If you followed along the previous series on Amazon Kinesis then the setup section will be familiar to you. Otherwise I’ll assume that you are starting this series without having read anything else on this blog.

Note that we’ll be concentrating on showing and explaining the technical code examples related to AWS. We’ll ignore software principles like SOLID and layering so that we can stay focused. It’s your responsibility to organise your code properly. There are numerous posts on this blog that take up topics related to software architecture.

Installing the SDK

The Amazon .NET SDK is available through NuGet. Open Visual Studio 2012/2013 and create a new C# console application called AmazonS3Demo. The purpose of this application will be to demonstrate the different parts of the SDK around S3. In reality the S3 handler could be any type of application:

  • A website
  • A Windows/Android/iOS app
  • A Windows service
  • etc.

…i.e. any application that’s capable of sending HTTP/S requests to a web service endpoint. We’ll keep it simple and not waste time with view-related tasks.

Install the following NuGet package:

AWS SDK NuGet package

Preparations

We cannot just call the services within the AWS SDK without proper authentication. This is an important reference page to handle your credentials in a safe way. We’ll the take the recommended approach and create a profile in the SDK Store and reference it from app.config.

This series is not about AWS authentication so we won’t go into temporary credentials but later on you may be interested in that option too. Since we’re programmers and it takes a single line of code to set up a profile we’ll go with the programmatic options. Add the following line to Main:

Amazon.Util.ProfileManager.RegisterProfile("demo-aws-profile", "your access key id", "your secret access key");

I suggest you remove the code from the application later on in case you want to distribute it. Run the application and it should execute without exceptions. Next open app.config and add the appSettings section with the following elements:

<appSettings>
        <add key="AWSProfileName" value="demo-aws-profile"/>
</appSettings>

First demo: listing the available buckets

We’ll put all our test code into a separate class. Insert a cs file called S3DemoService. We’ll need a method to build a handle to the service which is of type IAmazonS3:

private IAmazonS3 GetAmazonS3Client()
{
	return Amazon.AWSClientFactory.CreateAmazonS3Client(RegionEndpoint.EUWest1);
}

Note that we didn’t need to provide our credentials here. They will be extracted automatically using the profile name in the config file.

Let’s first find out what buckets we have in S3. This is almost a trivial task:

public void RunBucketListingDemo()
{
	using (IAmazonS3 s3Client = GetAmazonS3Client())
	{
		try
		{
			ListBucketsResponse response = s3Client.ListBuckets();
			List<S3Bucket> buckets = response.Buckets;
			foreach (S3Bucket bucket in buckets)
			{
				Console.WriteLine("Found bucket name {0} created at {1}", bucket.BucketName, bucket.CreationDate);
			}
		}
		catch (AmazonS3Exception e)
		{
			Console.WriteLine("Bucket listing has failed.");
			Console.WriteLine("Amazon error code: {0}",
				string.IsNullOrEmpty(e.ErrorCode) ? "None" : e.ErrorCode );
			Console.WriteLine("Exception message: {0}", e.Message);
		}
	}
}

We use the client to list all the available buckets. The method returns a ListBucketsResponse object which will hold the buckets.

You’ll see a lot of these Request and Response objects throughout the AWS SDK. Amazon are fond of wrapping the request parameters and response properties into Request and Response objects adhering to the RequestResponse pattern.

We then list the name and creation date of our buckets. Call this method from Main:

static void Main(string[] args)
{
	S3DemoService demoService = new S3DemoService();
	demoService.RunBucketListingDemo();

	Console.WriteLine("Main done...");
	Console.ReadKey();
}

Example output:

Found bucket name a-first-bucket-test created at 2014-12-03 22:30:59

Second demo: creating a new bucket

Creating a new bucket is equally easy. Add the following method to S3DemoService:

public void RunBucketCreationDemo()
{
	using (IAmazonS3 s3Client = GetAmazonS3Client())
	{
		try
		{
			PutBucketRequest putBucketRequest = new PutBucketRequest();
			String newBucketName = "a-second-bucket-test";
			putBucketRequest.BucketName = newBucketName;
			PutBucketResponse putBucketResponse = s3Client.PutBucket(putBucketRequest);					
		}
		catch (AmazonS3Exception e)
		{
			Console.WriteLine("Bucket creation has failed.");
			Console.WriteLine("Amazon error code: {0}",
				string.IsNullOrEmpty(e.ErrorCode) ? "None" : e.ErrorCode);
			Console.WriteLine("Exception message: {0}", e.Message);
		}
	}
}

Again, we can see a Request and a corresponding Response object to create a bucket. We only specify a name which means that we go with the default values for e.g. permissions, they are usually fine. PutBucketRequest provides some properties to indicate values not adhering to the default ones. E.g. here’s how to give Everyone the permission to view the bucket:

S3Grant grant = new S3Grant();
S3Permission permission = new S3Permission("List");
S3Grantee grantee = new S3Grantee();
grantee.CanonicalUser = "Everyone";
grant.Grantee = grantee;
grant.Permission = permission;
List<S3Grant> grants = new List<S3Grant>() { grant };
putBucketRequest.Grants = grants;

Call RunBucketCreationDemo from Main as follows:

demoService.RunBucketCreationDemo();

Run the application and the bucket should be created:

Second bucket created from code Amazon S3

It’s not allowed to have two buckets with the same name. Run the application again and you should get an exception:

Bucket creation has failed.
Amazon error code: BucketAlreadyOwnedByYou
Exception message: Your previous request to create the named bucket succeeded and you already own it.

Third demo: file creation

Let’s upload a text file to the bucket we’ve just created. To be exact, we’ll upload its contents. Create some text file on your hard drive such as c:\logfile.txt and add some text to it. This example shows how to set the contents of the request. We also set an arbitrary metadata key-value pair of key “type” and value “log”. You can set any type of metadata you want:

public void RunFileUploadDemo()
{
	FileInfo filename = new FileInfo( @"c:\logfile.txt");
	string contents = File.ReadAllText(filename.FullName);
	using (IAmazonS3 s3Client = GetAmazonS3Client())
	{
		try
		{
			PutObjectRequest putObjectRequest = new PutObjectRequest();
			putObjectRequest.ContentBody = contents;
			putObjectRequest.BucketName = "a-second-bucket-test";
			putObjectRequest.Metadata.Add("type", "log");
			putObjectRequest.Key = filename.Name;
			PutObjectResponse putObjectResponse = s3Client.PutObject(putObjectRequest);
		}
		catch (AmazonS3Exception e)
		{
			Console.WriteLine("File creation has failed.");
			Console.WriteLine("Amazon error code: {0}",
				string.IsNullOrEmpty(e.ErrorCode) ? "None" : e.ErrorCode);
			Console.WriteLine("Exception message: {0}", e.Message);
		}
	}
}

Call this method from Main:

demoService.RunFileUploadDemo();

Run the application and the file with its custom metadata should be visible in S3:

File uploaded to Amazon S3 with metadata

We’ll continue with more examples in the next post.

View all posts related to Amazon Web Services and Big Data here.

Inspecting the drives on the local PC using C# .NET

It’s very simple to enumerate the drives on a Windows computer. The DriveInfo object has a GetDrives static method which returns an array of DriveInfo objects. A DriveInfo describes a drive through its properties. It is similar to the FileInfo class which in turn describes a file.

There are some properties that can only be extracted if the drive is ready, e.g. a CD-Rom drive. The following method prints the available drives:

DriveInfo[] drives = DriveInfo.GetDrives();
foreach (DriveInfo drive in drives)
{
	Console.WriteLine("Drive name: {0}", drive.Name);
	if (drive.IsReady)
	{
		Console.WriteLine("Total size: {0}", drive.TotalSize);
		Console.WriteLine("Total free space: {0}", drive.TotalFreeSpace);
		Console.WriteLine("Available free space: {0}", drive.AvailableFreeSpace);
		Console.WriteLine("Drive format: {0}", drive.DriveFormat);
	}
	else
	{
		Console.WriteLine("Device {0} is not ready.", drive.Name);									
	}
	Console.WriteLine("Drive type: {0}", drive.DriveType);	
}

I got the following output:

Drives enumerated

DriveType can have the following values:

  • CDRom: an optical drive such as a CD-ROM, DVD etc.
  • Fixed: a fixed disk, quite often labelled as “C:\”
  • Network: a mapped drive
  • NoRootDirectory: a drive with no root directory
  • Ram: a RAM drive
  • Removable: a removable drive such as a pen-drive
  • Unknown: a drive whose type could not be determined

Read all posts dedicated to file I/O here.

Using Amazon S3 with the AWS.NET API Part 1: introduction

Introduction

Cloud-based blob storage solutions are abound and Amazon Web Services (AWS) is the leader – or one of the leaders – in that area. Amazon S3 (Simple Storage Service) provides a “secure, durable, highly-scalable object storage” solution, as it is stated on the homepage. You can use S3 to store just about any type of file: images, text files, videos, JAR files, HTML pages etc. All files are stored in a key-value map, i.e. each file has a key where the file itself is the value.

Purpose of S3

S3 is often used to store static components of web pages such as images or videos. S3 can be integrated with other Amazon components such as RedShift and Elastic MapReduce. It can also be used to transfer large amounts of data from one component to another.

However, in this series we’ll be concentrating on a slightly different but very specific usage: saving, deleting and checking for the existence of text based storage files. S3 can function as an important building block in a Big Data analysis system where a data mining application can pull the raw data from an S3 bucket, i.e. a container of files.

In S3 you can organise your files into pseudo-folders. I wrote “pseudo” as they are not real folders like the ones we create on Windows. The are rather used as visual containers so that you can organise your files in a meaningful way instead of putting all of them under the same bucket. Examples:

s3:\\sales\january-2015\monthly-sales.txt
s3:\\sales\february-2015\monthly-sales.txt

“sales” is the top bucket, “january-2015” is folder and then we have the file itself. You are free to create subfolders within each folder and subfolders within the subfolders etc.

Keep in mind that S3 is not used for updates though. Once you’ve uploaded a file to S3 then it cannot be updated in a one-step operation. Even if you want to edit a text file there’s no editor for it. You’ll need to delete the old file and upload a new one instead.

Amazon have also done a great job at providing SDKs for a range of platforms, like .NET, Java, Python etc. Programmatic access to S3’s services is equally available.

As with many other Amazon components don’t assume that S3 can only be used with other Amazon components. Any software capable of executing HTTP calls can use to access S3: Web API, .NET MVC, iOS, Java desktop apps, Windows services, you name it. Mixed architecture is quickly becoming the norm nowadays and S3 can be used both as part of a mixed solution or as an Amazon-only architecture.

Goals of this series

The goals of this series are two-fold:

  • Provide basic UI and programmatic knowledge to anyone looking for a fast, cheap, reliable and scalable cloud-based blob storage solution
  • Tie in with the previous series about another Amazon service called Kinesis which provides a reliable message queue service as entry point to a Big Data data mining system. We’ll take up S3 as an alternative for raw data storage towards the end of the series. The series on Kinesis ended where we stored the raw data on a local text file – we’ll replace it with S3 based storage

I’ll try to keep the two goals as separate as possible so that all readers with different motivations can follow through – those of you who are only interested in S3 as well as those that will see the greater picture.

I’ll assume that you have at least a test account of Amazon Web Services including the necessary access keys: an Amazon Access Key and a Secret Access Key. You’ll need to sign up with Amazon and then sign up for S3 within Amazon. You can create a free account on the S3 home page using the Create Free Account link button:

S3 create free account link button

Amazon has a lot of great documentation online. Should you get stuck you’ll almost always find an answer there. Don’t be afraid to ask in the comments section below.

In this post we’ll take an easy start and go through some of the visual aspects of S3.

S3 GUI

Log onto AWS and locate the S3 service link:

S3 link on Amazon UI

Before we go anywhere it’s important to mention regions in Amazon. A region in Amazon Web Services is the geographical location of the data centre where your selected service will be located. E.g. if you create a cloud-based server with Amazon EC2 in the region called US East then the server will be set up North Virginia. It doesn’t mean that your home page deployed on that server won’t be reachable anywhere else, it only means the physical location of the service. So if you’re expecting the bulk of your customers to come from Japan then it’s wise to set up the first web server in the region called Asia Pacific (Tokyo). Also, if you set up a service in e.g. EU (Ireland) on the AWS UI, then log out and log in again, your service may not be visible at first. A good guess is that you need to select the correct region. The region is indicated in the URL, e.g.:

https://console.aws.amazon.com/s3/home?region=eu-west-1#

…where “eu-west-1” stands for EU (Ireland). You can normally select the region in the top right hand corner of the Amazon UI where you’ll see the user-friendly names of the regions.

Regions are important for virtually all the components in AWS. Take a wild guess, which component is an exception. Check out the top right hand corner of the S3 screen:

No regions for Amazon S3

So regions don’t play the same role here as in other components in the AWS product offering. However, the selected region can still be used to “optimize for latency, minimize costs, or address regulatory requirements” as it says in the Create a Bucket windows we’ll soon see.

You’ll see that by default the screen will show all the top buckets:

S3 All buckets screen

Let’s try a couple of things to get our hands dirty. Click on the Create Bucket button. Give the bucket a name, select the nearest region to your location and press Create. We’ll skip logging right now:

Creating first bucket Amazon S3

The bucket is quickly created:

Created first bucket in Amazon S3

On the right hand side of the screen you can set various properties of the bucket such as logging and security:

Set properties of bucket in Amazon S3

We won’t go into them at all otherwise this series will lose its scope. The default values are usually fine for most purposes. If you ever need to modify the settings, especially those that have to do with permissions, then consult the AWS documentation of S3.

Click on the name of the bucket and you’ll see that it’s empty:

First bucket is empty in Amazon S3

Click the Upload button and click Add Files:

Upload a file in Amazon S3

Select some file on your hard drive, preferably a text file as they are easier to open. Click “Start Upload” and the file upload progress should appear on the right hand side:

Text file uploaded to bucket in Amazon S3

Click the file name to select it. The Actions drop-down will list several options available for a file such as Open, Download or Delete which are self-explanatory.

Now click the “Create Folder” button and give the folder a name:

Created folder in Amazon S3 bucket

You can click the folder name to open its contents – much like you do it with a double-click on the Windows file system. You can then upload different files in that folder and create subfolders.

This is enough for starters. We’ll start looking into some basic operations in code in the next post.

View all posts related to Amazon Web Services and Big Data here.

Elliot Balynn's Blog

A directory of wonderful thoughts

Software Engineering

Web development

Disparate Opinions

Various tidbits

chsakell's Blog

WEB APPLICATION DEVELOPMENT TUTORIALS WITH OPEN-SOURCE PROJECTS

Once Upon a Camayoc

ARCHIVED: Bite-size insight on Cyber Security for the not too technical.