Web farms in .NET and IIS using Web Farm Framework 2.2 part 2: provisioning a server farm
July 8, 2013 1 Comment
By the end of the previous post we had a system with 4 machines up and running: a controller with WFF installed, a primary web farm server and two secondary web farm servers. We also saw an example of application synchronisation using WFF. In this post we’ll look at application and platform provisioning.
Content mirroring
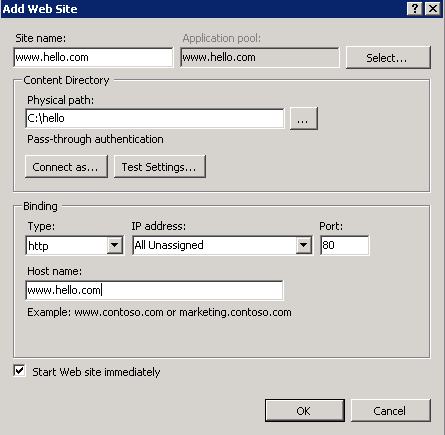
By default all content of the primary server is mirrored to the secondary servers. The first thing I want to check is whether web sites and their folder content are copied over. Let’s log on to the primary server and create a new website. Don’t worry about the URL and the binding, I’ve created the following:
A quick look at the trace messages on the controller shows the following:
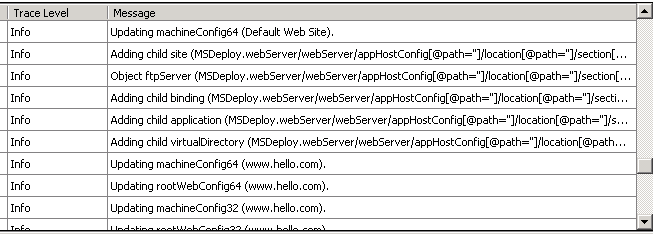
So far so good, our changes have been noted and apparently the sync process has started. I’ll make a couple of changes to the hello.com application pool to see if those changes are mirrored as well:
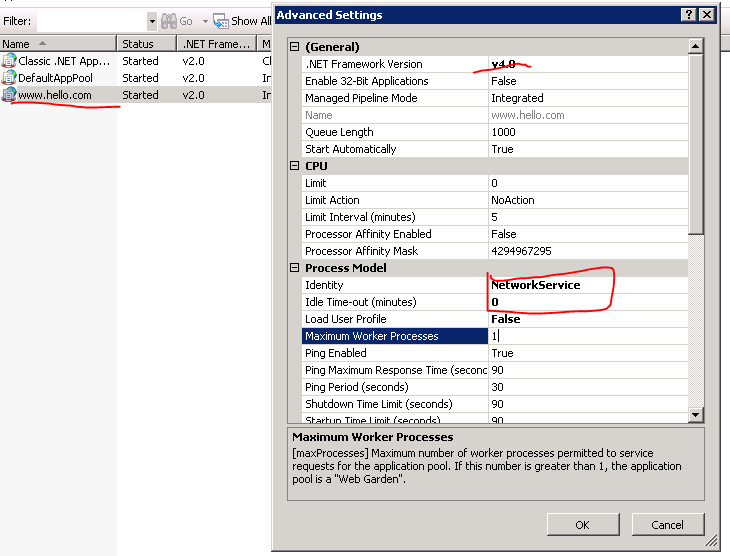
I’ll also simulate a deploy and place an empty index.html file in the deployment folder I created on the primary server, c:\hello. I’ll now check the status on the secondary servers. I can see that all elements have been correctly mirrored:

Platform provisioning
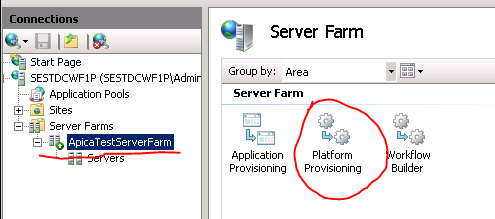
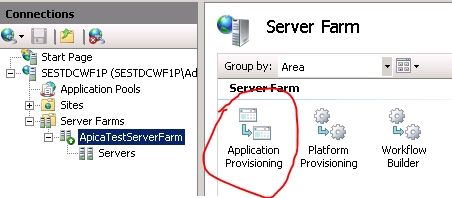
With platform provisioning you can synchronise the secondary servers with the modules installed on the primary server. You can also select the interval between sync cycles. You can open the platform provisioning options by selecting the name of the server farm you created and then double-clicking the Platform Provisioning icon:
This opens the Platform Provisioning window:
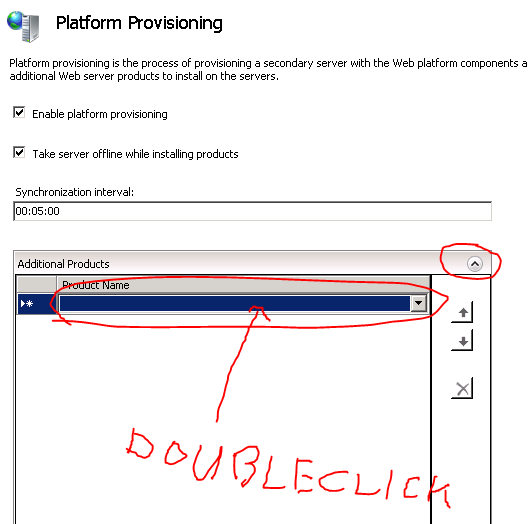
The purpose of the two checkboxes and the Sync interval textbox is easy to understand I believe. You can then select products to provision in the Additional Products section. At first this is confusing as the list will be empty and you may think there are no products available. You’ll need to double-click the product name row to bring up a list of products. I selected the PHP Manager for IIS package, but feel free to select whatever you want. Select Apply when you’re done:
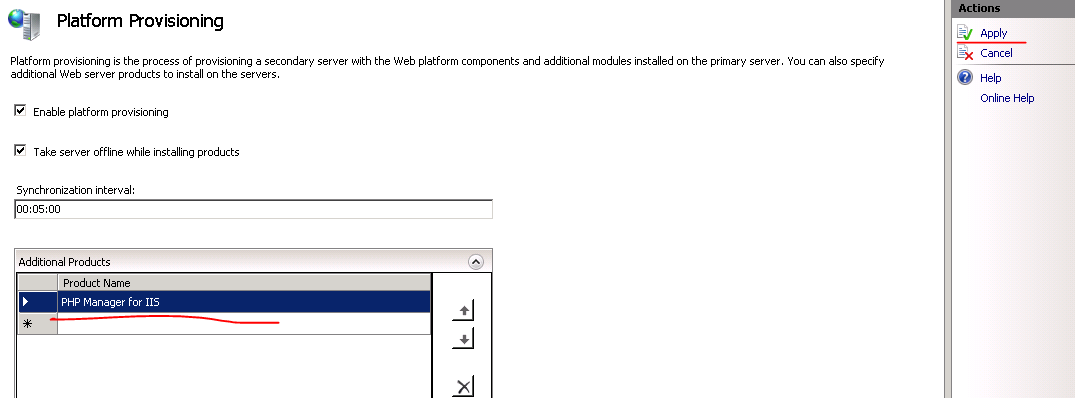
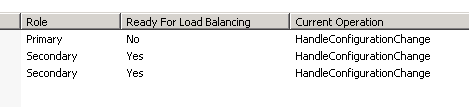
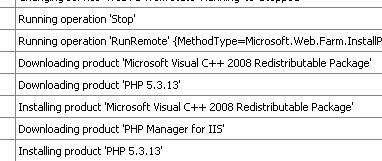
Clicking Apply will bring up the list of products that the web platform installer will provision. Click I Accept and let’s see what happens. Select the Servers node in the Connections pane and you’ll see that synchronisation has started. The changes have been noted:
The servers are brought offline one by one:
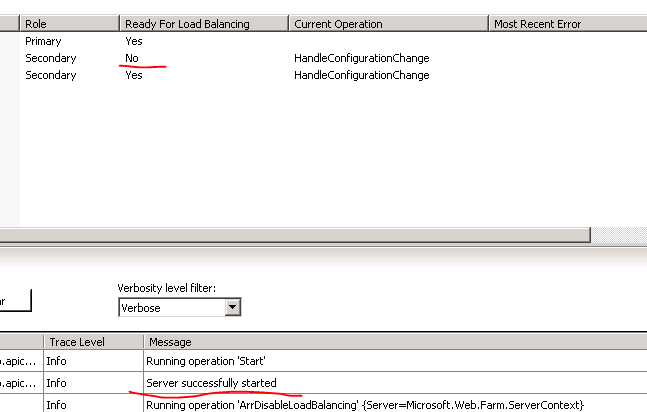
The first machine has been temporarily removed from the farm while the provisioning process takes place. You’ll see the related trace messages as well:
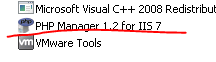
Of course I want to verify that the selected product has been deployed to the secondary servers and it has indeed:
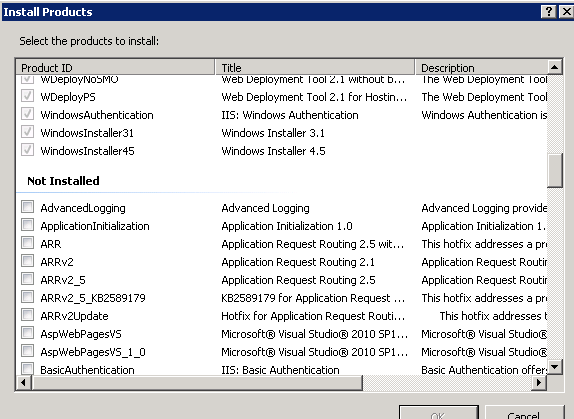
There’s another way to install products on the servers. You can even install the product on all machines of the web farm or just a selected one. If you want to install a product on the web farm then select the name of the web farm in the Connections pane on IIS on the controller machine and click the Install Products link:

If you wish to install a product on a specific machine then select one of the servers under the Servers node. You’ll find the same link as shown above under the Actions pane to the right. In either case the Install Products window will open where you can select the products to be installed:
Application provisioning
This is similar to platform provisioning but it’s dedicated to Web Deploy. If you recall from the previous post WFF has a dependency on Web Deploy 2.0 so is is here where it is heavily used. You can open Application provisioning as follows:
The options look similar to what you saw under platform provisioning. You’ll need to double click the Provider cell to bring up all MSdeploy providers:
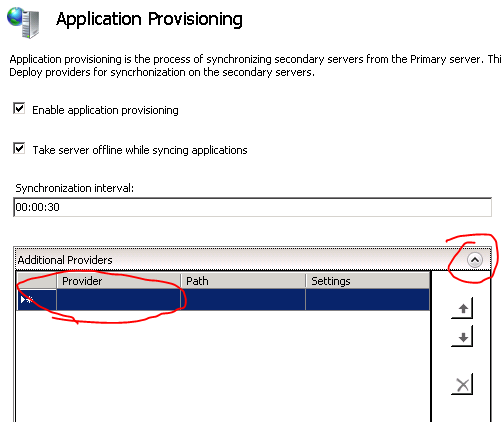
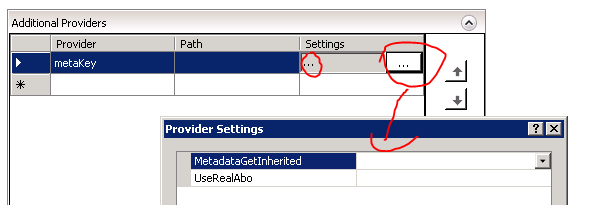
These are all MSDeploy providers, so you can automate MSDeploy commands. You can find the list of providers and what they do here and their settings here. The path will be the folder where the provider will be installed. You can open the settings, i.e. the MSDeploy program arguments by clicking the ellipsis:
Server operations
You can perform operations on the server farm or individual machines in the farm. The term operation is quite wide in this case and can be grouped into 4 categories:
- Provisioning: besides the types of provisioning mentioned above you can e.g. update Windows or get a list of installed products
- Windows services: you can control the Windows services installed on the target machine(s), change their state and reboot them.
- Diagnostics: get a list of processes and requests running on the machine(s)
- Server: test your servers
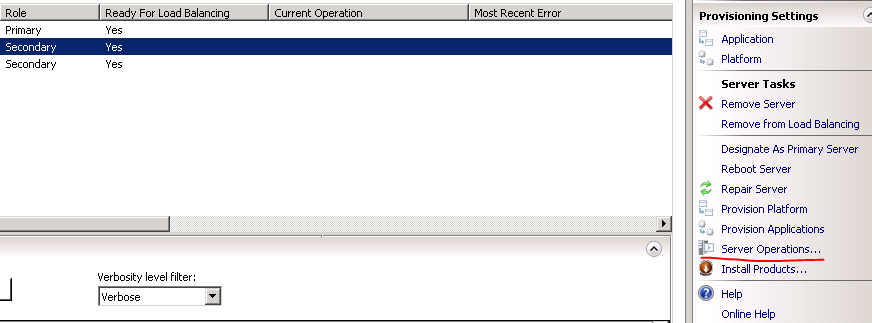
Let’s look at a couple of examples. These are all available on the controller machine. If you’d like to perform operations on the web farm level then click the Server Farm Operations link:

You can find a similar link if you open the web farm node and select one of the machines:
The link will open the Server Operations window where you’ll recognise the categories from the list above:
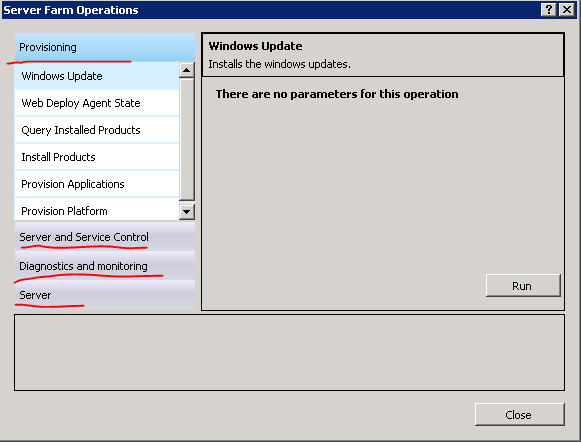
Click on the categories and subcategories to open the parameters you can provide to the operation. Most of them are quite self-explanatory, such as the Windows Update or Install Products option. Click the ‘Run’ button when you’re done and the results of the operation will be shown in the small panel in the bottom. The results will be presented in an XML format. The Query Installed Products produces an output similar to the following:
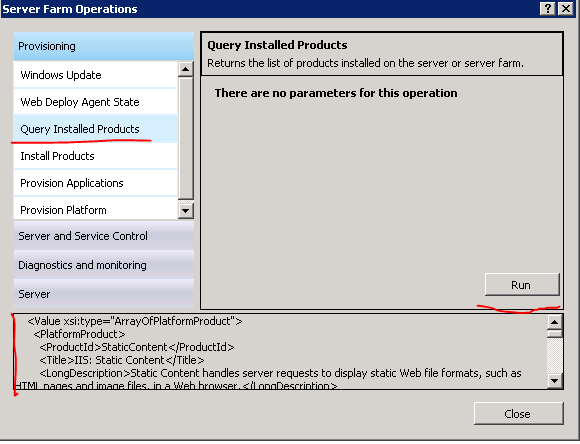
It’s not easy to look at the result in that small panel. If you want to view the details then copy and paste it to a text editor.
You can get the processes and requests running on the server under the Diagnostics and monitoring section. You can leave the filtering text boxes empty if you want to retrieve a full list:
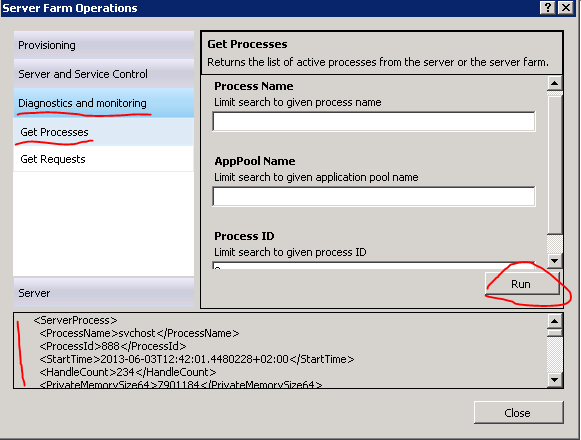
This gives you the list of processes as you can see them in the Task Manager serialised into XML.
In the next post we’ll see how to deploy a real web site in the sample web farm.


Thanks Andras your article thoroughly helped me to install the web farm here in my office.It’s all running here.Thanks again.